
How to use Generative AI in Photoshop. Adobe Firefly in Photoshop
How to use Generative Fill in Photoshop, powered by Adobe Firefly
Let’s start with something not as crazy, and we’re going to go down the rabbit hole from here.
Extending a Photo, uncropping
How many times have you shot a photograph and then afterwards you realize, Hey, I wish I’d gone a little bit wider.

Grab the crop tool. Let’s drag it out, make it a little bit bigger.

Make a selection with the rectangular marquee tool.

Press Generative Fill.

Hit Generate.

Adobe sensei uses AI to build the rest of this image, as if I had shot it wider. Pretty amazing stuff.

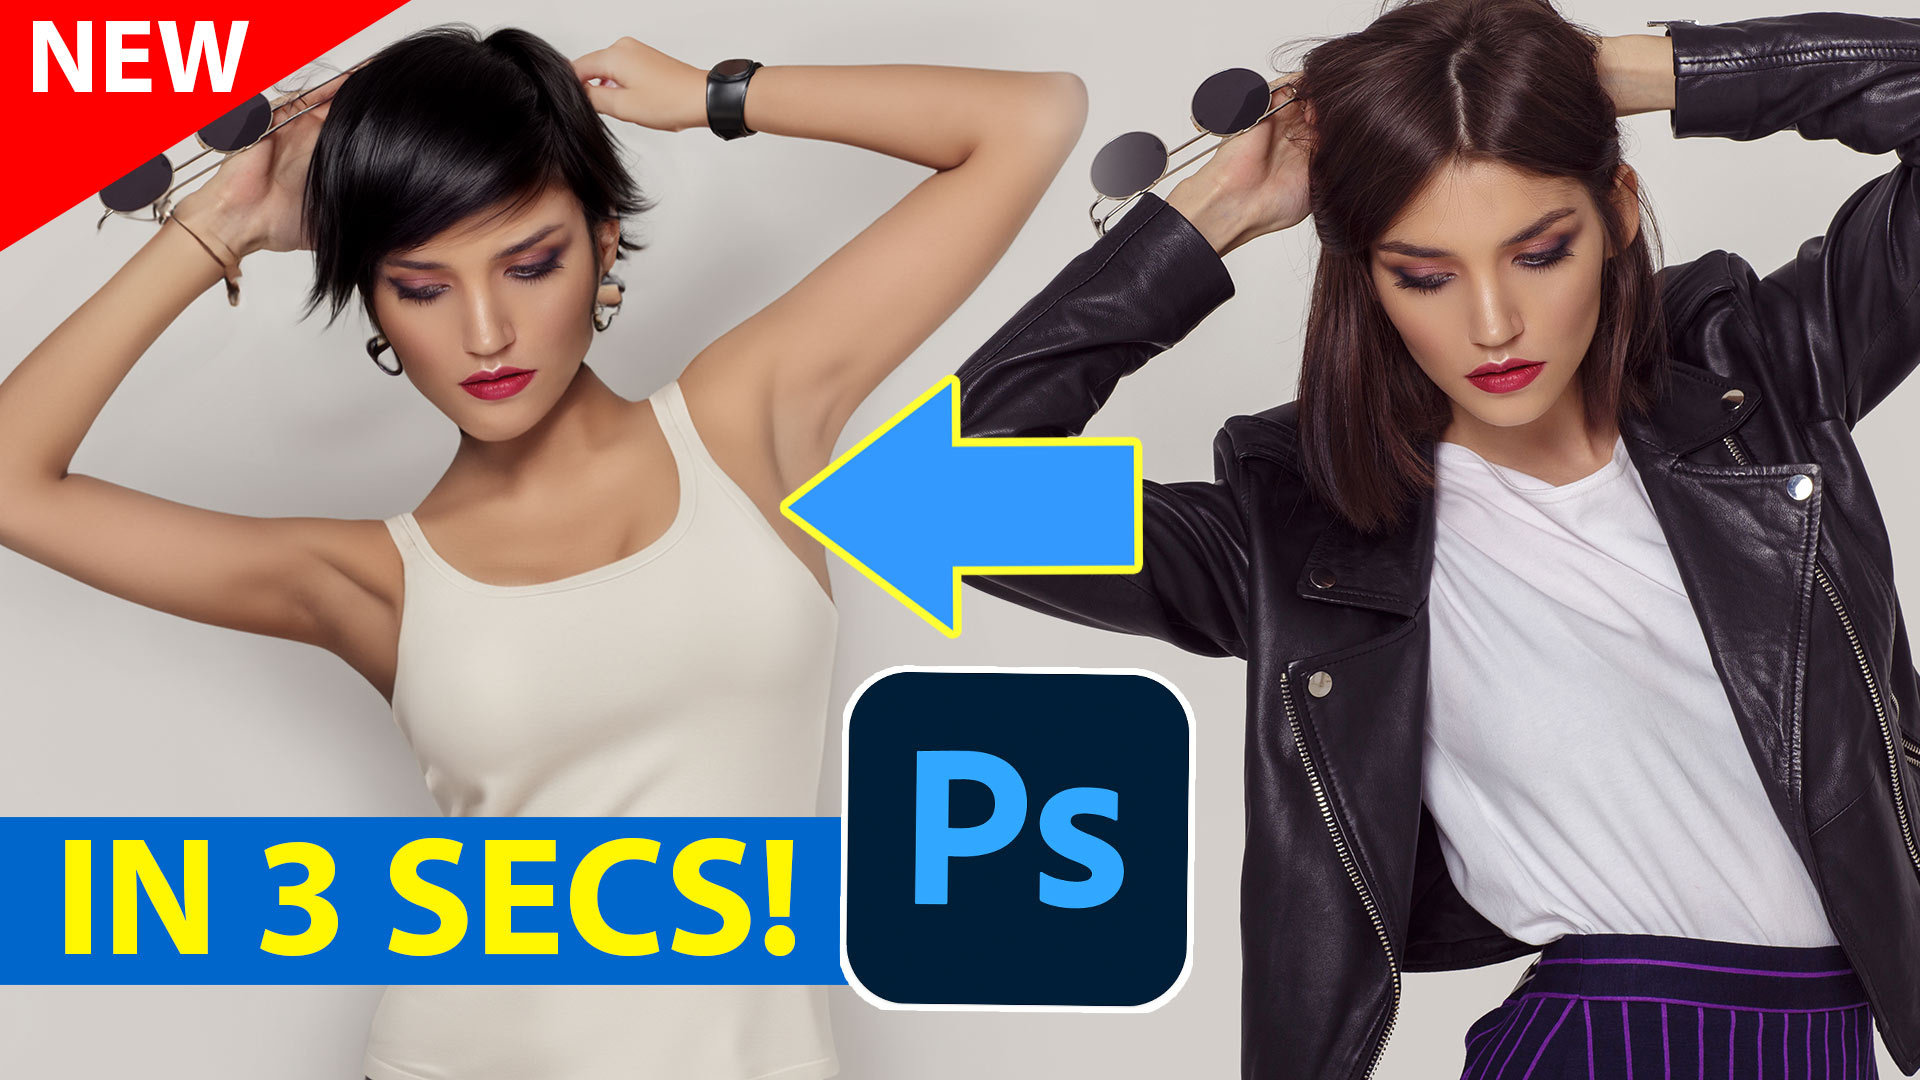
Changing Object and generating clothing
Another quick example.

With the Lasso tool, make a quick selection.

Hit Generative Fill, and this time, type into the field. Red T shirt and bingo.

Replacing a background
Let’s replace the background. We’re going to grab a Lasso tool and we’re going to make a rough selection around that background. I’m making a really rough selection just to show you how well this works. In fact, you don’t want it too tight. You want to give it some room.

Now, we’re going to hit Generate a fill. And why don’t we put in city? Hit Generate.

And we actually get three options in the Properties panel.

Each time we regenerate or change the prompt, it creates three more images. Choose the one you want to use.

Advanced Clothing change
This is the image I started with. Let’s give her some jeans instead of the skirt.
Make a selection with the lasso tool. (Watch this tip to see how important selections are, and how to make the right type of selections for better results in Generative Fill)


Hit Generative Fill, type in jeans. Let’s look at variations.

To view the variations, We can either view the thumbnails in the info panel. or click the arrows in the toolbar. See this tutorial on mixing variations

These are brand new images that never existed before. Let me show you. Why don’t we change this jacket to a plaid shirt?
Make a selection with the lasso tool

Type in plaid shirt. And look at that.

Some of the results you get here are not always perfect.
We could change this to something else, say a tank top. This one is looking pretty realistic. I mean, look at the arms and the shirt. Look how it’s even made the area for the sleeves and everything.
It has given us some extra hair. These are certainly, lots of bugs to fix and improvements to be made. If history of other Generative Models like Mid Journey are anything to go by, these improvements will happen very fast.

Extend a street
Let’s look at one more example.
So let’s grab our crop tool, let’s extend this.
Now, we want to extend the street, so let’s grab the Rectangular Marquee tool,
Choose Generative Fill in the toolbar. Remember, if you just want to extend and you don’t want to add anything, don’t fill out any prompts here and just hit Generate

.And look at that. That’s pretty amazing if you ask me.

Where do the images come from?
So where are these images coming from? These images have never existed before. They’re actually being generated by the AI.
What the AI is doing is it’s actually looking at the image and analyzing and knowing what it is. Now, Adobe didn’t just start with this last week. Adobe has actually been developing Adobe sensei for 10 years. So it’s actually had a little bit of training already on all the selections and different things that we’ve been doing throughout the years with the sensei tools. Firefly (name of the generative part of Sensei) Is looking at all the photographs inside of Adobe stock, and then it’s taking what it’s learning, and then it’s recreating these images or these parts of images from nothing. So it’s creating images that never existed before. Adobe have said they are going to find a way to compensate the contributors of Adobe stock. We will see what they decide to do.
I’m going to do a series on here where I’m going to go more in-depth and I’m going to show you more of the features and more things you can do. This is an introduction, so keep your eye out for my other tutorials. Signup on our mailing list, and follow me on soacial media, so you don’t miss any of these tutorials. Here are a few
My course on Generative Fill in Photoshop: https://photoshopcafe.com/shop/generative-fill-in-photoshop-introduction-course/

Extending a Picture with Generative Fill
How to get better results with Generative ai
Hack for getting high resolution and automating it
The generative Fill Variation Hack
Livestream, in depth look into Generative Fill
And until next time, I’ll see you at the cafe.
Colin
PS Don’t forget to follow us on Social Media for more tips.. (I've been posting some fun Instagram and Facebook Stories lately)
You can get my free Layer Blending modes ebook along with dozens of exclusive Photoshop Goodies here

12 thoughts on “How to use Generative AI in Photoshop. Adobe Firefly in Photoshop”
Leave a Reply
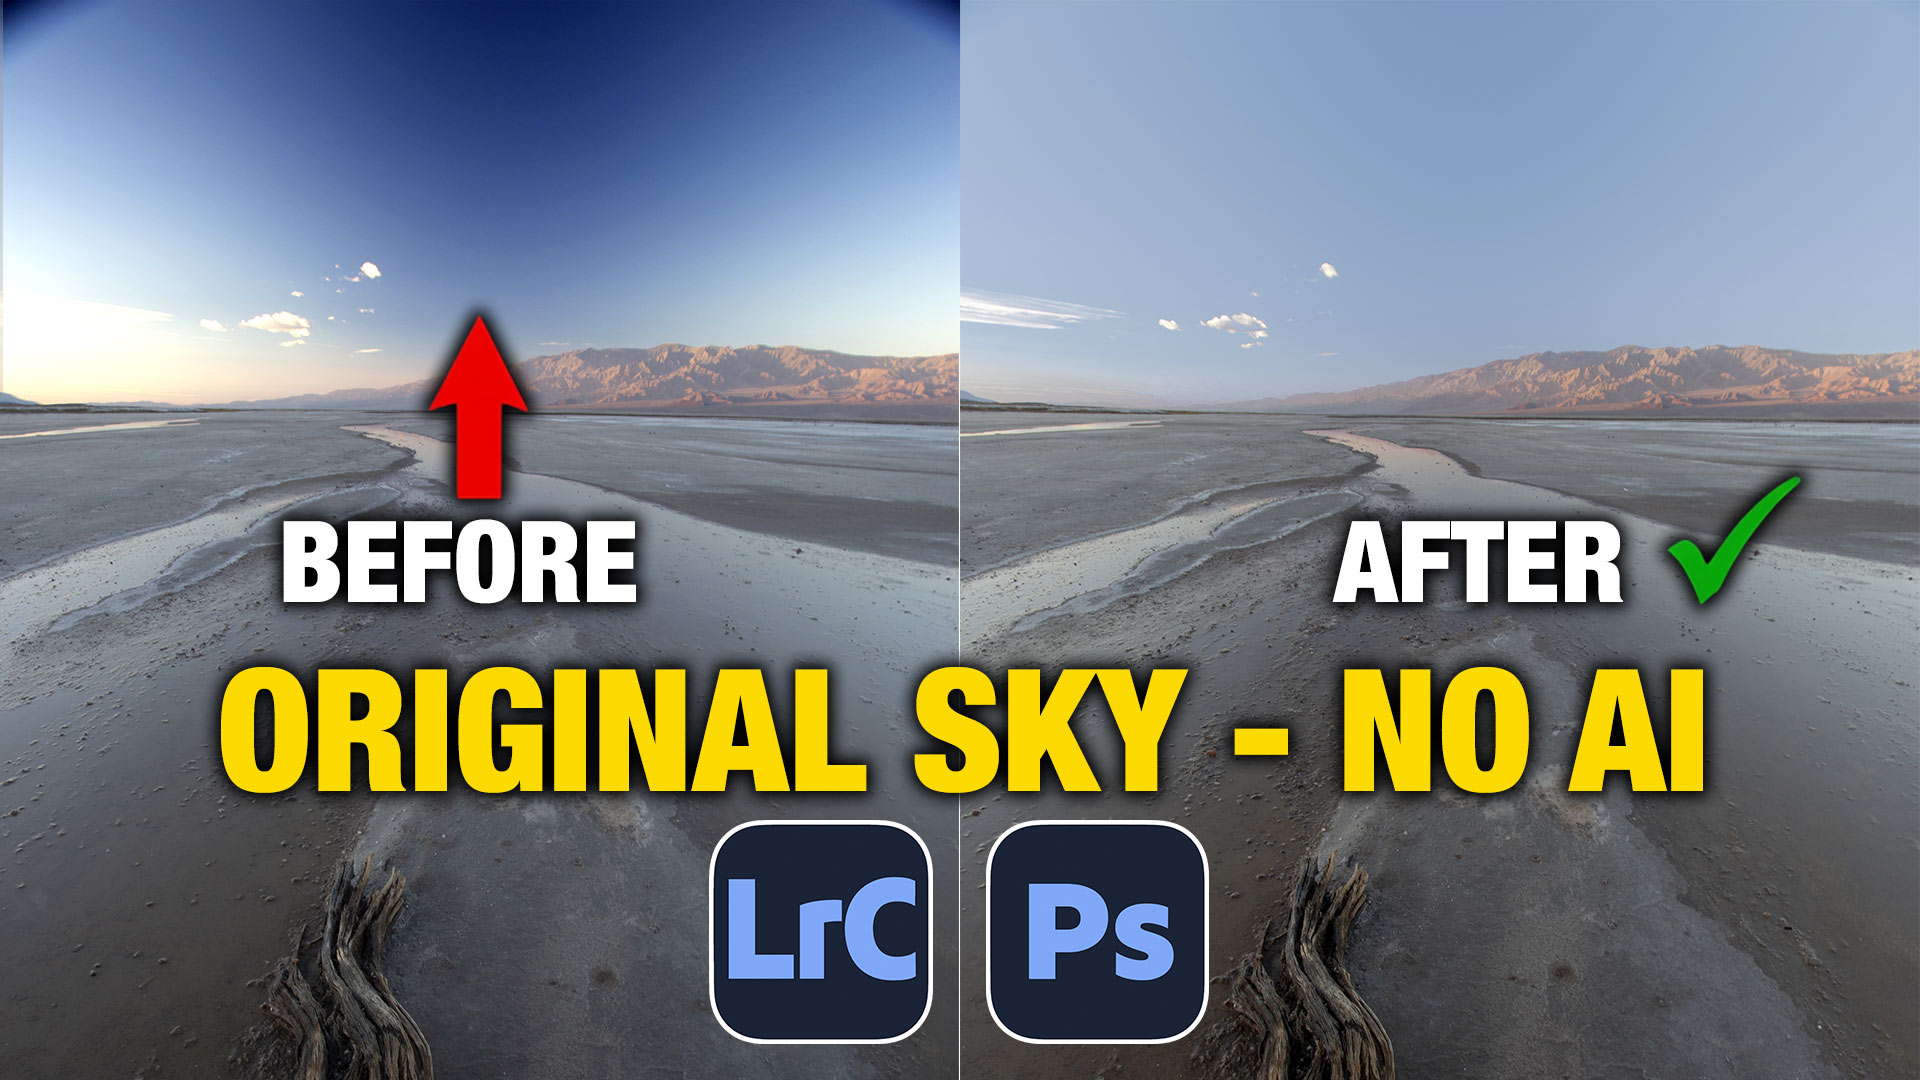
Learn how to fix uneven blue skies in Lightroom or Camera Raw without replacing the sky

How to make the apple liquid glass effect in Photoshop
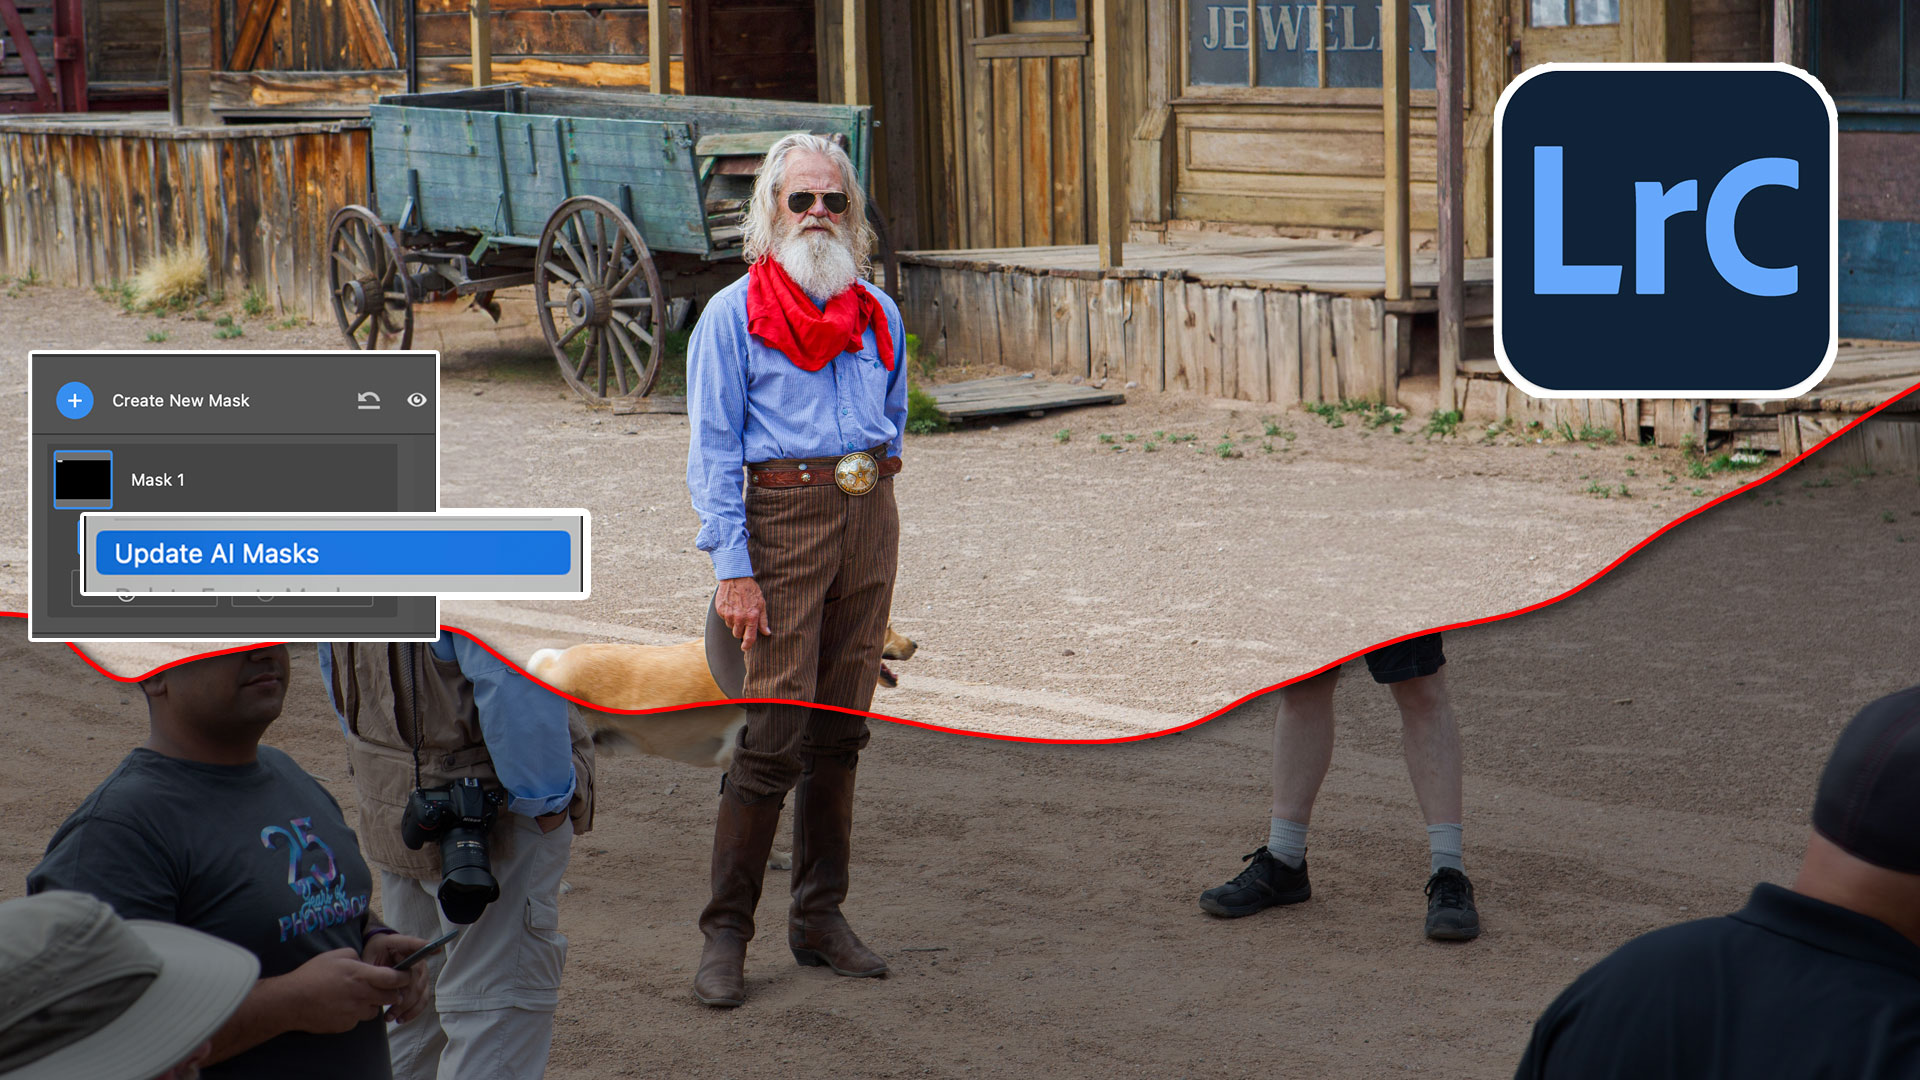
3 big features of Generative Remove in Lightroom and ACR ai.


Thank you so much for this video and text. Best. İsmail
Totally unbelievable! Can’t wait for more tutorials.
Fantastic Colin but as a camera club member how will we know if images are created or taken in club competitions?
Hi . Smith !
this video was great, please make more videos about AI in photoshop
Thanks
Gabi
It looks sort of convincing, but I have to say, on a closer look, the problems stand out. No shadows on the dogs for instance which would actually place them in the location. You pointed out the flaws with the limbs on the female model. And the satellite dish looked simply fake – the lighting bore no relation to the background. I found the same thing was true with the colorize filter as well – that the filter never does find the edges of clothing, thus, a jacket will start blue, and then devolve into browns and umbers because the AI mistakes changes in shade and tone for object edges. It apparently has no way to tell what different items of clothing really are and how the bodies underneath them distort the cloth. Plus, whoever designed the colorize filter only offers a variety of faded “retro” choices, which is annoying and rather silly. So I will hold my breath with the AI fill-in feature. Fascinating, but flawed.
No, Its not perfect, this just a tool. Human work is still needed and always will be.
Forget the issue of club competitions. Imagine the ramifications of AI generating pictures that can be used to blackmail someone. If you can change a jacket to a shirt can you have AI remove the shirt completely and create nude photographs of someone famous or otherwise. The statement, that who will you believe them or your own eyes is going to be rendored moot as you can no longer believe your own eyes.
This has been true of Photoshop for many years. It’s just faster to do it now. Check out the Content Authehentication Inititive
Amazing particularly adding those parts of a scene you chopped off when taking.
I’m speechless.
I am enjoying every one of your lessons. So easy to understand. Thank you. JH
Nice