
Wavey Grids in Photoshop Photoshop Tutorial
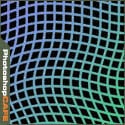
How to make Wavey Grids in Photoshop
This Photoshop tutorial shows you how to make wavey grids.
Step 1

Start with a blank document. Here I chose a black color for the bg.
Create a new layer.
Step 2
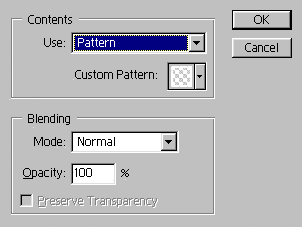
Edit>fill
Choose pattern and and select the grid.
If you don’t have a grid pattern, make one here.
Press ok
Step 3
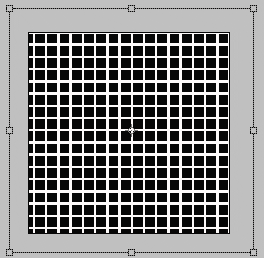
If we were to apply the distortion here, it would be messed up at the edges. So we need to enlarge the pattern
Press Ctrl/Cmd+T And scale the pattern off the canvas in all directions
Press Enter/Return to apply
Step 4
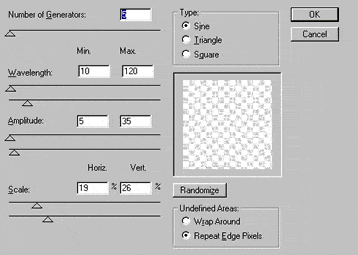 This is where it happens.
Filter>Distort>wave
Lower the scale and press ok
Step 5
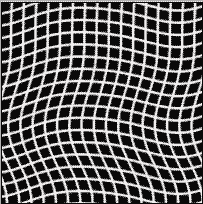
Here is the wavey grid.
Step 6
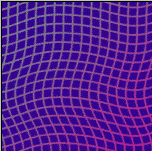

Try different colors for effect. Choose
Image>Adjustments>Hue/Saturation to colorize. Check the “Colorize” button. Push the saturation amout up and lower the brightness if dealing with white.
I hope you enjoyed this week’s tutorial.
Colin
PS Don’t forget to follow us on Social Media for more tips..
(I've been posting some fun Instagram and Facebook Stories lately)
You can get my free Layer Blending modes ebook along with dozens of exclusive Photoshop Goodies here


New Enhance Detail in Photoshop gets better resolution using Generative Fill and Generative Expand

One of the most popular features here at photoshopcafe is the “Super Tutorials”.In Super Tutorial #3 This will be a...

How to create a neon glow in photoshop. This free photoshop tutorial includes font, layer style and photo, so you...


