
Combine, auto composite your own photos with Generative Fill ai in Adobe Photoshop
Combine images with Generative Fill in Photoshop
I have 2 examples here of ways to combine images with Generative Fill. This is just a taste of what you can do with your own photos. All the photos used in this tutorial are my own. And they said photography of dead? Far from it. Long Live Photography.
Lets start with a shot I got of the Moana Surfrider hotel in Waiki Beach, Hawaii (you can see my room from here). Just for fun, we will drop it in as a mountainside villa on diamond Head Crater.

Open Both images in Photoshop File>Open
To combine, choose the Move tool (V key).
Drag the first image up into the tab of the second image.

Move your cursoe into the 2nd image and release. You will now see 2 layers in a single document. (The short video above shows this clearly).

Let’s resize the top layer
Press Ctrl+T (Win) Cmd+T (Mac). From now on I will write it Ctrl/Cmd+T etc.
This gives us Free transform and 8 adjustment handles.

Hold down Alt/Option and drag one of the corners to the center. Notice because the Alt/Option is held down, it transforms from the center.
Size the image to suit your tastes. Not to real scale, but if you don’t know what Diamond Head looks like in real life, you wouldn’t know the actual size anyway.

Now we need to make a special type of selection for this to work. Let’s start by selecting the building.
Grab the Quick Selection tool. (Or whatever selection tool you prefer).

Paint over the image to select the building. Tip: if your selection goes too far, hold down alt/Option and drag to remove from selection.

Now we want to create a selection where we are selecting outside the building, but constrained to a rectangle, as shown in Green.

Press Ctrl/Cmd+Shift+I to inverse the selection. Or use Select>Inverse.
Notice the marching ants around the edges of the image. We are now selecting everything BUT the building.

Lets trim the selection
Grab the Rectangle Marquee tool.
Hold down Alt/Option and drag over the top part to remove it from the selection, Notice I left a little overlap. The overlap is important.
Now do the same on the sides and bottom.

Now we have selected a box around the rectangle of the top image. But the Building isn’t selected.

If I quickly paint with red, you can easily visualize which areas are selected.
Undo the red (obviously)

Let’s blend them together.
Click on Generate (Currently only in the Beta version of Photoshop – How to get it here)

Leve the text filed blank and click Generate.

And you can see it merged the building into the side of the cliff. Sure, it’s not perfect, but this is where your Photoshop skills come int play, to retouch it. (See, your skills aren’t obsolete anymore than your camera is).

Just for fun, I added a water fall, you can see it on the short video at the top.

Fusing 2 images together in Photoshop
Let’s look at another completely different example, for a completely different result.
Here I have 2 photos I shot with my drone. One of a beach and the second of a forest from above.

Just like we did with the first example, combine the 2 photos into a single document.

Choose the move tool (V).
Zoom out, so you can see the canvas. (Alt/Option and scroll wheel, or zoom tool).
Drag the top layer down and off the canvas, leaving a gap between the placement of the 2 layers as shown by the red box. Tip: Hold down the Shift key as you drag to constrain the alignment.

Now, you might think I’m going for the crop tool to revel the 2 layers. Nope.
Choose Image>Reveal All (I know you’re here for all the tips)

As you can see, Photoshop resizes the document to show all the pixels.
Now to fix the gap.

Grab the rectangular Marquee tool (M)
Drag over the area to fuse together. Make sure to include lots of overlap.

Click Generative fill, than Generate, like we have earlier in this tutorial.

And here is our final masterpiece. Pretty cool right?

I hope you found this useful.
If you did, it’s a taste of what’s on my new course on Generative Fill in Photoshop, Check it out here.

Also follow me on Instagram, Tik Tik and Twitter. for shorts and reels.
Great to see you here at the CAFE
Happy Photoshopping
Colin
PS Don’t forget to follow us on Social Media for more tips.. (I've been posting some fun Instagram and Facebook Stories lately)
You can get my free Layer Blending modes ebook along with dozens of exclusive Photoshop Goodies here


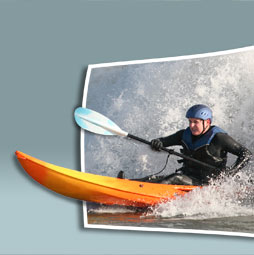
How to make the out of bounds pop out effect in Photoshop. This free video tutorial walks you through the...

How to make realistic animated rain in Photoshop. Create raindrops and make them move in Photoshop, Control the density &...


