
New features Adobe Camera RAW 16, Photoshop 2024
New features Adobe Camera RAW 16, Photoshop 2024
Let’s take a look at the most important new features in Lightroom 16 inside Photoshop 2023. These features work the same in Lightroom.
Check out the more in depth look into each of these here. Point Color, Lens Blur. HDR Output to come, (I have one here, but plan on a newer one soon).
Point Color to enhance colors in a photograph
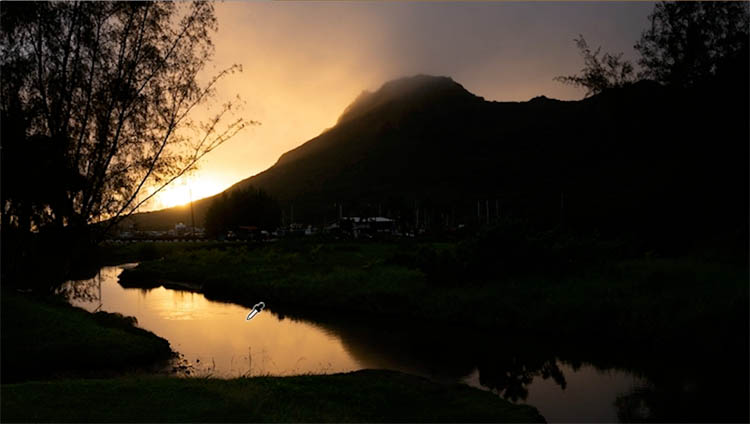
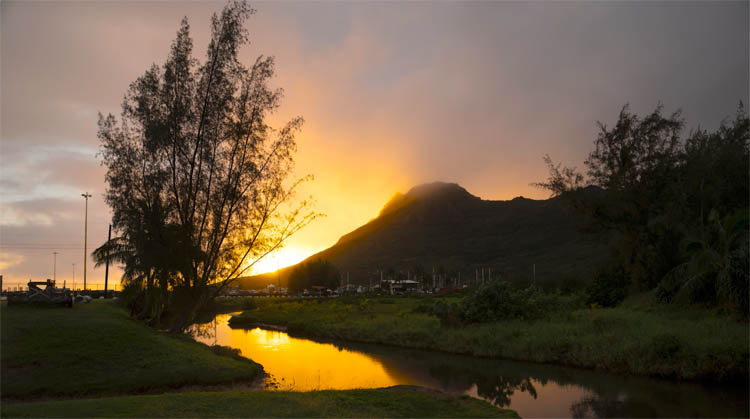
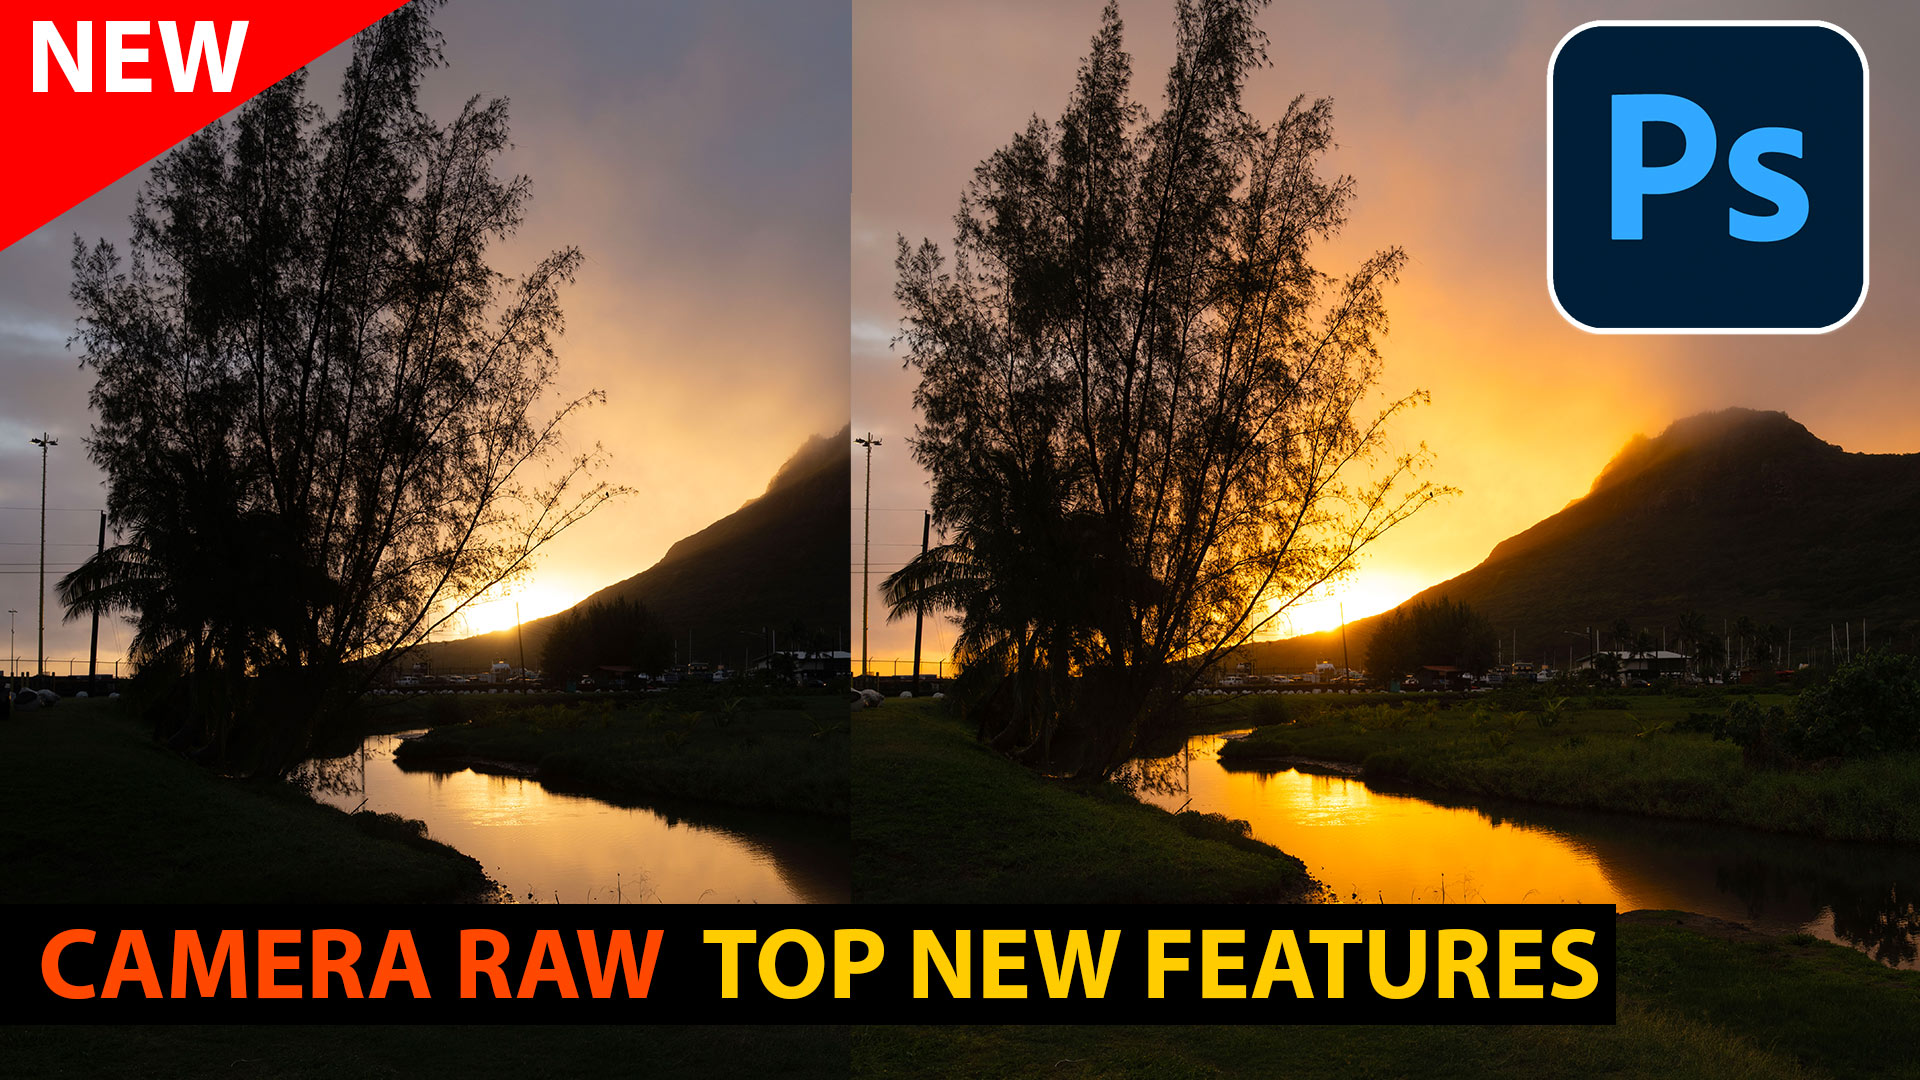
Here is a photo I captures in Kaui, but it doesn’t show the vibrant colors of the sun rising through the fog like I saw. Let’s fix that.
Choose Point Color, next to Color Mixer
Grab the eyedropper
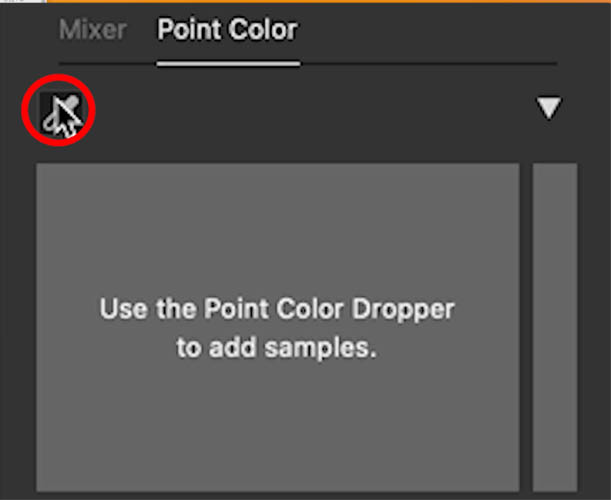
Click on the color you want to work with
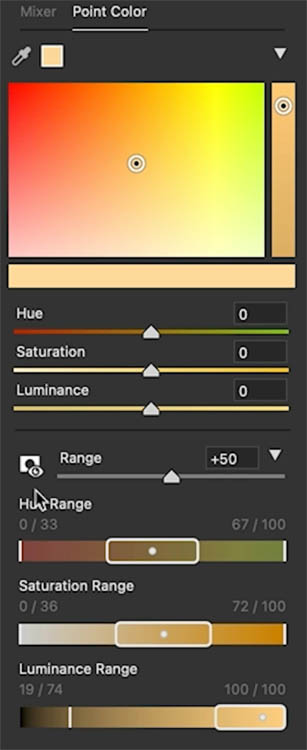
There are 2 parts. The top part of the panel enables you to change the color.
The bottom half (range) enables you to choose which colors you will affect.
Hold down the Alt/Option key to isolate the colors you are selecting. The image will turn black and white except for the colors you are including in the range.
You can select the colors using 3 dimensions.
Hue: The color itself
Saturation: The amount of color
Luminance, lights and darks

Once you have selected your color in the range you can change them in the top part of the panel. (All shown in the video at top)
I increased the saturation and luminance.
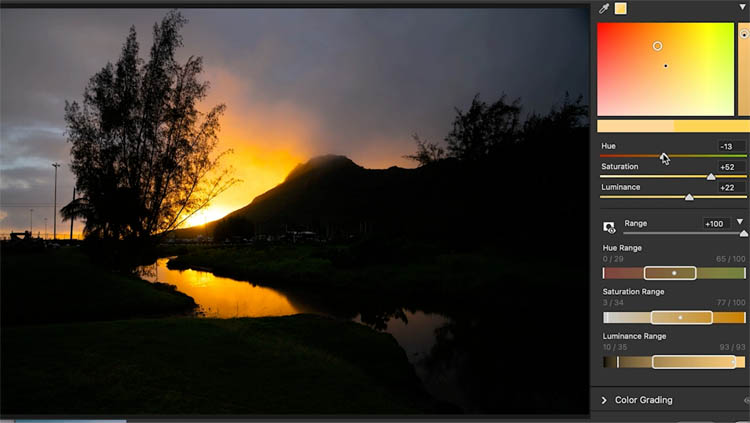
After adjusting the rest of the settings in the basic (shown on video) this is the photo, looking more like what I saw when I pressed the shutter.
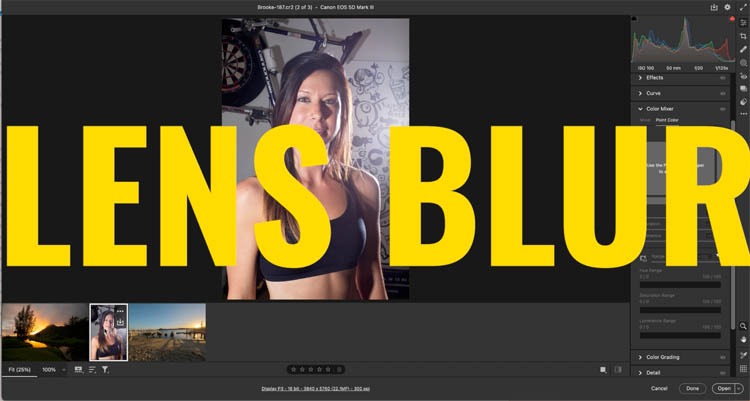
Feature #2 Blurring backgrounds with Lens Blur
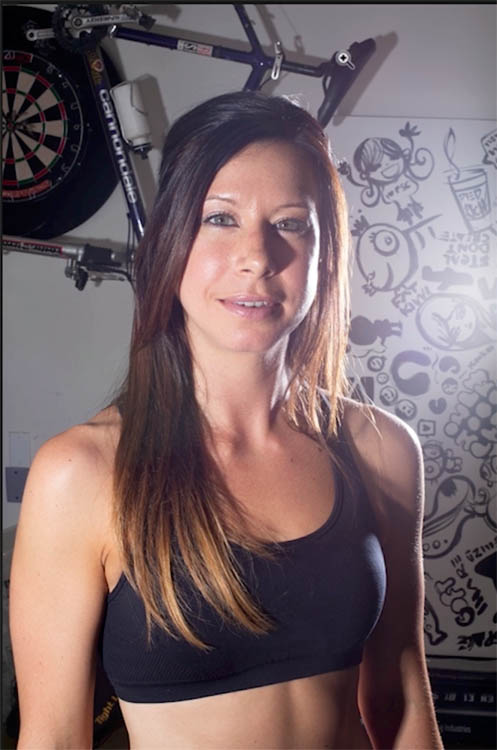
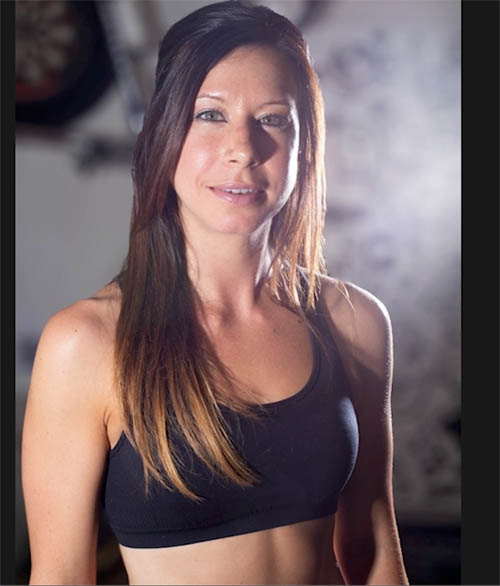
Here’s a photo with a very distracting background.
We can blur the background to keep the emphasis on the model.
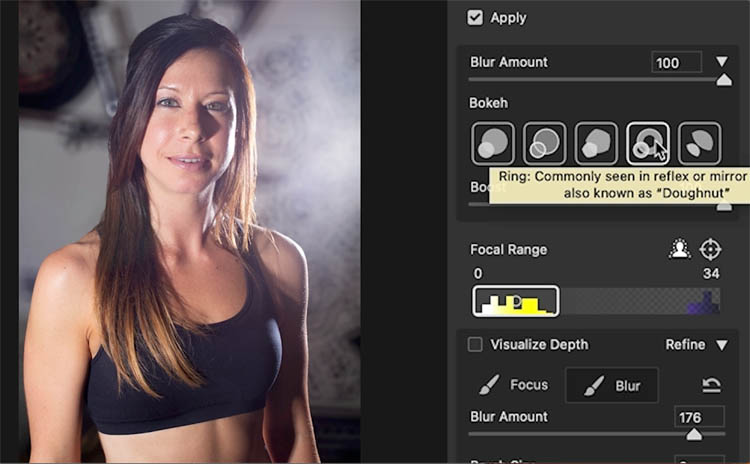
Choose Lens blur and click apply. The ai will select the background and blur it.
If you use a photo that includes a depth map such as from a mobile phone shot in portrait mode, Camera Raw will use that depth map.
Adjust the amount of blur. Usually I push it all the way up so I can easily see what I’m working on. We will adjust the blur amount at the end of the workflow for a realistic value.
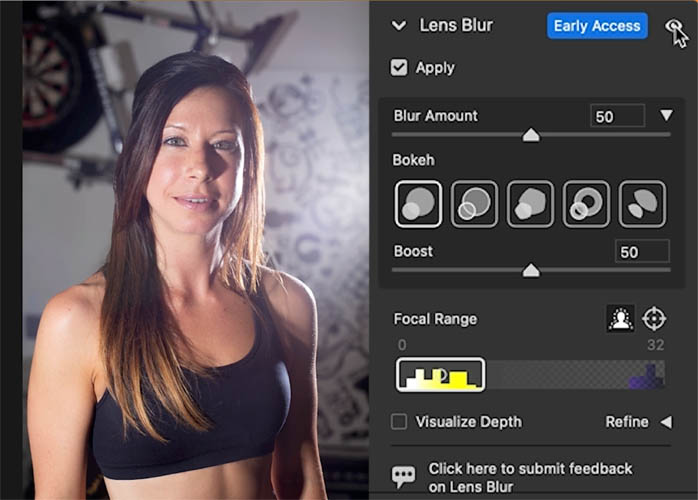
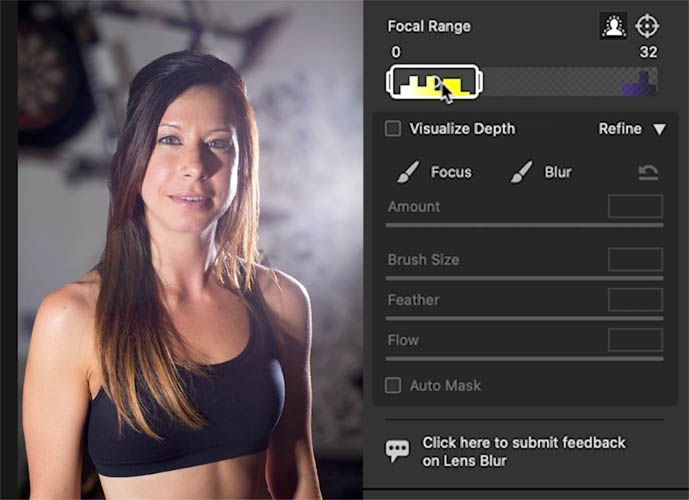
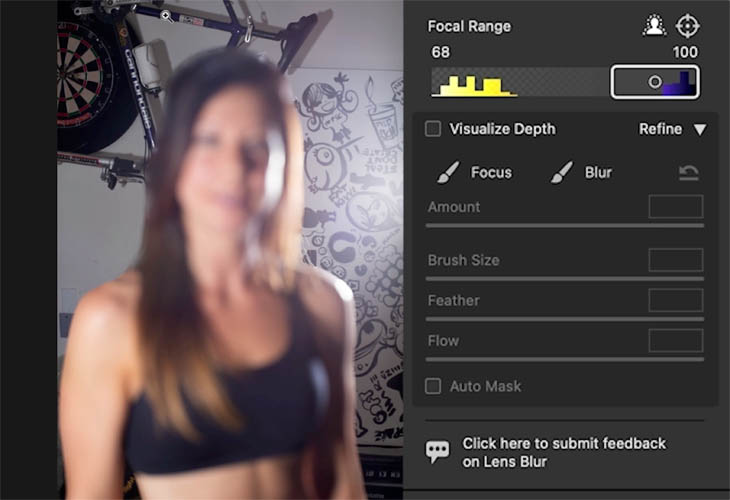
You can change the focus area by sliding the Focal Range
Here we are putting the background into focus.
Slide it back to put the model in focus.
Lets refine the blur areas
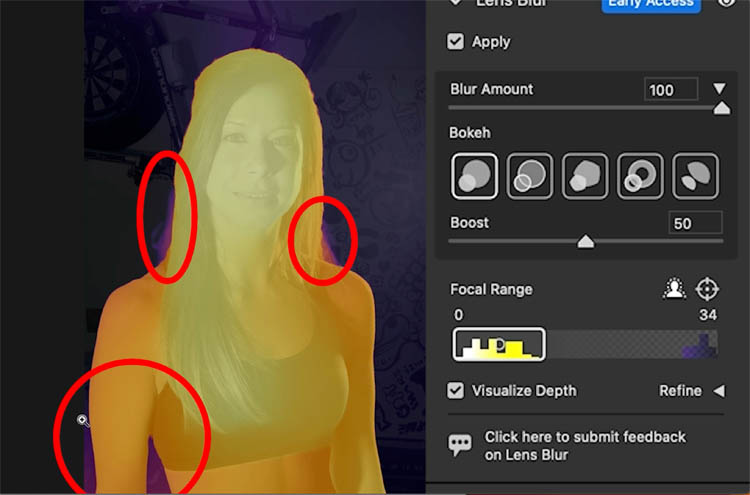
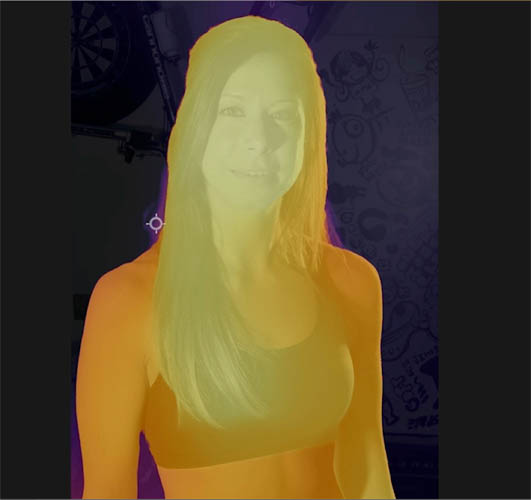
Turn on Visualize Depth.
You will see the Depth Map and lighter areas are close and the darker areas are further back.
See the purple around the hair and arm? Its easy to see the problems when we are in visualize mode with the Depth Map.
Grab th Blur Brush
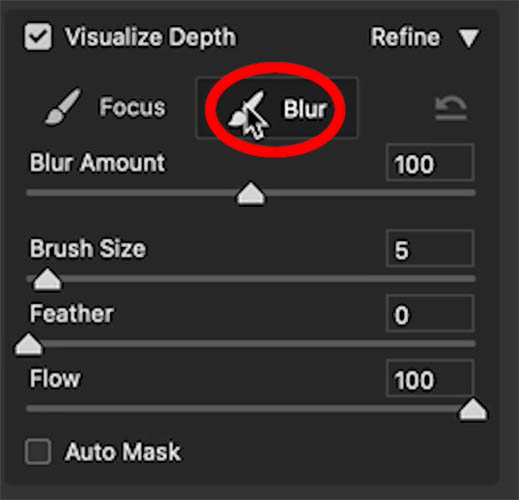
Turn on Auto Mask to detect the edges
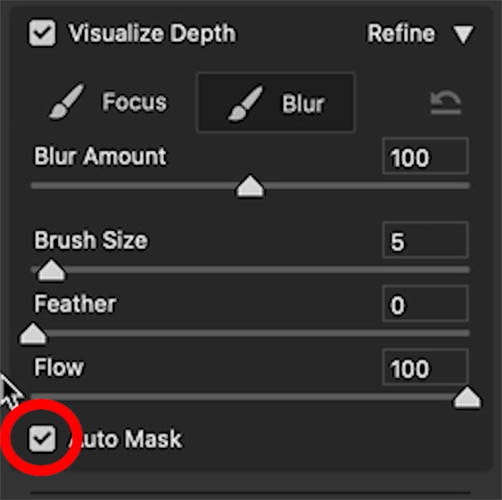
Paint around the purple areas
You may not initially notice much difference.
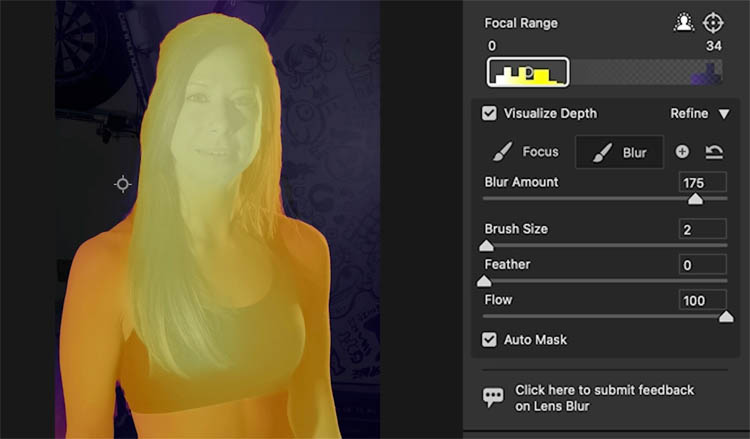
Slide the Blur Amount. Notice as you do, the painted areas are lightened or darkened. Move the slider until the painted areas match the others in the Depth Map.
Looks like I missed a little on the arm.
As you paint with the blur tool, you will see it instantly changes to match. So easy to see what you are doing now. (Focus brush, if you are fixing the selection of the sharp area, model).
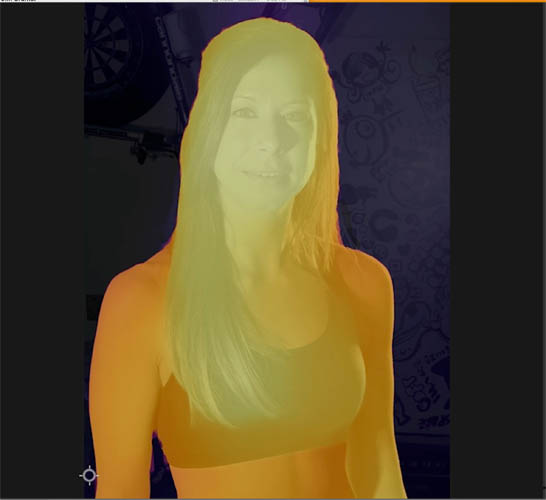
See how the edges look better.
If you choose the different bokeh types, you’ll see a different kind of blur. (each type of bokeh explained here)
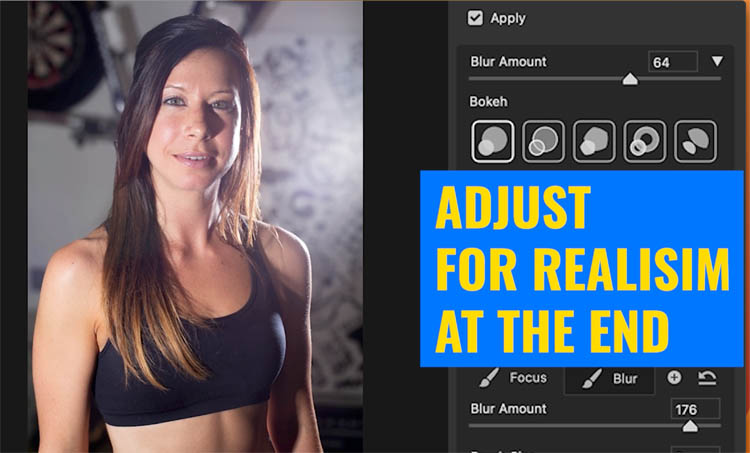
Finally, roll back the blur amount for a more realistic result.
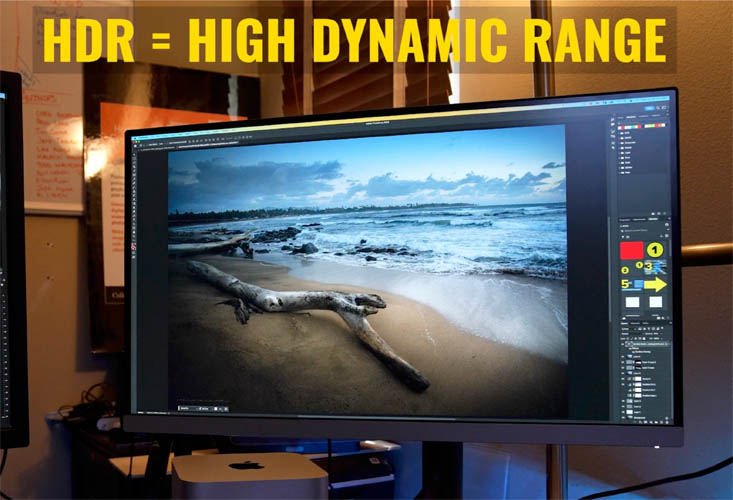
HDR output
HDR stands for High Dynamic Range. I have done many, many tutorials on HDR over the years. So I won’t go into detailed explanations here.
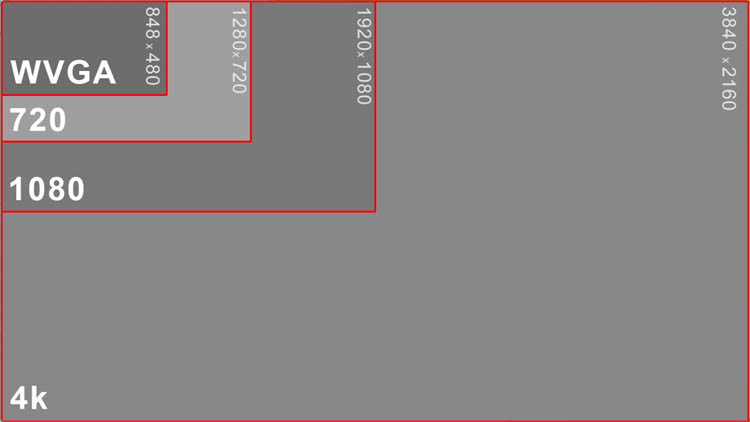
There has been a lot of big developments in resolution over the past few years. Going from VGA to 4k. More Megapixels were all the thing on cameras.
We now have 8k and climbing, and frankly at this point you can’t see the difference unless you have a massive sized screen. Resolution is no longer an issue. It’s resolved (sorry couldn’t resist)
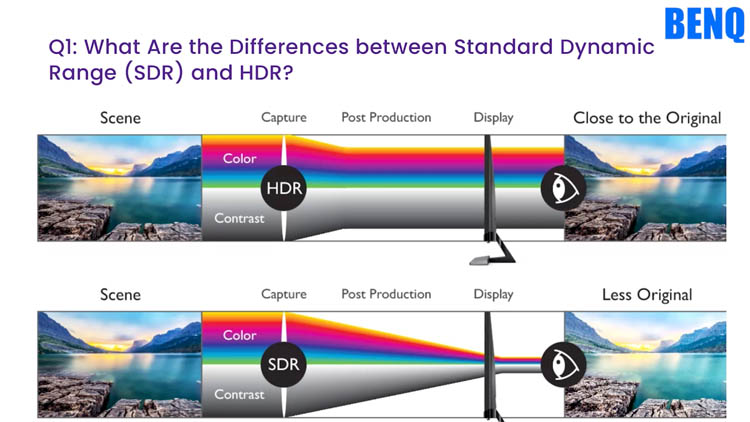
Where we have a challenge is with dynamic range. The sensors and hardware were unable to show a range of tones and colors as realistically as we can see, especially in the highlight regions.
SDR is Standard Dynamic range. Even though SDR has come a long way in deeper blacks and smother gradations, it still has a way to go.
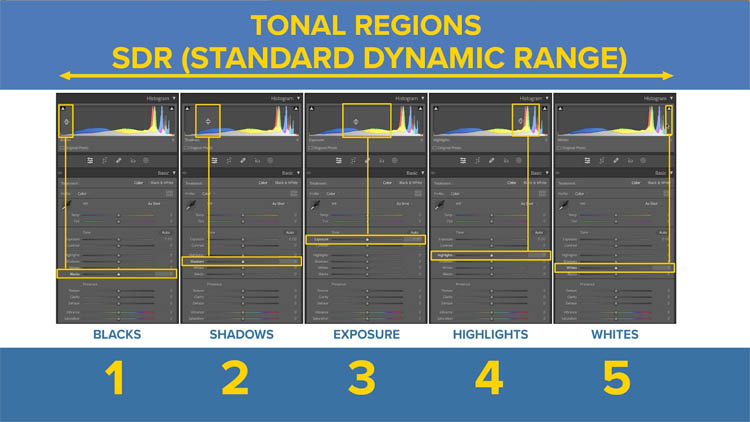
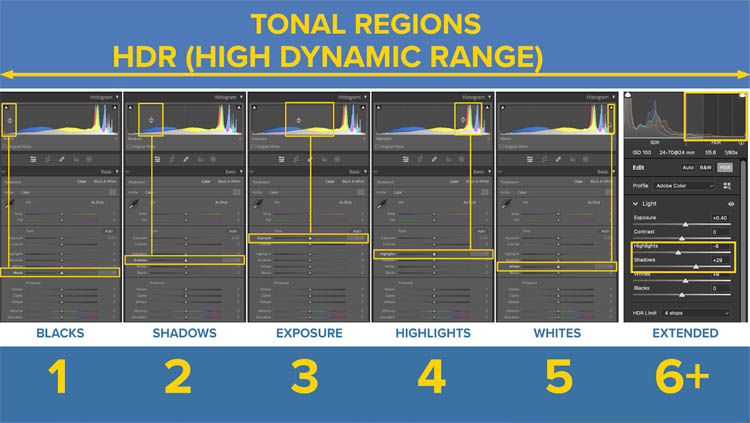
Along comes HDR. HDR is able to display more colors and tones, and extends the brightest part of image to show detail and color, instead of clipping to white. Same thing in the shadows, more detail is shown and backs so rich, it looks as if your screen is off.
For a while now, cameras have been getting better and better dynamic range in RAW. Some have better sensors and others use computational photography to collect high dynamic range. We can also bracket photos and make HDRs in Camera RAW and Lightroom from our own photos.
Most new TV and Monitors are now HDR capable, such as the BenQ monitors I use.
Mobile phones, apple laptops and ipads can display in HDR (Apple calls it XDR).
So, we have hardware capable of showing HDR, what’s the holdup?
Until now, we never had and end to end HDR workflow in Lightroom and Camera RAW. Sure, we could make HDR images and save them as OpenEXR, Photoshop and DNG, butnone of these are consumption formats.
Now we have the capability to save as jpg XL (jxl) or avif.
Don’t worry, if you don’t understand all this yet.
Ok, lets look at this now.
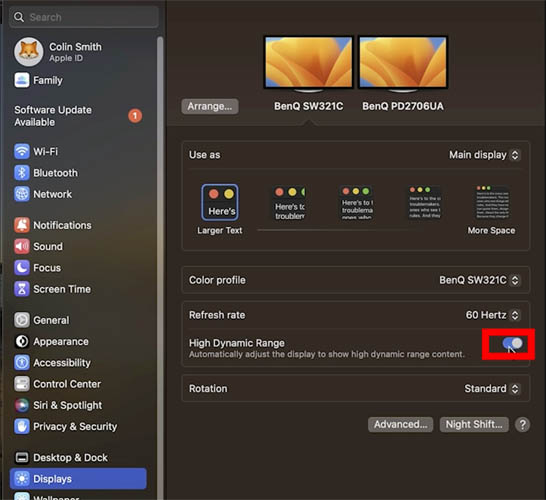
If you have an HDR capable monitor, you can turn on HDR in your control panel in mac or windows. (Even if you don’t have an HDR monitor, you can still output HDR images for people to enjoy on those devices, or on mobile phones etc.
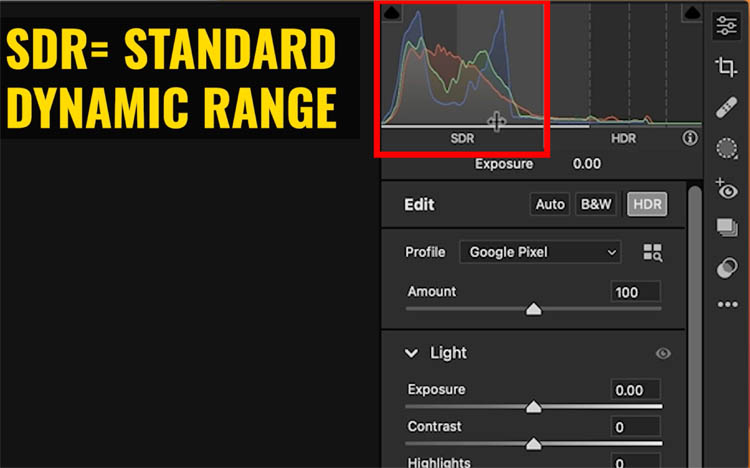
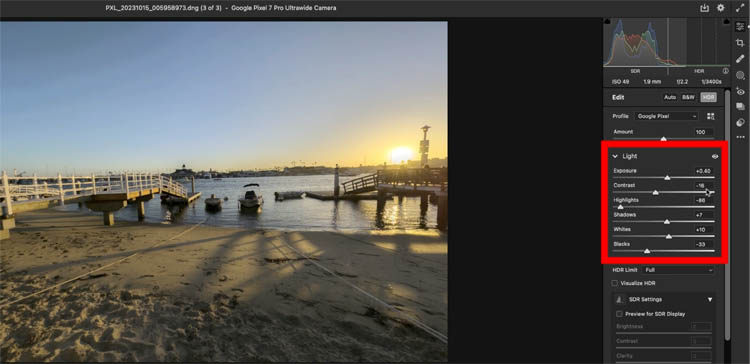
In the Edit panel in Camera RAW, you will see and HDR button.
Press it and you will notice your histogram changes.
On the left is SDR, or all you could output previously in a jpg.
On the right, notice it says HDR. This is where it can hold more info.
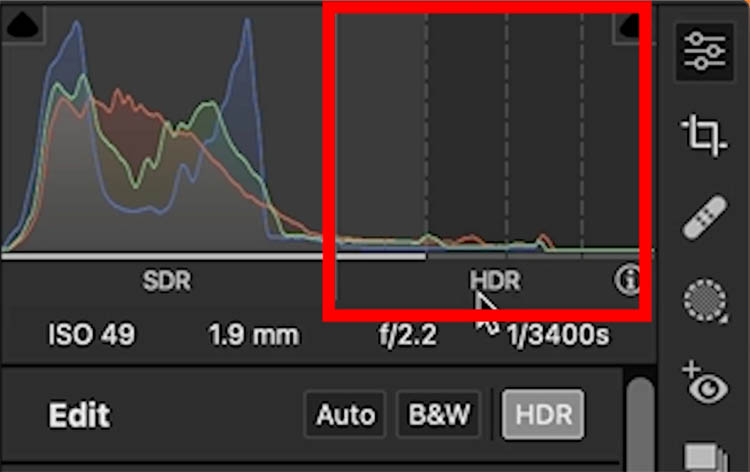
See the additional pixels that would have been cut off and not shown in SDR. These are colors and detail that is brighter than white in SDR, but not in HDR. They can be displayed.

Turn on Visualize HDR and you will see the areas of detail that would be clipped off or lost. Not surprising the ball of the setting sun is very bright, and often just shown as white.
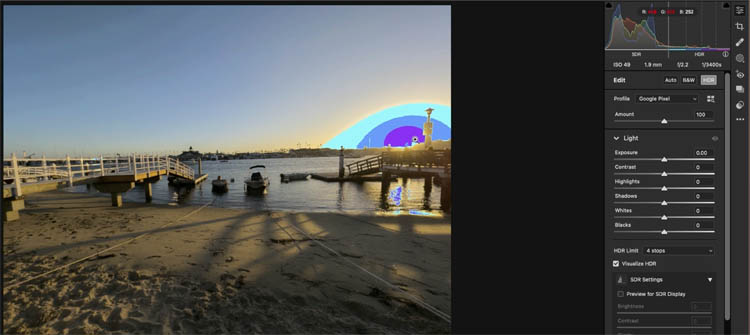
make adjustments, turn off visualize.
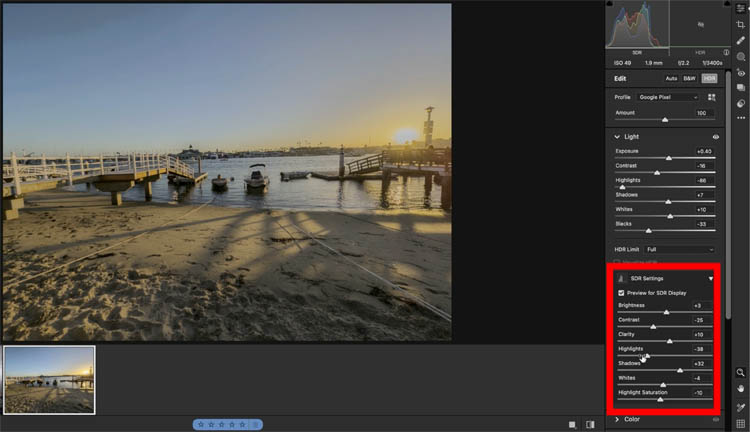
Click on Preview for SDR Display
This simulates when the image will look like on an SDR display. Make adjustments until you get it looking its best. (These will be tone-mapped – look at my HDR tuts to understand what tone-mapping is).
Make adjustments
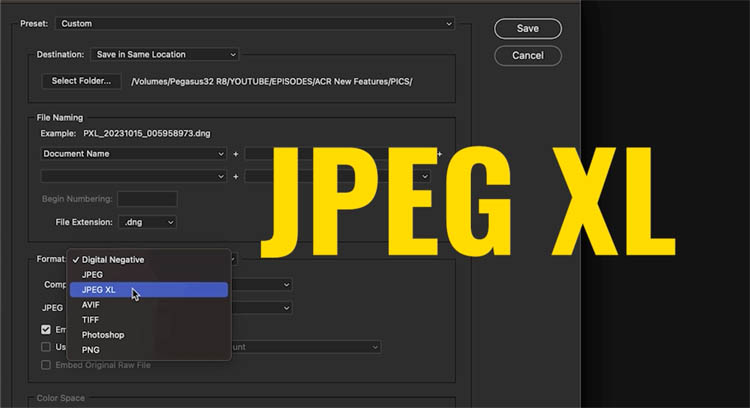
Ok Now we want to output this images into a format that can display true HDR.
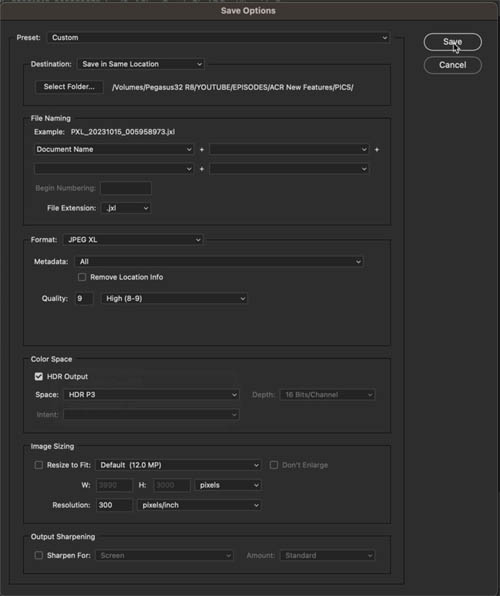
choose the output button.

Under format choose a format that can support HDR output such as avif or jpg XL.
Turn on HDR output.
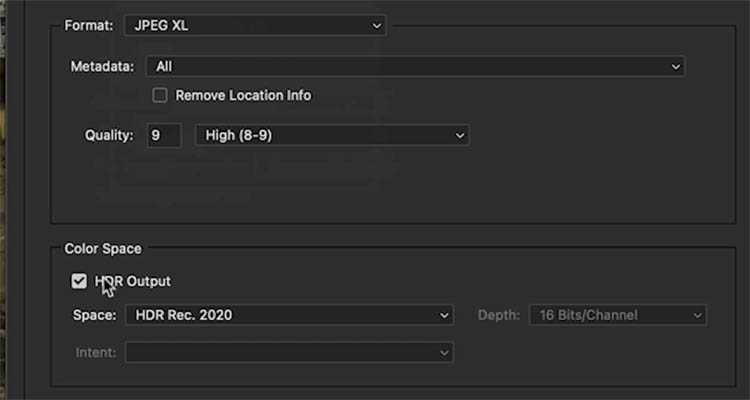
I like to use P3 (it’s widely supported), although Rec. 2020 will also work.
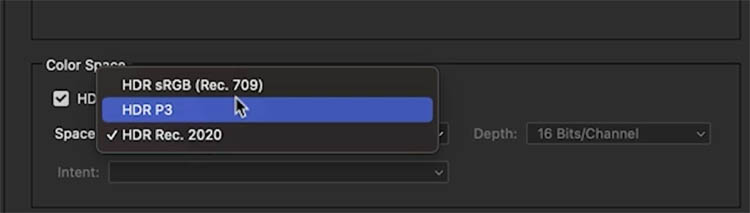
Choose Save and you will export an image that will show as HDR on compatible hardware. You’ll notice a difference especially in the brighter areas where the images will look more lifelike than what you have seen before.
Ok, there’s my round up of the top 3 new features in Camera RAW. I hope you found this useful
Colin
If you use Camera RAW, you will LOVE my course on Camera RAW, check it out here.
PS Don’t forget to follow us on Social Media for more tips.. (I've been posting some fun Instagram and Facebook Stories lately)
You can get my free Layer Blending modes ebook along with dozens of exclusive Photoshop Goodies here

One thought on “New features Adobe Camera RAW 16, Photoshop 2024”
Leave a Reply

Keyboard shortcuts for Photoshop. Work faster with these 5 keyboard shortcuts, to get things done faster and to do things...

Use the hidden photographic toning presets in Photoshop, for pro color grading with gradient maps.

In this Photoshop tutorial, I'm going to show you how to create the title to Star Wars. We are going...


Colin, thank you. Your tutorials are consistently valuable.