
How to Make HDR photos in Photoshop for Real estate and Architecture photography
How to Make HDR photos in Photoshop for Real estate and Architecture photography.
This Photoshop tutorial shows you how to make HDR photos in Photoshop Camer RAW for the most realistic HDR photos possible,
This enables you to show both the details inside a room as well as the details outside through the windows at the same time. This is possible by High Dynamic Range. It may sound difficult, but this tutorial will make it very easy for you to do it, even if you don’t have a lot of experience.
How to make interior photos that show outside detail for Real Estate and architecture photography.
For tips on shooting HDR and a more advanced HDR tutorial Here
We start by shooting multiple photos and bracket between each. In this case I am using 3 images.
- Regular exposure
- Over exposed by 2EV (2 stops)
- Under exposed by 2EV -2 Stops
Use AEB (Auto Exposure bracketing) on your camera to capture the shots and use exposure compensation. (all covered in the advanced HDR tut)
Step 1
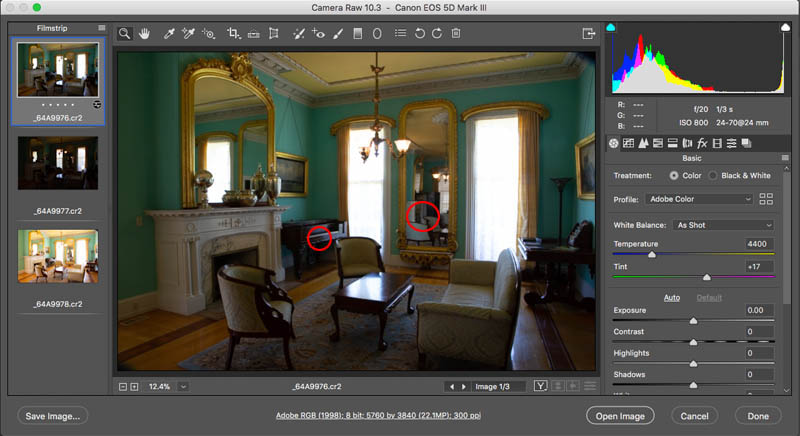
Select all 3 raw files (make sure to shoot in RAW) and open them in Photoshop Camera RAW (ACR). If you choose bridge or even from your finder, it should open in ACR. You will see the photos in the filmstrip.
Selecting the regular exposure. Is shows some nice detail in the mids, but loses details in the windows and the dark shadows. Without HDR, photographers would need to put tinted film on th windows to bring down the brightness, or blast the interiour with lots of light to bring it up to a closer brightmness to outdoors. All that is in the past 🙂
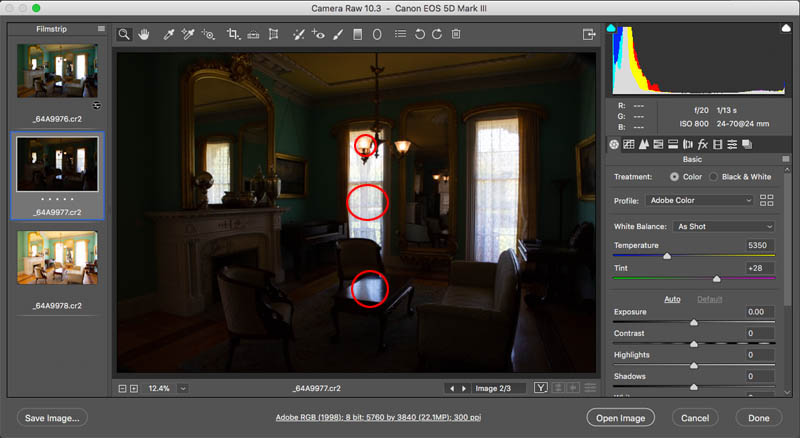
Click on the next image in the film strip. This is the underexposed image. You can see that the details from the windows, reflections and lamps show though nicely.
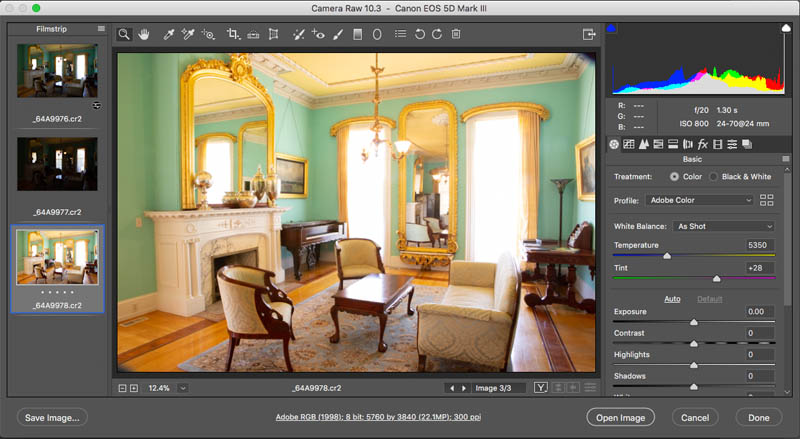
Click on the last image which is over exposed by 2ev (exposure values). You can see that the details are showing in the shadows, but the highlights arecompletly lacking in detail. This is the limitation of the cameras sensor or Dynamic Range, which means how much shadow and highlight can be captured in a single photo. This is why we need HDR.
Step 2 merging into HDR
Click at the tool option in the top an choose Select all. Or press Cmd/Ctrl+A to select all 3 bracketed photos.
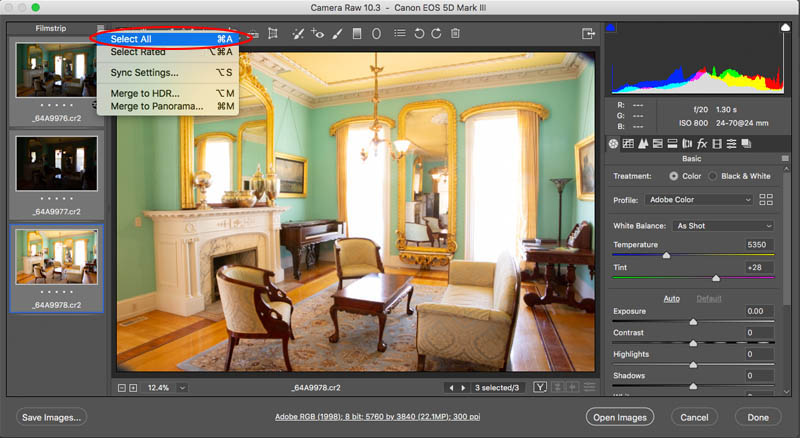
Now we want to take all the dynamic range (details) of the 3 images and combine them into a single new image.
Choose Merge to HDR
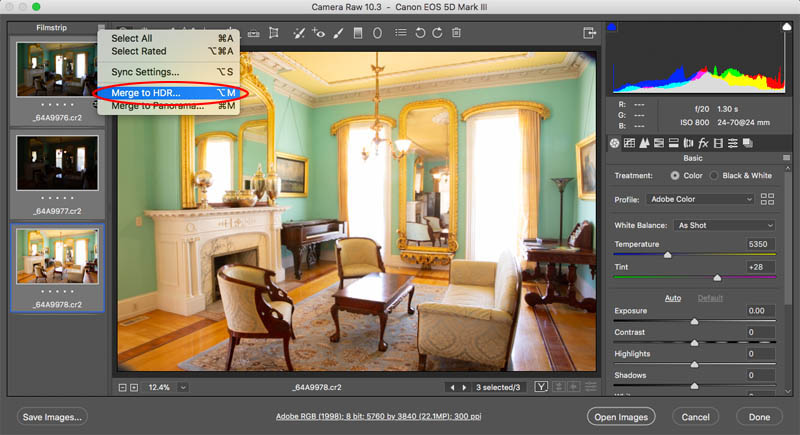
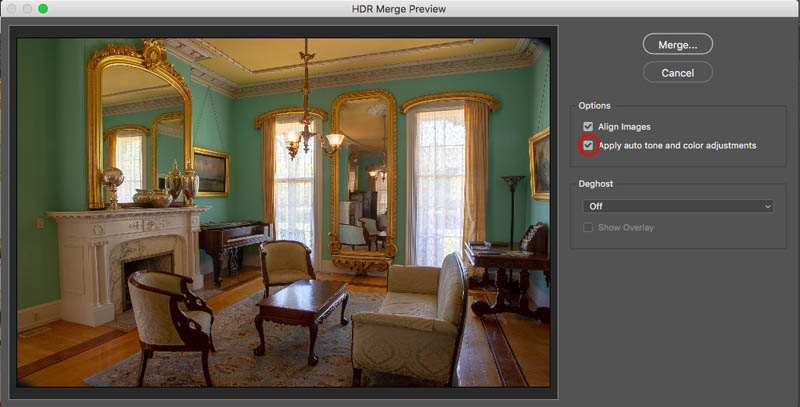
You will see a dialog box. I normally turn on Ally Auto Tone, it gives you a good starting point. Deghost is only used if there is movement and objects appear in some of the photos and not all, such as a person walking or a bird flying through.
Click Merge
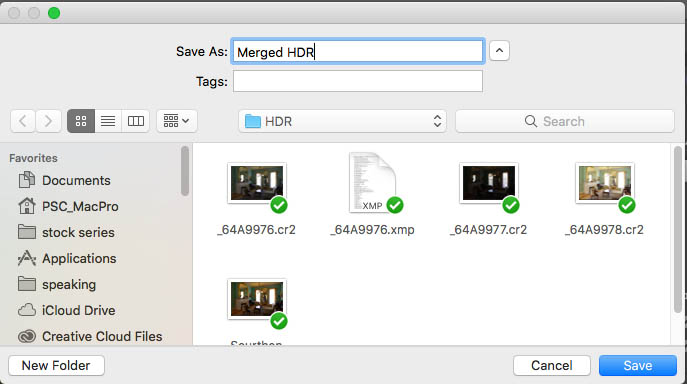
You will now be asked to save a file. This is going to be the new merged photo. Choose where ever you like to save it, but don’t forget where you put it!
Click Save
Step 3. Refining the HDR Photo
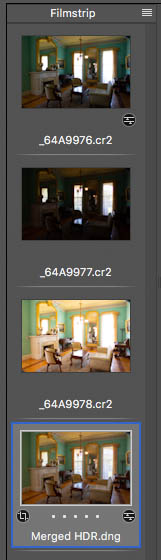
You will notice that the new Merged Photo (HDR) is now at the bottom of the film strip. Click on it to make some adjustments.
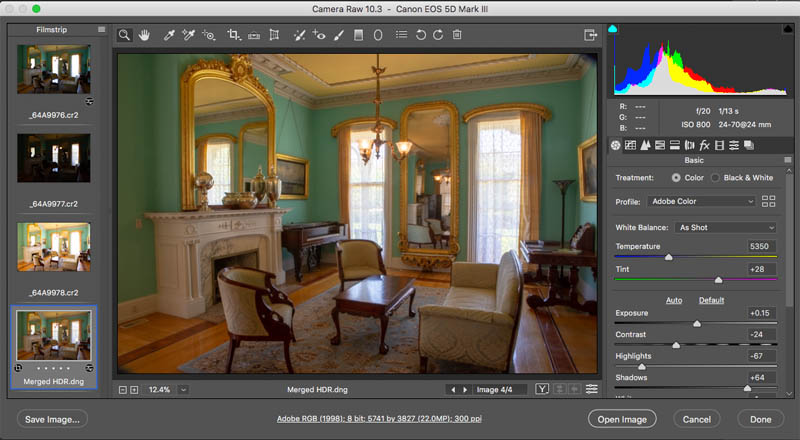
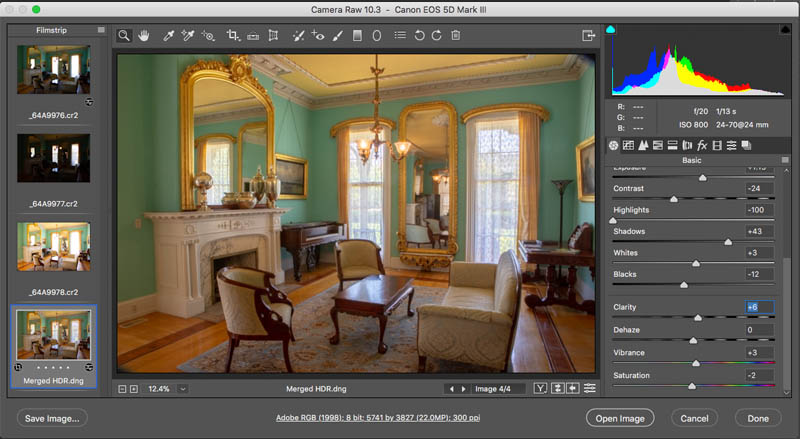
And here it is after I have made some subtle changes to the basic sliders. You can see it’s a realistic looking result.
Tip: Avoid moving the Shadows too far to the right or it will begin to look fake.
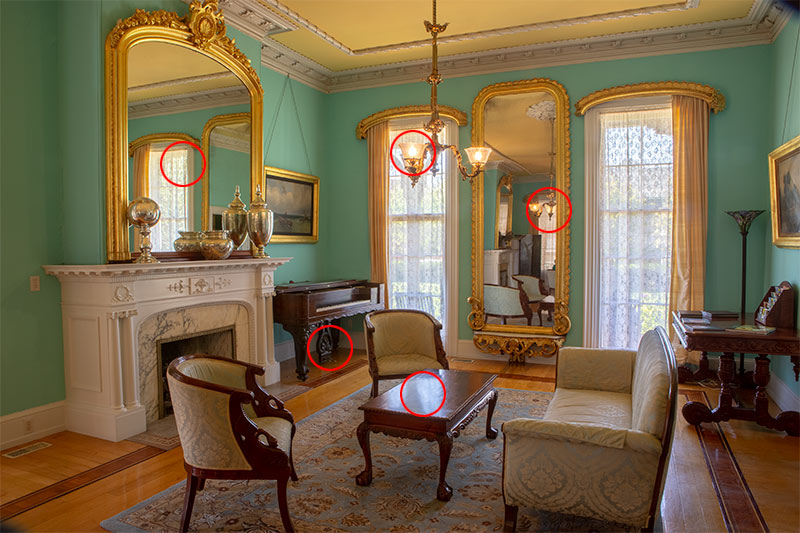
You can see the advantage of HDR. I have highlighted some of the areas that would be very difficult to capture with detail without using this technique. This is really useful for anyone, but especially for people working with Real Estate and architecture photos.
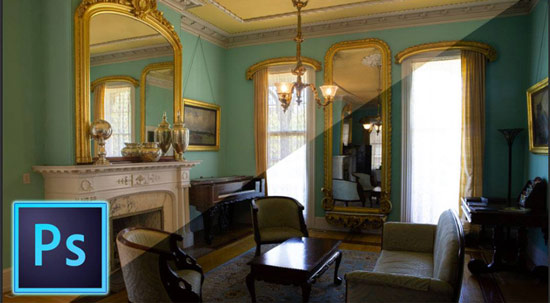
And here is the final result. I hope you enjoyed this, check out the resources below and make sure you watch the video if you didn’t, there is some additional information.

- Check out my in-depth HDR tutorial Here
- HDR in Lightroom tutorial here
- HDR Landscape photos with Camera Raw and Lightoom
Thanks for checking it out!
Colin
PS Don’t forget to follow us on Social Media for more tips.. (I've been posting some fun Instagram and Facebook Stories lately)
You can get my free Layer Blending modes ebook along with dozens of exclusive Photoshop Goodies here

27 thoughts on “How to Make HDR photos in Photoshop for Real estate and Architecture photography”
Leave a Reply
How to make a shattered glass effect in Photoshop with displacement maps and Layer Blending modes.

How to use Layer Masks in Photoshop. Layer Masks explained and 7 tips on Photoshop Masks. If you want to...

Finally, real retouching is possible from within Lightroom. Join Colin Smith, as he shows you how to use the new...


I would like to know, which is easy to use the Camera Raw Alone or the Filter with Ps in your opinion? As a PC user, the only Adobe product I ever used was a Camera Raw filter included with Photoshop.
Great tutorial ! Very easy to follow. I forgot that Bridge could do so much. Thanks from a Mac user.
Thanks Colin. Very well explained and easy to understand. I just need to practice.
I’ve been using photoshop on a Mac (performa 630) since it first cane out on floppy disks! I still learn an incredible amount of great info from your tutorials. I use HDR in Photoshop occasionally to boost colors and details, and your last lesson on masks was great too.
I use both Mac and PC. I have done HDR for some time using both PS and LR. However, I did not know you could merge in ACR. Looks like a more conveniet way to do it since you can go right into PS after doing ACR adjustments.
HI Colin, Great and simplified tutorial – as always! We still want to see you at the December 15 ATX meeting! Let us know!
I’m a PC user, despite suffering through Adobe’s general preference for Apple.
I’ve used HDR, but not very much. Really should do it more.
I use both PC and Mac, generally preferring the PC OS. I’ve used HDR many times starting way back before the more automated features by stacking and masking images in Photoshop. Then migrating to Photomatix. I still use Photomatix as well as the features in Lightroom and Photoshop.
I have and still do use HDR. Reviewing old results I try to be less extreme, ‘cause they where un-realistic sometimes. I sometimes also use a channel as a layer and next mix this with another image to manage lighter and darker areas. I do use these with Win10, by the way.
Love your tutorials, keep up the quality!
Using a Mac Book Pro and Adobe Lightroom Classic, Lightroom CC and Photoshop CC. Love your enthusiasm and expertise presented in a fun way. Thank you.
I am a Mac user. Enjoyed the tutorial about HDR. Very good.
I am a PC user and have used HDR a little in the past without to much success. Just discovered I have been doing it all wrong! Thanks for the information – very useful. Followed along with a set of my own images and the improvement was remarkable.
Hi Colin. Thks your always great Video instructions. I am sitting in Denmark, and enjoying every minute of them.
I used to work in Windows as I am a former PC technician, however, I have come to the conclusion, that life is too short for Windows, so I have been on MAC for the past 5 to 6 years and have no intention to leave that platform.
I have tried to work with HDR photos before, but my results have not come out as good as yours. But, after this brilliant instruction, I’ll give it another shot.
Regards Birger Hauerslev
Hi Colin,
Thanks for the latest tutorial, I found it very easy to understand and will definitely use HDR in Photoshop. I’m a keen amateur photographer and can’t wait to put your tutorial to the test.PC user
Love the tutorial. I’ve used HDR, but only when I want to create some serious drama. Didn’t know using CR could be so powerful in modulating the effect. Most art shows today feature HDR images, many of which are ridiculously overdone. (pc user)
Hello Colin, you asked if I was new to HDR photography. No, I’ve worked with it for many years. I have noticed a major change from when it first came around. Through the learning process and changes in the way things are done it seems to me things have settled down a lot. The HDR images I’ve seen and done are milder and well, just better. Your teaching & Tut’s have helped tremendously.
I’m a PC user.
Try SNS-HDR Pro, is the best for the real estate photography.
And that should be “Southern Mansion” not “Sourthen Mansion” !!!
Hello Colin,
Can you open RAW from Photoshop? I usually open RAW by double clicking on a RAW file, but after watching this tutorial I wondered how you open the three files, thank you
GreT tutorial ..How do you save t the end ?,,I ve heard of flattening to preserve all changes made in case you need to alter some more then when ready just do JPG for client ..so how would you do that ?..
Save as PSD and make copies to share as jpg
Using Windows and for HDR Photomatix. Thanks for these love em