
Lens Blur in Lightroom and Camera Raw – Ultimate Guide
All the features of the Lens Blur Filter in Camera Raw and Lightroom Classic
Lens Blur allows us to blur the background of a photo, to simulate using an expensive lens with a wider aperture. If you don’t have a nice lens, or you are working on existing photos, or photos supplied by someone else, this tool is very useful. Even if you shot with a nice lens, maybe you didn’t open it up when you took the shot, to you didn’t have a neutral density filter in strong light. There are many scenarios where you don’t have sufficient background blur on some photos. Let’s looks at all the features in this ai powered tool including how you can finesse the results. I hear mixed feeling on this, some people loving it and some hating it. Don’t worry about other peoples opinions, if you like this look, go for it! Personally, I’m not a purest and I enjoy this feature. If you use it in a subtle way, it can produce very convincing results.
Adding background Blur
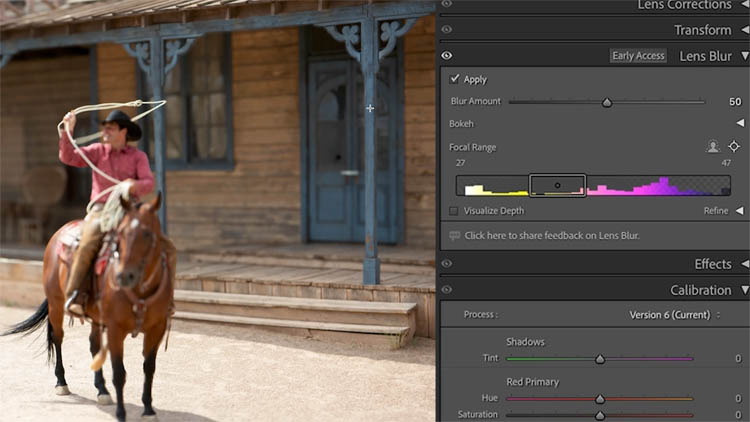
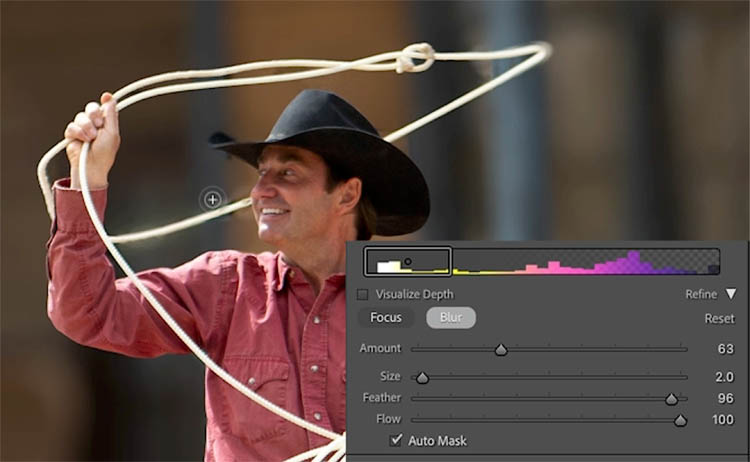
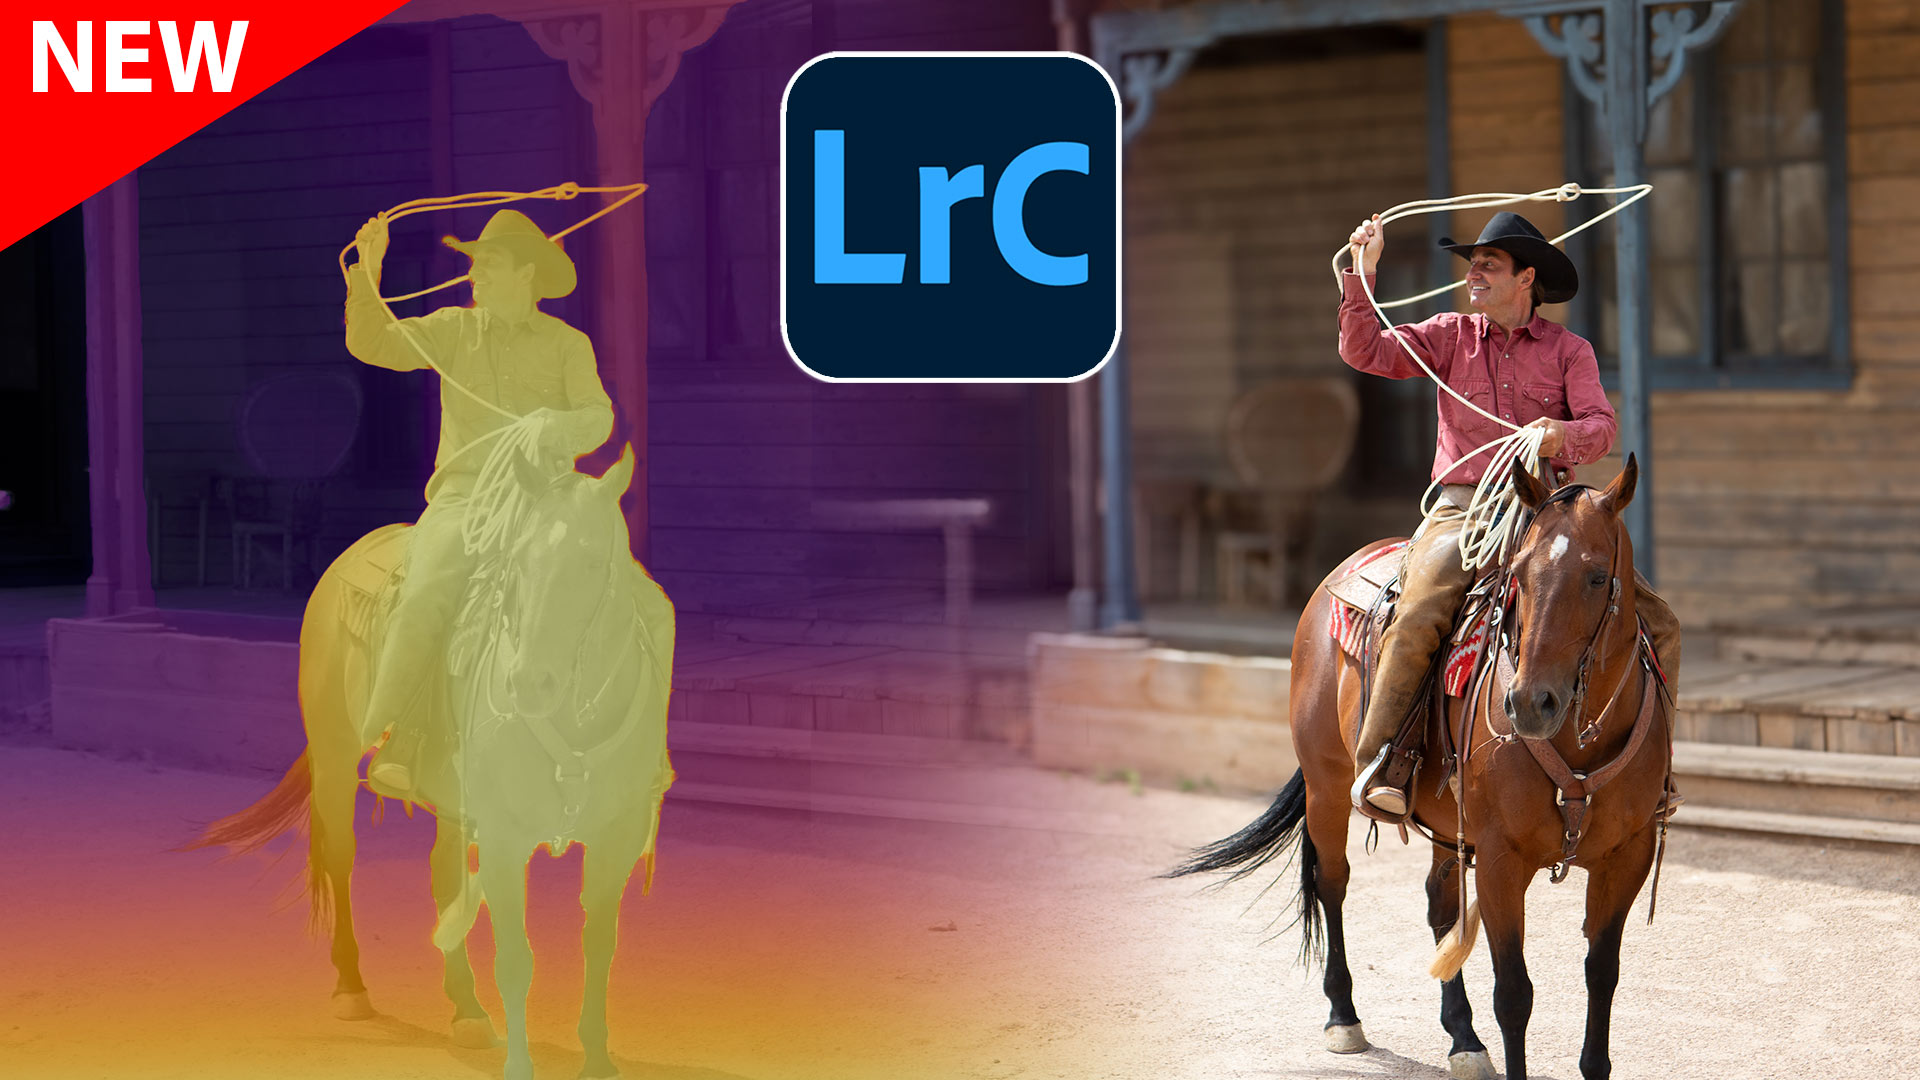
Let’s start with this picture I made of the cowboy in Santa Fe, New Mexico
Notice there is a small amount of background blur, but not much.
Choose Lens Blur under the develop module.

When you turn on Apply, Lens Blur uses ai to detect the depth in the image and create a depth map. If the image was shot on a phone in portrait mode that makes a depth map, Lightroom/ACR will use that map.
See the icon of the head in white. This is focus on subject
Notice it detects the subject and blurs the background. Changing the blur amount effects how blurry the background it.
Generally, I add a little too much blur to start with, this makes it easy to see what we are doing and then, we roll the blur amount back at the end to a tasteful amount.

If you click the crosshair to the right of Focal Range, you can click on the photo. Wherever you click will become the area in focus.

When I click on the door its in focus.

Or the post in front of it.
You can also slide the box under Focal Range to change the focus, much like focusing a camera.
If you make the box longer, it extends the depth of field, making more of the photo in focus at once, like an f11 aperture or so. Make the box more narrow for a shallow depth of field, like a f2.8. The video shows this clearly.

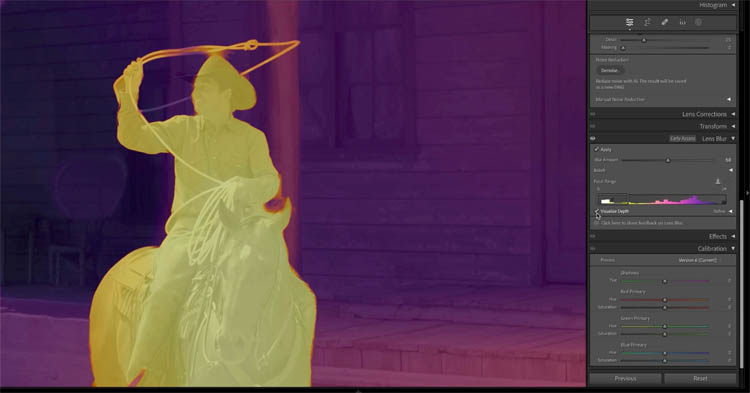
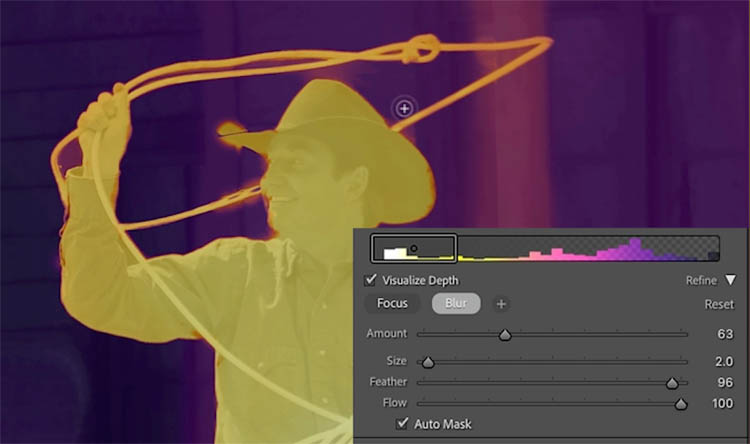
THe ai didi a decent job of selecting the subject (And in simpler photos, it’s pretty good. I chose this one with fine detail so we can see how to manually fix the selection)
The rope and the tip of hit hat needs some help.

Turn on Visualize depth to make it easier to see what’s going on.
The lighter areas are closer to the camera, whereas the darker areas are further away.
Lets manually adjust the selection.
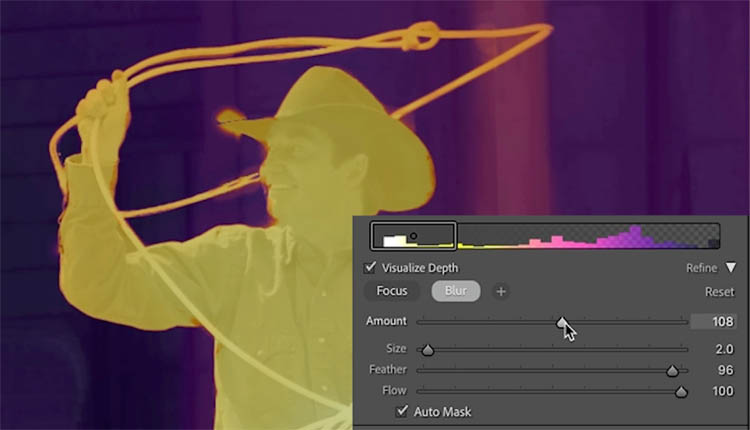
Choose Focus to paint on the areas that should be sharp. Turn on Auto Mask to help with the edges.
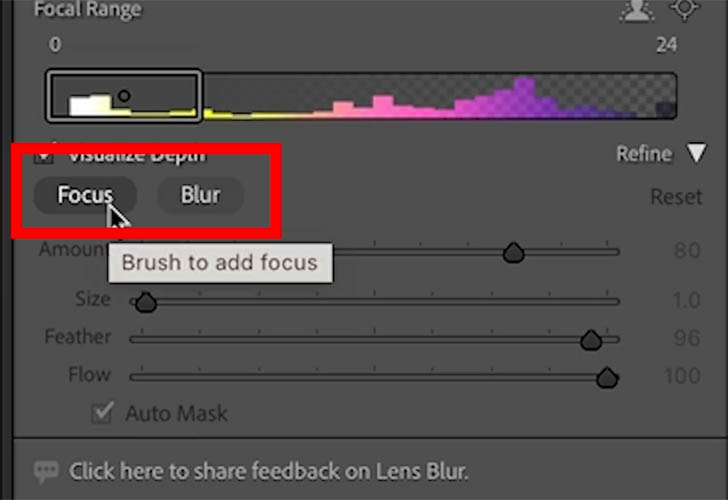
Paint on the areas that need to be sharp, but were missed by the ai selection.

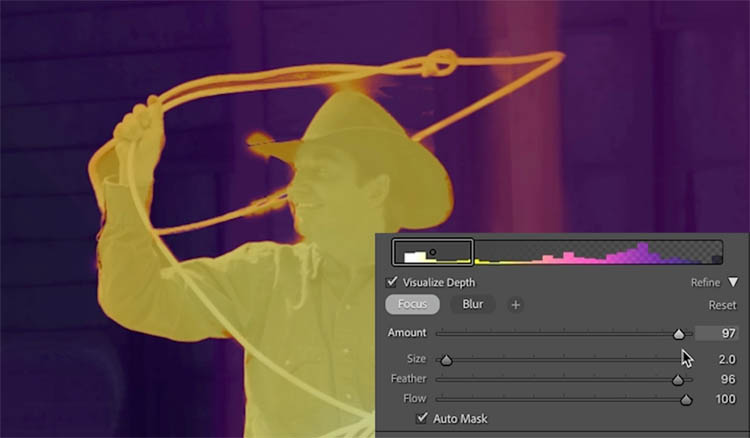
In order for them to match, adjust the amount. As you go to the left it pushes the painted area further into the background as you can see by the slight orange color.

Push the Amount slider to the right to make it closer to the camera. Now, it’s yellow. We want the area we paint to match the colors in the existing depth map for a perfect result.
Choose the Blur button to fix the areas outside of the rope.
Paint with the blur to include the areas of the background that were accidentally selected.
Adjust the Amount so the purple between the rope matches the background.
And here we have a pretty nice edge.

For a realistic result, Increase the depth range so that more of the photo is in focus.
Reduce the blur amount to a reasonable value.

Using Bokeh settings
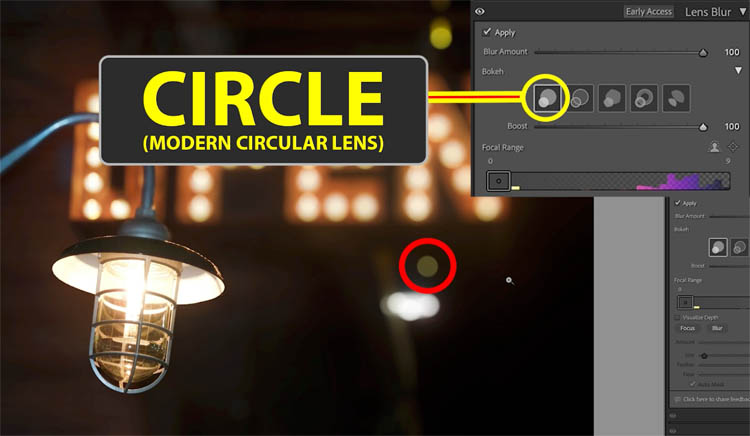
Let’s use this as an example to show off Bokeh. Bokeh changes bright and specular areas into circles that imitate the way different camera apertures look for out-of-focus highlights.
Apple the blur and turn amount all the way up to easily see what’s going on.
Notice we made the Focus Range very narrow to smite a prime 1.4 or 1.8 (ish) lens.

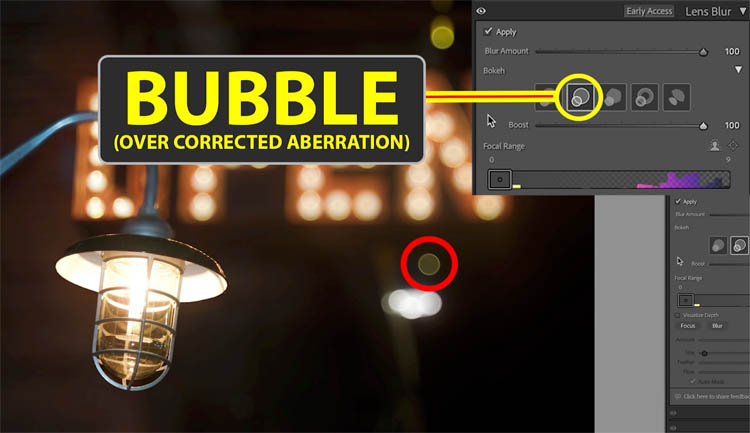
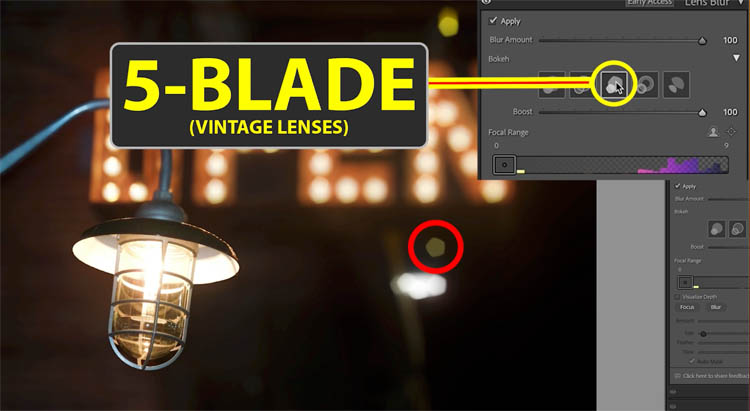
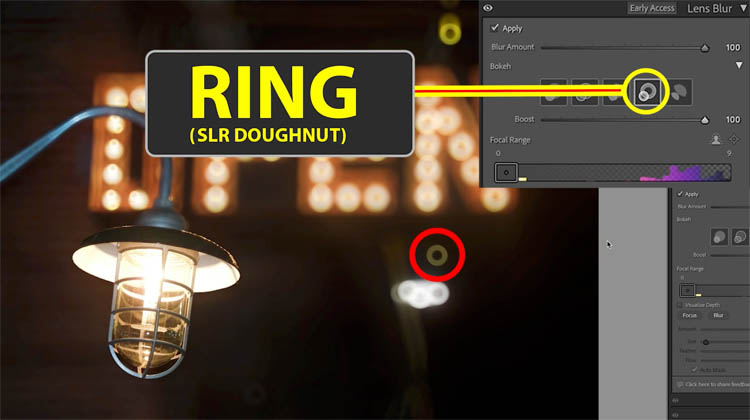
Here I have highlighted one of the circles so you can clearly see the different types of bokeh shapes.
Circle is what’s on most modern cameras including mirrorless cameras.
Bubble adds a little stroke to the circle.
5-Blade gives us a pentagon to simulate the aperture opening on a vintage lens.
Ring simulates a camera with a mirror.
And the cat eye, provides an interesting variation

And the result, after lowering the amount a little bit.
I hope you enjoyed this tutorial. If you did, share it with your friends and on social media
Great to see you here at the CAFE
Colin
PS Don’t forget to follow us on Social Media for more tips.. (I've been posting some fun Instagram and Facebook Stories lately)
You can get my free Layer Blending modes ebook along with dozens of exclusive Photoshop Goodies here

4 thoughts on “Lens Blur in Lightroom and Camera Raw – Ultimate Guide”
Leave a Reply

Learn how to swap heads in photoshop, this tutorial teaches you how to take faces from different photos and place...

How to photograph the great American eclipse, how to safely view and photograph the 2024 total solar eclipse

Learn how to make the colors look the same on different photos on different layers in Photoshop. This is a...


Fantastic lesson. Love your sessions !
As always, great tutorial and explanation and so much help to put this new tool to use and make it look believable. Thank you Colin
Very useful information and I will use it to update a number of older photos. Thank you again.
I have downloaded and installed Camera Raw 17. I use it on none RAW photos usually. The new lens blur will not load, is this because the photo has to be a RAW file?