How to Use Relight Layer in Photoshop to Change Lighting
How to Use Relight Layer in Photoshop to Change Lighting
Photoshop used to have a filter called Lighting Effects. It was loved by those who used it. Unfortunately, Adobe removed it because of compatibility issues that also affected the 3D tools.
But now there’s a new feature in Photoshop Beta called Relight Layer. And this one uses AI to change the lighting in your photos. You can move lights around, change their color, soften them, and even combine multiple light sources.
Let’s see what we can do with it.
Adding a Relight Layer
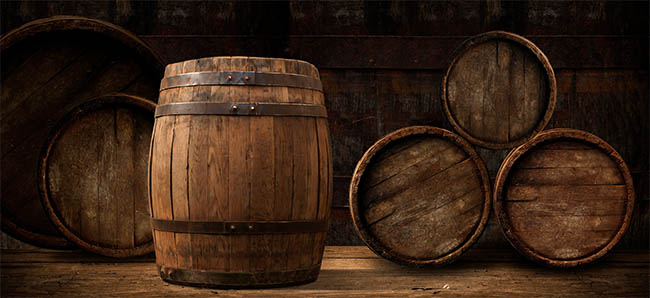
Open a photograph in Photoshop. Here we have some familiar barrels I’ve used on tutorials before.
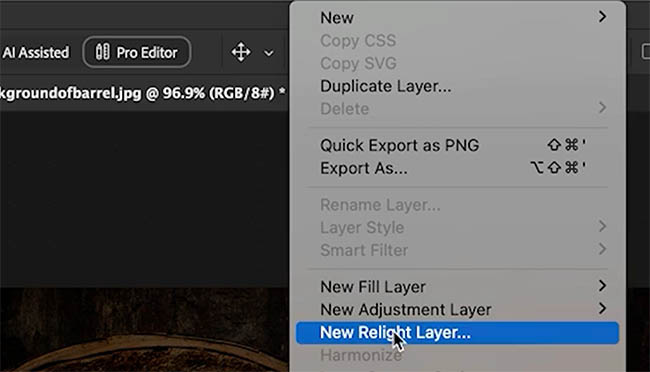
Choose Layer > New Relight Layer. (only in Photoshop beta right now)
You’ll see a new Relight Layer in the Layers panel and a white dot over your image.
You’ll also notice there are options in the Properties panel and in the task bar, you can use either, they are the same settings.
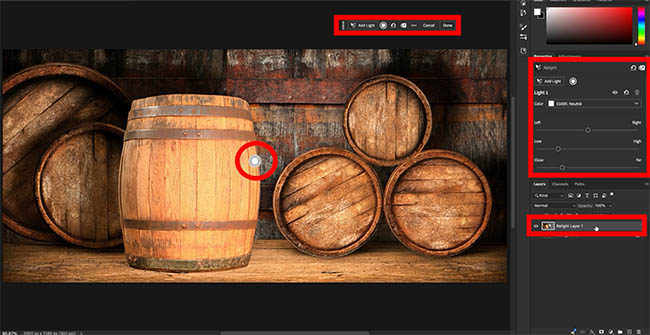
That little white dot is your light source.
You might notice the image suddenly looks very bright and little soft. Don’t panic! We’re working with a preview. Photoshop will render the higher-resolution result when we apply the lighting.
Moving the light around
Grab that white dot and drag it around the image.
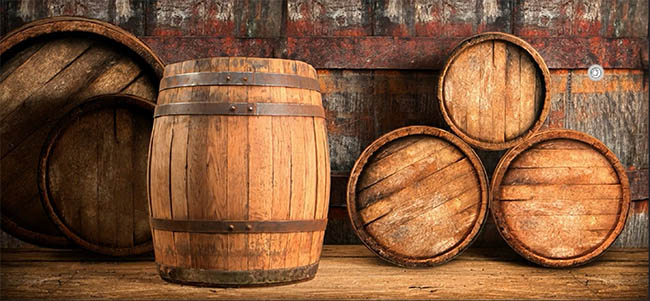
Notice how the direction of the light changes? Try moving it to the left, right, or above the subject.
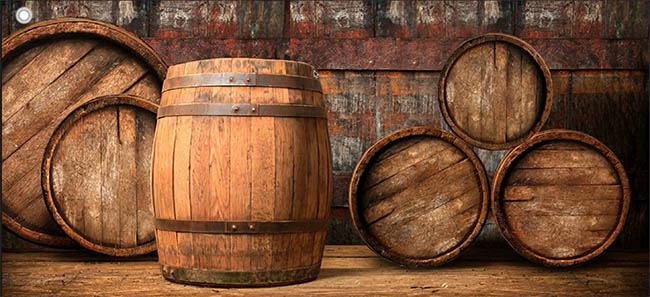
You can go further too (and the results are worth it). Zoom out a little and drag the light right off the canvas.
As you move it further away, you can get some very different lighting effects, which I like better.
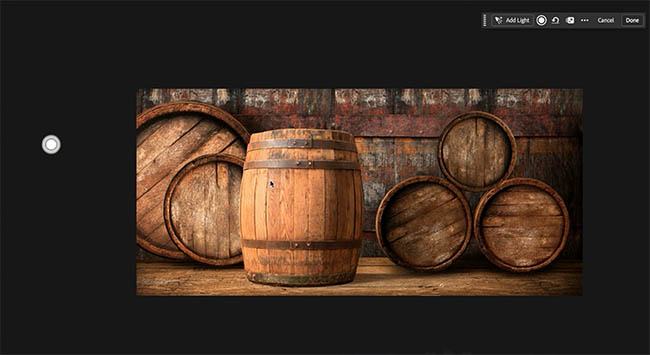
You can also control the light’s position using the Properties panel.
You’ll find sliders for Left/Right, Low/High, and Close.
The first two change lighting position, the same as dragging the dot around, but useful if the dot is off the canvas and not visible.
What if you want to change the distance of the light, move it forward or backwards? This is what the Close slider is for.
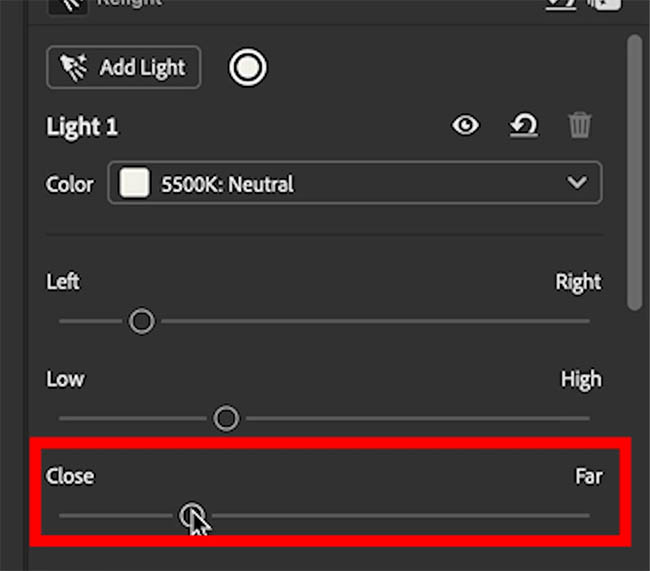
Move it toward Far to push the light behind your subject, creating more backlighting.
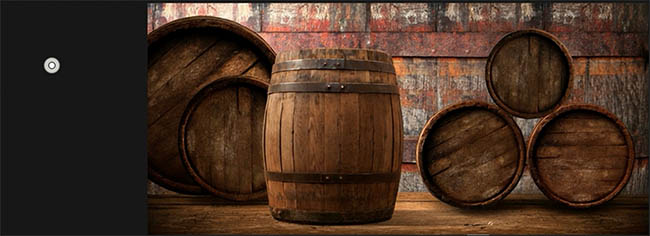
Move it toward Close to bring the light forward.
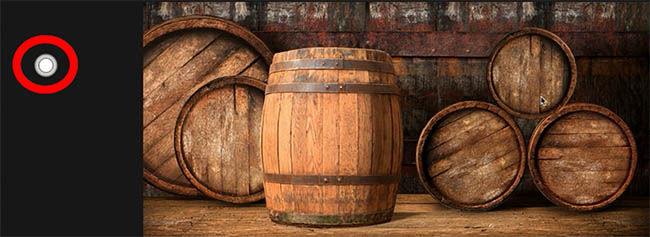
Notice how the white dot changes size as you do this.
Changing the original lighting
You can also mix the original lighting with the new lights.
Find Original Lighting in the Properties panel or contextual taskbar.
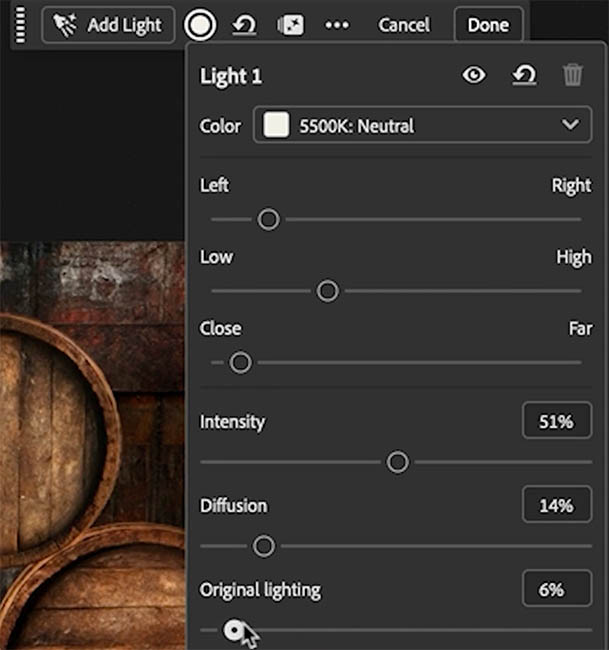
Turn this down by moving the slider to the left.
Notice how the original lighting disappears, and we can start to see more of the light we’re adding?
We can now mix the original lighting with our new lighting.
Try moving the light behind the subject, then reduce the original lighting.
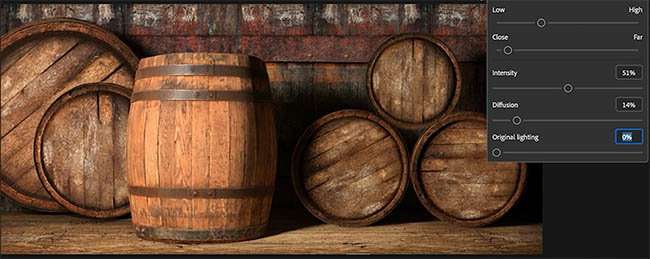
This gives us more control over the final look and let’s us add some drama.
Changing the color of the light
Let’s make this a nighttime scene.
Click the option that say Color.
You’ll see a drop down with preset colors in Kelvin.
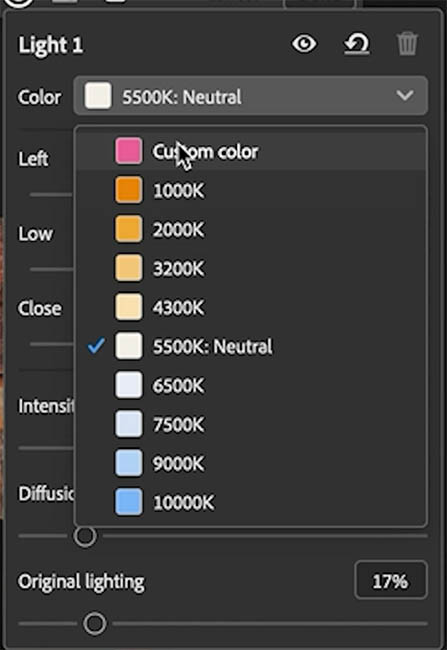
Click on Custom Color to bring up a color swatch to pick a color. At the moment, you can’t click on the image with an eyedropper to sample the color, you need to choose it in the color picker.
Pick a custom color.
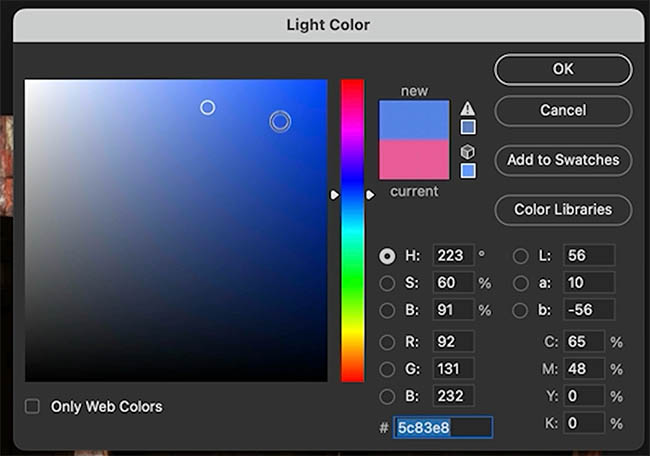
I’m going to choose a cool blue to simulate moonlight coming through a window.
Move the light a little higher and further away.
Making the light softer or harder
Find the Diffusion slider.
Move it to the right to soften the light and spread it across more of the scene.
Move it to the left to create a harder, more directional light source.
For our moonlight, I’m going to make it a little harder to simulate moonlight coming in from a smaller window.
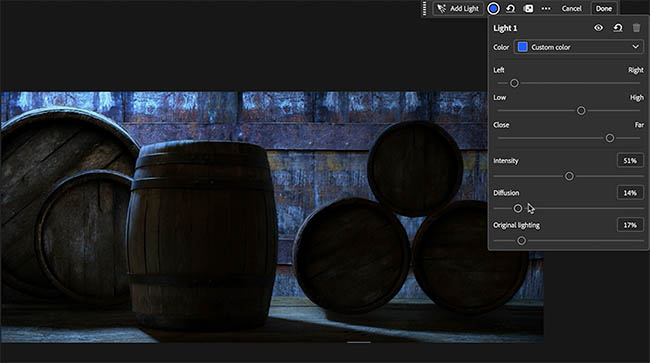
Of course, if you’re going for a softer look, move it the other way.
You can also adjust Intensity to control the brightness, you will usually have to turn this down for dramatic lighting. .
Adding a second light
We’re not limited to just one light, we can add up to three lights.
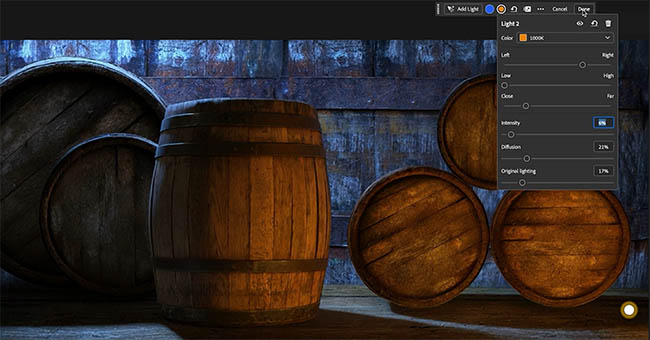
Let’s add another light to our scene. This time, I want a warmer light coming from inside the room.
Add a second light and move it toward the corner.
Click Add Light from the task bar or Properties panel.

You will still see a single lighting layer.
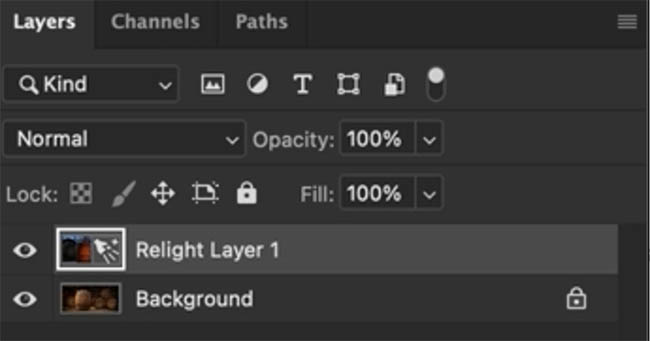
But you’ll notice 2 colored circles now. Which ever one is highlighted is the one that will change when you adjust the properties.

Make sure the new light is selected. Otherwise, you’ll be adjusting the wrong one. Ask me how I know!
Choose a warm orange color.
Now turn the intensity down. We just want a little warm light in that corner.
Move it a bit closer and adjust the diffusion until it looks right.
We now have cool moonlight coming through the window and warmer lighting inside the room.
When you’re happy with the result, click Done.
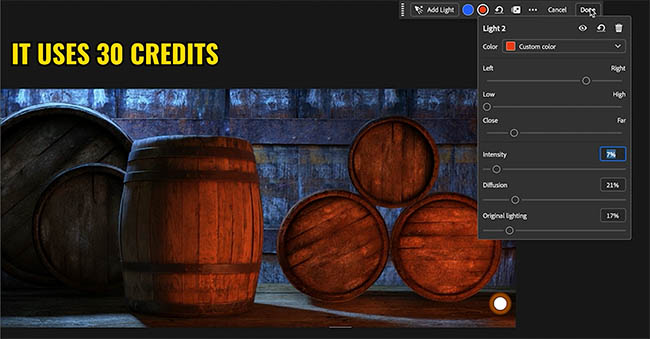
Photoshop renders the higher-resolution result. When you press the done button, it renders the result. This currently costs 30 standard generative Credits. (If you are on Creative Cloud Pro or Firefly Pro you get unlimited use of these features.)
Tip: Moving lights and adjusting the preview doesn’t consume generative credits. Applying the result with Done does, so you can experiment for free and only render if you like the results.
At anytime, you can choose Edit Lighting and make further adjustments.
I felt the warm light was too strong, so I lowered it in this example, to match something more like a candle. (Be aware when you re-edit the lighting, you will be charged a further 30 credits when you click apply again.)
Matching lighting in a composite
Now that you know how the lighting settings work (also watch the video at the top to see it in action) Let’s try something a little more practical. We are going to match lighting in a composite, this is where this feature really shines. (pun sort of not intended, but I’ll take it).
I have 2 layers. A woman added against an existing background. (I’ll remove the 2nd woman later with the remove tool, I didn’t want to interrupt the tutorial steps here).
The problem? The lighting doesn’t match at all. I could use Harmonize, but I like having manual control for a better result.
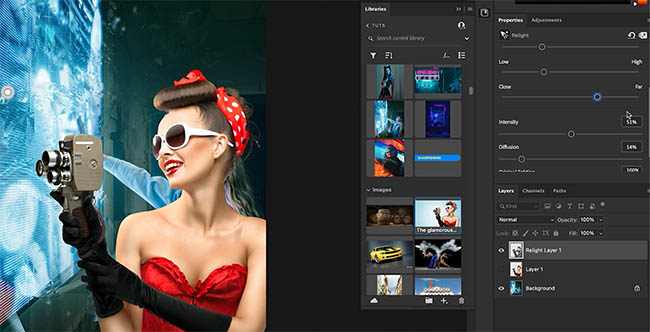
With her layer selected, choose Layer > New Relight Layer.
First step is to position the light.
Look at the background and decide where the light should be coming from.
In this example, there’s a large blue screen illuminating the scene.
Move our light toward the screen and push it further away using the Close slider to match the position.
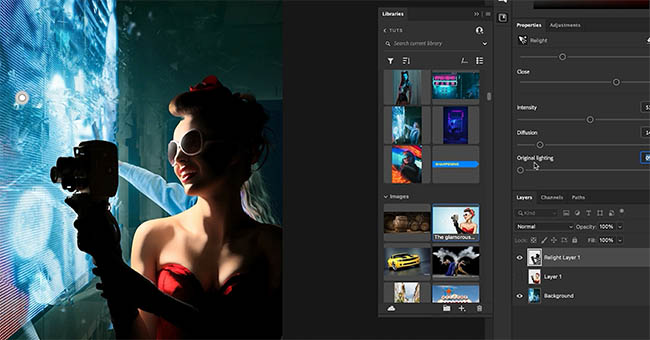
Now turn Original Lighting all the way down (off) so we can replace the lighting on our subject.
Choose a custom blue color that matches the screen.
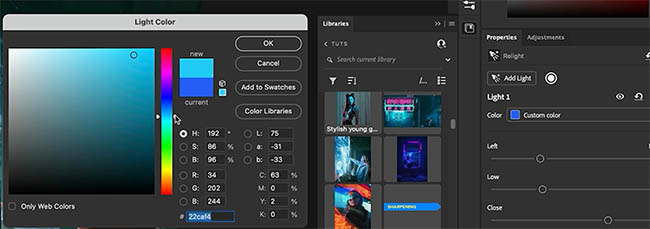
Because the screen is a large light source, increase the Diffusion. This spreads the light and helps it wrap around the subject.
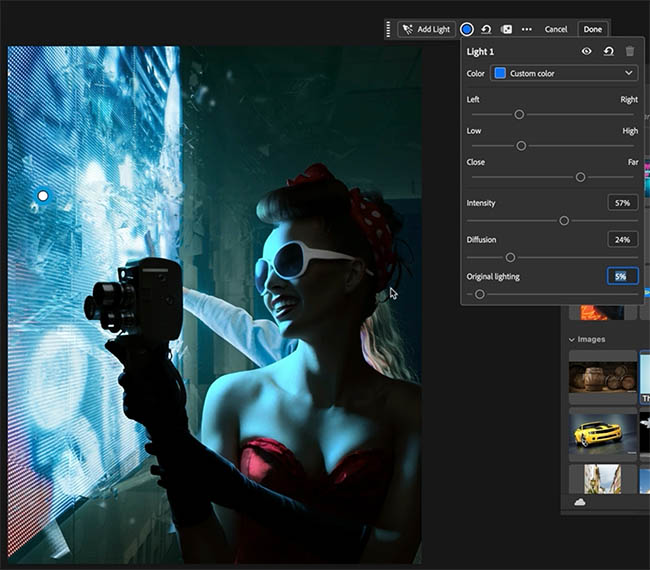
Adjust the Intensity until the amount of lighting looks right.
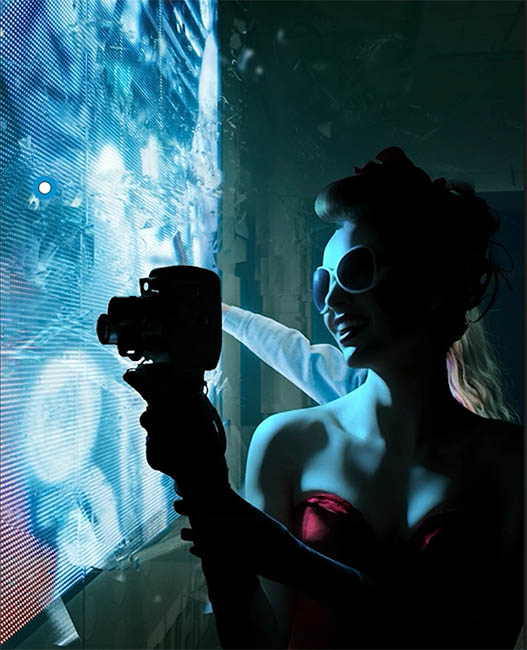
I’m also going to bring back just a touch of the original lighting so we don’t lose too much detail in the shadows. This restores just a little bit of detail in the shadows. I didn’t want just a silhouette.
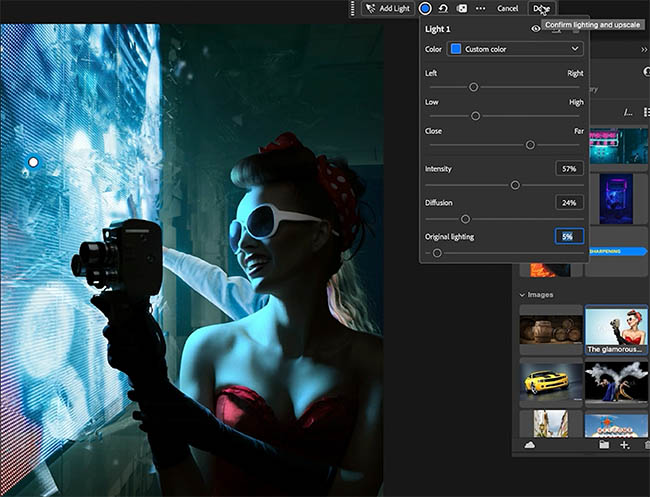
Click Done.
Let’s compare the before and after.
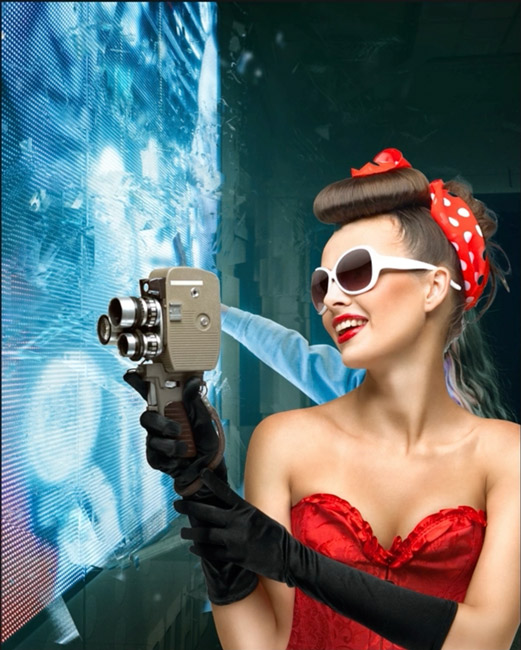
In the after, I removed the original person behind her.
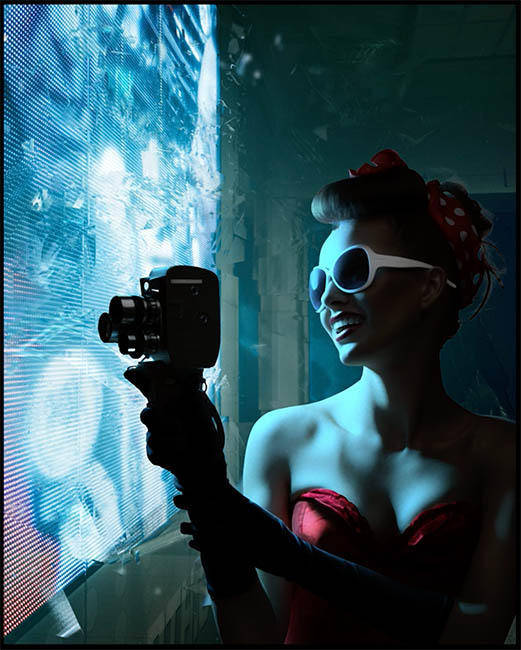
How it looks more like our subject belongs in the scene.
Now, I know what some of you are thinking. Why not just get the lighting right in camera?
And I agree. Whenever possible, absolutely.
But when you’re combining photographs taken under different lighting conditions, that isn’t always an option.
Relight Layer gives us another way to match the lighting without rebuilding it all manually.
I’m curious what you think of this feature. How would you use it? And what would you like Adobe to add?
Let me know in the comments.
If you’re new here, welcome to the CAFE! Check out my free Photoshop goodies at PhotoshopCAFE.com/vault.
It’s great to see you here at the CAFE!
Colin
PS Don’t forget to follow us on Social Media for more tips.. (I've been posting some fun Instagram and Facebook Stories lately)
You can get my free Layer Blending modes ebook along with dozens of exclusive Photoshop Goodies here



This tutorial shows how to crop a photograph in Photoshop to an exact size and resolution. Includes tips, composing and...

How to make a creative photo collage with Photoshop 2026 and free Adobe Stock Photos

Use this trick to Fix color in any photo in 1 click in Photoshop, Lightroom or Camera Raw