What’s New in Photoshop 2027? All the New Features Explained
What’s New in Photoshop 2027: All the Big Features
Photoshop has just received a big update, and there’s a lot to look at. We have new ways to work with lighting, better integration with Camera Raw, a redesigned interface, and several new AI features.
Some of these have moved from Photoshop Beta into the main release, while others are completely new.
I’m going to move through the features fairly quickly and show you what they do. For the more important ones, I’ll also be making separate tutorials where we can go deeper.
Let’s jump in.
Open Camera Raw masks directly in Photoshop
We’re going to start with a feature that people have been asking for for years.
Let’s open a raw photograph in Photoshop.
Because this is a raw file, Photoshop opens it in Adobe Camera Raw.
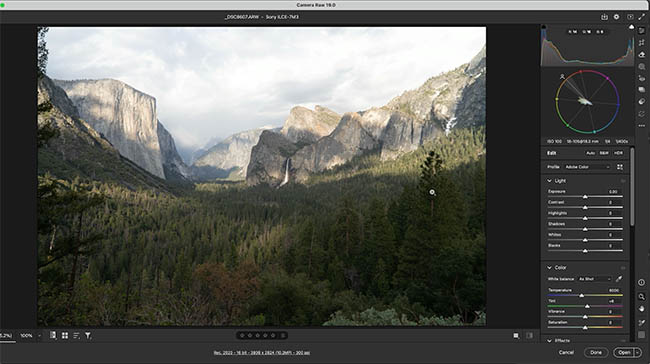
There’s a huge number of new features in Camera Raw 19, and I’ve made a separate tutorial covering those. But this first feature is something I’ve been waiting for.
Let’s create some masks.
Open the Masking panel and choose Landscape.
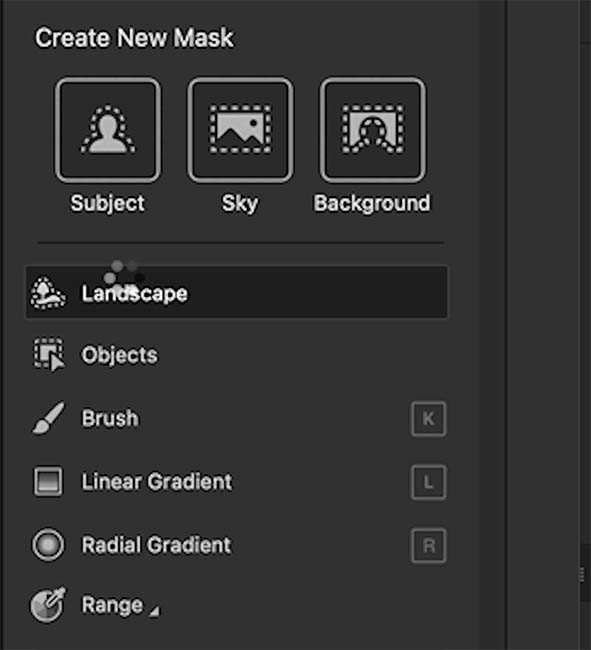
Camera Raw analyzes the photograph and gives us several different areas we can select.
I’m going to choose the Sky, Mountains, and Vegetation.
Click Create.
Now we have three separate masks that identify those parts of the photograph.
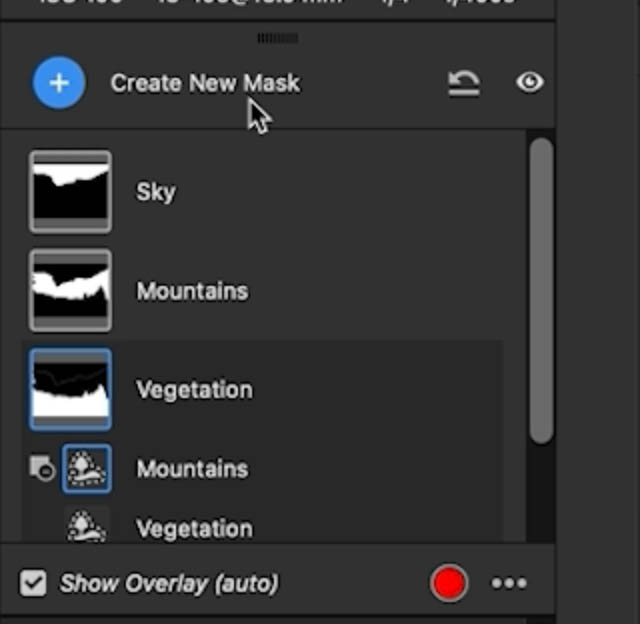
We’ve been able to create these kinds of masks in Camera Raw for a while.
That’s not the new feature.
Open with Masks
Look at the Open options.
Notice something new?
Open with Masks.
Hell has frozen over.
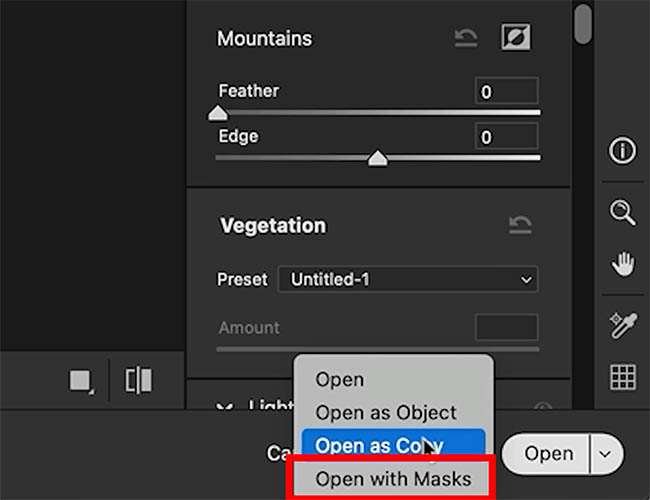
Choose Open with Masks to open the photograph in Photoshop.
Now open the Channels panel.
Look at that!
Our Camera Raw masks have been transferred into Photoshop as alpha channels.
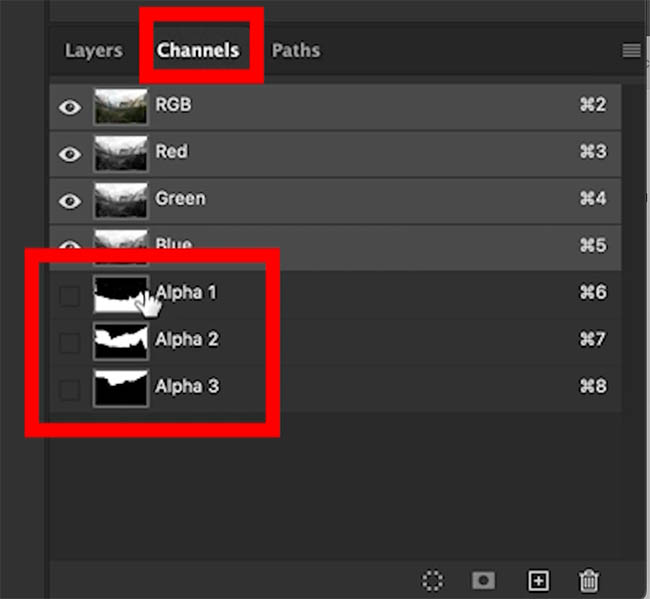
We can even rename the channels if we want to make them easier to identify.
But the important thing is that we can now use these masks with Photoshop’s adjustment layers, brushes, and filters.
Using the Camera Raw masks in Photoshop
Let’s start with the sky.
In the Channels panel, hold Ctrl (Windows) or Cmd (Mac) and click the sky channel thumbnail.
This loads the channel as a selection.
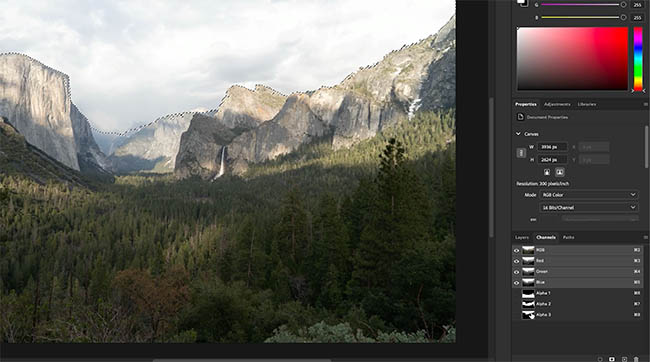
Now go to the Layers panel and create a Light adjustment layer.
This is another relatively recent Photoshop feature, by the way. Full tutorial on Light Adjustment Layers here.
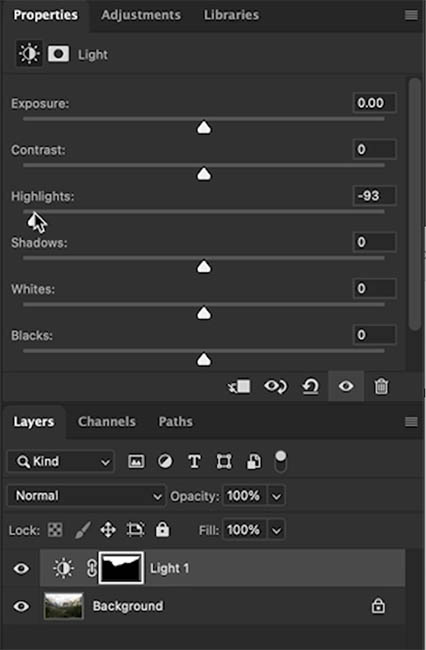
We can now adjust the lighting in the sky to bring back some of the detail.
Notice that the adjustment only affects the area we selected.
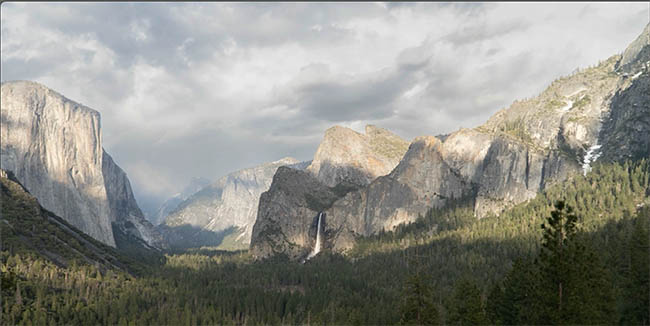
What about the mountains?
Return to the Channels panel.
Hold Ctrl or Cmd and click the mountains channel to load it as a selection.
This time, let’s try some Clarity and Dehaze adjustments.
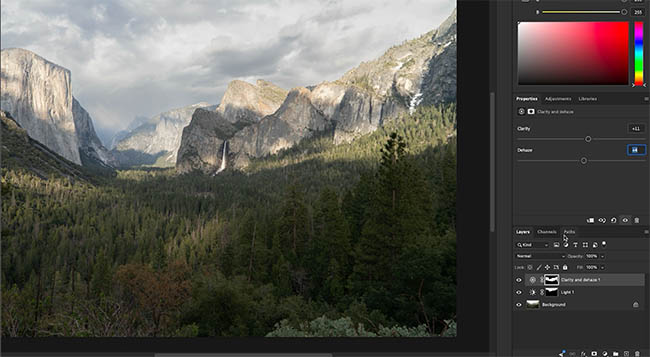
Now we can do the same thing with the vegetation.
Load that channel as a selection, return to the Layers panel, and create another Light adjustment.
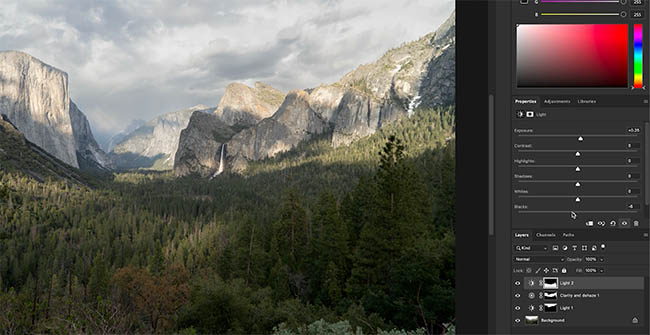
Notice that we’re working on different areas of the photograph without having to create those selections again.
Camera Raw has already done that work for us.
Why would we do this in Photoshop instead of Camera Raw?
You might be wondering why we’d go to all this trouble when we could make these adjustments directly in Camera Raw.
And you’re right. For basic tonal and color adjustments, we absolutely could.
But here’s where this gets interesting.
We can take advantage of Photoshop’s tools that aren’t available inside Camera Raw.
For example, right-click the image layer and choose Convert to Smart Object.
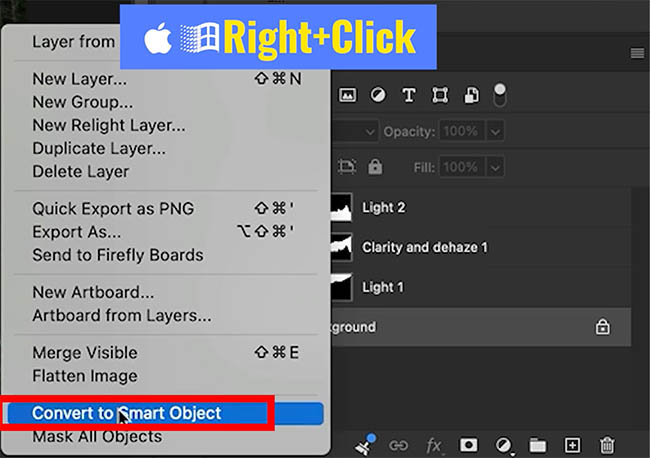
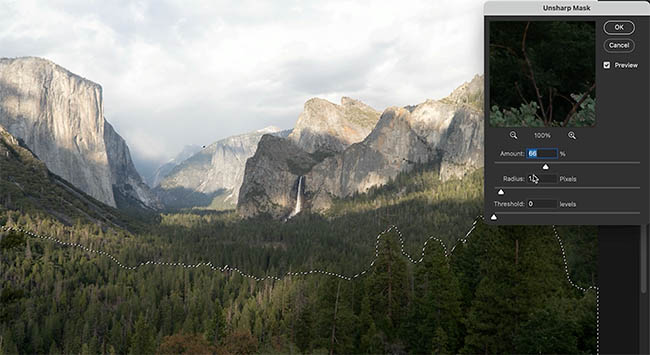
Now we can load one of our saved masks from the Channels panel and use it to help control where a Photoshop filter is applied.
This gives us access to filters and effects that Camera Raw doesn’t have.
But where I really see this coming in handy is manual dodging and burning.
Photoshop’s painting tools are much more flexible than the brushes in Camera Raw, particularly when you’re using a pressure-sensitive pen.
We can use the masks from Camera Raw to help define the edges of objects, then use Photoshop’s brushes to paint more precisely.
This gives us the best of both applications.
Camera Raw makes the selections, and Photoshop gives us more control over what we do with them.
Tip: Alpha channels are saved selections. Hold Ctrl (Windows) or Cmd (Mac) and click a channel thumbnail whenever you want to load that selection again. You don’t have to recreate the mask.
Quick Compare: Before and after in Photoshop
Now that we’ve made some adjustments, here’s another new feature that comes in handy.
Quick Compare.
Click the Quick Compare icon to open the comparison view.
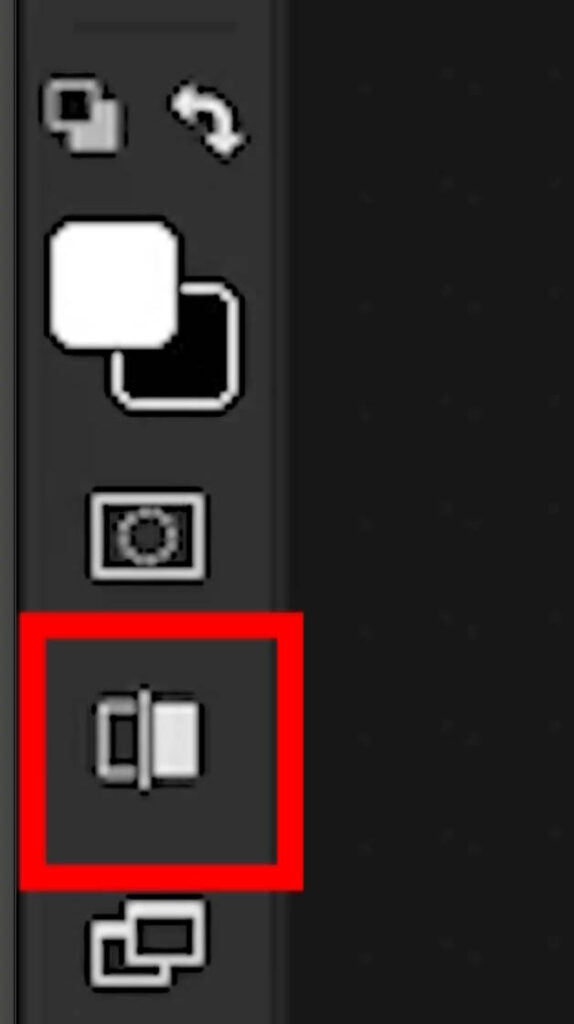
Notice how we get a before-and-after slider across the photograph.
Drag the divider from side to side.
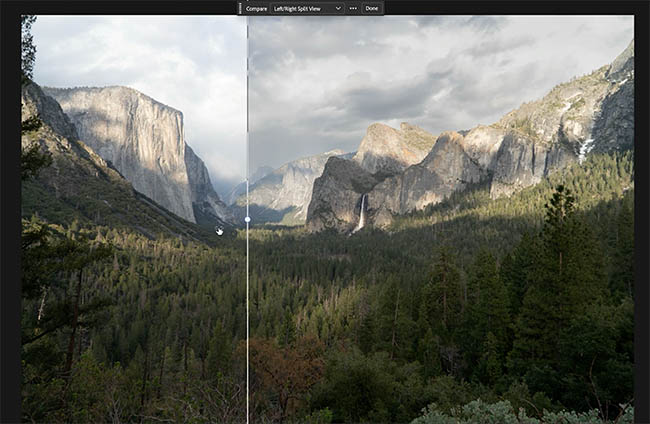
Wow, we’ve made quite a difference to this photograph.
This makes it easy to see exactly what our adjustments have changed.
Different comparison views
We’re not limited to a vertical comparison.
Choose the horizontal comparison option.
Now we can compare the top and bottom of the photograph.
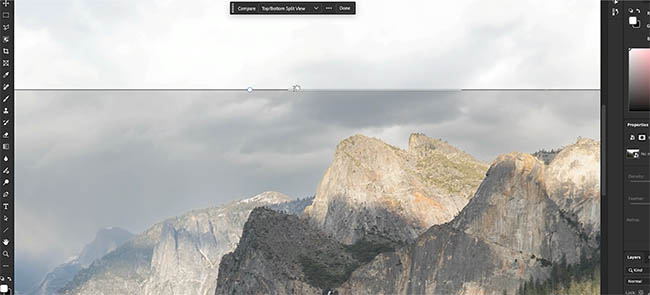
We can also zoom into the photograph while we’re comparing.
This is particularly useful when looking for unwanted changes or checking fine details.
There’s another mode called Single View.
Choose that option and click to switch between the before and after images without a divider.
What does Quick Compare use as the before image?
Here’s something important to understand.
Quick Compare uses the state of the image when the document was opened as its starting point.
This means that it doesn’t necessarily compare the original camera file with your current edit.
If you want to compare a particular version of the document with your latest changes, you can arrange the layer visibility, save and close the document, and then reopen it.
That gives you a different starting point for the comparison.
This can be useful when you want to see the difference between two stages of editing rather than the original photograph and the finished result.
Remove reflections from eyeglasses
Here’s another feature I’ve heard a lot of requests for.
Removing reflections from glasses.
Look at this portrait.
There’s quite a bit of distracting glare on the eyeglasses.

Choose Filter > Camera Raw Filter.
Notice that we’re opening Camera Raw as a filter. We don’t have to be working on a raw photograph to use this feature.
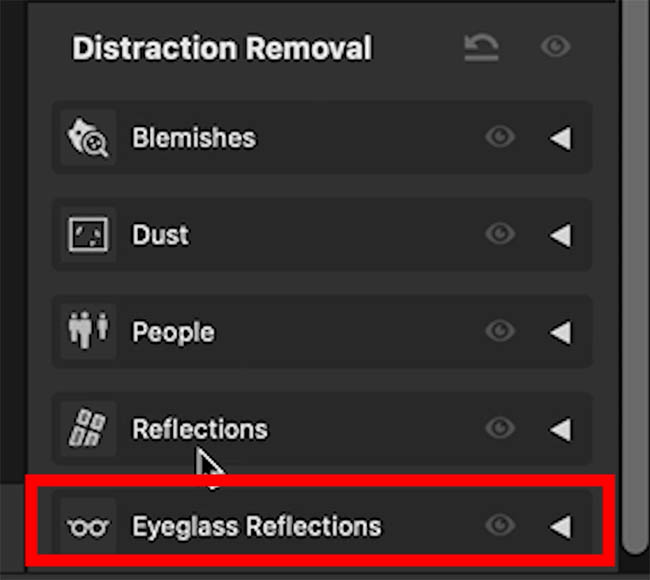
Inside Camera Raw, choose the Remove tool.
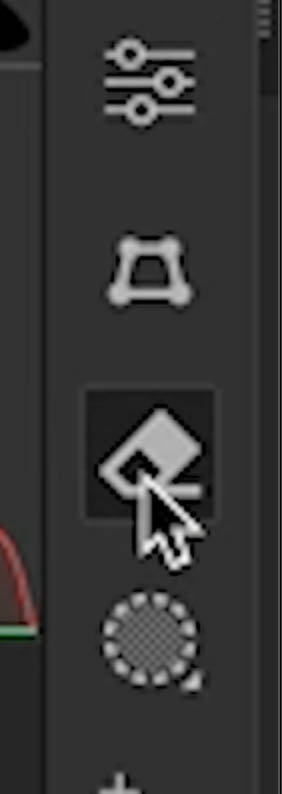
Find Reflections, then choose Eyeglass Reflections.
Click Apply.
Look at that.
Camera Raw removes much of the glare and makes the eyes easier to see.

That’s a pretty good result.
But let’s look at another photograph.
What about strong specular highlights?
This second image has brighter, more concentrated reflections.
These are what we call specular highlights.

Apply the eyeglass reflection removal again.
Notice that it does a reasonable job around the eyes, but some of the stronger reflections remain.

So it’s very good at removing certain types of glare, but not quite as good with these stronger reflections.
Fortunately, we can often clean up the remaining areas using the regular Remove Tool.
Select the Remove Tool and paint over the leftover reflection.
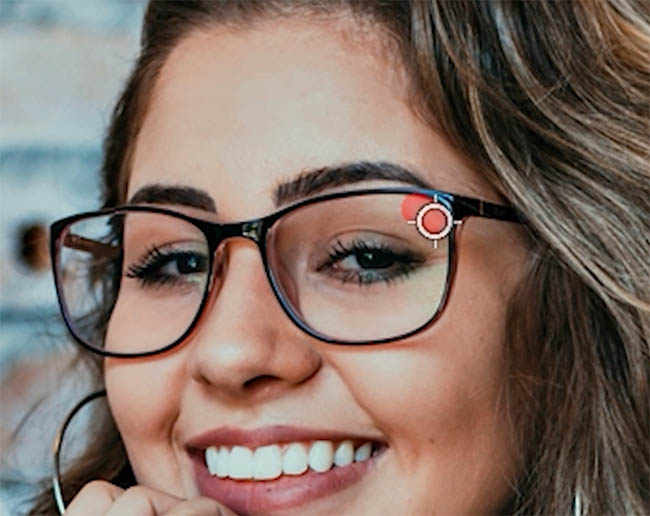

There we go.
That finishes it off.
Tip: Check the actual eyes and the shape of the glasses after removing reflections. The automatic result might be a good starting point, but stronger reflections can require some manual cleanup.
LUTs are now in Adobe Camera Raw
Let’s look at one more new Camera Raw feature.
We can now use LUTs directly inside Camera Raw.
LUT stands for Look Up Table. It’s a way of transforming colors to create a particular look.
Open the color grading controls and find LUTs.
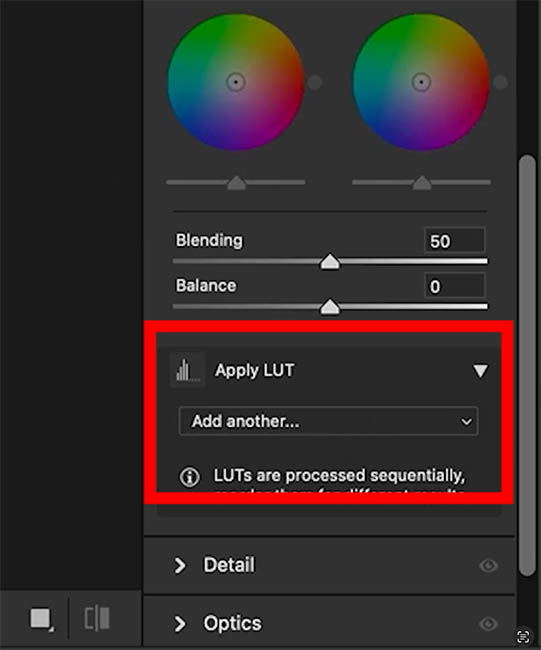
We can choose a LUT file, including the familiar .cube format.
Let’s load one.
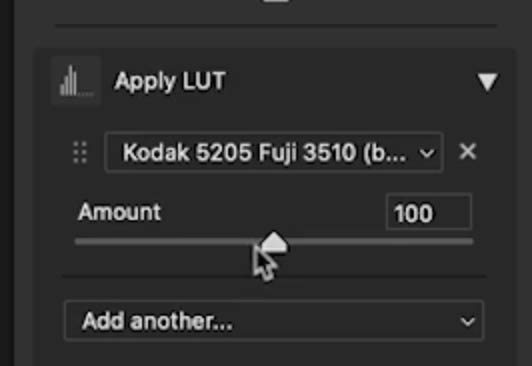
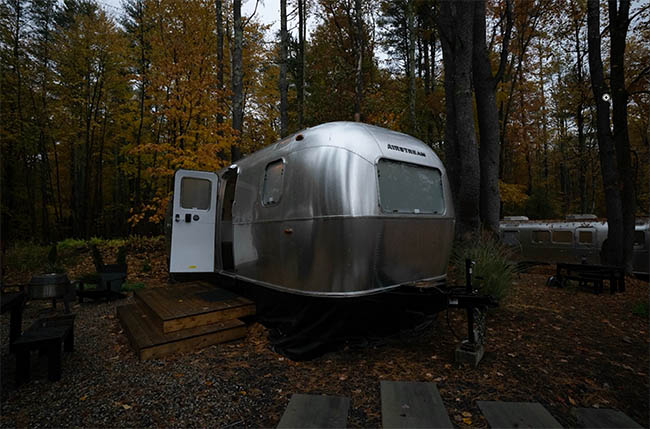
Notice how the color of the photograph changes.
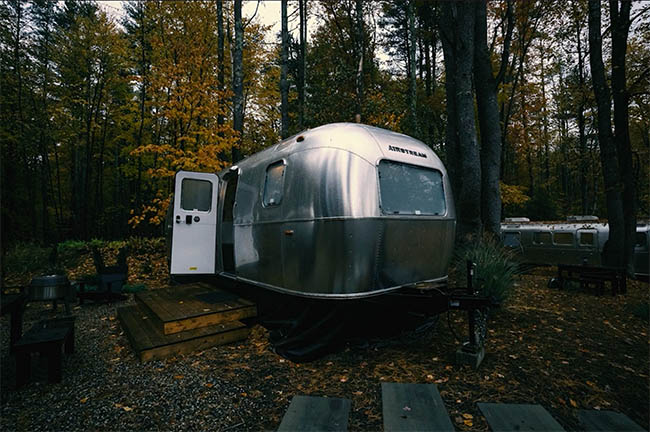
We can use the Amount control to adjust the intensity.
Move it down to reduce the effect, or increase it for a stronger look.
Stack multiple LUTs
Here’s another interesting feature.
We’re not limited to just one LUT.
Let’s add a second.
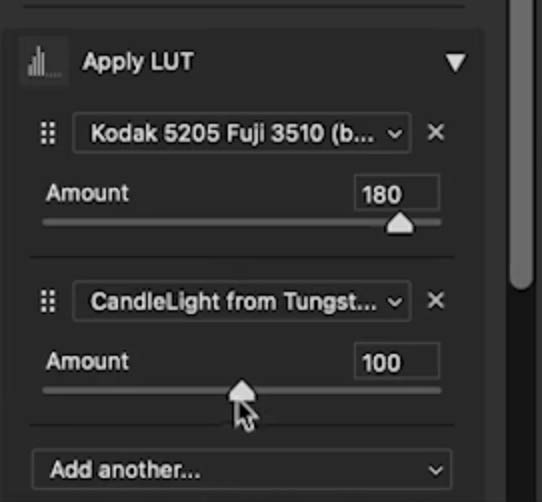
Now we can combine the color treatments.
And we can still use Camera Raw’s regular adjustments to refine the photograph afterward.
This gives us a lot of flexibility for color grading.
I’ve gone into these features in more detail in my separate Camera Raw 19 tutorial.
Photoshop gets a modern Spectrum interface
One of the biggest visual changes is the new Photoshop interface.
Adobe calls it Spectrum.
The first thing you’ll probably notice is that everything looks a little darker, with higher contrast.
The panels and controls also have more rounded corners.
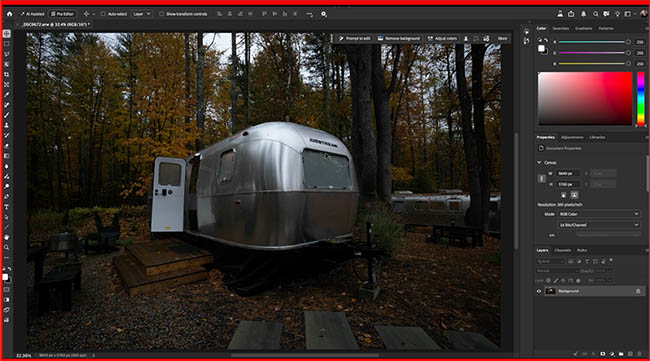
But it’s more than just a visual redesign.
Find hidden tools without clicking
Move your cursor over the tools in the toolbar.
Notice that the grouped tools now open automatically when you hover over them.
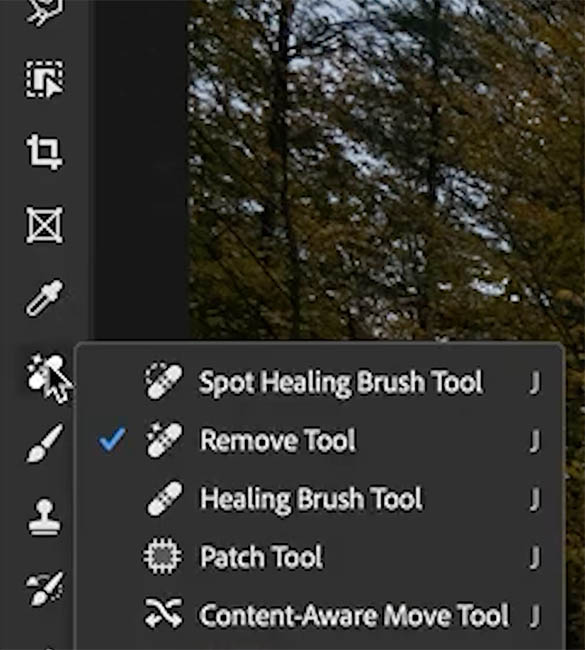
We don’t have to click and hold to see what’s underneath.
This is particularly useful with all the newer selection and removal tools. Sometimes it’s easy to forget which tool is hiding behind another one.
Now we can find them much more quickly.
Easier access to Curves color channels
Let’s look at another improvement.
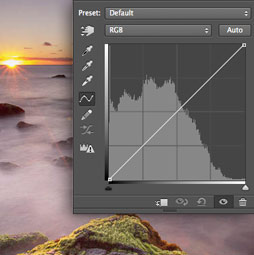
Create a Curves adjustment layer and open the Properties panel.
Notice the updated appearance with the rounded controls.
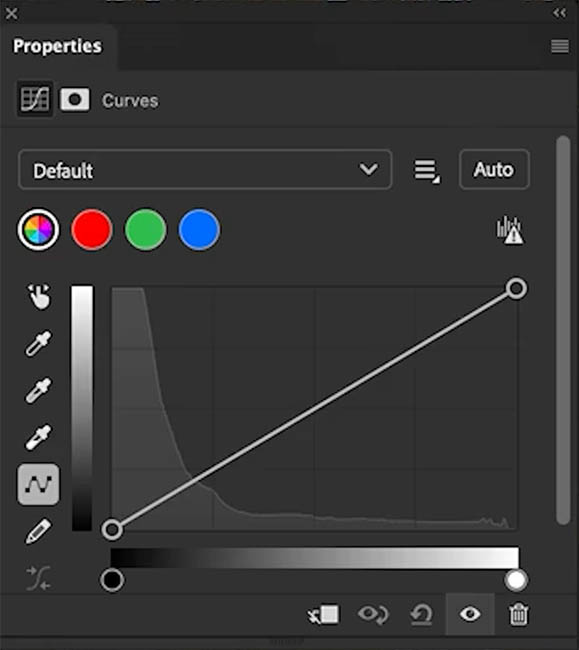
Now look at the color curves.
Previously, we had to use the channel menu to choose the red, green, or blue channel.
In the updated interface, those channels are easier to access.
Click Red and adjust the red curve.
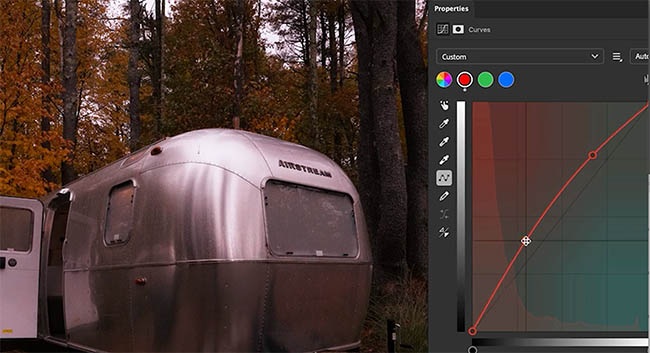
The Color blend mode allows us to use the color changes from the adjustment while largely preserving the underlying luminosity.
It’s a quick way to create a color treatment without changing the photograph’s contrast in the same way.
Customize the interface brightness
Now, if you don’t like the darker interface, you’re not stuck with it.
Open Settings/Preferences > Interface.
At the top, you’ll see different interface brightness options.
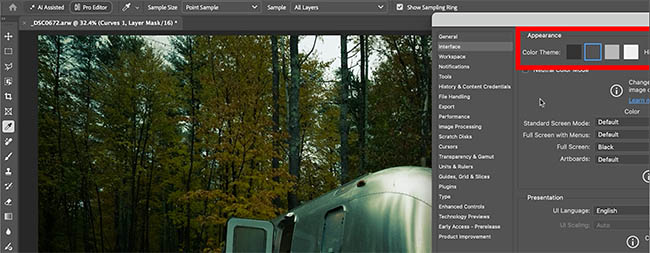
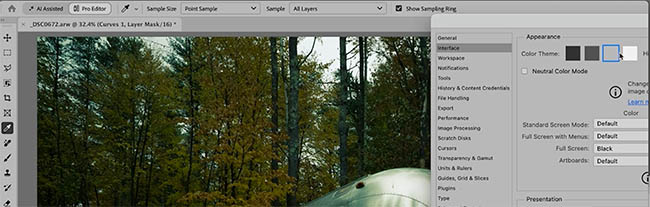
We can choose something closer to the previous Photoshop appearance or go even lighter.
There’s also an option to change the highlighting color used for selected items in panels, such as the Layers panel.
For example, we can choose a blue highlight if that’s easier to see.
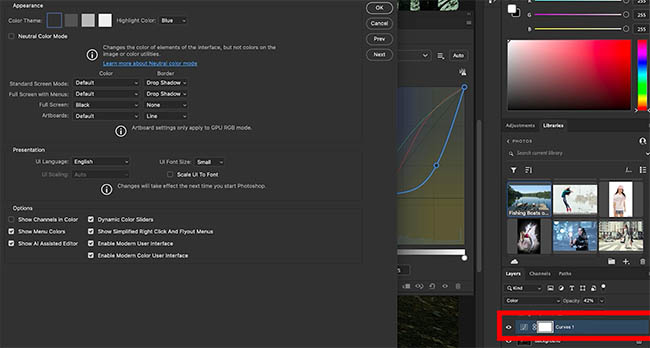
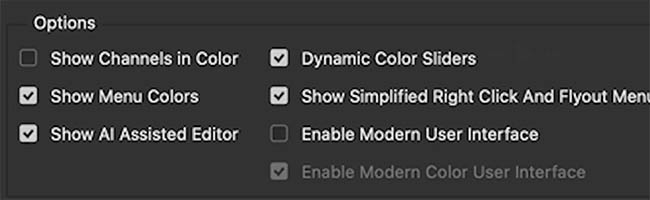
And if you don’t want the modern interface at all, you can turn it off.
A restart is required for that interface change to take effect.
The new Photoshop Color Picker
There’s another modern interface option worth looking at.
It’s the Modern Color User Interface.
With this enabled, open Photoshop’s Color Picker.
Notice the recently used colors along the bottom.
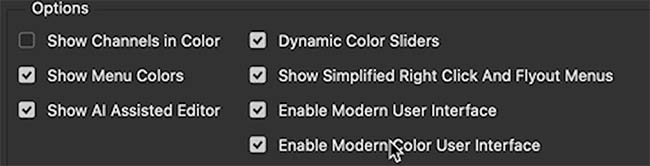
This makes it easy to reuse colors without sampling them again or entering their values.
But there’s one thing I noticed that’s missing.
Where are Web Safe Colors?
In the older Photoshop Color Picker, we have an option to show only Web Safe Colors.
These are the original 216 web-safe colors.
Now, I know most people don’t need to restrict their colors for modern websites anymore.
But I still find this option useful.
I like using it to quickly find common grays, and there are some other colors I use regularly that are easy to locate in that smaller palette.
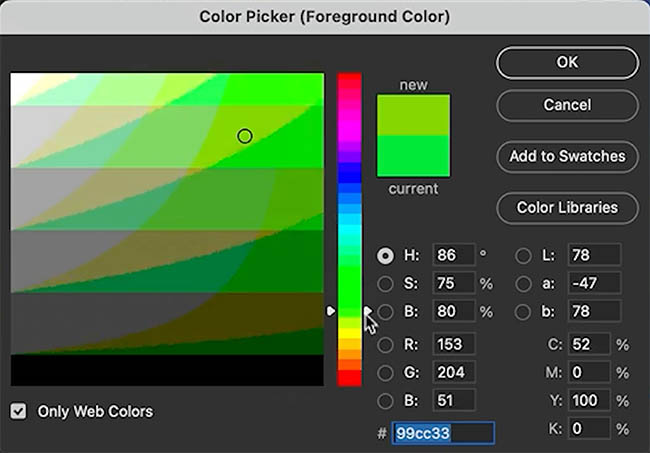
If you use this feature, you can turn off the Modern Color User Interface and return to the older Color Picker.
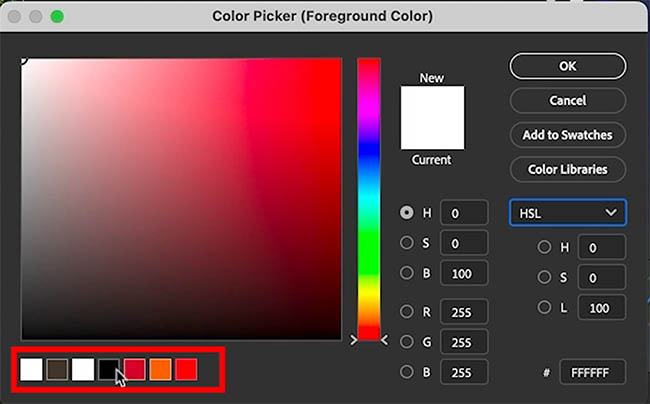
So depending on how you work, you can choose the new Color Picker with its recent colors or the older one with Web Safe Colors.
It’s nice to have the choice.
Changes to the contextual taskbar
Here’s a smaller interface improvement.
Look at the contextual taskbar.
Some of the controls that previously used text now use icons.

This makes the taskbar a little more compact.
And here’s a useful little trick.
Click in an empty area outside the canvas to show or hide the contextual taskbar.
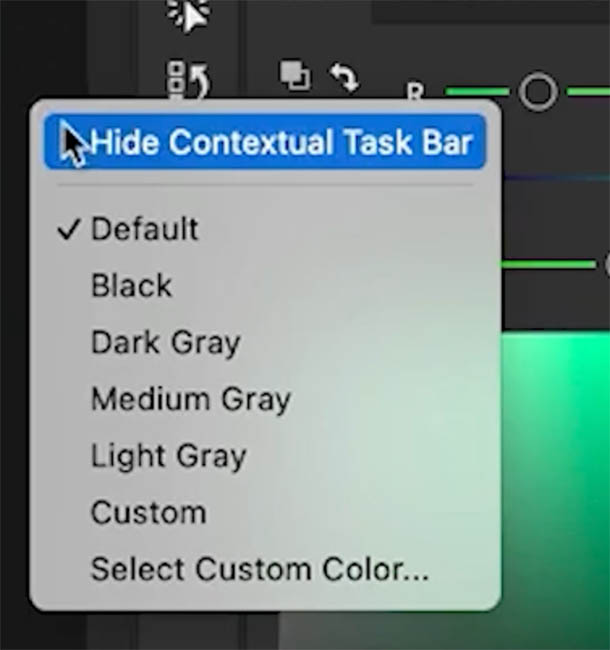
These aren’t huge changes, but they can make everyday work in Photoshop a little quicker.
Customize Photoshop placeholder text
Here’s a feature that might be useful if you work with typography.
When you create a text layer in Photoshop, you’ve probably seen the placeholder text Lorem Ipsum.
This is the sample text Photoshop uses when filling new type areas.
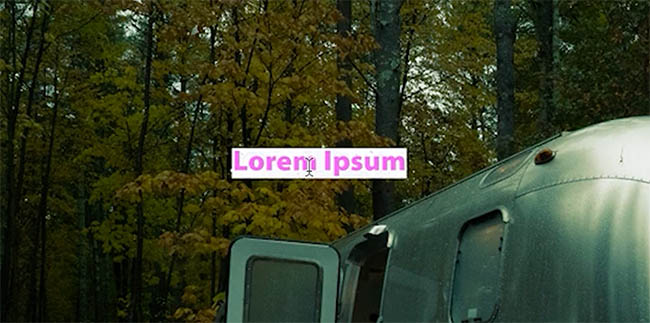
We can also create a paragraph text box by clicking and dragging with the Type Tool.
Photoshop fills that area with placeholder text too.
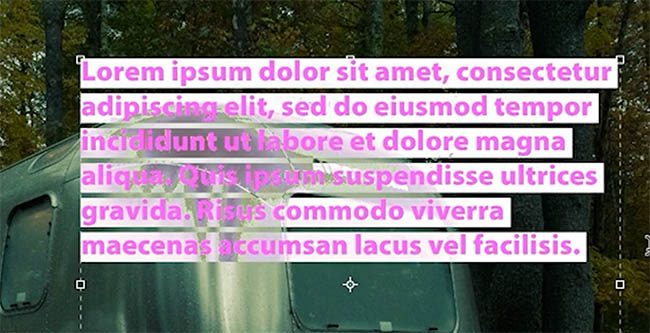
But now we can customize that text.
Go to the Type settings and find the Lorem Ipsum placeholder text option.
Instead of using the usual sample text, I’m going to enter:
The quick brown fox jumps over the lazy dog.
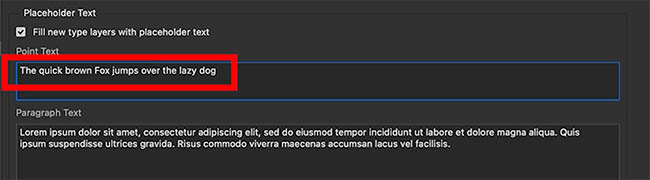
Now when we create our text, Photoshop uses our custom placeholder.
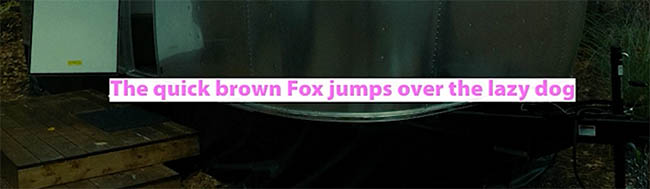
Why is this useful?
Because that sentence contains every letter of the English alphabet.
It makes it easier to compare typefaces and see how different letters look when we’re trying out fonts.
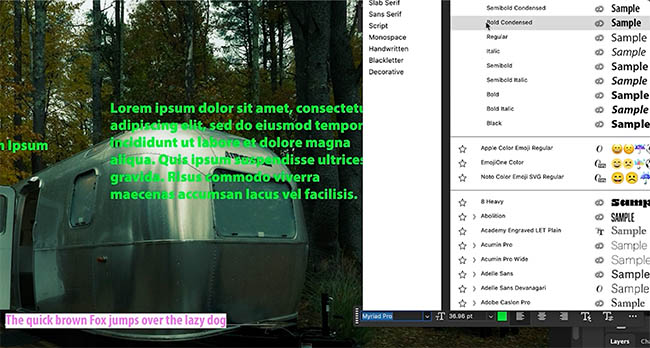
It’s a simple addition, but I can see it being useful for designers.
Prompt to Edit and Firefly Image 5
Let’s look at some of the AI features.

When nothing is selected in the image, notice that the contextual taskbar now shows Prompt to Edit.
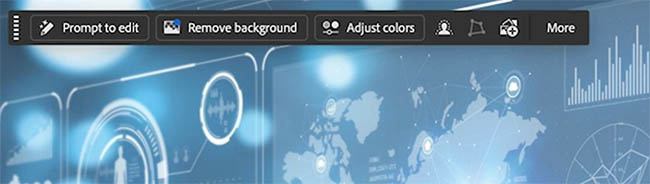
This doesn’t replace Generative Fill.
Instead, it gives us access to models that support prompt-based image editing.
Click Prompt to Edit.
We can see the available options, including Adobe Firefly Image 5 and supported partner models.
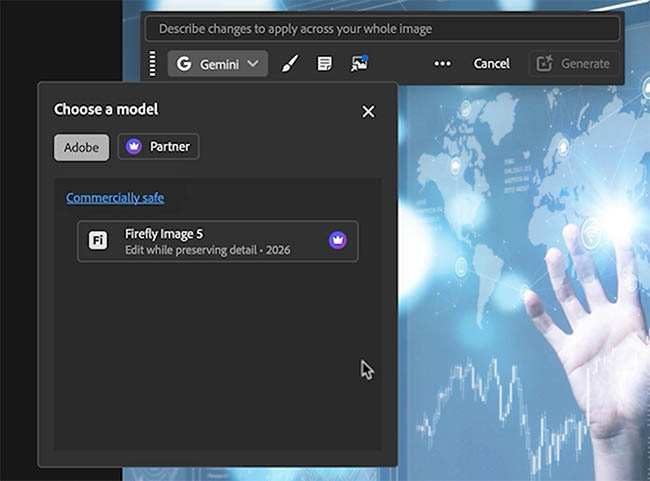

For this example, I’m going to use Adobe Firefly Image 5.
Editing an image without making a selection
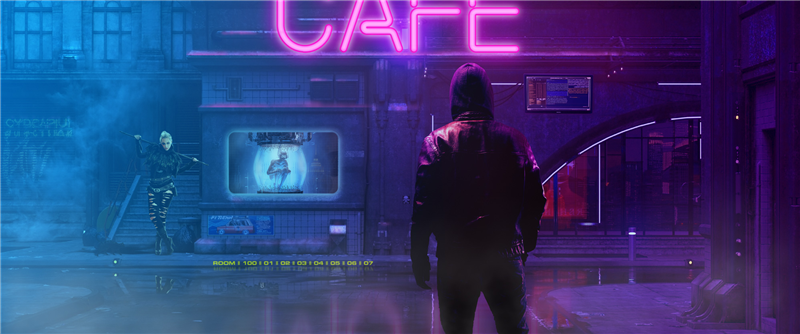
Here’s our original photograph.
I want to create a different lighting atmosphere and change some of the colors.
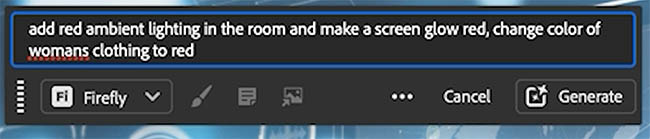
I’m going to use this prompt:
“Add red ambient lighting in the room, make the screen glow red, change the color of the woman’s clothing to red.”
Notice that I haven’t made any selections.
Click Generate.
Look at that.
The room now has red ambient lighting, the screen is glowing red, and the woman’s outfit has changed color.

This is an interesting capability because we can describe several changes to the photograph in a single prompt.
Of course, we’ll want to inspect the result carefully to see whether anything else has changed.
But for quickly exploring a different look, this can be useful.
Generative Restyle: Create the look between two images
Now, maybe we don’t want the full red treatment.
Perhaps we’d prefer something halfway between the original photograph and the generated version.
This is where Generative Restyle comes in. A deeper look at Generative Restyle here
We have our original image and the new AI-generated version on separate layers.
Select the two layers and choose Generative Restyle.
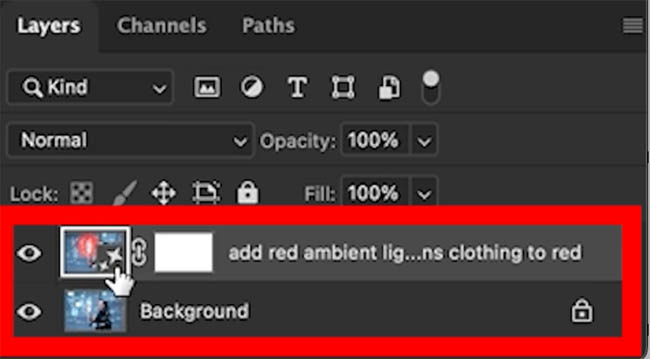

Photoshop creates an animated transition between them.
At the beginning, we have the original photograph.
As we move through the animation, the lighting and colors gradually change until we reach the generated version.
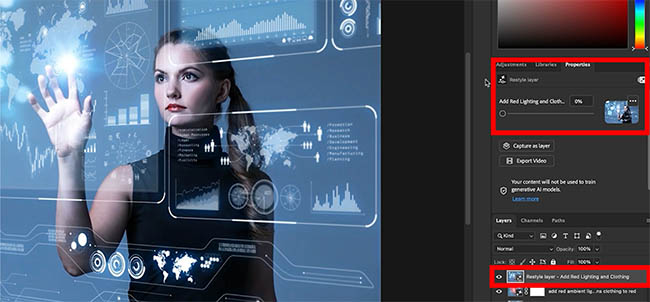
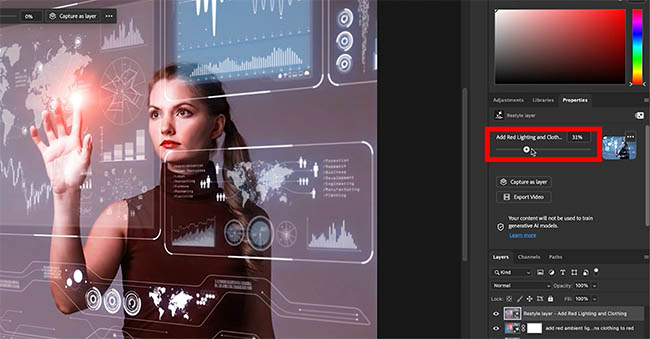
We can scrub through the animation and find a look that we like.
Notice that the video preview is fairly low-resolution.
But there’s a way to get a better still image from it.
Capture as Layer
Move to the point in the animation that you want.
Choose Capture as Layer.
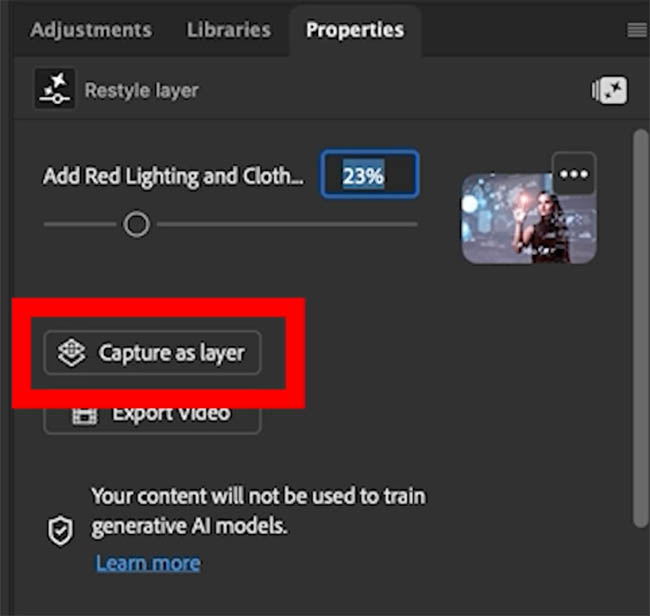
Photoshop creates a new layer using an enhanced version of that frame.
Notice that the captured result is sharper than the animation preview.

And here’s another addition.
We can now export the Restyle animation as a video.
Open the animation options and choose the video export command.
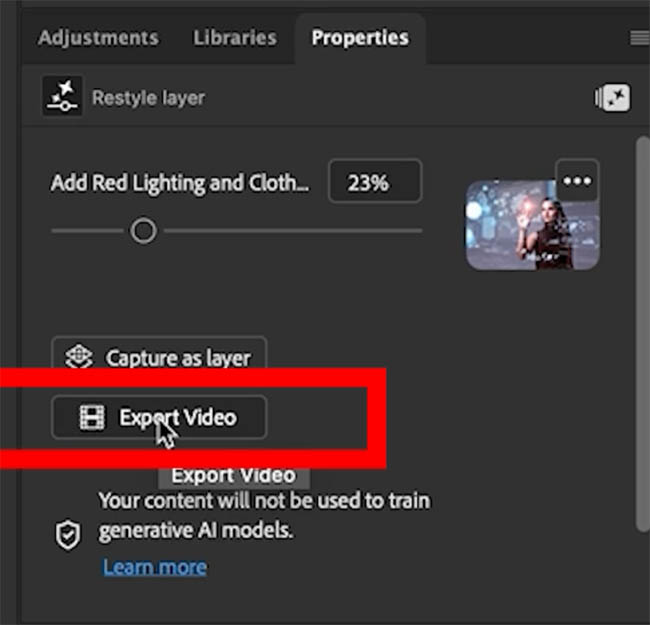
This feature was previously available in Photoshop Beta, but it’s now included in the main release.
I’ve covered Generative Restyle in more detail in a separate tutorial.
Relight Layer is now in Photoshop
Here’s another big feature that has moved from Beta into the main release. Check out the deeper look at Relight Layers here.
Relight Layer.
This is one of the more interesting new features because it allows us to change the apparent lighting in a photograph.
We can move lights around, change their colors, soften them, and even add multiple lights.
Let’s take a look.

Add a Relight Layer
With our photograph open, choose Layer > New Relight Layer.
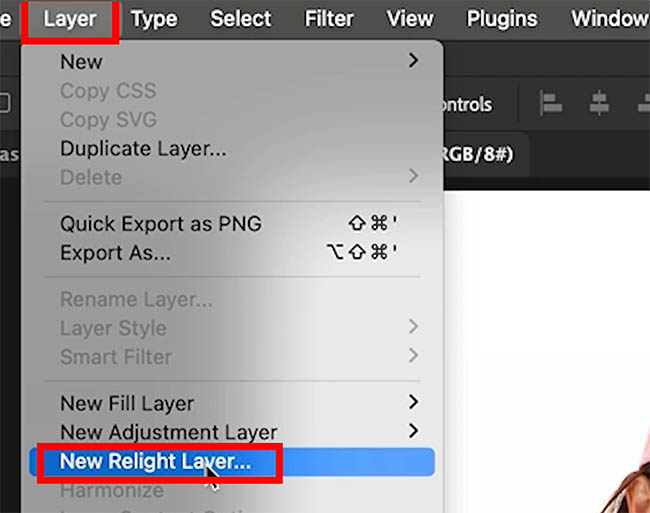
Photoshop creates a Relight Layer, and we can see a light source over the image.
Drag the light to change its position.

Notice how the lighting changes as we move it.
We can even drag the light off the canvas to create different lighting angles.
Adjust the position and distance
For more control, open the Properties panel.
I’m going to detach it so we can see the controls more easily.
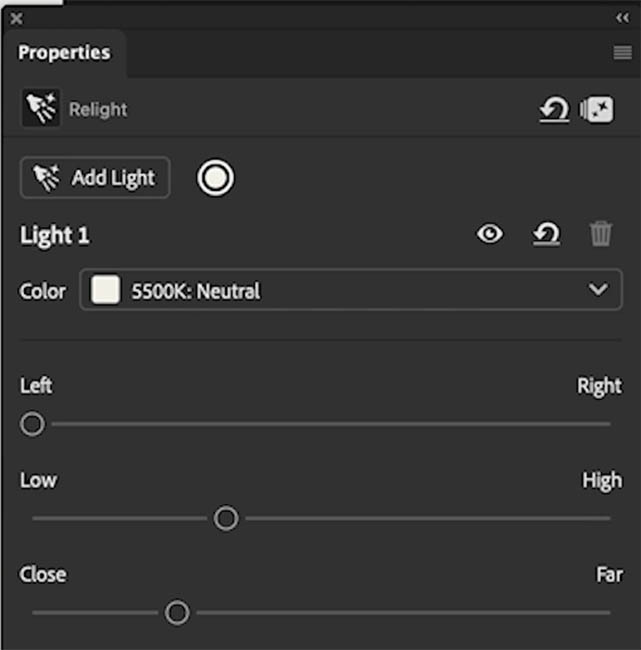
We can move the light left or right, but we can also change how close or far away it is.
Let’s move it further away, behind the woman.
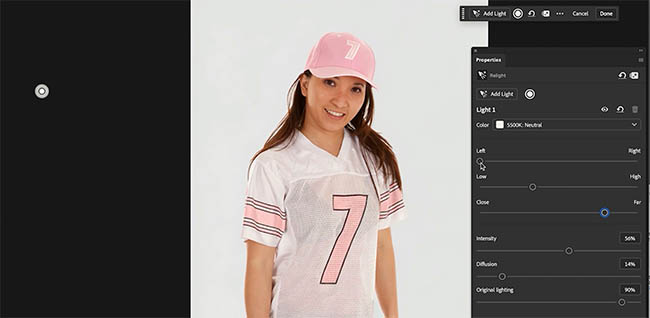
At first, it’s a little difficult to see what the new light is doing because we still have the original lighting.
So let’s turn Original Lighting down.
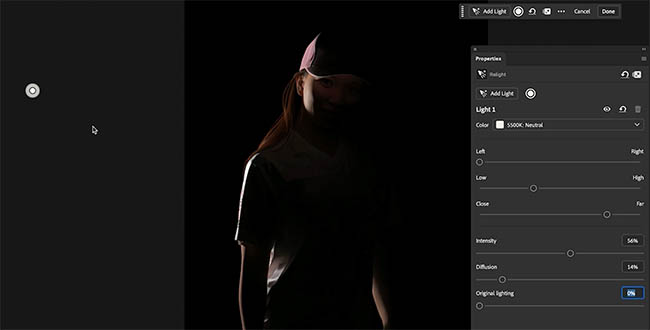
Now we’re seeing more of the lighting we’re adding.
Move the light around again.
Notice how it changes the illumination on the subject.
This gives us much more control over the lighting direction.
Create a two-color rim light
We’re not limited to a single light.
Let’s add another one.
Click Add Light.
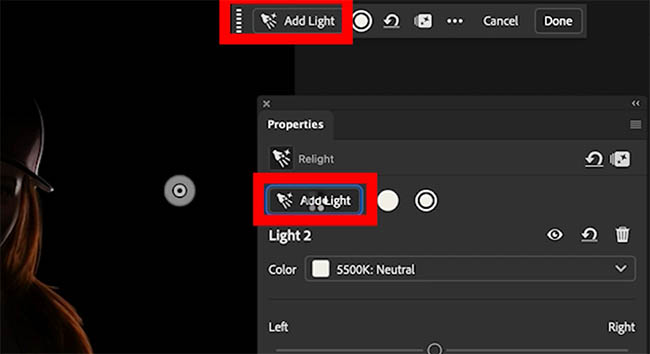
Move this second light behind the subject.
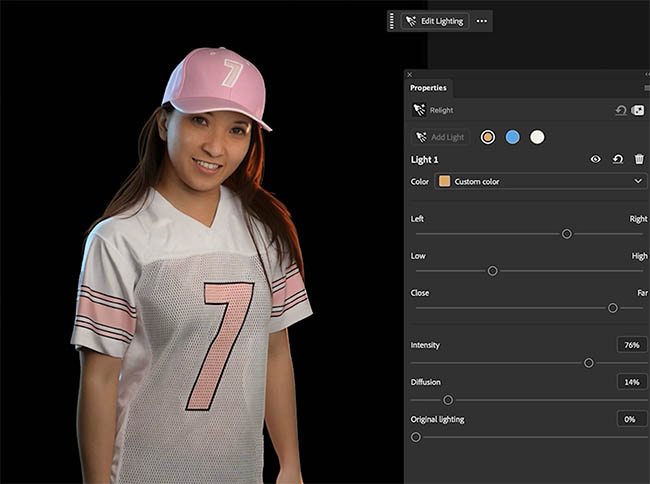
Now click Custom Color and choose a light blue.
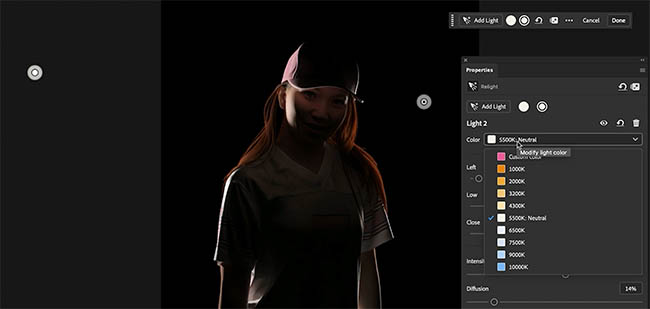
Look at that.
We’re starting to get a cool rim light around the edges of the subject.
Now click the other light.
Make sure the light you want to edit is selected before changing its settings.
Let’s give this one a warmer color.
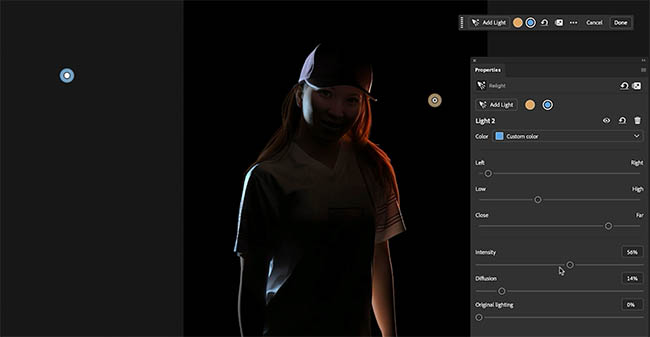
Notice how we’re creating an interesting separation between warm and cool lighting.
We can also adjust the Intensity to make the lights brighter or darker.
And by moving them further behind the subject, we can change the way the light wraps around the edges.
Diffusion and Intensity
Let’s refine the lighting a little more.
Increase Diffusion to soften the light.
Reduce Intensity so the rim light isn’t overpowering the rest of the photograph.
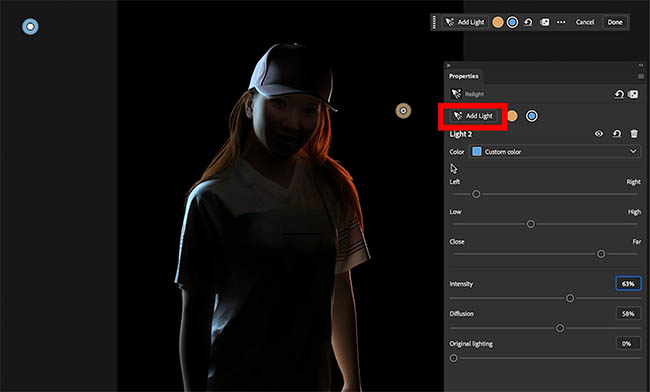
Now we have some interesting backlighting, but we still need a light on the front of the subject.
Add a key light
Let’s add one more light.
This will be our key light, the main light illuminating the subject from the front.
Click Add Light and move it in front of the woman.
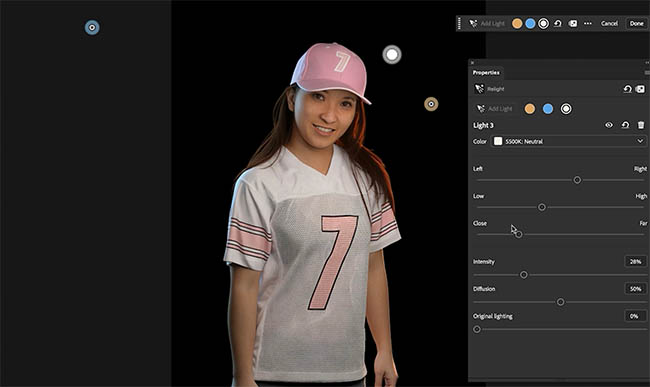
Increase Diffusion to make the light softer.
Then reduce the Intensity until it looks natural.
One warm rim light, one cool rim light, and a softer key light illuminating the front of the subject.
This is the maximum of three lights available in Relight Layer in this release.
A useful way to learn photographic lighting
Here’s something else I like about Relight Layer.
You can use it to experiment with lighting setups.
Because the controls are designed around familiar lighting concepts, you can see what happens when you move a light closer, further away, behind the subject, or change its diffusion.
You could then use what you learn to experiment with a similar setup using actual lights.
That’s pretty interesting.
Applying the lighting and generative credits
Let’s compare the original photograph with our new lighting.
We’ve made quite a difference.
Now there’s something important to know about generative credits.
Moving the lights around and adjusting the preview doesn’t consume generative credits.
You can experiment with the settings without being charged for every adjustment.
But when we click Done, Photoshop renders the higher-resolution result, and that operation uses generative credits.

So it’s worth spending a little time getting the lights where you want them before applying the result.
Remove Tool: Remove related elements
Let’s finish with another improvement to the Remove Tool.
This is something I’ve already covered when it was in Beta (deeper look here), but it’s now available in the main version of Photoshop.
Choose the Remove Tool.
Notice the updated controls in the contextual taskbar. Some options that previously appeared as text now use icons. These options are also available in the regular tool options.
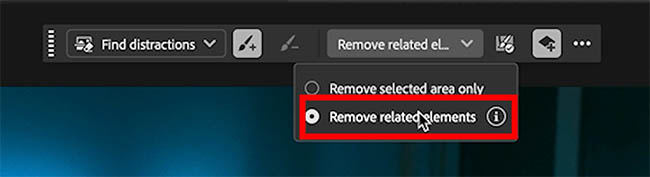
The one I want to show you is Remove Related Elements.
Removing more than the selected object
Look at this photograph.
There’s a light source in the scene that I want to remove.

Normally, we could use the Remove Tool to paint over the light itself.
But what about the light that it’s casting into the room?
If we remove the physical object but leave its illumination behind, the result might not make sense.
This is where Remove Related Elements comes in.
Open the Remove Tool options and choose Remove Related Elements.
Now select the light that we want to remove.
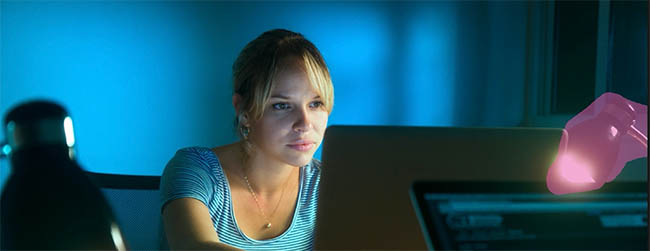
Click Remove.
Look at that.
Photoshop removes the light itself, but it also changes the surrounding illumination.

Notice that the light is no longer acting as a source of illumination in the room.
This can also work for other related elements, such as shadows, reflections, and water splashes.
That’s what makes it different from simply removing the selected object.
Check the surrounding details
Now, one thing I want you to watch out for when using this feature is that the generated result can change more than you intended.
It doesn’t always know exactly which pixels we want to preserve.
So take a close look at the surrounding details after the removal.
If you have the generated result on a separate layer, you can add a layer mask and reveal only the parts you want.
This lets you retain the original detail elsewhere in the photograph.
I covered these techniques in more depth in my tutorial on the Remove Tool and related elements.
Final thoughts on Photoshop 2027
As you can see, there’s quite a lot in this Photoshop update.
Some features are practical improvements that make our existing workflows easier, like Quick Compare, the new interface, and being able to transfer Camera Raw masks into Photoshop.
Others open up new creative possibilities, such as Relight Layer and Generative Restyle.
And some, like removing reflections from glasses or removing related elements, can save us time on difficult retouching tasks.
It’s a bit of a mixed bag when it comes to the results. Some of these tools work better than others, and it’s still worth checking the details rather than assuming the automatic result is perfect.
I particularly like the ability to combine Camera Raw’s masking tools with Photoshop’s painting and adjustment tools. That’s a feature I can see becoming part of my regular workflow.
I’ve also created separate tutorials covering the big updates to Adobe Camera Raw and Lightroom, so make sure you check those out.
And if you’re experimenting with the different generative AI models in Photoshop, I’ve made a free cheat sheet comparing which models are best suited to different tasks. You can find that through the link accompanying the video.
Which new Photoshop 2027 feature do you think will be most useful in your own work, and why? Let me know in the comments.
It’s great to see you here at the CAFE
Colin
Join me LIVE for XAM!
Thursday, November 12 at 1 PM Pacific
I’ll be exploring the new Photoshop and Camera Raw features, demonstrating some practical techniques, and answering your questions live. We’ll also look at some features shared with Lightroom Classic.
Sign up for my free livestream notifications and I’ll email you the viewing link when we go live.
More 2027 Tutorials
I’ll be adding more in-depth tutorials on selected new features. Bookmark this page and check back as I explore the tools and workflows in more detail.

Keep growing with Premium Courses
Photoshop 2026 for Digital Photographers
Learn Photoshop properly, from the basics to pro retouching, step by step.
$129.00 · one-time purchase · instant download
Free for you
The Photoshop Vault
Get my free Layer Blending Modes ebook along with dozens of exclusive Photoshop goodies: actions, brushes, presets and cheat sheets.
You're on the list, so your free goodies are waiting for you in the Vault.
Get Free Photoshop Goodies Open the Vault
How to Use the Light Adjustment in Photoshop: In-Depth Guide
Colin Smith shows how to use Photoshop’s Light adjustment layer to recover highlights and shadows, control tone, use masks and stack adjustments. Read tutorial
5 big new features in Photoshop 2026 August update
5 New Photoshop 2026 Features You Need to Know Adobe has added a number of new features to Photoshop 2026, and some... Read tutorial
5 New Photoshop Beta Feature You Need to See
Photoshop Beta has some interesting new additions, including a redesigned interface, an improved Color Picker, Restyle Layer video generation, Quick Compare, and... Read tutorial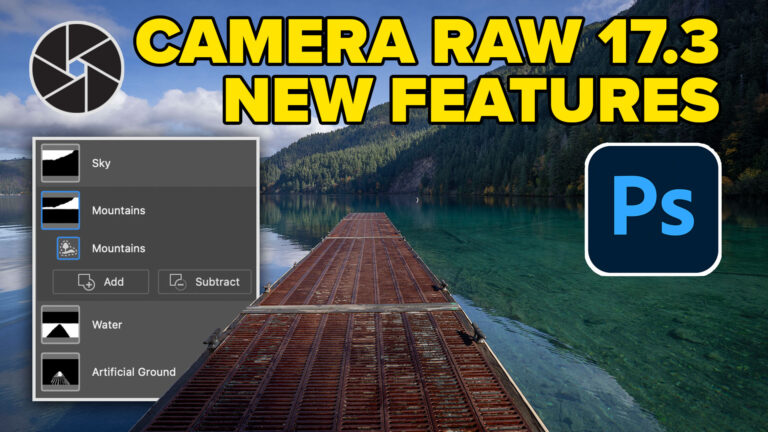
New in Adobe Camera RAW 17.3
New Features in Adobe Camera Raw 17.3 ACR in Photoshop 2025 April update. Landscape Masks and reflection removal updates Read tutorial
New Features in Lightroom and Camera RAW, August 2026 update
New Lightroom Classic and Camera Raw features including mask edge refinement, Render to DNG, blemish removal, Generative Expand and vectorscope. Read tutorial