Photoshop Remove Tool, Remove Related Elements like Shadows and Reflections
How to use Related Elements (formerly Trace Erase) in Photoshop to remove objects and their shadows, reflections, and other traces.
The Remove Tool in Photoshop is excellent at removing unwanted objects from photographs. But there has always been one little problem. When you remove an object, the shadow, reflection, light changes, or trace that something used to be there is still visible, you know, the leftovers. This is a dead give-away that something was removed from the photo/
There’s a new option in Photoshop Beta called Related Elements that can remove an object along with its shadows, reflections and other traces like ripples and lighting glows.
You might remember this feature being demonstrated as Trace Erase at Adobe MAX, if you were there or saw any of the videos.
Let’s see how it works. There is a catch, though. I’ll show you what it is and how to work around it.
Removing an object and its shadow
Open a photograph in Photoshop
Here we have a car with a shadow on the ground.
Choose the Remove Tool from the toolbar.

In the Options bar at the top, choose Related Elements.
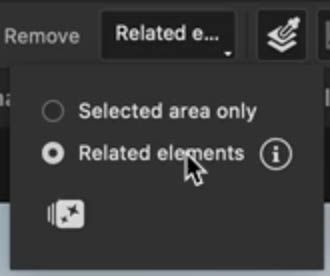
Now make a rough selection around the car with the Remove Tool. You can brush over the car or draw around it to select the area.

Notice I’m not selecting the shadow separately. Let’s see if Photoshop can figure that out for itself.
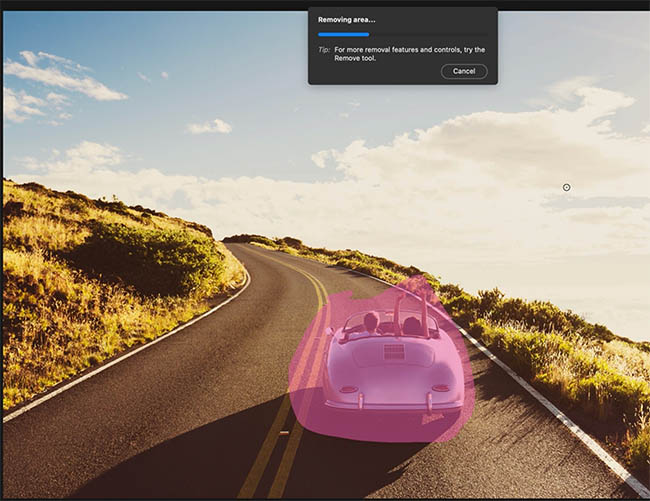
Look at that. The car is gone, and so is its shadow!

Normally, we would have to remove the car and then go back and clean up the shadow separately.
But shadows aren’t the only thing this feature can detect.
Removing reflections and splashes
Let’s try something a little more complicated.
Here we have an object reflected in water. Not only is there a reflection, but there are also splashes around it.

Grab the Remove Tool with Related Elements still selected.
Make a rough selection around the object. I’m not going to carefully select all those little splashes or the reflection in the water.
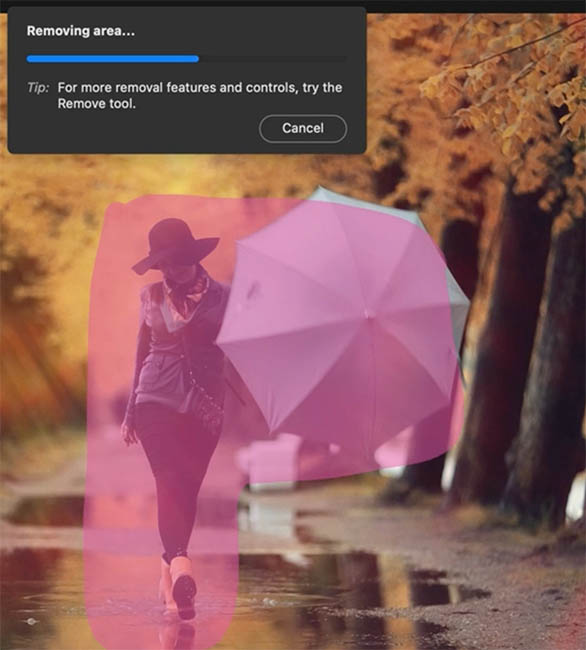
Let’s see what Photoshop does.
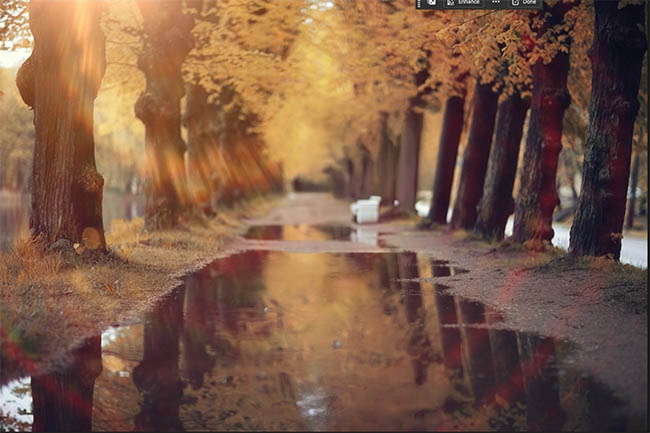
Look at that! Not only has Photoshop removed the object and its reflection, but the little splashes are gone too.
Let’s compare the before and after.
This is the kind of cleanup that would take quite a few extra steps with the regular Remove Tool.
Removing a kayak and the ripples in water
How far can we push this?
Here’s a photograph of a woman in a kayak. We have the person, kayak, oars and ripples in the water.

Make a rough selection around the main subject.
Notice I’m not even bothering to carefully select the second oar. I’m curious to see if Photoshop can identify it as part of the object.
And look at that!
Photoshop removed the kayak, the person, both oars and even the ripples in the water.

We didn’t have to go back and remove each of those little details separately.
Click Done to accept the result.
Removing complicated objects and their traces
Let’s try another photograph. This time we have people with chalk powder flying through the air.
This is a much more complicated removal because the chalk is scattered throughout the scene.
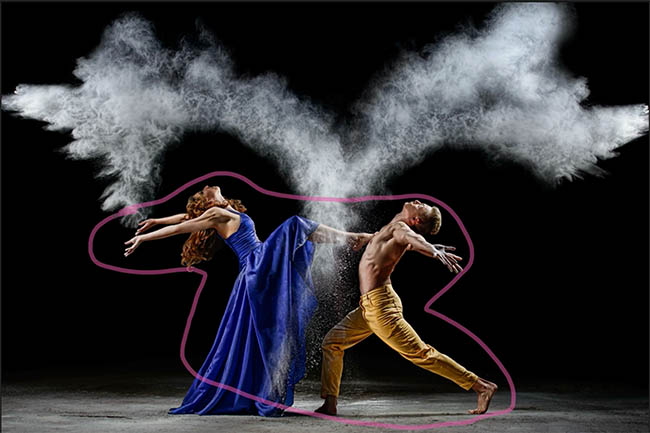
Make a selection around the people using Related Elements.
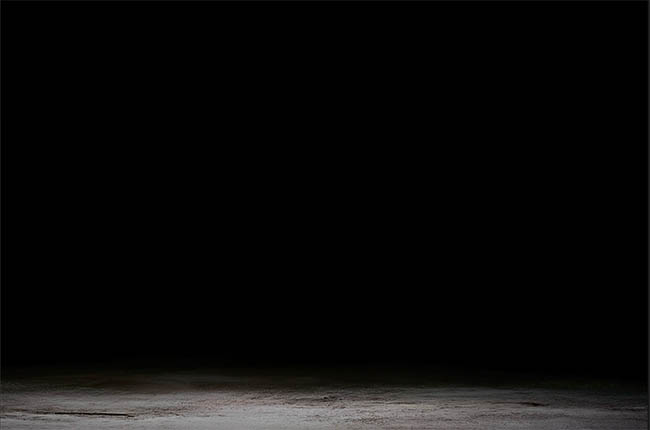
Look at the result.
Photoshop removes the people along with the chalk powder associated with them.
Improving the detail with Enhance
Let’s go back to one of our earlier examples.
The removal looks pretty good when we’re zoomed out, but look a little closer.
Notice how the generated area is a little soft? We’re not getting the same level of detail as the original photograph.

This is where Enhance comes in.
Choose Enhance to improve the resolution and detail in the generated result.


That looks better, but there’s something else going on here.
Look closely at the rest of the photograph.
Photoshop has actually changed parts of the image outside the area we removed!
I don’t want that. I only wanted to replace the area where the object used to be, not change the rest of my photograph.
Fortunately, there’s a simple fix using a layer mask.
Using a layer mask to protect the original image
We want to keep the original photograph and only reveal the enhanced area that Photoshop generated.
Make sure the enhanced result is on a separate layer above your original image.
Select the enhanced layer in the Layers panel.
Hold Alt (Windows) / Option (Mac) and click the Add Layer Mask button at the bottom of the Layers panel.
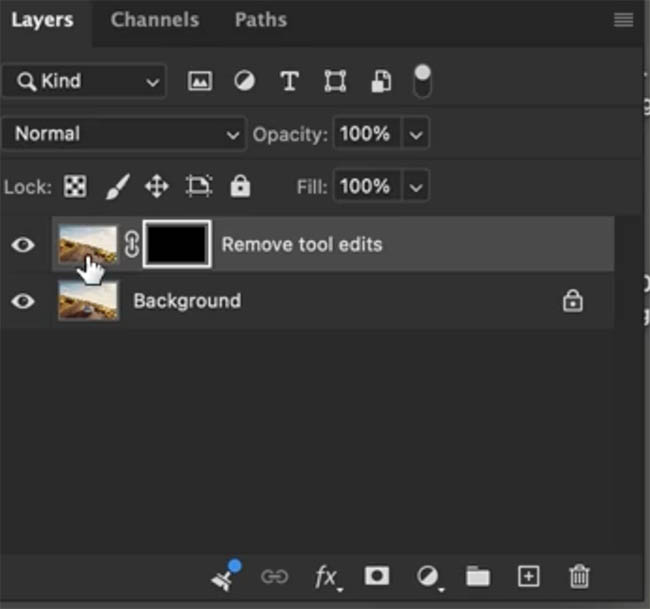
This creates a black layer mask.
Remember, black hides and white reveals.
Because the mask is black, the entire enhanced layer is now hidden, and we can see the original photograph underneath.
Grab the Brush Tool.

Set the foreground color to white and choose a soft brush.
Now paint over the area where we removed the object.

As you paint, you’re revealing the enhanced result, but only in the area where you actually need it.

This leaves the rest of the original photograph untouched.
If you reveal too much, just switch your brush to black and paint over the area you want to hide again.
Now we can blend the repaired area into the original photograph without replacing everything else.
It’s not always going to be perfect, but at least we’re in control of which parts of the photograph Photoshop changes.
Does Related Elements use generative credits?
Here’s the catch I mentioned earlier.
The regular Remove Tool doesn’t consume generative credits.
But Related Elements does.
At the time of this demonstration in Photoshop Beta:
- Regular Remove Tool: No generative credits.
- Related Elements: 10 generative credits.
- Enhance: An additional 10 generative credits.
So using Related Elements and then Enhance can cost 20 generative credits.
Is it worth it?
Well, that depends on what you’re removing.
Let’s go back to our car example.
When the regular Remove Tool is actually better
This time, instead of using Related Elements, let’s use Selected Area Only.
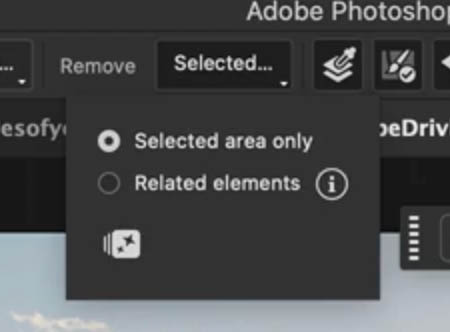
Make a selection around the car and remove it.
Notice the shadow is still there.
No problem. We’ll just use the Remove Tool again, this time over the shadow.
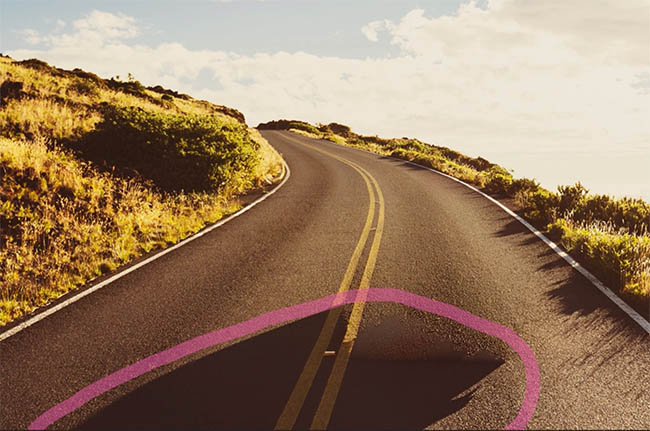
And here’s our result.

Compare that to the version we made using Related Elements.
In this particular example, I actually think the regular Remove Tool gave us a better result.
And we didn’t use any generative credits!
Now, imagine trying to do that with all those splashes and reflections in the water, or the chalk powder flying around the people.
That would be quite a bit more work.
Which Remove Tool option should you use?
My suggestion is to be selective about using Related Elements.
If you’re removing something simple, like a car with a clearly defined shadow, try the regular Remove Tool first.
You might get a better result, and you won’t use any generative credits.
But if you’re dealing with a complicated reflection, splashes, ripples, or lots of other traces spread across an image, Related Elements could save you quite a bit of cleanup work.
And if you use Enhance, remember to check whether it’s changing other parts of the photograph. A simple layer mask can help preserve the original detail.
I think Related Elements is a useful addition to Photoshop. I just wouldn’t use it automatically for every removal.
I’m curious what you think. Would you spend generative credits to remove the related elements automatically, or would you rather do a little extra cleanup yourself?
Let me know in the comments.
If you’re new here, welcome to the CAFE! Check out my free Photoshop goodies at PhotoshopCAFE.com/vault.
It’s great to see you here at the CAFE!
Colin
PS Don’t forget to follow us on Social Media for more tips.. (I've been posting some fun Instagram and Facebook Stories lately)
You can get my free Layer Blending modes ebook along with dozens of exclusive Photoshop Goodies here


This Photoshop tutorial shows you different tools and techniques to remove anything from a photo. We will remove braces from...

How to make the apple liquid glass effect in Photoshop
Learn how to make 4 vintage photo effects in thisPhotoshop tutorial. Learn processing techniques that were historically used and how...