
How to make tiny people in Photoshop, shrink people into mini people
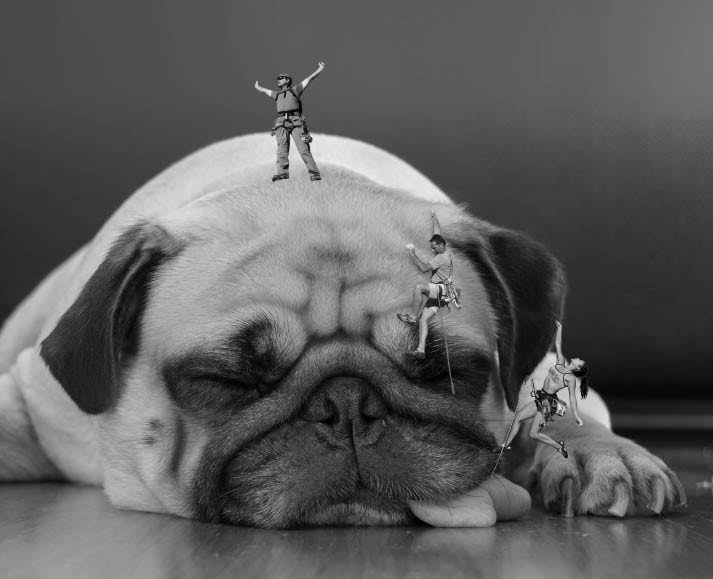
This fun Photoshop tutorial shows you how to take photos of people and make them look tiny. Composite the people into a scene with a dog to make it look really giant. If you want to learn how to play around with size, this is the Photoshop tutorial for you. Even if you aren’t making tiny people. there are a lot of skills that you will learn in this tutorial. Throughout, I have provided links to tutorials on different topics if you want to learn more about those. If you aren’t fluent in those topics, I suggest bookmarking this tutorial and exploring all the different topics as it will cause your Photoshop skills to grow.
This tutorial will work on All version of Photoshop from CS to CC. I have to confess, this is a LOT of fun to do 🙂 Share your tiny people with the rest of us over at the CAFE Facebook page (join here – it’s safe and free).
The goal: To make people (or anything really) look tiny as in “Honey I shrunk the…”
The method: Find a good background plate and idea. Find the People that fit the story. Cut them out and composite in a believable way. This story is a humous looking dog that is taking a nap (I love the tongue dragging on the floor). The people will be climbing the dog, kind of like a Jack and the Beanstalk / Gulliver’s travels kind of style.
The Steps to making tiny people/Giant dog
Step 1: finding images
Once you have the idea, look for some images that will be your props to tell the story. You can take them yourself or use stock images. (Tip: You can also use stock to build an idea/pre-vis and shoot your own images later). I like to use Adobe stock, because I can use any of the images for free to try out ideas, discover ideas and practice my skills. Sure they are watermarked and lower resolution, but they are large enough to do some real work with. As a bonus, if I like the result, I can always license the images that worked and share and print it nice and big. I don’t need to pay for the images that I don’t use. I have tutorials on how to use Stock for free this way.
These are the images I have used.
Step 2 – Prep the background
We will start by choosing our background plate. This is the dog photo. It will become the canvas where we assemble everything together. If you need to clean the plate, such as remove destractions in the background etc, now is a great time to do it. Also do any of your retouching and compositing the build the plate.

I used Content Aware Fill to remove the black shadow at the top and did a quick tonal adjustment in the Camera Raw plugin. (Photoshop CC)

Step 3 – Cut out photos
Cut out your props (Climbers)
I have so many tutorials ion cutting out people, we don’t need to cover it again here, just check out a tut here.

Step 4 – Combining Photos in Photoshop
In this step we will bring all the props (the people) into the plate image on separate layers.
(How to combine photos in Photoshop for beginners)
Bring all the cutout people into the Dog photo. Each one will be on its own layer
Step 5 – Resize and transform the Layers
Press Cmd/Ctrl+T for free transform. Drag the handles to rotate and resize each layer. Hold down Shift to constrain the shape.

Take each Layer and drag into position using the move tool (V).

Step 6 – masking in Photoshop
Use Layer masks to hide different parts of the photos to make it look like they are behind objects. (The photos are already cut out at this stage, you are using the masks to blend the people into the scene). Also use jaggy brushes to make it look like the feet are buried in fur. You can also use tiny sized brushes to paint in fur on the masks.

Step 7 – Match the color and tone
In this step you can use curves adjustment layers to match the images, or use levels. Make sure that the darks and lights match on each photo. (Tip: Use a Black an White Adjustment layer to hide the color for a moment so you can see the tones (luminosity) better).
Make sure the saturation matches the photos (Saturation is the amount of color). Use a hue saturation adjustment layer for this and adjust the amount of saturation. Also adjust the hue (color) if you need to. Here is a tutorial on how to perfectly match colors across different photos in photoshop.
(Tip, don’t change the background plate, adjust the layers to match the plate)
Step 8 – The little things that matter
There are some simple rules of nature to pay attention to when compositing in Photoshop.
As things get further away they:
- Get smaller (Perspective = Vanishing point)
- Get softer (Depth of field an atmospheric distortion)
- lose some color (Atmospheric perspective)
Use the free transform (Ctrl/Cmd+T), Hue/Saturation (Ctrl/Cmd+U) and Filter>Blur>Gaussian blur to make these adjustments.

Step 9 – Finishing Touches
At this point you may do an overall color adjustment and maybe a little bit of sharpening to finish off.
The best way to adjust everything together is to Select all Layers
Press Cmd+Shift+Option+E (Ctrl+Shift+Alt+E Windows) to create a merged layer of the whole image on the top.
Choose the new top layer and Filter>Camera Raw filter
Make all your final tweaks in Camera Raw (Settings in Lightroom are identical) and then press ok
All done!


Thanks for hanging out with us here at the CAFE
Don’t forget to comment and subscribe to our newsletter (its free)
Colin

Free for you
The Photoshop Vault
Get my free Layer Blending Modes ebook along with dozens of exclusive Photoshop goodies: actions, brushes, presets and cheat sheets.
You're on the list, so your free goodies are waiting for you in the Vault.
Get Free Photoshop Goodies Open the Vault
Keep Growing with Premium Courses
When you're ready to go deeper, Photoshop 2026 for Digital Photographers takes you through Photoshop step by step.
5 thoughts on “How to make tiny people in Photoshop, shrink people into mini people”
Leave a Reply

Should you use Opacity or Flow when using brushes in Photoshop for painting or retouching? This tutorial explains the difference...
How to use Adobe Photoshop with the new Macbook Pro touchbar. This review / tutorial shows how to use the...
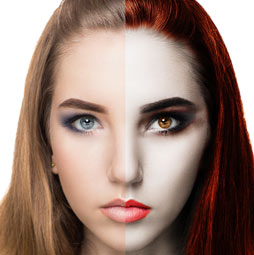
Learn how to turn a person into a realistic vampire in this Photoshop tutorial. In just a few steps we...







you make it look easy! Thanks for this ‘moving people’ tutorial.
Hi! I just became a facebook member and want to submit a picture for the small people contest. My problem is I don’t see how to do that. Please help.
Hi Alex, just go to the group and apply to join. We manually accept people so we can keep spammers out and only have good people there like yourself 🙂
Awesome tutorial. Can’t wait to have a go
A good teacher