
New Features in Lightroom and Camera RAW, August 2026 update
There are new features in Lightroom Classic 2026 and Adobe Camera RAW in Photoshop 2026. This is the August 2026 update and it includes a number of new features including some that have made their way from Camera RAW into Lightroom. It seems the pattern lately is to release features in Camera RAW and then move them into Lightroom after a while. This makes sense since the develop module is essentially ACR.
New Lightroom Classic and Camera Raw Features You Should Know
Adobe has added several useful new features to Lightroom Classic and Adobe Camera Raw, including better mask edge controls, Render to DNG, automatic blemish removal, improved image expansion, a bidirectional gradient, autofocus point display and a new vectorscope for working with color.
Some of these features are brand new and others have been added or improved recently.
Let’s look at how they work and, more importantly, when you might actually want to use them.
Refine AI Mask Edges in Lightroom Classic
One of the most useful additions to Lightroom Classic is better control over the edges of AI masks.
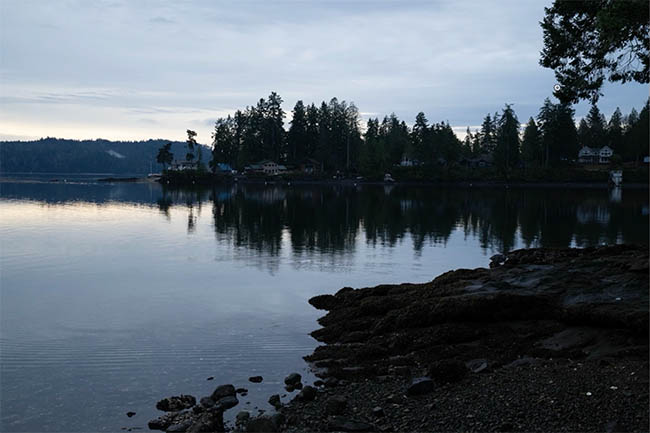
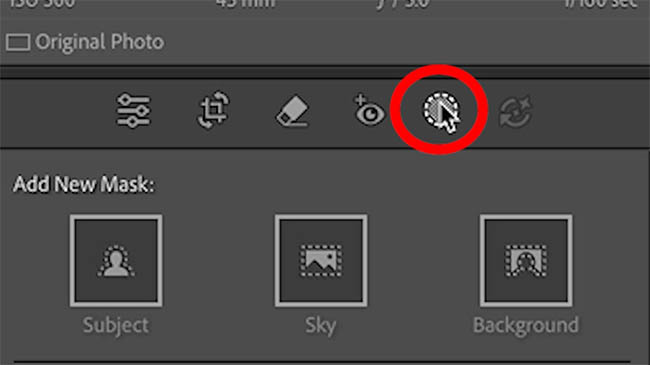
Go to the Develop module and open Masking.
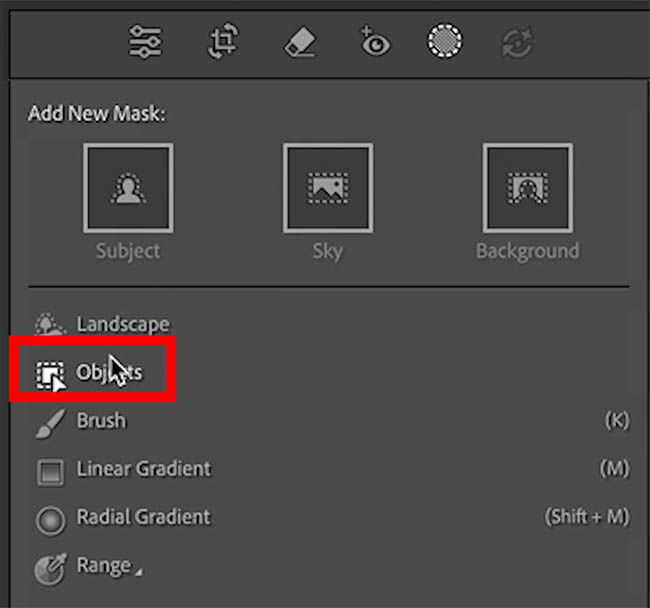
Create a mask using something like Select Objects.
Paint over the area that you want to select.
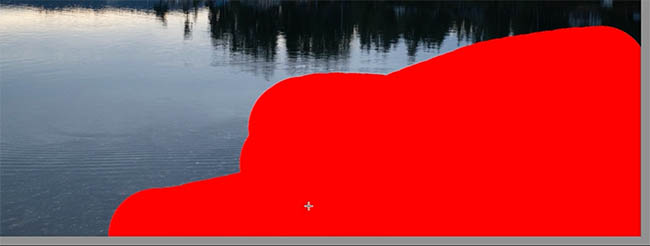
Lightroom usually does a good job with the selection, but if you zoom in, you might see the mask spilling over the edges of the object.
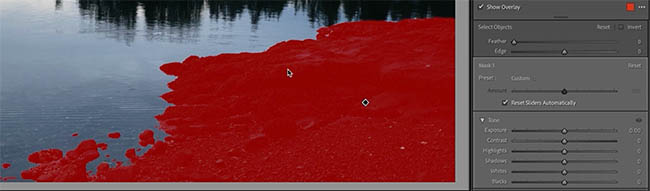
This is where the Edge and Feather controls come in.
Drag Edge to the left to pull the mask inward.
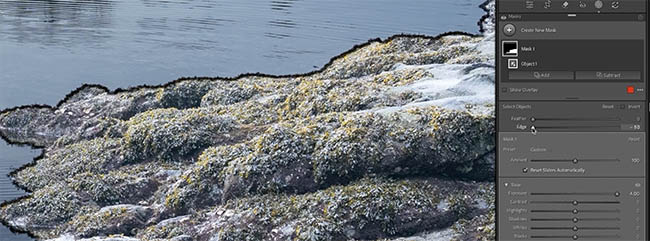
Drag it in the other direction to expand the mask.
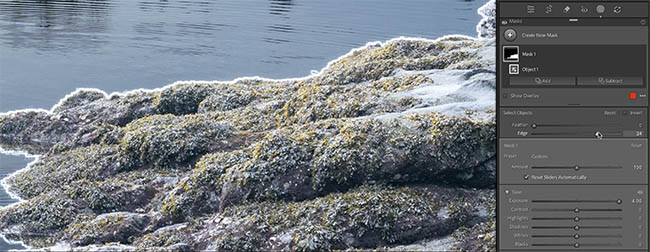
Think of this a little like Contract and Expand Selection in Photoshop.
Then use Feather if you want to soften the transition.
You can now get a better edge than before. Watch the video to see this in action.
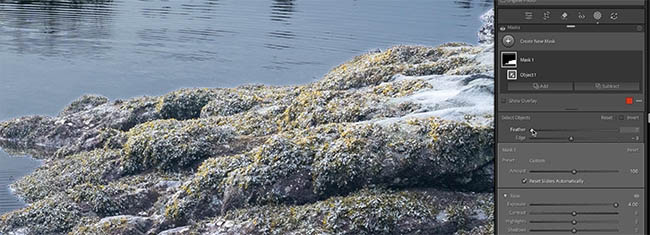
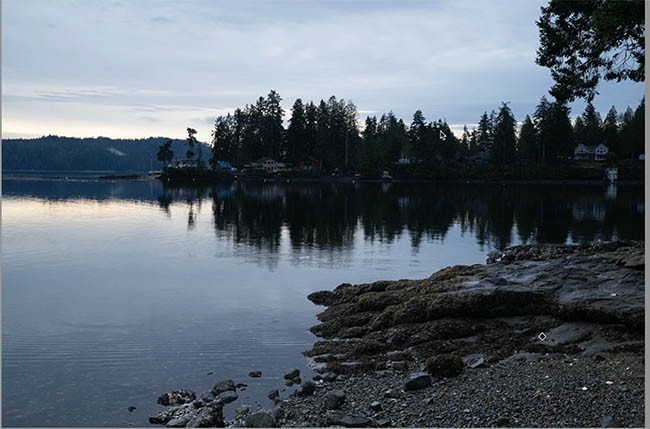
Here, I increased the exposure a little bit to brighten the foreground , notice the rest of the image is unaffected.
Render an Edited Photo to a New DNG
Lightroom Classic can also render an edited photograph into a new DNG file.
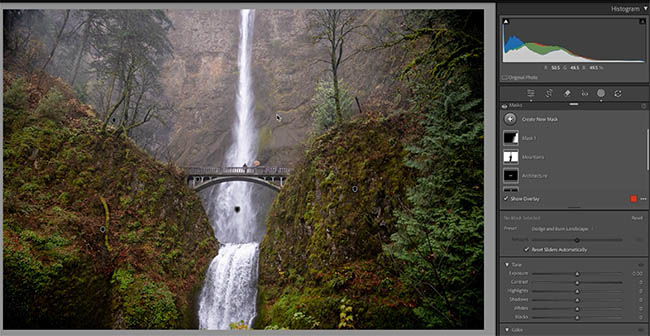
This is useful when you have a complicated image with lots of masks and adjustments and want to start working from a clean version.
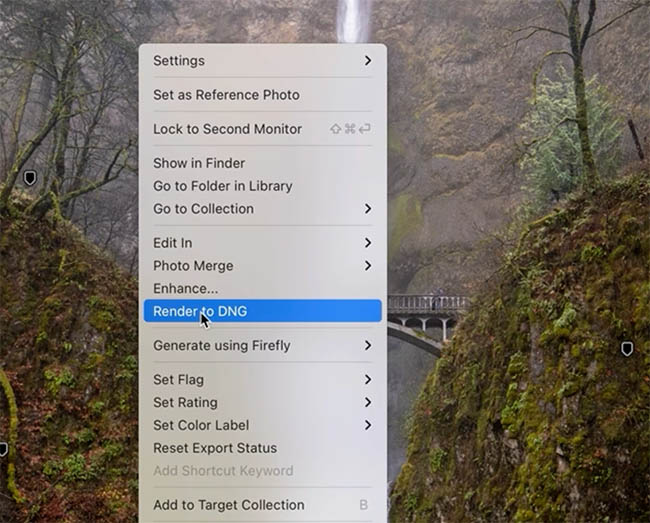
Right-click the photograph and choose Render to DNG.
Lightroom creates a new DNG with your current edits rendered into the image.
Open the rendered version and you’ll notice the adjustment sliders are reset.
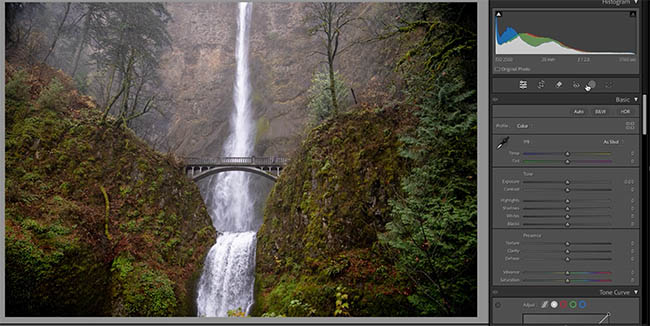
Your edits are still visible in the photograph, but now you have a fresh set of controls and no long list of previous masks getting in the way.
Your original file is still there if you ever need to go back to it.
Get More Adjustment Range With Render to DNG
There’s another interesting use for this.
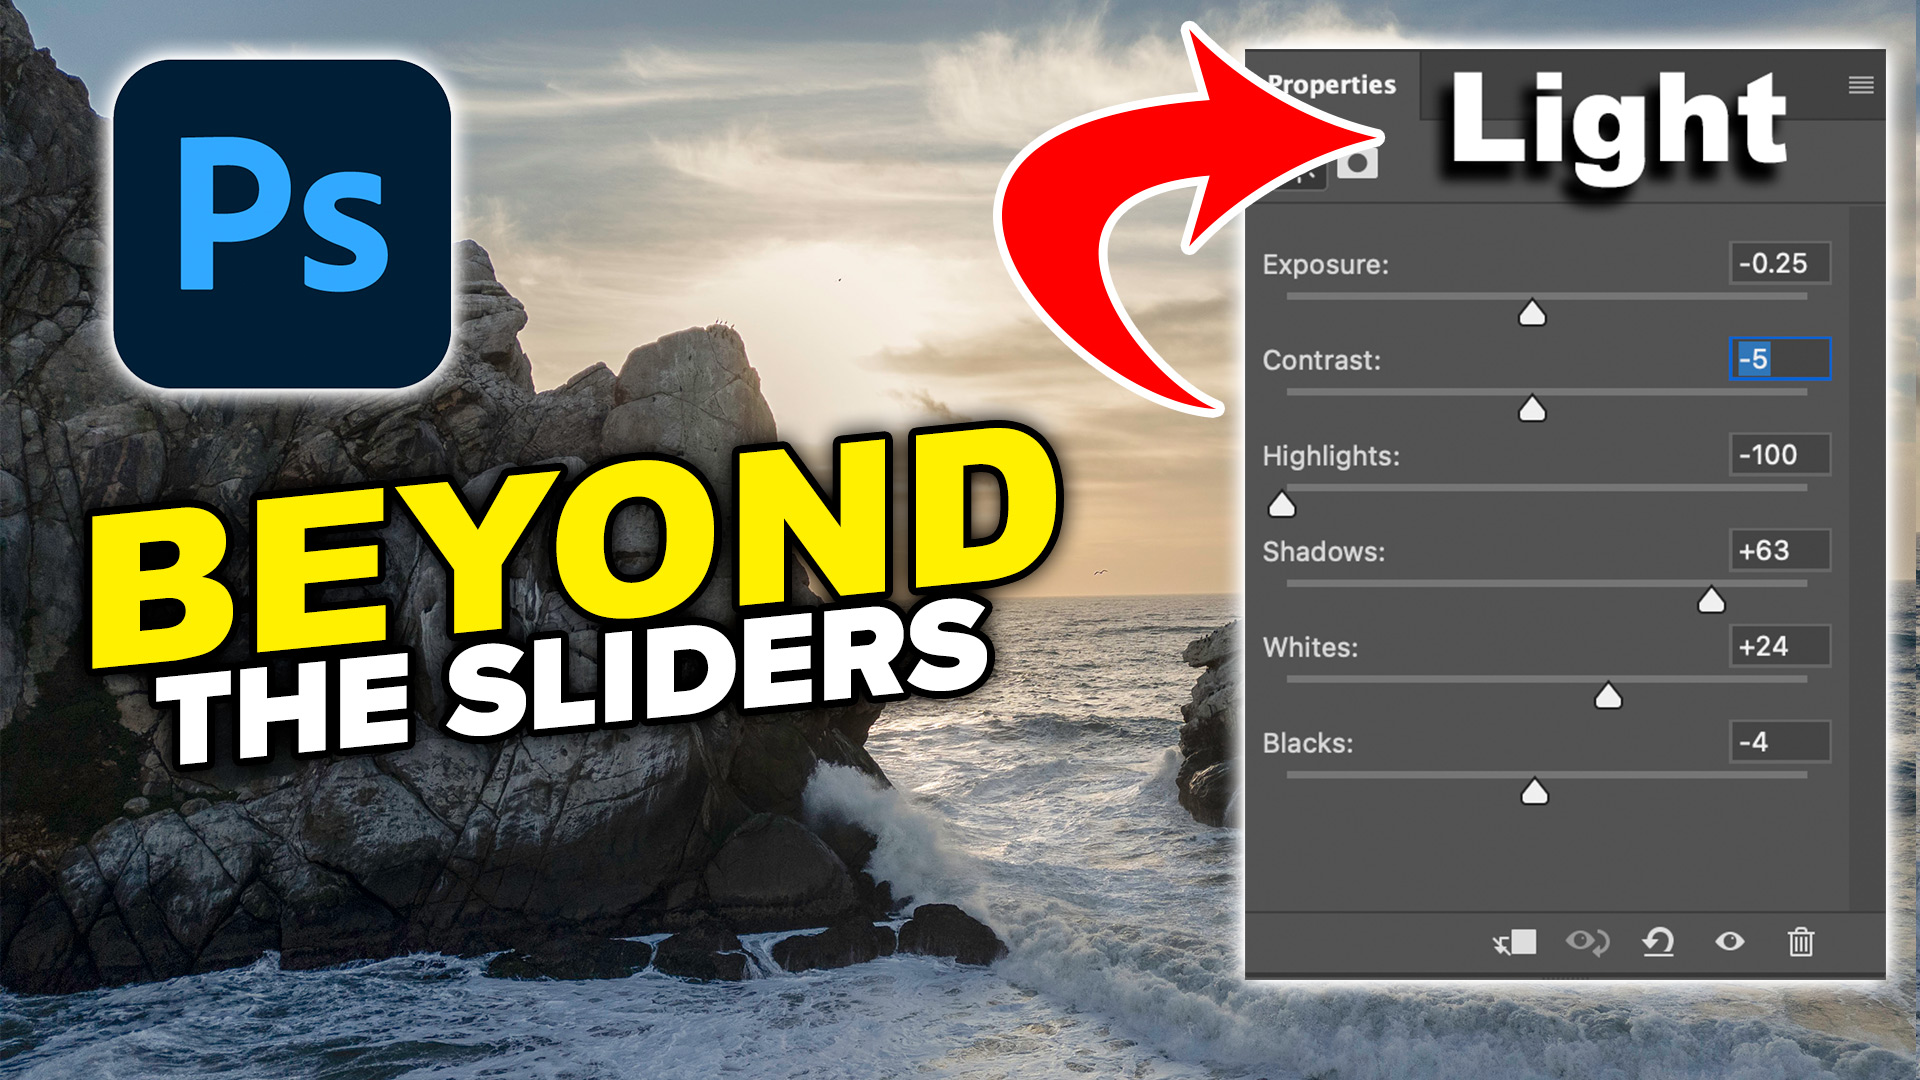
Suppose you pull the Highlights slider all the way down but still want a little more highlight recovery.
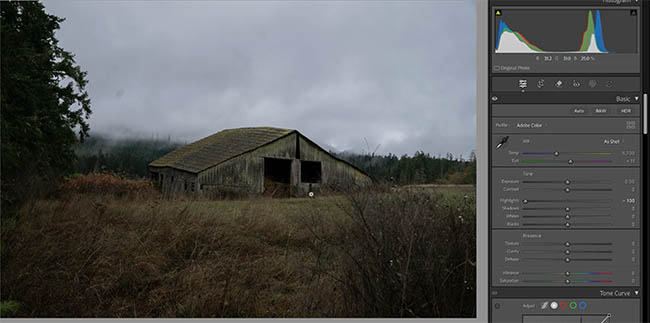
Render the image to DNG.
The existing highlight adjustment is now rendered into the new image and the Highlights slider resets.
Now you can pull it down again.
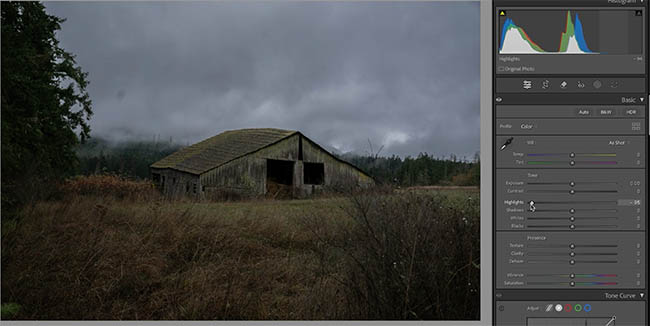
You probably won’t need to do this very often, but it can be useful when you’ve reached the limit of an adjustment and still need a little more.
New Features in Adobe Camera Raw
Now let’s jump over to Adobe Camera Raw and look at some of the newer tools there.
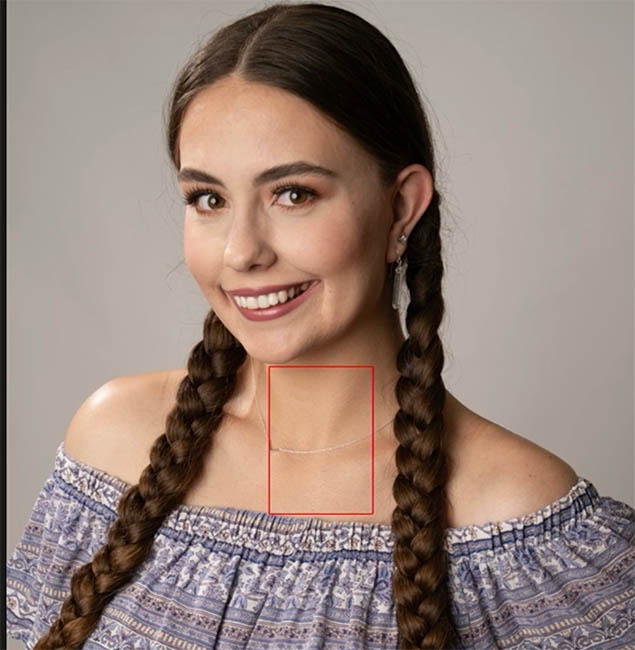
Automatic Blemish Removal in Camera Raw
Camera Raw can now automatically find and remove skin blemishes.
Open the Remove tool and choose Blemishes.
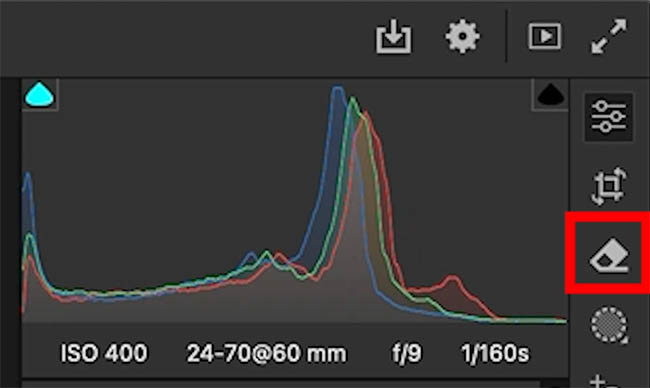
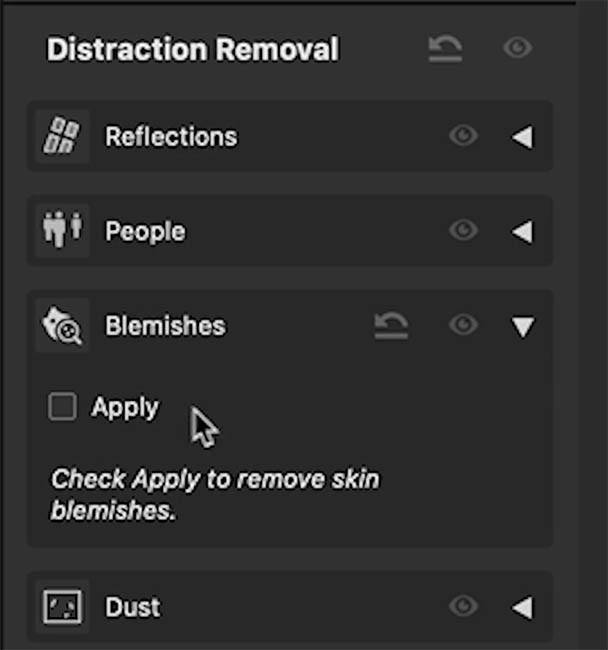
Click Apply.
Camera Raw analyzes the photograph, finds the blemishes and removes them automatically.
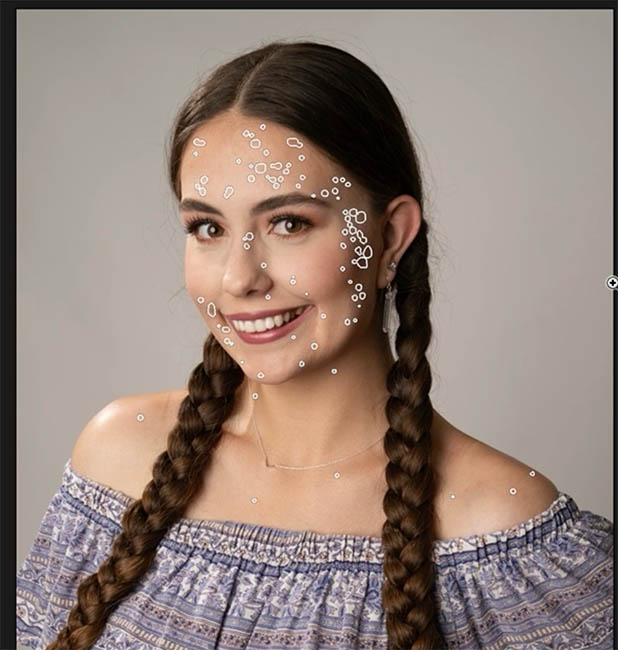
You can still manually add or remove individual corrections afterward.
There’s also a Fade control.
Move it one way to preserve more natural details such as freckles and moles. Move it the other way and Camera Raw becomes more aggressive about removing them.
The goal isn’t necessarily to remove everything.
Dial it in until the skin looks clean but still natural.
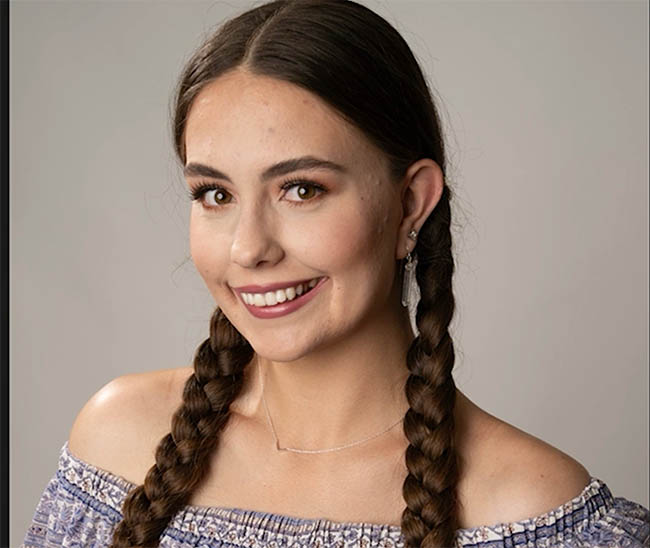
Here is before.
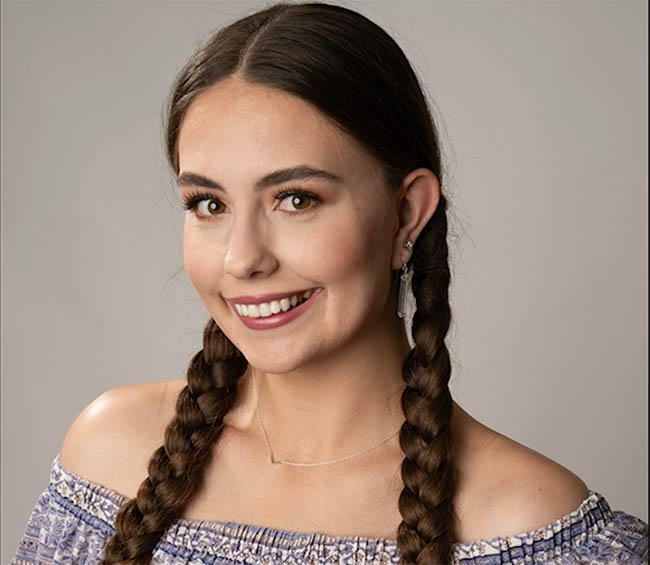
and after
Expand Photos With or Without Generative AI
Camera Raw now gives us two different ways to extend an image beyond its original boundaries.
Choose the Crop tool and turn on Enable Expand.
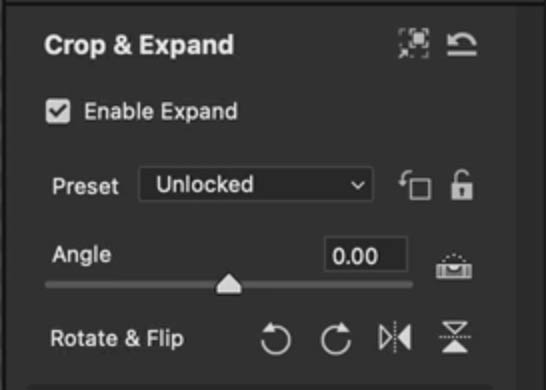
You can now drag the crop outside the original photograph.
Camera Raw gives you two ways to fill the new area:
Content-Aware Fill
or
Firefly Fill and Expand
Expand With Content-Aware Fill
Content-Aware Fill is a good choice when the missing area is relatively simple.
Panoramas are a great example.
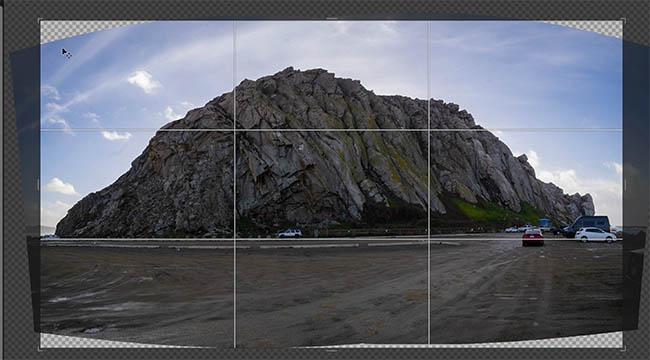
When you merge a panorama, you often end up with empty areas around the edges that normally have to be cropped away.
Turn on Expand, extend the crop into those areas and choose Content-Aware Fill.
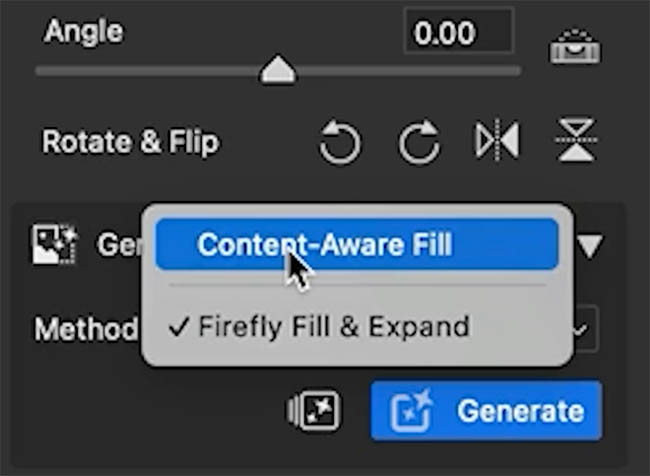
Camera Raw fills the missing pixels without using generative AI.
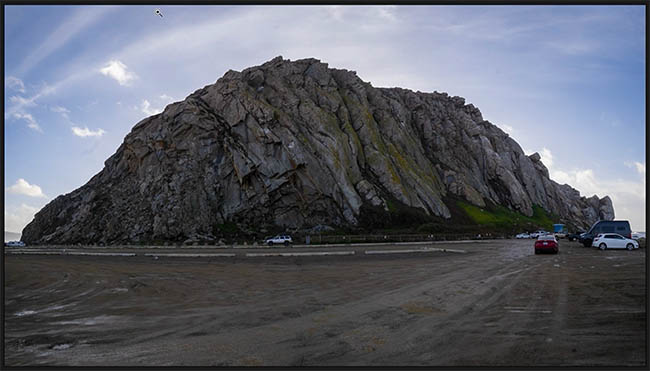
This can sometimes save parts of the photograph that you would otherwise have to crop away.
Generative Expand With Adobe Firefly
For more complicated areas, switch to Firefly Fill and Expand.
Extend the crop beyond the original photograph and click Generate.
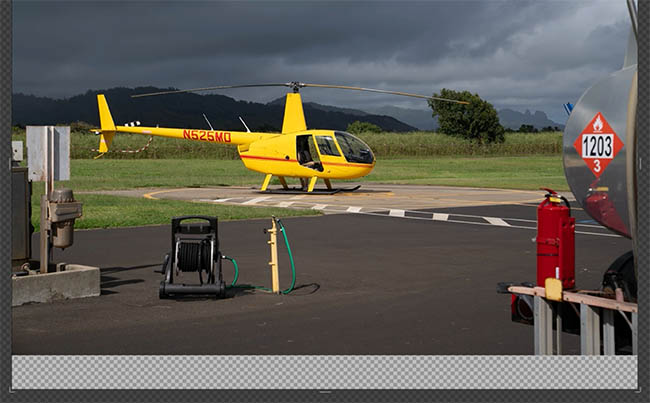
Camera Raw creates three variations for you to choose from.
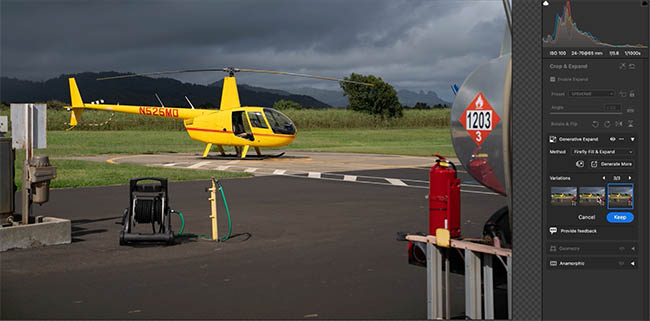
This works well when Content-Aware Fill doesn’t have enough existing information to convincingly create the missing area.
One important difference is that Firefly Fill and Expand uses generative credits, while Content-Aware Fill does not.
So now you can choose the method that makes the most sense for each photograph.
Use the Bidirectional Gradient in Camera Raw
Camera Raw also has a bidirectional Linear Gradient.
Create a mask and choose Linear Gradient.
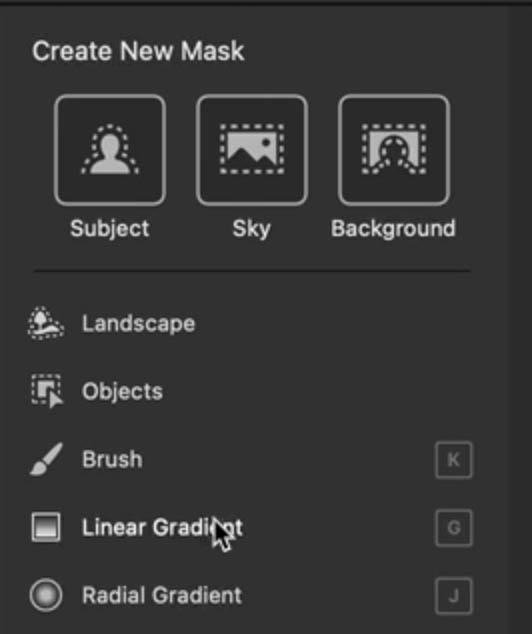
A normal Linear Gradient fades in one direction.
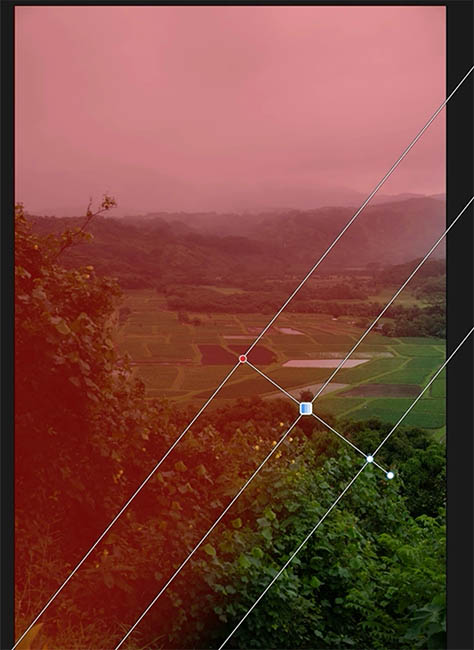
Switch it to Bidirectional and you can control both sides independently.
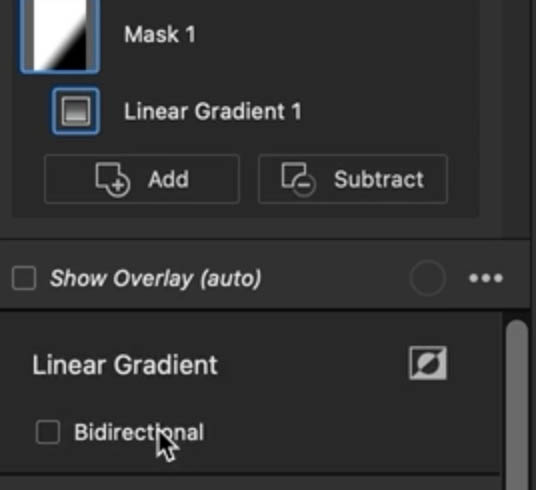
You can also adjust how much each side is feathered.
This is really useful for something like creating a controlled beam of light through a landscape.
Brighten and warm the gradient to create the light.
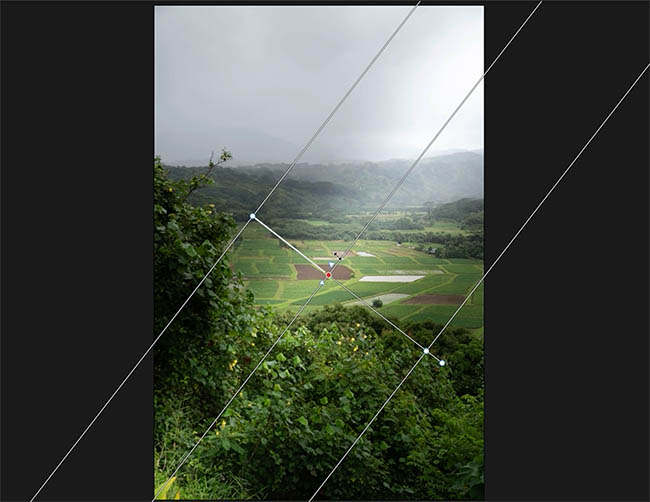
If the gradient covers something you don’t want to affect, choose Subtract and use Select Object or the Brush to remove that part of the mask.
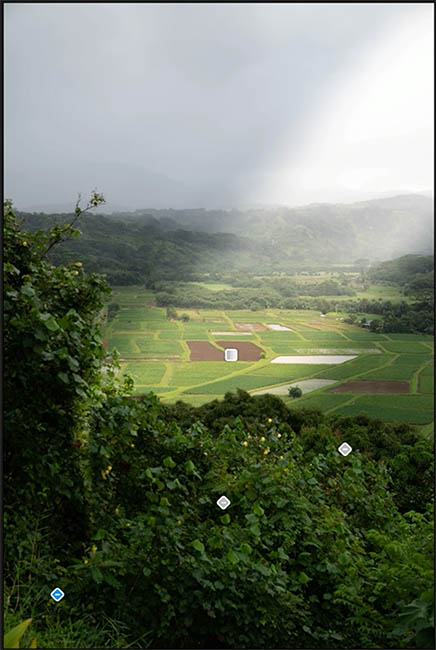
Now you can place the lighting much more precisely.
Show Camera Autofocus Points in Camera Raw
Here’s a simple feature that can be very useful when you’re sorting photographs.
Right-click the image and choose Show Autofocus Points.
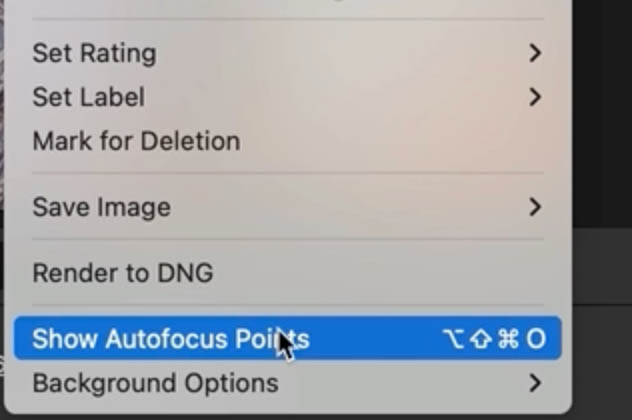
Camera Raw displays where the camera focused when you took the photograph.
This can help when you’re comparing a group of similar shots.
For example, if you photographed a portrait several times, you can quickly see whether the camera focused on the eye, the face or somewhere else.
The autofocus point display stays active as you move between photographs, so remember to turn it off when you’re finished.
How to Use the Vectorscope in Camera Raw
One of the more interesting additions to Camera Raw is the vectorscope.
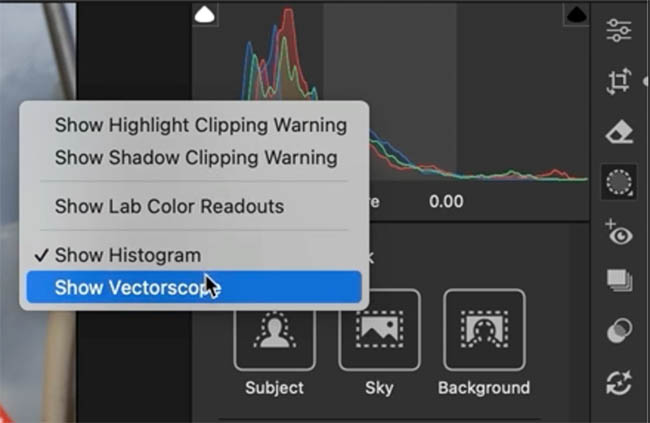
Right-click inside the Histogram and turn on the vectorscope.
Vectorscopes have been used in video production for a very long time to analyze color.
I actually used to work with physical vectorscopes back in the analog days.
Fortunately, the basic idea is pretty simple.
A histogram shows you tone. A vectorscope shows you color.
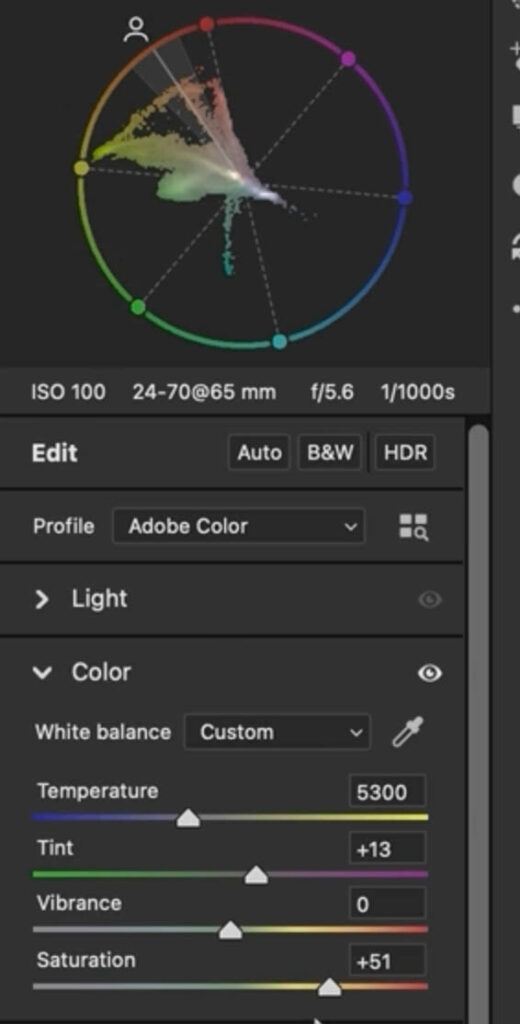
The direction around the vectorscope represents the hue.
The distance from the center represents saturation.
Colors closer to the middle are less saturated.
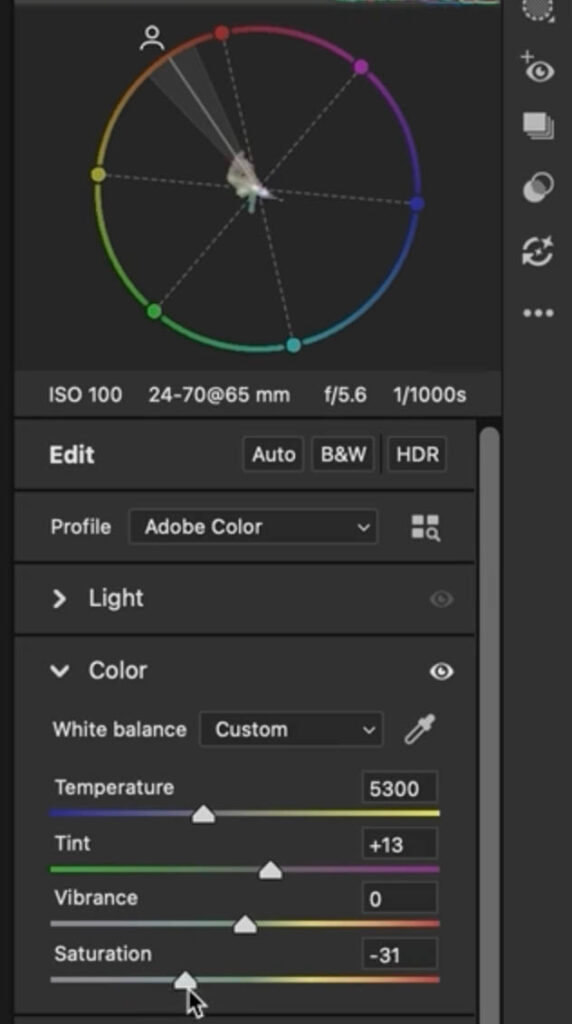
As colors move farther toward the outside, they become more saturated.
See Color Adjustments on the Vectorscope
Move the Temperature slider toward blue and you’ll see the color information move toward the blue side of the vectorscope.
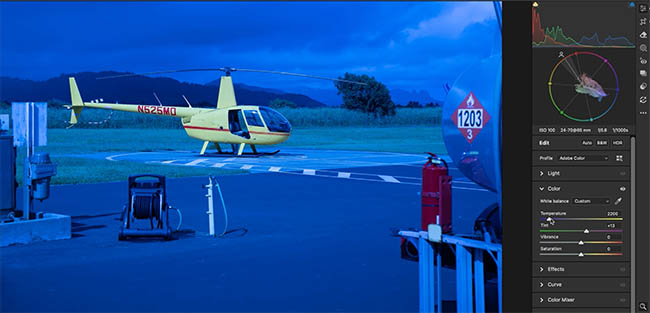
Move the Temperature warmer and it shifts toward yellow and orange.
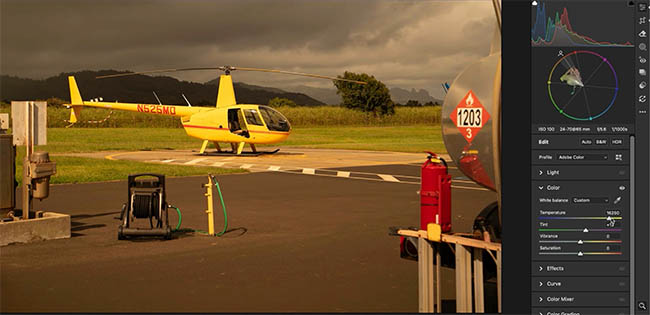
This gives you another way of seeing exactly what your color adjustments are doing.
It can also help identify excessive saturation. If colors are pushing right against the outside of the scope, you may want to pull the saturation back as these colors could “clip” or lose their detail.
Use the Vectorscope to Correct Skin Tones
The vectorscope can also be useful for working with skin tones. Let’s start with this image which has a really bad color cast. There are other more efficient ways to remove the color cast, but objective here is to lean how the vectorscope works, not to nearly remove a color cast.

We can use a mask to isolate the skin tones in the vectorscope rather than all the different colors in the photograph.
Open Masking and choose People.
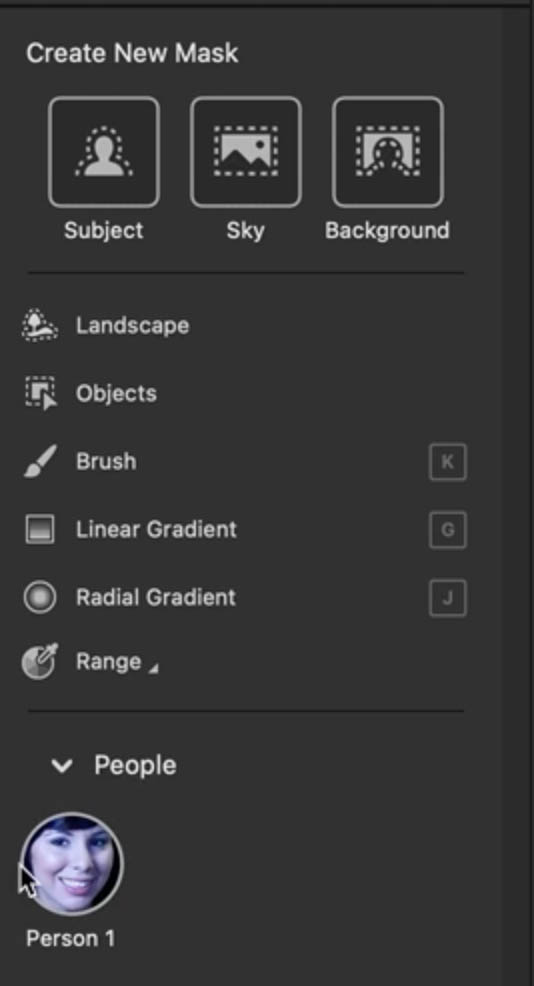
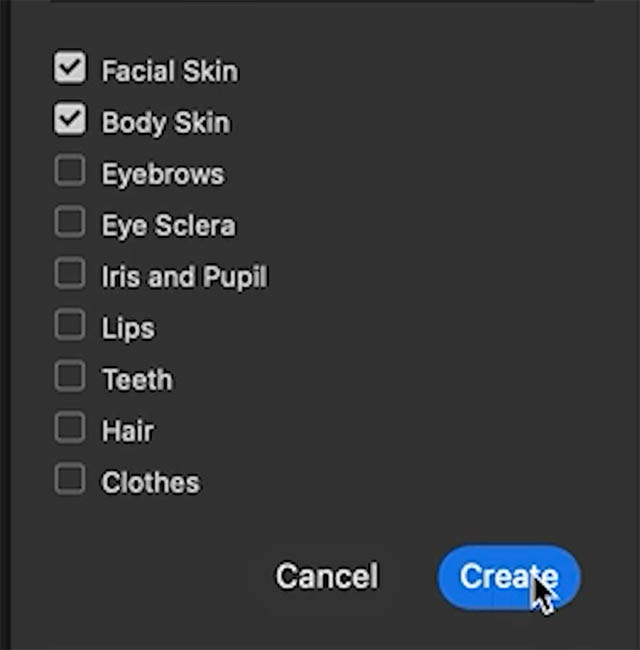
Select Facial Skin and Body Skin and create a single mask.
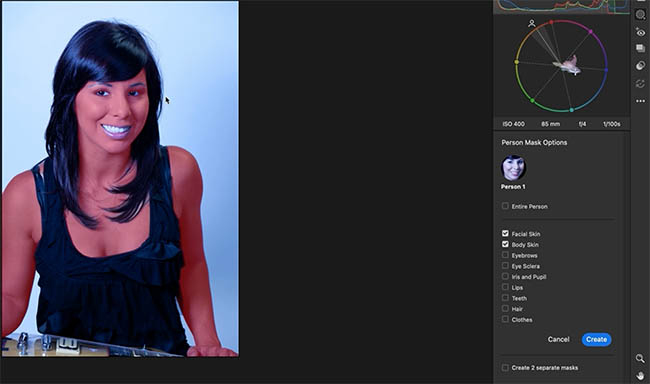
Notice on the vectorscope there is a slice at about 10 o’clock. This is the area that most skin tones fall into.
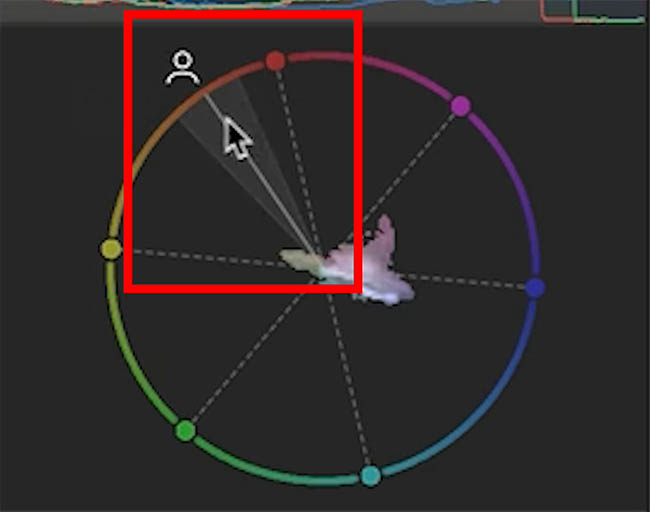
See the cloud near the middle. Notice, they are on the line moving towards blue. They need to move to the left towards the center. We do this by changing the blue to more yellow. A perfect job for the temperature slider.
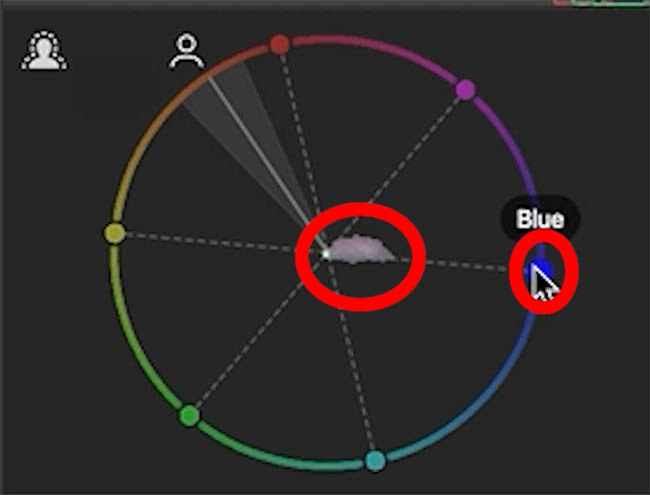
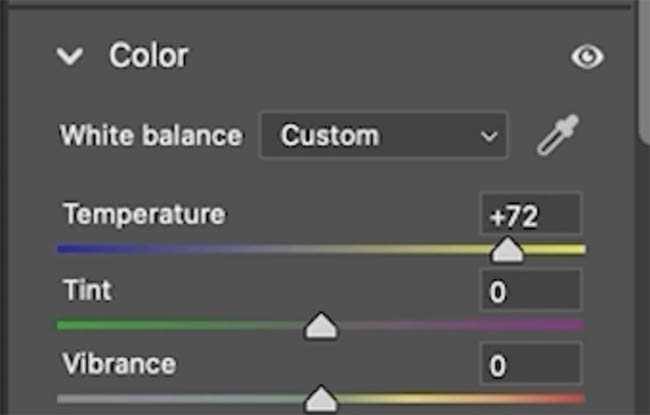
Adjust Temperature and Tint (mostly temperature in this case) while watching where the skin tones move on the vectorscope. You can see this demonstrated in a clearer way on the video.
Once the skin looks right, remember those adjustment values.

Delete the temporary mask and apply the adjustment to the entire image.

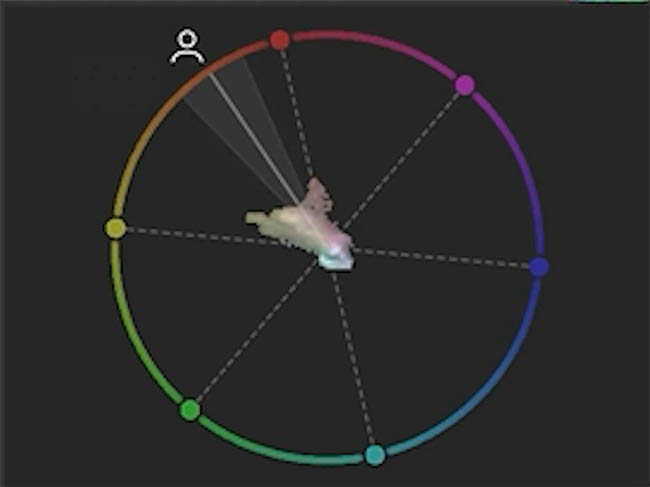
There are other ways to color correct a photograph, but this is a useful way to understand what the vectorscope is showing you.
See how the corrected image looks.
Lightroom Classic and Camera Raw Continue to Get Better
There are some genuinely useful additions here.
The new mask Edge controls make AI selections easier to clean up.
Render to DNG gives you a fresh starting point after a complicated edit.
Automatic blemish removal can save time when working on portraits.
Image expansion now gives you a choice between traditional Content-Aware Fill and Adobe Firefly generative AI.
The bidirectional gradient gives us much better control over localized adjustments.
And the vectorscope gives photographers a new way to visualize and understand color.
If the vectorscope seems confusing at first, just remember this:
What the histogram is to tone, the vectorscope is to color.
That simple idea makes it much easier to understand.
See you at the CAFE.
PS Don’t forget to follow us on Social Media for more tips..
(I've been posting some fun Instagram and Facebook Stories lately)
You can get my free Layer Blending modes ebook along with dozens of exclusive Photoshop Goodies here


4 thoughts on “New Features in Lightroom and Camera RAW, August 2026 update”
Leave a Reply
How to use ai selections in the Adjustment Brush to edit part of a photo in Photoshop 2024.

How to expand a picture using Generative Fill in Photoshop

Learn about Content aware fill, puppet warp, HDR, Brushes, HDR toning, lens correction, refine edge and other features introduced in...







I updated yesterday – had no time to work – but saw vector scope in passing, and thought, what’s that? Thanks for the explanation. It looks handy.
Glad you liked it
why am I missing all these update from august. I downloaded all updates from Adobe Cloud for Lightroom Classic, and Photoshop or Beta but none of the updates appear to be there like the Expand in Crop or the Remove people edit tool. The DNG tool does not operate as your does. I using Windows 11.
Cannot get reveal the focal point and vector scope to work. I am on a Mac computer,
. I have watched the video several times to no avail
Does it need a certain image like dng or psd or what ? .Can you help?
Vince