Lightroom Classic 2026 new features (Lightroom 15)
New Features in Adobe Lightroom Classic 2026 aka Lightroom Classic 15
On Nov 28, 2025 at Adobe Max, Adobe released the new version of Lightroom and Photoshop 2026.
Let’s have a look at the new features in Lightroom Classic. A lot of these features are also in Lightroom Desktop.
Assisted Culling
Using ai, Lightroom is able to analyze your photos for certain characteristics and then sort them based on those criteria. This saves a lot of time after shoots sorting out the keeps from the not so good ones. This works best with portrait photos right now, hopefully more features will be added in time.

Under Select, choose Subject focus.
You will see green checkmarks and red Xs to indicate if the photo passed or not.

There is a sensitivity slider that goes from soft to sharp to vary the sensitivity.

You will also notice other options, such as Eye focus and additional options under “eyes open.”

You can also reject things like misfires and exposure issues.

When you roll over the badge on any image, it will show you its score. Note, the score isn’t always that accurate.

At the bottom of the panel under View, you show, selects, rejects or all.

It’s a good idea to check the rejects, because there may be some good images there.
For example, this dancing image was rejected because the models eyes are closed. This is a good photo.

You can right-Click on the badge and Mark as Select, to add it to the keepers. I’m glad we can override the auto selections.

Once you have analyzed a collection of images, you can organize them.
Choose Batch Actions

Notice there are a number of ways to tag these images.

Auto Stack
The other Option is Auto Stack

You have to be in a collection to Auto stack, this won’t work on a Collection Set.
We can stack by time, or visual similarity. This is a great way to split up a shoot into individual framings or costume changes.
The video at the top shows this in action.

Shadow and Reflection Detection in Remove Tool
The remove tool isn’t new in Lightroom. However, one challenge is also removing the shadow or the reflection.

Choose the remove tool in the Develop module.
Select the ai remove tool. (Turn on use Generative ai and Detect Objects.)

Make a selection around the cowboy. Notice the tool automatically detects and includes the shadow.

And it removes nicely using Generative ai. Note: Lightroom doesn’t use Generative Credits.

Automatic Dust removal
Auto ai Dust removal was recently added to Camera Raw, but now, it’s new in Lightroom.

Choose the remove tool and go to Dust. Click apply.

Lightroom automatically detects the spots and dust and applies the spot remove tool to them. You can see the small rings where the dust is removed.

If you want, turn on Visualize Spots to see the spots.
Any of the repair spots can be removed by alt/Option clicking.

Reflection Removal
Reflection removal isn’t new now either. But the algorithms has received an update where it works better now and has better success with specular light (bright highlights).
Here is a photo with reflections in the glass.

Choose the remove tool and Distraction removal
Choose Reflections

As you can see, it does a really good job. The slider is all the way up to 100,

If you move the Slider to the left, you will see the reflection on its own and you can choose a balance between image and reflection with the slider.

Variance in Point Color for Landscape (seperation)
Another new feature, that was previous a tech preview in ACR is the Variance slider in Point color.
Say we have a photo of the California Super bloom and you want more separation between the flowers and the stems?

Under Color Mixer, grab the eyedropper.

Click on a stem.

Adjust the Saturation.

If you move the variance slider to the right, it makes a separation between colors and makes the stems change color without affecting the flowers.

If you move the Varience to the Left, it causes the colors to blend together more.

As you see, we can get a nice separation of color using Variance.

Variance in Point Color for Portrait (Smoothen colors)
Let’s try this same tool on a portrait. It works especially well to smoothen out color inconsistency in skin. This model has great skin, so we won’t see a huge difference in this image, but you will still notice it.

Noice as we move the slider to the left, it even out the colors, almost like applying makeup.

If you move to the Right, the colors are more separated. This is less flattering.

If you add just a little Variance you can even out skin color inconsistencies.

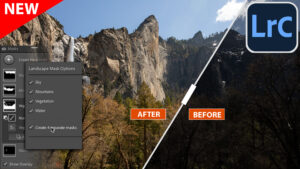
New Landscape Mask. Snow
Choose the Mask button. Choose Landscape.

You will see a new property. We can now automatically select snow.
Click create masks.

Now the snow is automatically selected.

New Color Profiles
Previously, we could only works in Pro Foto RGB or Adobe RGB. Now other options like sRGB and Pisplay P3 have been added as options when opening an image in Photoshop for Lightroom Classic. There are now new options for HDR and Video.

Export Video and Slideshows to 4k
We have been able to work with video in Lightroom at a limited capacity for a long time.

Previously we could only output up to 1920×1080 HD. Now we can export in 4k. This includes slideshow. This is a welcome addition since almost everyone can capture 4K these days with their mobile phones and we like to output higher res Slideshows for view on 4K TVs and monitors.

Other Additions
There is now Tethered Support for Leica cameras added to the existing Sony, Canon, Nikon and Fiji.
You can now Zoom while Cropping.
There is a slider to adjust the headroom in HDR.
Auto Stack by time, now has milliseconds added.
We can open a photos in Photoshop in 32 bit for our HDR images now. This is great form people working in True HDR (32 bit) workflows.
I hope you enjoy this look at the new features in Lightroom Classic 2026. (I plan on updating my Lightroom Classic training course soon).
Thanks
Colin

Recommended for this tutorial
Learn Masks in Lightroom and Camera RAW
Make precise local adjustments in Lightroom and Camera Raw with every type of mask.
$59.99 · one-time purchase · instant download

Free for you
The Photoshop Vault
Get my free Layer Blending Modes ebook along with dozens of exclusive Photoshop goodies: actions, brushes, presets and cheat sheets.
You're on the list, so your free goodies are waiting for you in the Vault.
Get Free Photoshop Goodies Open the Vault

Lightroom Classic Update Deep Dive: What’s New and What Actually Matters June 2026
Lightroom Classic just got one of its biggest updates ever. See the 10 new features photographers have been waiting for, including Duplicate... Read tutorial
New Features in Lightroom and Camera RAW, August 2026 update
New Lightroom Classic and Camera Raw features including mask edge refinement, Render to DNG, blemish removal, Generative Expand and vectorscope. Read tutorial
Adobe Camera RAW 17 in Photoshop 2025 new Features
New Features in ACR 17 Adobe Camera Raw 17 in Photoshop 2025 Read tutorial
New Features Lightroom Classic 2025. LRC 14
New Features in Lightroom Classic 2025 aka Lightroom Classic 14 Read tutorial
Adaptive Profiles in Adobe Camera RAW – perfect starting place for photos
New Adaptive Profiles in ACR Adobe Camera Raw make photos better Read tutorial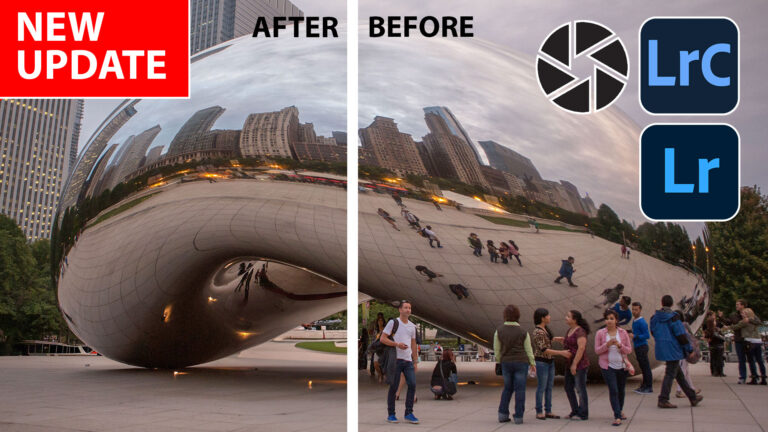











Brilliant and informative as always, makes learning easy and enjoyable
I’ve already started using the reflection removal and have been very impressed by the results.