HDR in Lightroom CC tutorial how Lightroom CC does High Dynamic Range
It is now possible to create stunning HDR images entirely in Adobe Photoshop Lightroom 6/CC. I am a long time HDR shooter and have produced a tutorial which has become one of the most popular free HDR and Photoshop tutorials on the internet.
Lightroom tutorial: How to do HDR In Lightroom
HDR stands for High Dynamic Range. Its a way to get more shadow and highlight details in your photographs that comes closer to what the human eye sees. Its been around for a while and used heavily by photographers to bring out cloud details in the sky, details in the inside of buildings and through the windows at the same time, and also used for surrealistic photographs that work well with textures and reflections.
To achieve this effect, multiple images are photographed and then merged together in Photoshop. The final step is to “tone map”, which is where you either go realistic or the hyper-realistic path. If you are new to HDR an want to understand HDR, check out this free HDR and Photoshop tutorial.
In recent years, you have been able to process HDR images in Lightroom and ACR as long as they are merged in Photoshop and saved as a 32-bit Tiff file. All that has changed today! You can now process HDR images entirely in Lightroom. Lightroom has the ability to merge photographs together and tone map them all without ever leaving Lightroom.
Let’s have a look at how it works.
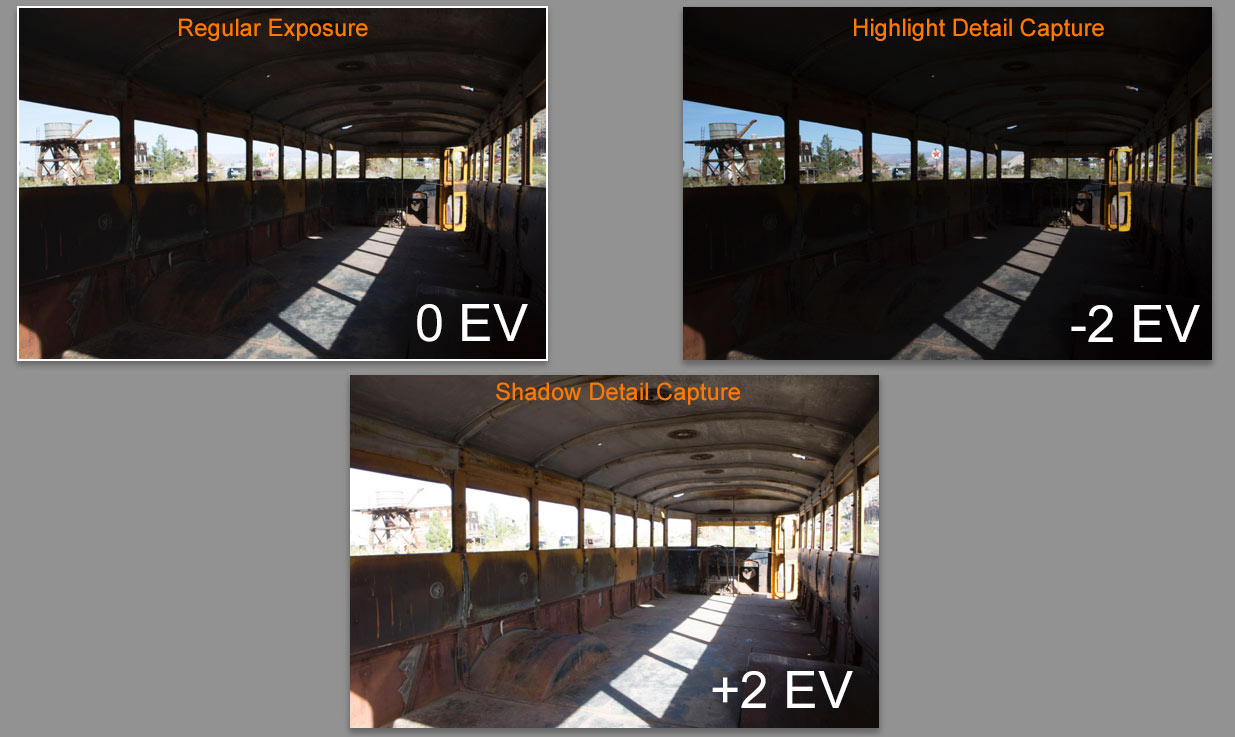
1. Here I have captured 3 images of a bus interior. The regular photo doesn’t have enough dynamic range to show all the highlight details outside the windows and the shadow details inside the bus at the same time. I shot a second image at -2EV to capture all the details in the highlights outside the windows and a 3rd capture at +2 to get all the textures on the inside of the bus.
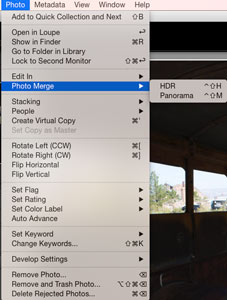
2. Select all 3 photos, then go to Photo>Photo Merge>HDR
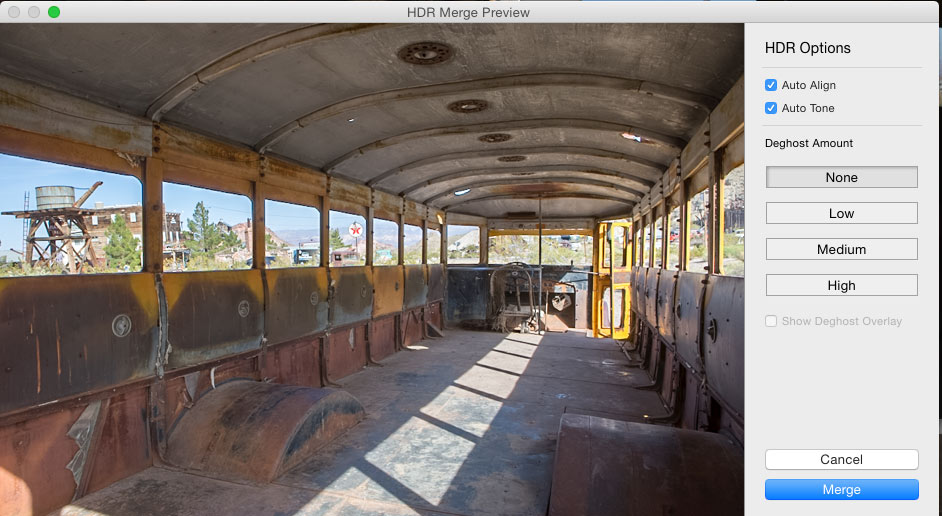
3. Lightroom creates a preview of the 3 merged files. There are 3 main options
- Auto Align: This will align the images if there was movement between shots (not on a tripod)
- Auto Tone: This button creates a balanced preview which is a good place to start
- Deghost Amount: If there is movement between the 3 captures such as people walking, leaves and water movement etc they can be repaired by choosing a level of “de-ghosting.”
4. Click Merge and the images will be merged into a new 16-bit floating point DNG file.
As you can see here the file will be called originalFileName-HDR.dng
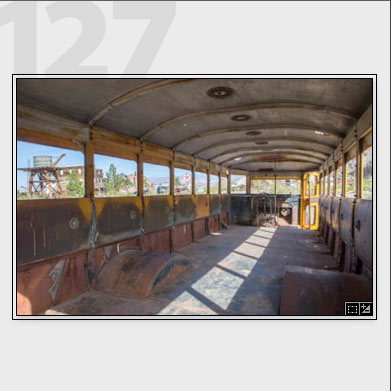
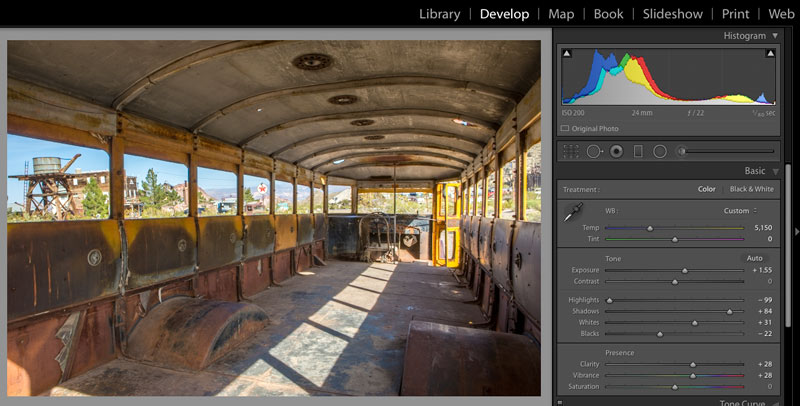
5. Initially the image will show more detail than the original 3 images (if auto tone is on).
This is a raw file that contains all the dynamic range and information from the 3 photos (Note: It doesn’t have to be 3 images, it could be 2, 5, 7 or more. 3 is the most common)
6. Now you can process the DNG file in Lightroom just like a regular photograph, but you have a lot more information in the shadows and highlights to play with. This results in a much better looking photograph that can mimic what you saw when you took the photograph initially.
I’m very excited about this new feature because Adobe are innovating the HDR space and allowing us to do it very quickly and easily. There are times when you can still get better results in Photoshop but this is pretty amazing and it does a really nice job.
Tip: Go headless. You can choose Ctrl+Shift+H to process the HDR images in the background and skip the merge window. This allows you to continue working while all the processing goes on in the background.
See newest Lightroom content
- Landscape masks in ACR and Lightroom
- Where are the missing tools in Camera RAW?
- Adaptive Profiles in Lightroom and ACR, 1 click pop on all your photos
- Miraculous reflections removal from photos in Lightroom and Camera RAW
PS Don’t forget to follow us on Social Media for more tips.. (I've been posting some fun Instagram and Facebook Stories lately)
You can get my free Layer Blending modes ebook along with dozens of exclusive Photoshop Goodies here

One thought on “HDR in Lightroom CC tutorial how Lightroom CC does High Dynamic Range”
Leave a Reply
How to cut out anything in Photoshop, 3 methods to cut out hair, trees, sharp edge, difficult images and more....
Here is a fun little tutorial that will show you how to make chrome outlines around your text. Have fun...
This Photoshop CC tutorial shows you how to make a seamless panorama in Camera RAW from multiple photographs. Learn how...



This tutorials great and useful for me, thanks