
TV interlaced scan lines in Photoshop Photoshop Tutorial
In this tutorial, we are going to create the classic TV scan line effect or interlacing effect. This gives a cool feel to the image. This is a quick and easy way to give a photograph and interesting hi tech look, or just to add some visual interest. This really comes from the classic/vintage style that you would see on old televisions. This comes from one of my original tutorials on PhotoshopCAFE, but we give it a couple of twists at the end with some more advanced options.
Watch the video AND read the tutorial
Download free Pattern set at bottom of page
Step 1: Making the pattern
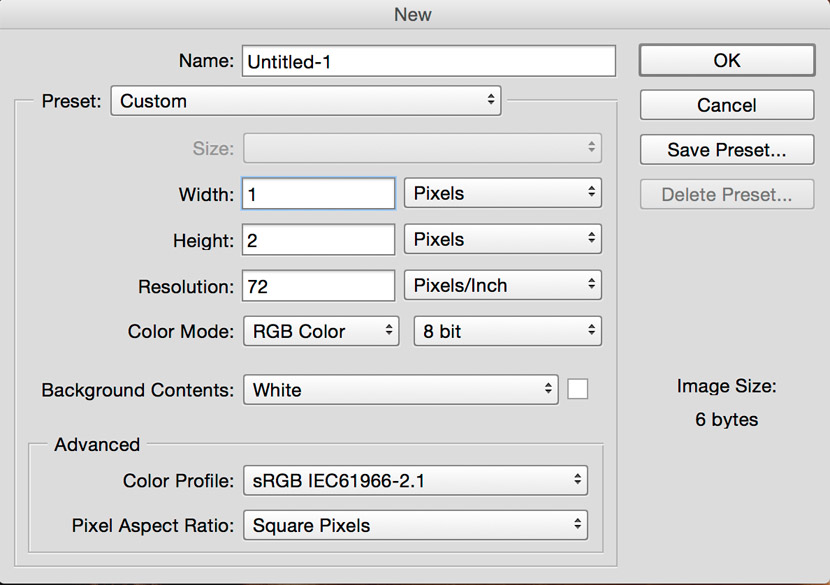
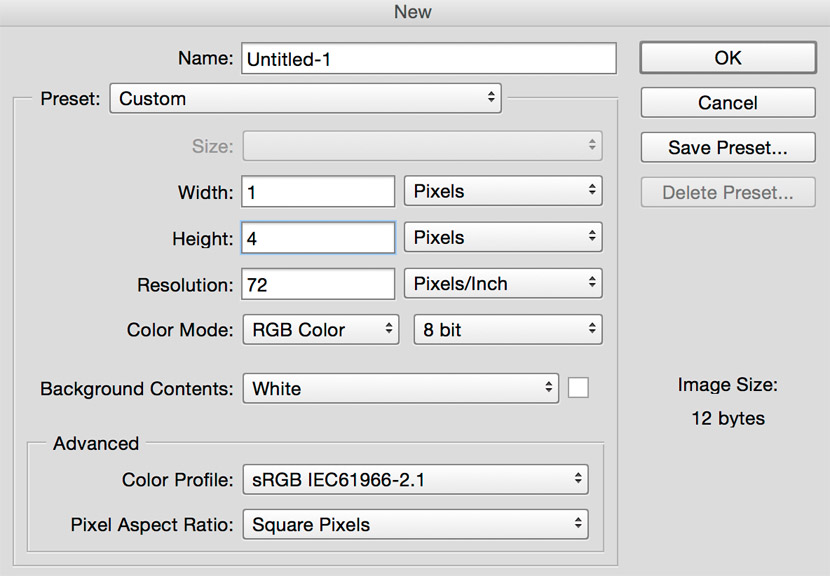
Let’s prepare our lines. Create a new document 1×2 pixels for very tiny tight lines for low res. We can vary the height for fatter lines, the width can be set to 1. Keep white as background color.
Step 2

with the foreground color set to black, take the pencil tool and paint the top half of the image.
Step 3
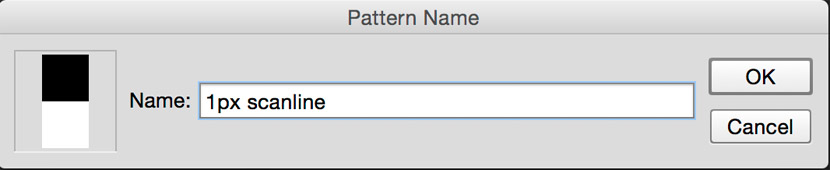
Edit>Define pattern
This box will come up, name your pattern. When you define a pattern, it is saved in the library for future use. Click ok
I usually make a number of different patterns at this point, so that I can have different thicknesses of lines, especially if you are working with high resolution images, 2px will be too small. Build up a decent library of sizes.
Step 4: Using the pattern
Open the image you want to add the scan lines to.

Step 5
Create a new blank layer above the image.
Press Shift backspace (Shift+Del on the Mac) to open the fill dialog box.
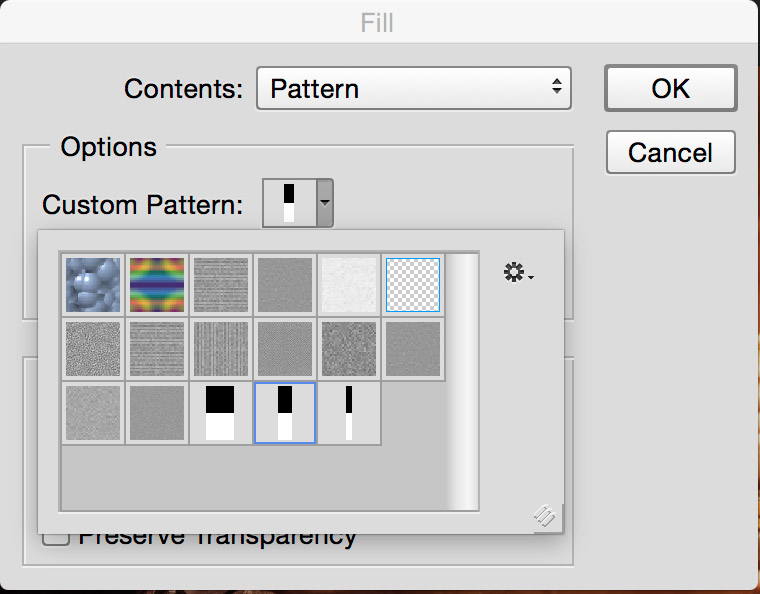
Make pattern the contents and select our scan line pattern in the custom pattern tab.
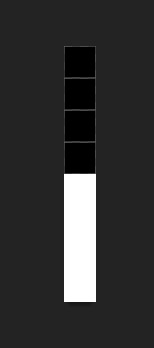
Click ok and you’ll see a pattern like this.

Step 6
Now to display it.
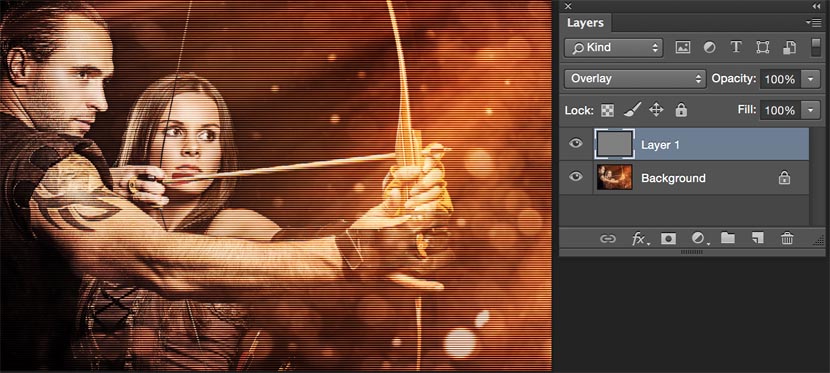
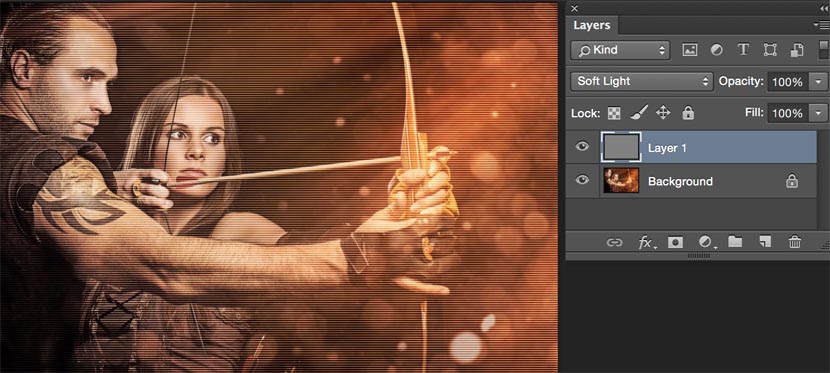
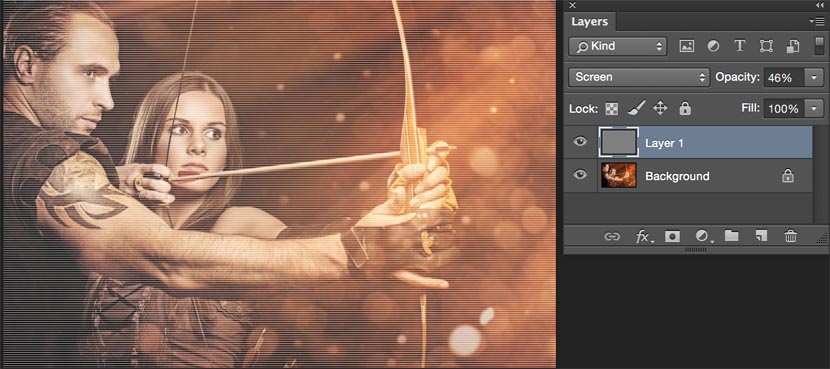
Change the blending mode mode and (optionally) drop the opacity down till it looks good
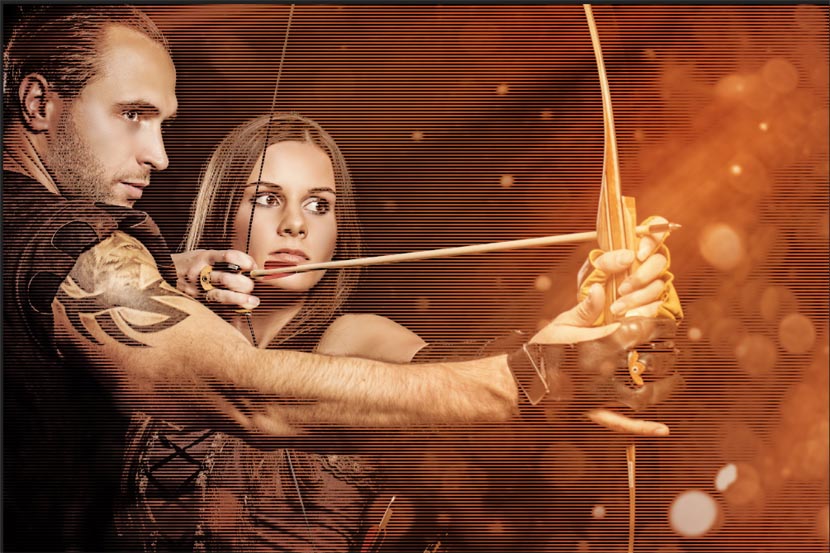
Here are the results of some different blending modes.
Overlay
Soft Light
Screen
Extra Credit
Let’s go the extra mile now and take it a step further if you want. We are going to make the lines only appear where its dark and protect the faces. Don’t fear, no selections will be required.
Set your scan line layer to overlay blending mode.
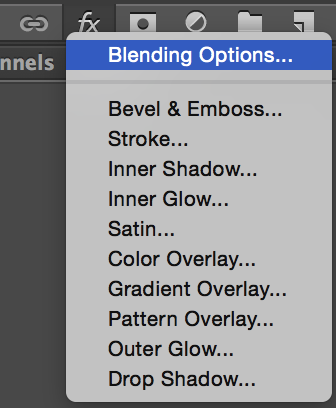
At the bottom of the layers panel, click fx (where you would add a layer style)
Choose Blending Options
We are now in the Advanced Blending Options. You will see dialog box like this.
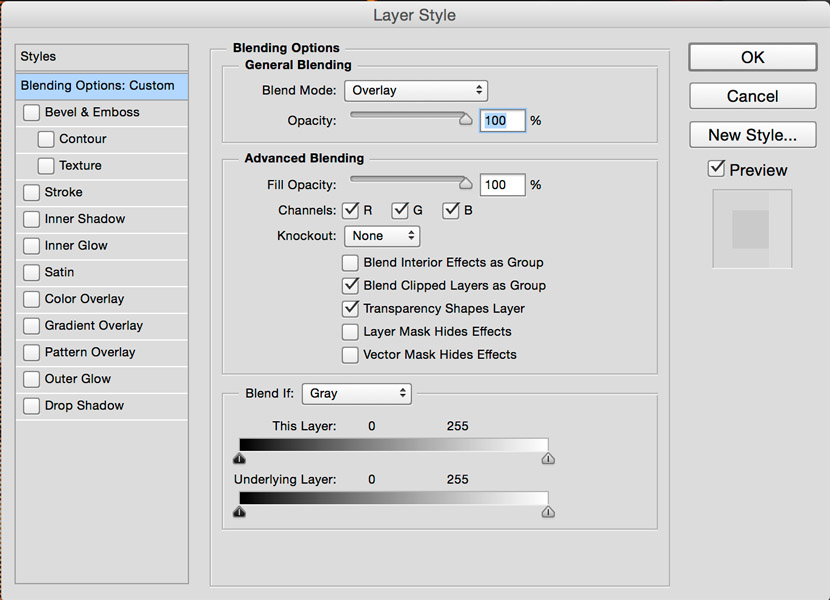
At the bottom, slide the White slider to the left to hide the effect from the highlights. Hold down the Alt/Option key to spilt the triangle and create a smooth blend.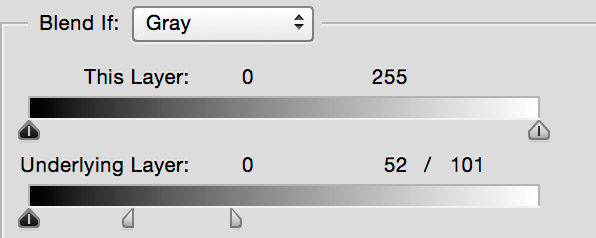
I hope you enjoyed this photoshopCAFE tutorial. Add a comment of go to our forums and let me know what you would like to learn!
See you at the CAFE
Colin
PS Don’t forget to follow us on Social Media for more tips.. (I've been posting some fun Instagram and Facebook Stories lately)
You can get my free Layer Blending modes ebook along with dozens of exclusive Photoshop Goodies here


8 thoughts on “TV interlaced scan lines in Photoshop Photoshop Tutorial”
Leave a Reply

How to add a dreamy magical glow effect to add romance and glamor to any photograph. This Photoshop tutorial shows...
Match color and tone on background with Harmonize in Photoshop 2022

How to use layer blending modes in photoshop to create amazing collages and compositions. This free Photoshop tutorial shows how...


i could not get the lines to appear without laying down a top coat which blocks the picture.
Turn the fill of the top layer to 0%. That should keep the layer’s style but make its contents invisible.
Thanks, this saved me hours of bumbling around!
permission to share your tutorials
Sharing as in:
1. Sharing the links on your page, or social media? Of course, thank you!
2. Embedding the video on your page? absolutely.
3. Cutting and pasting the text somewhere else? This isn’t allowed
thanks!
I like your photo editing, good effect , But Photoshop is too hard for me to learn 🙂 For such effects I just use apps or I send my photos to online photo retouching services like FixThePhoto
copy and paste the pattern in step 5 onto new layer over image. change opacity mode to multiply and 40%. done.
Fantastic tutorial! Easy to understand and gives exactly the effect I was looking for (unlike some other tutorials I found on other websites)