
Photorealistic Interface – Part 4, glass reflections, buttons and controls- Photoshop Tutorial

This is Part 4 of a 4 part tutorial
Are you ready to wrap up this puppy? It’s time for the finishing touches. We are going to learn how to make realistic glass reflections and recessed buttons. Fasten your seatbelts and let’s go…
1
Make a selection around the screen. The easiest way is to use the magic wand tool.

2
Create a new layer. This is where we are going to create the reflection.


3
Set the foreground color to white. Choose the gradient tool and choose the foreground to transparent linear option.
![]()
![]()
4
Drag the gradient from the top of the selection about 1/3 of the way down.

5
Repeat for the bottom except start from the bottom (duh)


6
To give it more of a rounded look press ctrl/cmd+T for the free transform tool.
Hold down the shift+Alt/option keys and shrink the gradients slightly.
Press enter.

7
Filter>blur>gaussian blur >2 pixels.
In the layers palette, drop the opacity down to 60%
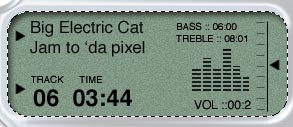
8
You should now have realistic looking reflections on the interface. This gives the screen a feeling of depth and realism.

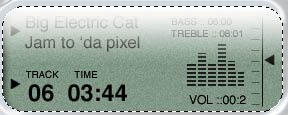
9
Add some text for effect. What company wouldn’t brand their product?

10
Adding the buttons
Create a new layer.
Using the custom shape tools, (like we did earlier) Create some shapes to use as the labels on the buttons.


11
Select the chrome interface shape layer.

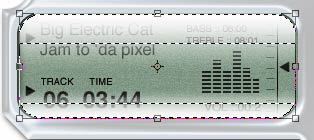
12
Make a selection in the shape of the button.


13
Press Ctrl/cmd+j This will duplicate the selection onto a new layer.
Note: We have just copied a piece of the interface onto a new layer. By adding a bevel we will make it look like a button.
14
Click the little “f” at the bottom of the layers palette to open the layer styles dialog box.
Uncheck the drop shadow to turn it off.
Choose bevel and emboss and change to pillow emboss.
Click ok
15
You should now have an indented looking button.

16
Repeat these steps for the forward and back buttons, only this time use a circular selection instead of a rectangular. (Don’t forget to choose the interface layer before pressing ctrl+j or nothing will happen)
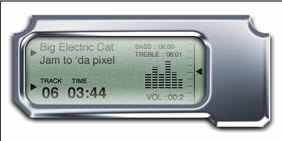
17
The final mp4 player (have to be future thinking you know)
I hope you have enjoyed this tutorial as much as I have in writing it.
Have fun with this and I trust you have learned some new things during our peek into the world of Photorealism.
Photoshop VAULT
Access valuable Photoshop extras and goodies for free and much more a

PS Don’t forget to follow us on Social Media for more tips.. (I've been posting some fun Instagram and Facebook Stories lately)
You can get my free Layer Blending modes ebook along with dozens of exclusive Photoshop Goodies here
How to change the color of an object in Photoshop and get good strong colors, change white to any color...

How to combine images and auto composite in Photoshop with Generative Fill ai. Colin Smith shares his Photoshop Gen Fill...

How to select hair, cut out people and remove them from their background in Photoshop CC . This free tutorial...


