
Photorealistic Interface – Part 2, Adding 3d Depth Photoshop Tutorial

This is Part 2 of a 4 part tutorial
Please note Adobe have retired the 3D lighting effects in Photoshop CC. If you are using a newer version of Photoshop, you will have to substitute the steps at the beginning of this tutorial for adding bevels with Layer Styles.
1
Begin with the shape you created last tutorial.
Make a selection by Cmd/ctrl+clicking on the layer thumbnail

2
Now open the dreaded channels palette. Don’t worry I will hold your hand and you will come out safely. (Actually channels really are not that terrifying, they just sound scary)
Click on the new channel button and your shape should appear in an alpha channel.
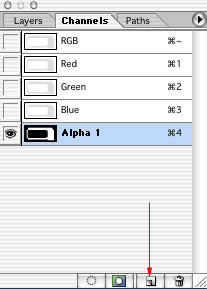
3
This is how your shape should look in the main window.
Deselect
If yours is inverted (shape black and bg white), press cmd/ctrl+I
Otherwise lets go on… you did remember to deselect, right?

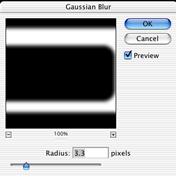
4
Filter>blur>Gaussian blur
Click ok.
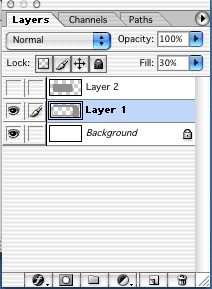
5
Now go back to the layers palette and click on layer 1.
Important! Even if you think you don’t need to click on layer 1 do it. (that way, will make sure you are working in all channels and not just in the alpha channel).
6
Lets add depth
Filter>render>lighting effects
You will see this big dialog box.
Here is the trick… Under texture channel, choose alpha 1
You should now see some depth in the preview.
Adjust the light in the thumbnail preview by clicking and dragging on any of the 5 points. Try to achieve a pretty even lighting effect without any extreme shadows or highlights
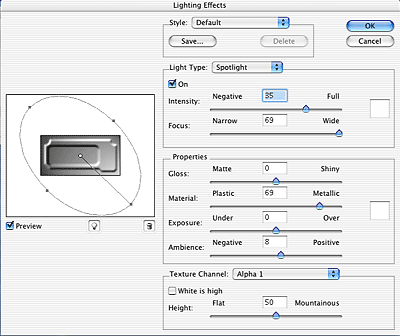
Click ok
7
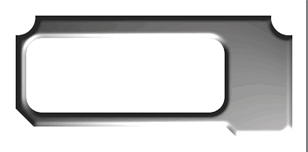
Your layer should now look something like this
We now have a 3d look. Making it chrome is very easy, in fact so easy we are going to do it now.
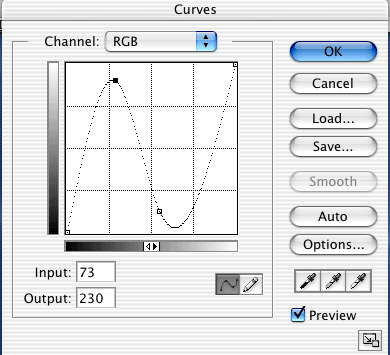
8
Open the curves dialog box. The quickest way is to press Ctrl/cmd+M
If you are totally opposed to keyboard shortcuts then go image>adjust>curves
You will see a diagonal line Click about a third way from the left and drag up. Click about a third from the right and drag down. Make fine adjustments until your chrome is looking good. You can see the artwork as you are making the adjustments. If you can’t see any change on your image check the preview box in the curves box.
9
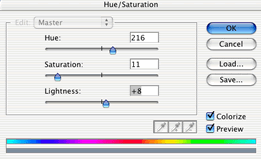
Make a quick little color adjustment.
Image>adjust>hue/saturation cmd/ctrl+u
Click colorize and adjust as shown to produce a slight blue hue to the interface to make it appear more like chrome.
10
Add a quick drop shadow and you’re your shape should look something like this.
Yeah, now your getting excited.
Tune in next week for more of my corny humor, I mean for the thrilling continuation of the interface tutorial. We will be creating a screen and display.

Click here to download this layered .psd.iface-2
PS Don’t forget to follow us on Social Media for more tips.. (I've been posting some fun Instagram and Facebook Stories lately)
You can get my free Layer Blending modes ebook along with dozens of exclusive Photoshop Goodies here

How to use the amazing new Adobe denoise, AI noise reduction in Lightroom and Adobe Camera Raw and examples.
When Photoshop changes your colors, Color Spaces explained

Auto remove anything in Photoshop with General Distractions tool.


