Photorealistic Interface – Part 1, the basic shape Photoshop Tutorial

How to make a realistic looking 3D interface in Photoshop
This is Part 1 of a 4 part tutorial
Step 1
I have several ways of drawing shapes. We will use my “Dump and Chop” method in this tutorial Create a new document in rgb mode. Create a new layer. Choose the rectangle shape tool with the settings shown Make your foreground color gray.
Step 2
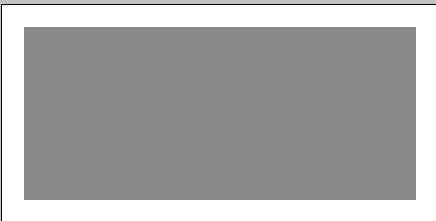
Draw a large rectangle to cover most of your canvas area.
Step 3
Choose the elliptical marquee tool and make a circle. Hold down the shift key to constrain to a perfect circle. Hit the delete key to cut a corner out. With the selection tool still selected, click and drag the selection to the opposite corner. Hit delete again. (Are you starting to see why I call this the Dump and chop method yet?)
Step 4
Now lets make the classic High Tech Interface shape at the bottom. Choose the polygon lasso tool. Just click and then as you move the mouse it will stretch until you click again to join the dots. Here is the secret, hold down the shift key to constrain the shape to increments of 45 deg. (I hear someone saying “ohh that’s how they do that) Click all the way around until you get back to the start point. You will see a little circle. Don’t be shy, click it! And… you will see a selection around the shape. And as our custom is. Hit the delete key.
Step 5
How about a rectangle with rounded corners. Choose the rounded rectangle shape tool and use the settings as shown.
Step 6
Create a new layer. Draw a rounded rectangle about the size you need for a screen. Now for a little layer jumping… Cmd/Ctrl+Click on the “screen” to load the selection. Choose our iface layer. (layer 1)
Step 7
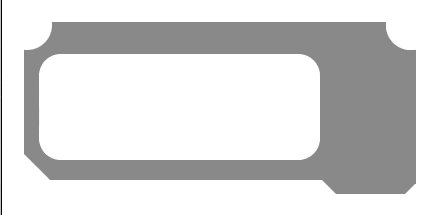
Hit the delete key and you should have a shape as shown here. Will the interface escape the lab of the evil flatland? Will it get depth and texture? Will it ever see buttons and features? Tune in next week to the same channel and same time. Hang on to this psd, because we are going to continue with it next week and give it depth and texture
I hope you enjoyed this Photoshop tutorial and found it useful
Colin
PS Don’t forget to follow us on Social Media for more tips..
(I've been posting some fun Instagram and Facebook Stories lately)
You can get my free Layer Blending modes ebook along with dozens of exclusive Photoshop Goodies here

How to make a realistic lens flare in Photoshop. This non destructive method uses a little trick to make your...
This tutorial teaches you how to take a photograph and make it look like a miniature model in photoshop instead...
This technique is a contrast/tone and color correction technique all in one. Once you run through this, you will see...


