
Remove Color shadows from a face with Point Color in Photoshop
Point Color for retouching and fixing colored shadows
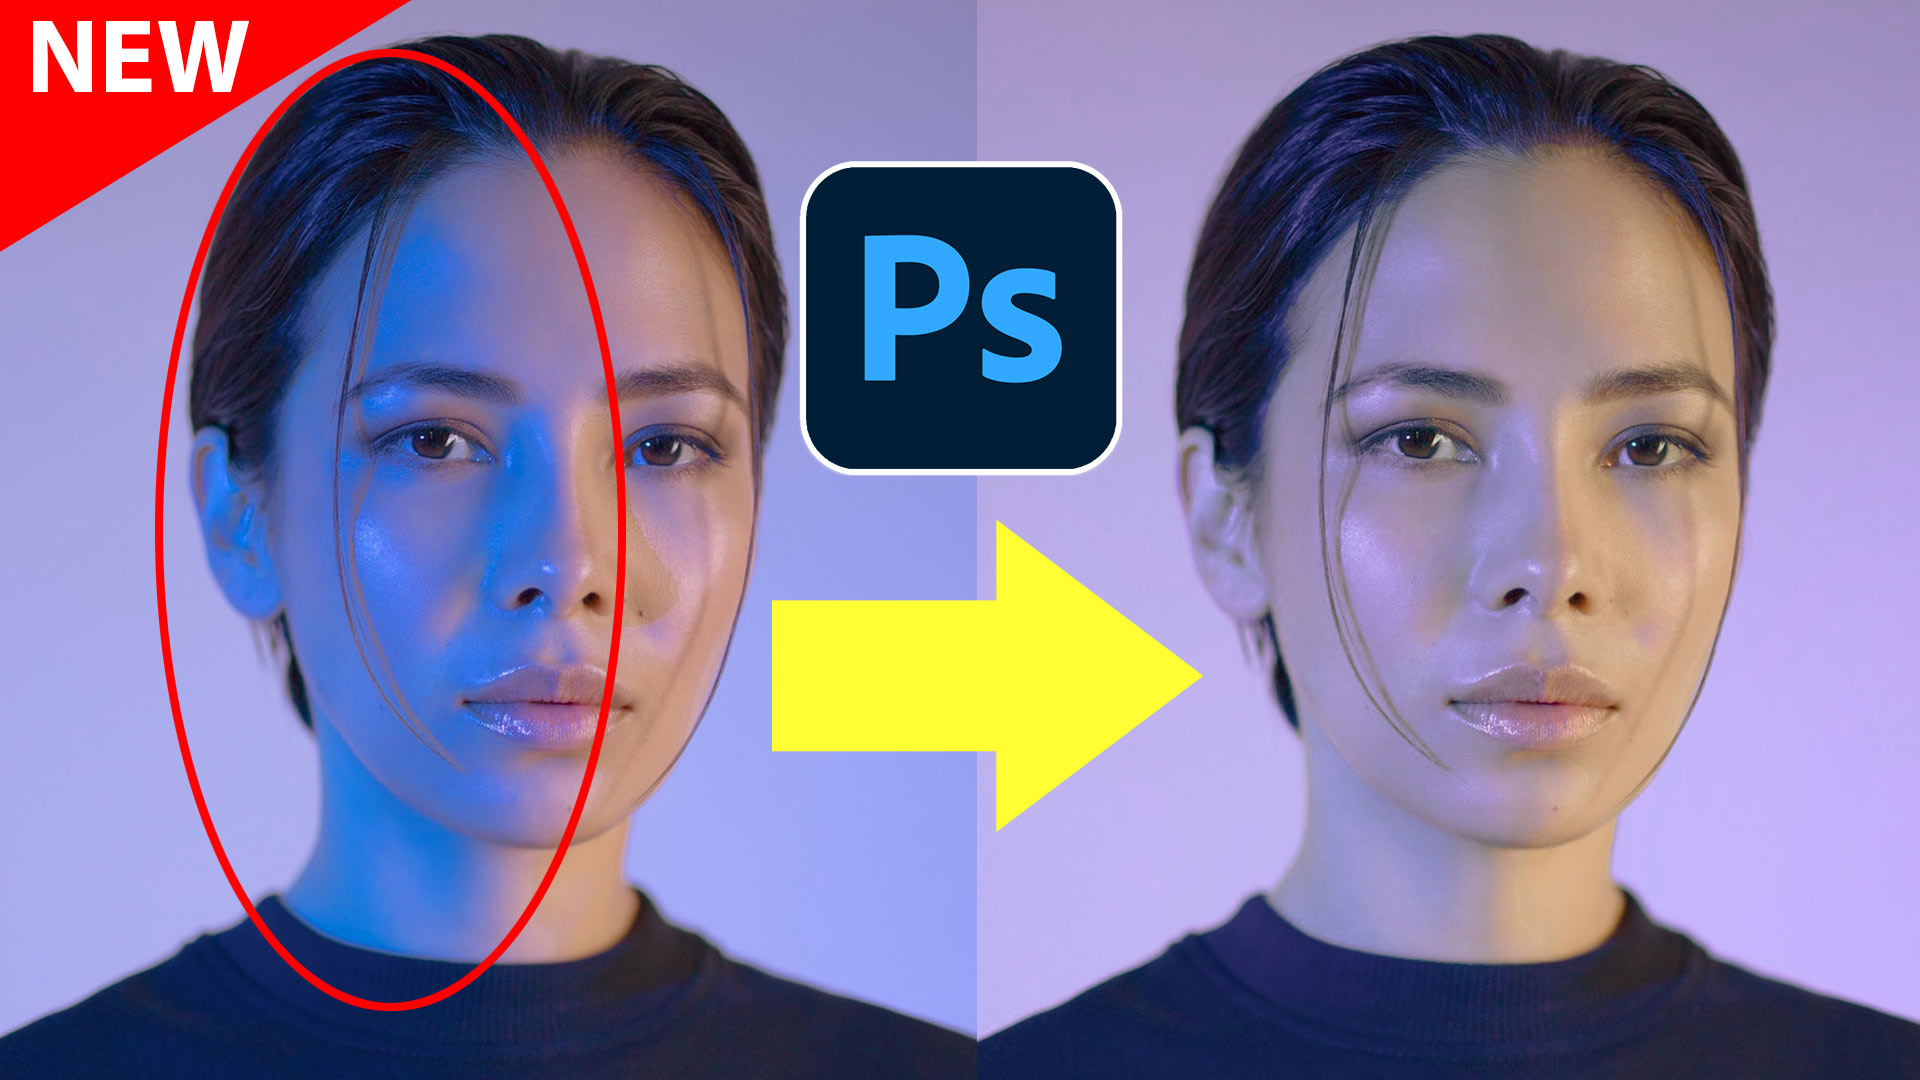
Here is a photo which has a blue light hitting one side. You can also see issues where the strands of hair are casting a different colored shadow. This is an especially tricky image because it also has a strange highlight on the other cheek that looks like a birth mark. we can easily fix all of this using the new Point Color tool.

Choose filter>Camera Raw (Or open in Lightroom, it works identical. Point color in Lightroom tutorial)

Scroll down to the Color Mixer section and click on point color.
The first thing we do is sample a color with the eyedropper.

Click on the blue color with the eyedropper.

Notice it adds a colored swatch

The first thing we will do, is refine the area we are targeting.
If the tools aren’t showing under Range, click the little triangle.

Hold down Alt/Option as you move the sliders and you can visualize the are you are selecting.
The range determines how close to the exact sampled color will be included.
Use the Hue, Saturation and Luminance range to further refine the selection based on color(Hue), how much color (Saturation) and lightness (Luminance). (The Hue/Saturation in Photoshop can select by hue only).

Once you have selected you color, its time to change it with the color swatches, or the Hue, Saturation and Luminance sliders.
Change the Hue in to match the color

Adjust saturation and luminance to match the rest of the image. Notice even the shadow on her hair looks correct now.

There is still the problem with the harsh shadow on the other cheek.

Once again, grab the eyedropper.
Click on the shadow color, notice you see a second color. You can add up to 8.

In the same way, make adjustments until it matches.
If you want to reduce the transition area, we can use the healing brush. Here is how.

Choose the healing brush tool

Select a small sized, feathered soft setting
Drag over the transition area.

and the healing brush fixes it.

Here are the before and after images for you to look at.


I hope you found this tutorial useful. Drop a comment and say hi!
Watch the video at the top and subscribe to our YouTube channel for lots more free Photoshop tutorials.
Great to see you here at the CAFE
Colin
If you want $250 worth of Photoshop add-ons for nada (Brushes, presets, actions, sky photos, ebooks, cheat sheets and more) Check out the Vault
PS Don’t forget to follow us on Social Media for more tips.. (I've been posting some fun Instagram and Facebook Stories lately)
You can get my free Layer Blending modes ebook along with dozens of exclusive Photoshop Goodies here

15 thoughts on “Remove Color shadows from a face with Point Color in Photoshop”
Leave a Reply

How to use the new features in Lightroom 10, color grading, tethered capture and new zoom
I received a request from the forum for this effect from one of our Members living in Japan. This is...
This weeks Photoshop tutorial, I'm going to show you how to make the portrait text effect. This takes a photo...


This will make retouching much easier. Thank you again.
Great tutorial. Thanks!
I like the new format and the tutorial-written-with-pictures. Fast and useful! Thanks.
Thanks, glad you like it
Thanks Colin!
Always a huge thank you for sharing your incredible knowledge with us
You’re very welcome
Never disappointed with your tutorials. Thanks again
I love these quick tutorials that you offer – so very helpful to me as I am only one year into PS.
Merry Christmas!
Great tutorial as always thank you
Thanks for saying so
I have learned more useful photoshop skills from you Colin. Thank you so much!
You are the best
Always awesome tutorials!!
thanks