
Photoshop 2024 Generative Fill Tips – 16 Fast Tips and tricks
The Ultimate Photoshop 2024 Generative Fill Tips guide
When you hit generate in Photoshop Generative Fill, you will see tips. I have assembled all the tips here and will demonstrate each one. I have also thrown in a couple of my own to make it more interesting. Check out the quick video, each tip is a little over 30 seconds on average. Here is my written summary.
I will show each tip and then show you an example.
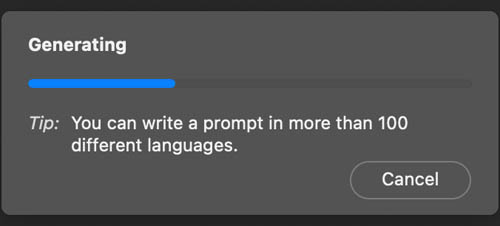
1. New Languages
It supports over 100 languages now. It will be interesting to see if it generates localized content based on the language. For example, person in Japanese” 人 hito”, might be biased towards generating Japanese people. and localized content, like it does on Mid Journey.
2. Pin Taskbar

Click on the menu and choose pin, for the taskbar to stay in position. It now says put even when you relaunch. To find the taskbar choose Window>Taskbar

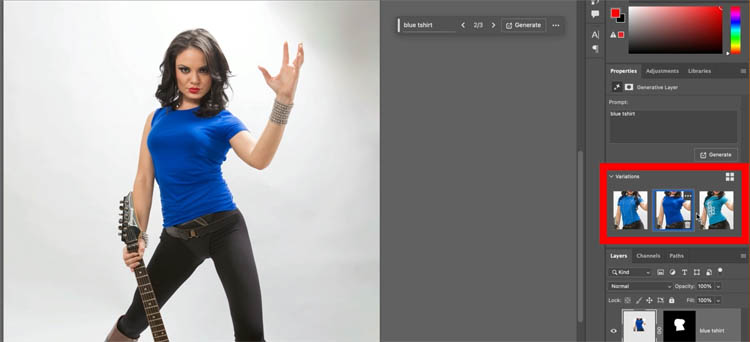
3. Selections matter

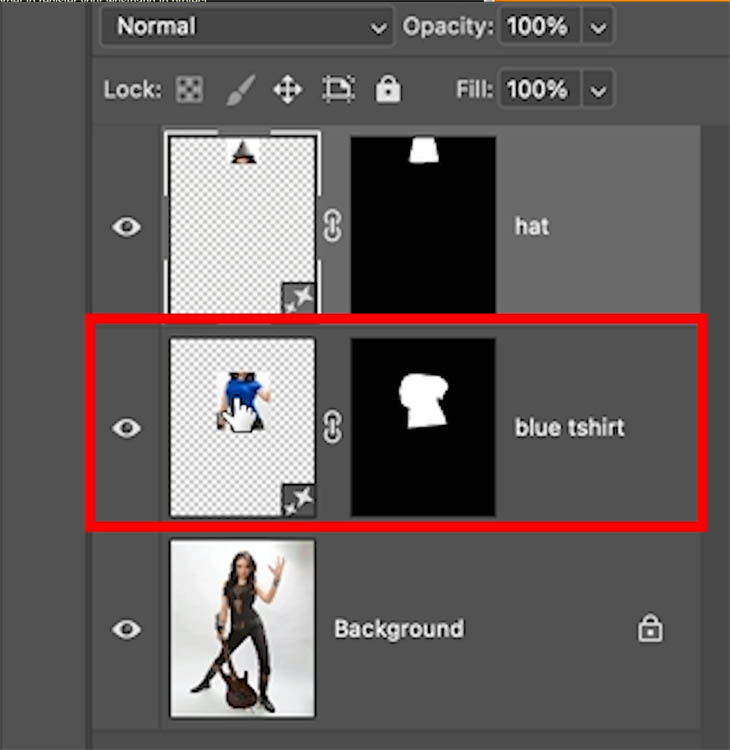
When you make a selection, remember it will be able to change anything within the selection area, but cannot outside the selection.
If I want to generate a t-shirt, I need to make sure I provide enough room for the shirt, this includes completely selecting what I want to remove as well as providing space for the sleeves, otherwise I’ll get a tank top. At the same time, if I don’t want the hair to change, I shouldn’t include it in the selection.

When we generate, notice the shirt is generated perfectly, but she lost half her hair.
4. The shape of the selection is very important

This one is really important, so much so, I created a whole tutorial on selections and generative fill previously
Make a wide selection and type hat

We get a wide hat
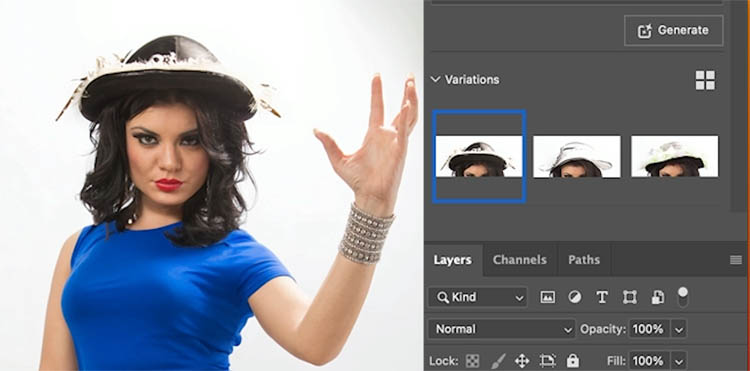
Make the selection taller

And we get a top hat. Make the selection in the shape you are looking for. In the previous example you will see I made it in the shape of the t-shirt I wanted. This also reduces the amount of “content warnings” you get. But I’ll add another bonus tip on that at the end.

5. Change density of Generation
Changing the density of the selection will make semi transparent generations to make things appear underwater or though glass etc.
Start by double clicking Quick mask in the tool box.

Set the options to Selected areas
Click ok

Press the Q key to go into Quick Mask
Click the foreground color picker on the bottom of the tool box.
Back will give us 100% dense selection. White will make it invisible or no selection. The lighter the gray the more transparent. (It’s clear in the video at the top)
Choose black

Grab a brush and paint the area to select with black, Make it above the water. (shows red because of quick mask)
Change to a light gray and paint under the water as shown.
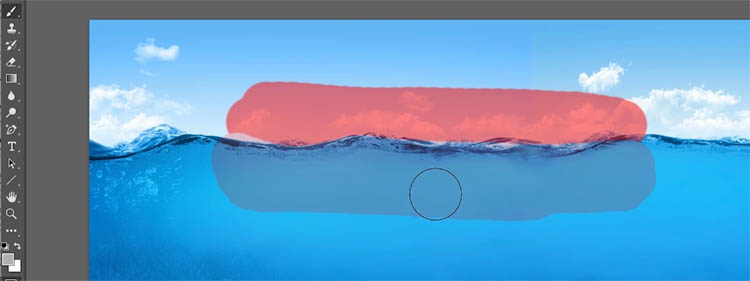
Press the Q key to change the Quick mask into a selection. The bottom part doesn’t show as a marching ant selection because its less than 50% opacity, but its still selected..

Type in Whale

Looks like we got 2 whales. Notice how the bottom part looks underwater because of the gray we painted into the mask.

6. Moving a generated layer

Here I have generated a truck

We want to change the position. Drag the generated layer to the other side
Notice it doesn’t blend in anymore
Press generate and it will
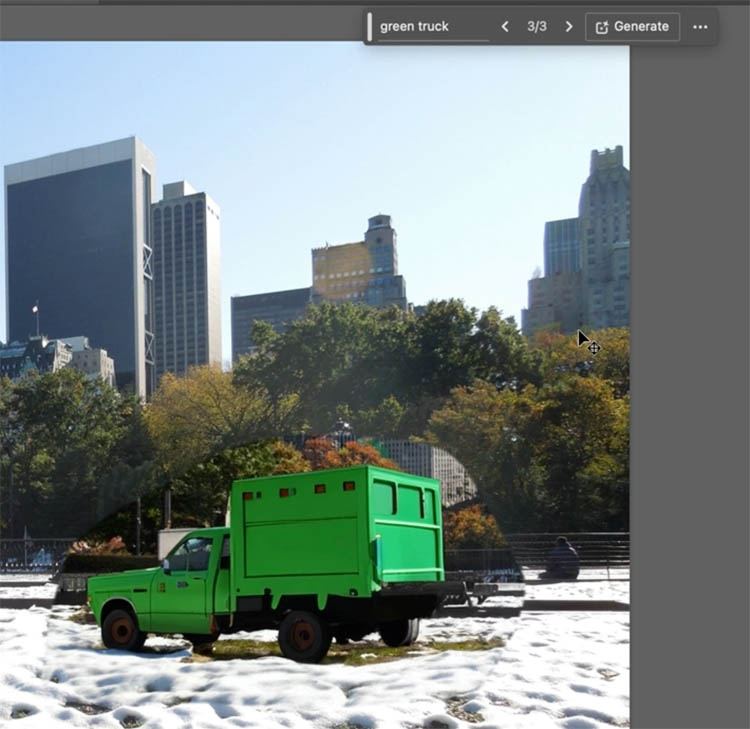
It now blends but we have a different truck. That’s one of the drawbacks of generative pixels.

7. Keep the same object but move it. (Bonus tip)
This tip isn’t in the Adobe tips, it’s one of my own.
Instead of hitting generate when we move an object, we need to select just the generated area outside the object.
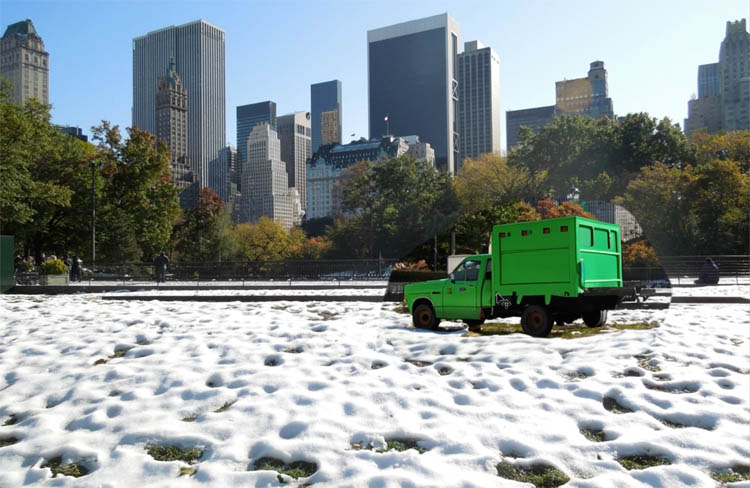
With the truck layer active. Choose the quick selection tool
Press Select Subject

You will see the truck is selected. Refine the selection if you need to.
Choose Select>Save Selection
Name it truck.

Now we need to select all the pixels in the Generative fill layer.
Hold down the Alt/Option Key and click on the Mask in the Layers Panel. You will see the selection loads up.

Now, to remove the truck from the selection.
Choose Select>Load Selection
Choose truck under the channel
Click on Subject from selection.
Click ok

Now we have just the extra generated pixels selected.

Press generate without typing anything into the filed.
And now it blends the image into the background perfectly including shadows.

(You may think, you could just select the truck and choose inverse and generate. If you do that, it replaces the ENTIRE background, so you have to do it the way I just showed you).
8, Generate again

If you don’t like the result, press generate again to get 3 more variations.
(bonus tip) this also works after the fact, you can open the image and choose any generative layer to make more variations.
Click generate and get 3 more options each time.


9. Reduce file size

Each variation contains and image and adds to file file size.
Rollover the unneeded variations and you’ll see a trash can. (Bin for British, Kiwis and Aussies).
Click the trash can to remove the variation
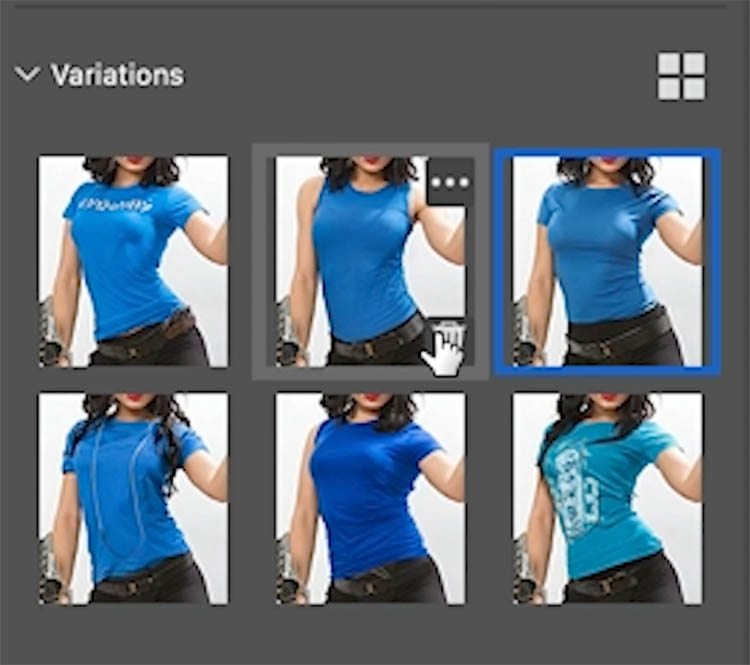
Here we just kept the one we need. You can always generate more, it will remember the prompt on the generative layer.

10 to remove content

Use the lasso tool to make a selection around objects to remove.

Don’t put anything into the text field, just hit generate and it will remove the object, don’t type remove.

bingo

Note, you will often Gert faster results with the remove tool, plus it works in high resolution, doesn’t use generative credits and doesn’t need to be connected to the internet. (see Generative Fill vs Remove tool ai here)
11. Don’t micro manage Gen Fill

When removing objects, some people (too many) think if you type “remove” it will help get a better result.This isn’t the case according to Adobe documentation from day 1.
If you want a boat, just type in “boat” don’t type “add boat” it doesn’t help.
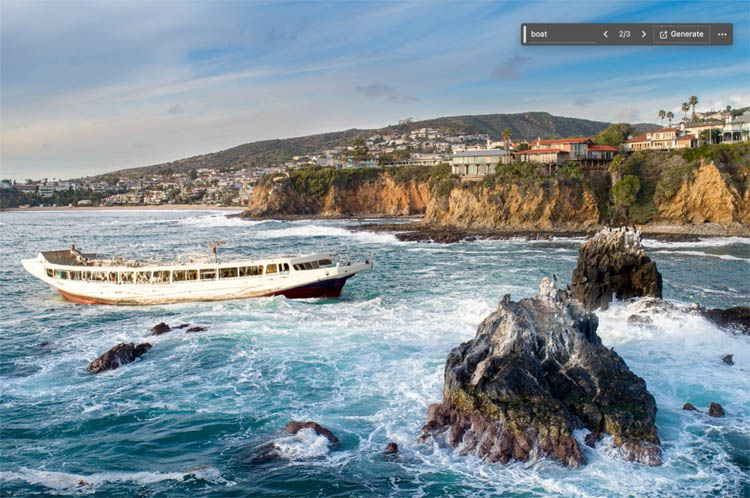
12. Re generate part of a generated image (Bonus tip)
Another of my own tips you don’t find in the Adobe documentation.
The front of this boat looks good, but the back is weird. You don’t have to generate a different boat hoping for a better result.
Just make a selection around the area you don’t like.

Type in boat and get a better back half. Yay! (Why didn’t I think of that? Oh, wait, I did)

13. Negative reinforcement

You can direct Gen Fill by telling it what you don’t want. Say you ask for an old car, and want a run down modern car for a post apocalyptic scene, and not a classic car. Type “Old car, not classic” for example. (I wish I thought of this example instead of the one I used in the video, it’s a better idea.)
Make a selection around the hand. Type Black Glove not velvet. This way I won’t get a velvet glove for our sports theme.

Looks like I got a nice latex, and woolen glove collection in the variations.
We didn’t get back either and we got 6 fingers, perfect for the piano part in the movie Gattica. (Its not perfect, but its getting better all the time)

14. Generative Expand

We can expand the edges of a canvas by generating pixels in the blank areas. I use this one a lot!
Choose the crop tool
Make sure the option is set to Generative Expand from the top toolbar.

With the crop tool, drag outside the image boundaries.

Press enter and Generative expand will ex[pand the background to match the image.

15. Generate a Different environment
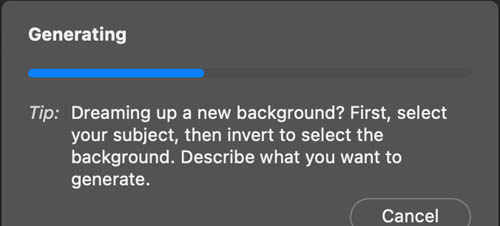
Select your subject, using select subject.
Press Ctrl/Cmd+Shift+I to inverse the selection and select everything but the subject.

Type in something different like beach

Now we get a different background. (BTW this is what would have happened in tip 7 if we simply inverted the selection)

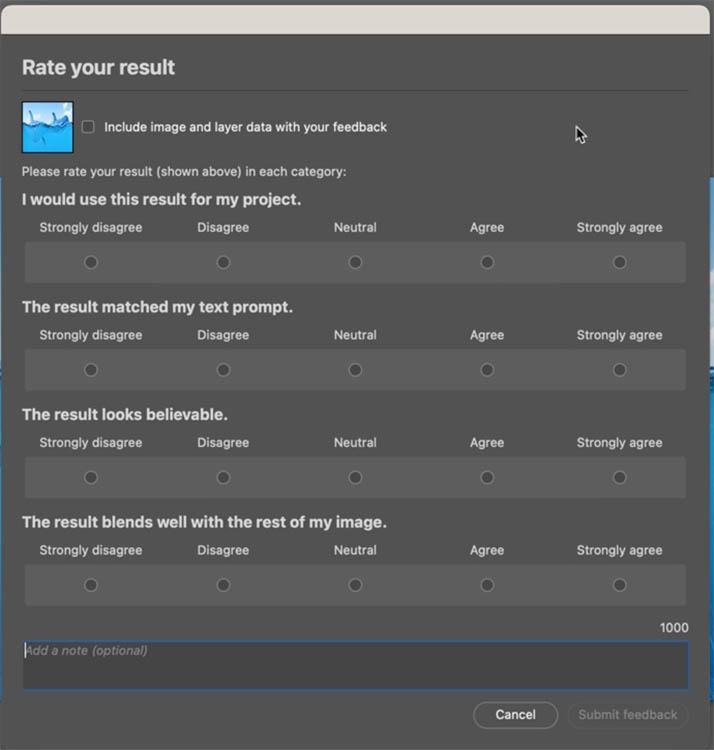
16. Tell Adobe what you think

When you use Generative Fill, you can rate your result and let Adobe know your thoughts.
Click the menu and choose thumbs up or down, or report or delete.

A questionnaire will appear. These are read by real people, so this is your chance to be heard by Adobe.
Here are a few more bonus tips I have for you..
Content Warning
When dealing with people mostly, you might get a false content warning. To get around that, type a period only “.” into the box and generate.
Create in High Resolution
Photoshop generates in 1024 x 1024 blocks at the moment. See my tutorial on how to get High Resolution in Generative fill. Also includes a free action.
Mixing Variations hack
See how to mix variations to get a perfect result
Bonus tip: My new Course on Generative Fill
As you may know, I made a course on Generative fill (the first and as far as I know, the only course) and everything on the course works exactly the same in the final release, except you don’t have to download the beta anymore. If you missed the discount before, I thought it would only be fair to offer it again here if you are now ready to jump in.
I’ll give you a week to use the code GENFILL2 to save 20%. Grab it here (If you already bought the course, you don’t need to buy again, it’s unchanged, as the features are unchanged)

Check out the ai Art category here at photoshopCAFE for many more tips and tutorials on this topic.
Thanks for checking this out, I hope it helped you! Tell your friends about the CAFE.
Colin
PS Don’t forget to follow us on Social Media for more tips.. (I've been posting some fun Instagram and Facebook Stories lately)
You can get my free Layer Blending modes ebook along with dozens of exclusive Photoshop Goodies here


3 thoughts on “Photoshop 2024 Generative Fill Tips – 16 Fast Tips and tricks”
Leave a Reply
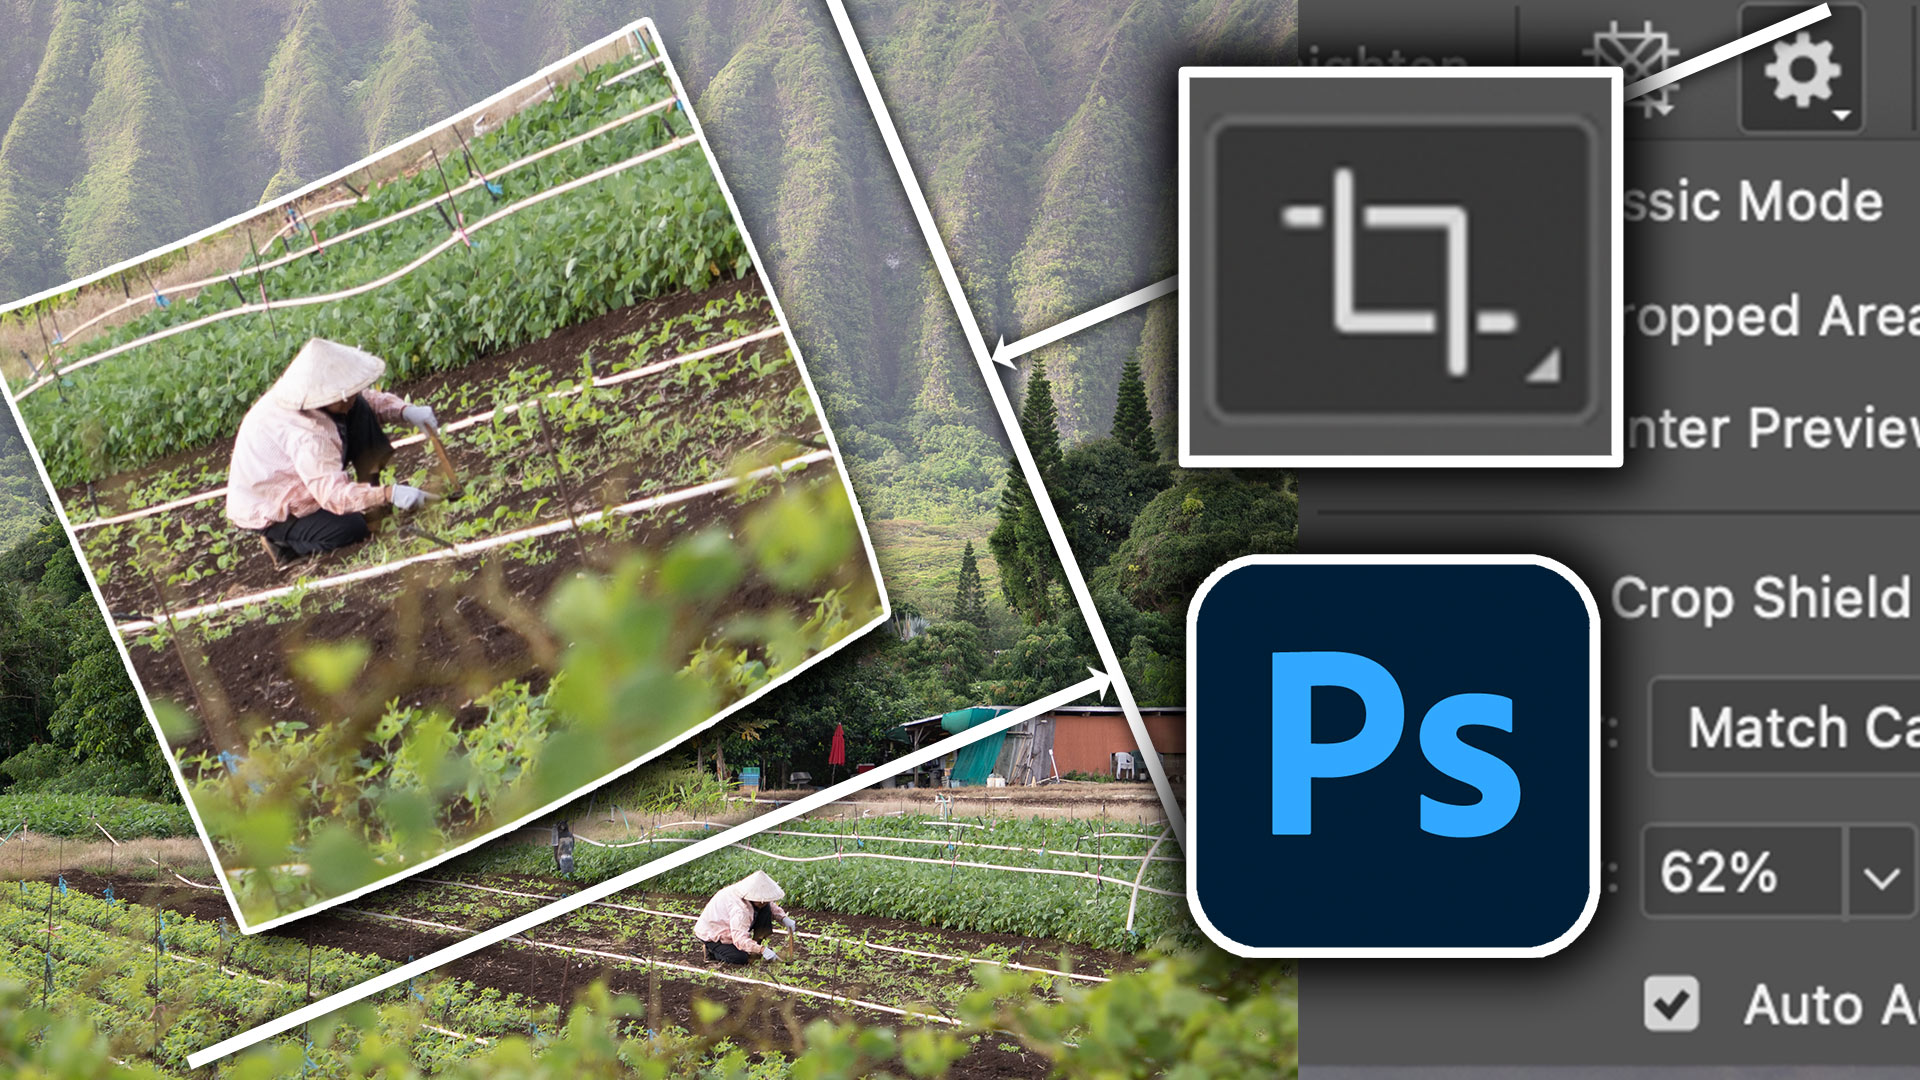
How to crop an image in photoshop to a specific size or shape, easy tutorial
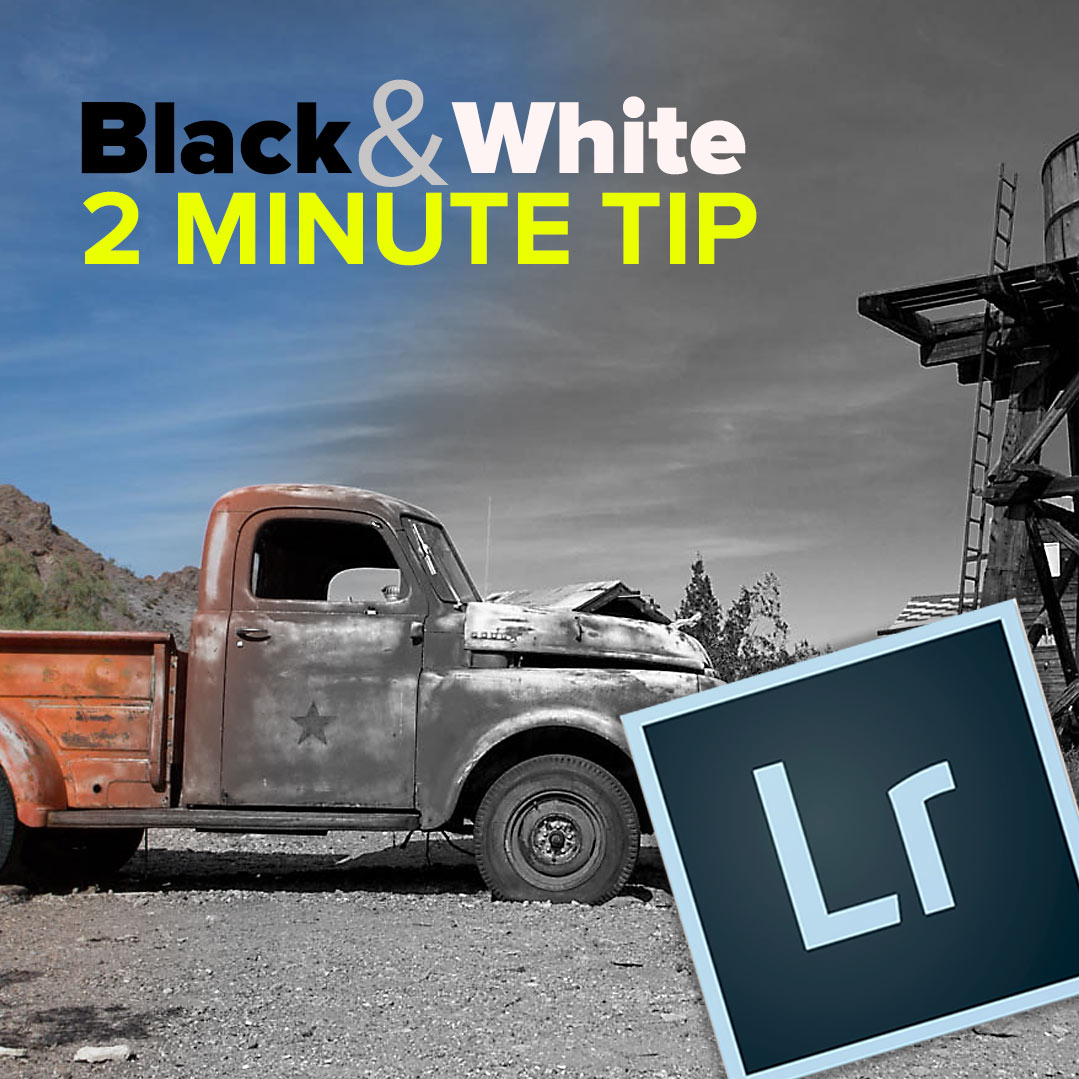
How to get the best Black and White conversion in Lightroom in 2 minutes Here is a quick tip for...

Auto remove anything in Photoshop with General Distractions tool.


very useful – will you be making this available as a PDF download, please? I would like to be able to consult this offline.
Thank you again Colin fantastic as always.
Great video and I love the notes that I can print. Video is short and to the point and you make it look sooo easy. Love your channel.