Lightroom CC / Lightroom 6 first look, review and tutorials

What’s new In Lightroom 6/CC? First look and review of Lightroom CC.
It’s been a while since the release of Lightroom 5. Almost 2 years in fact (June 10, 2013). If you include the public beta period, its almost exactly 2 years. So Lightroom 6 is well due. This time around there is no public beta, just a full release that is ready to go, and here it is.
Lightroom 6 or CC? Which is it?
You may have already realized that the new version of Lightroom is a dual citizen. What does this mean? It means that you can buy Lightroom 6 as a standalone or as an upgrade just like you always have and it will exist without a monthly subscription.
There are lots of people on the Creative Cloud, or the Creative Cloud Photography Program that also get Lightroom as part of their package. Initially the features are the same on Lightroom with the exception of Lightroom mobile which is only available to cloud subscribers either on the full Adobe Cloud or the Photoshop and Lightroom for $9.99 mo in the Creative Cloud Photography Program.
So, Lightroom 6 and Lightroom CC are the same thing as far as features are concerned and all the features and resources on this page will be the same for both (Except Lightroom Mobile which is only available on the CC offering).
Ok, feature time..
The Big Ones
I’m going to jump right in and give the big features right off the bat. The smaller ones will be listed further down the page. Now, what I consider a big and small feature may be different for you, depending on what you do, so be sure to look at them all. I have also put some videos in here for you to look at. If you want a full A-Z on Lightroom, check out our multi-award winning Lightroom training here.
HDR Merge.
I’m just going to start with this feature because I am such a big HDR fan, having shot HDR for a long time (at least 10 years, I was one of about 2-3 people teaching it back then) and producing one of the most popular free HDR and Photoshop tutorials on the internet.
HDR stands for High Dynamic Range. Its a way to get more shadow and highlight details in your photographs that comes closer to what the human eye sees. Its been around for a while and used heavily by photographers to bring out cloud details in the sky, details in the inside of buildings and through the windows at the same time, and also used for surrealistic photographs that work well with textures and reflections.
To achieve this effect, multiple images are photographed and then merged together in Photoshop. The final step is to “tone map”, which is where you either go realistic or the hyper-realistic path. If you are new to HDR an want to understand HDR, check out this free HDR and Photoshop tutorial.
In recent years, you have been able to process HDR images in Lightroom and ACR as long as they are merged in Photoshop and saved as a 32-bit Tiff file. All that has changed today! You can now process HDR images entirely in Lightroom. Lightroom has the ability to merge photographs together and tone map them all without ever leaving Lightroom.
Let’s have a look at how it works.
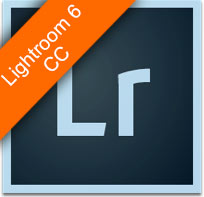
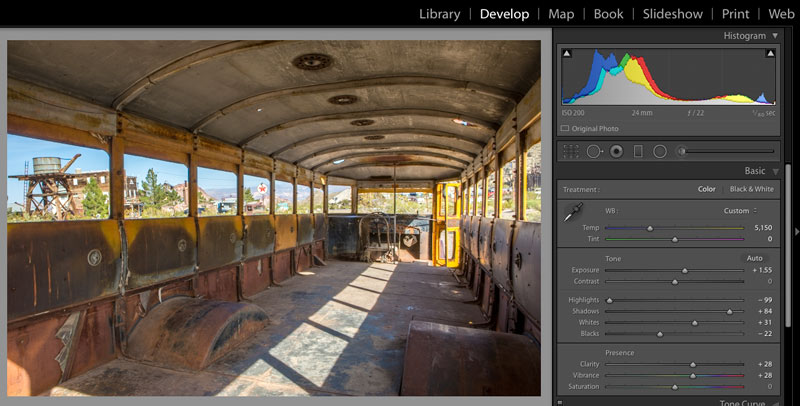
1. Here I have captured 3 images of a bus interior. The regular photo doesn’t have enough dynamic range to show all the highlight details outside the windows and the shadow details inside the bus at the same time. I shot a second image at -2EV to capture all the details in the highlights outside the windows and a 3rd capture at +2 to get all the textures on the inside of the bus.
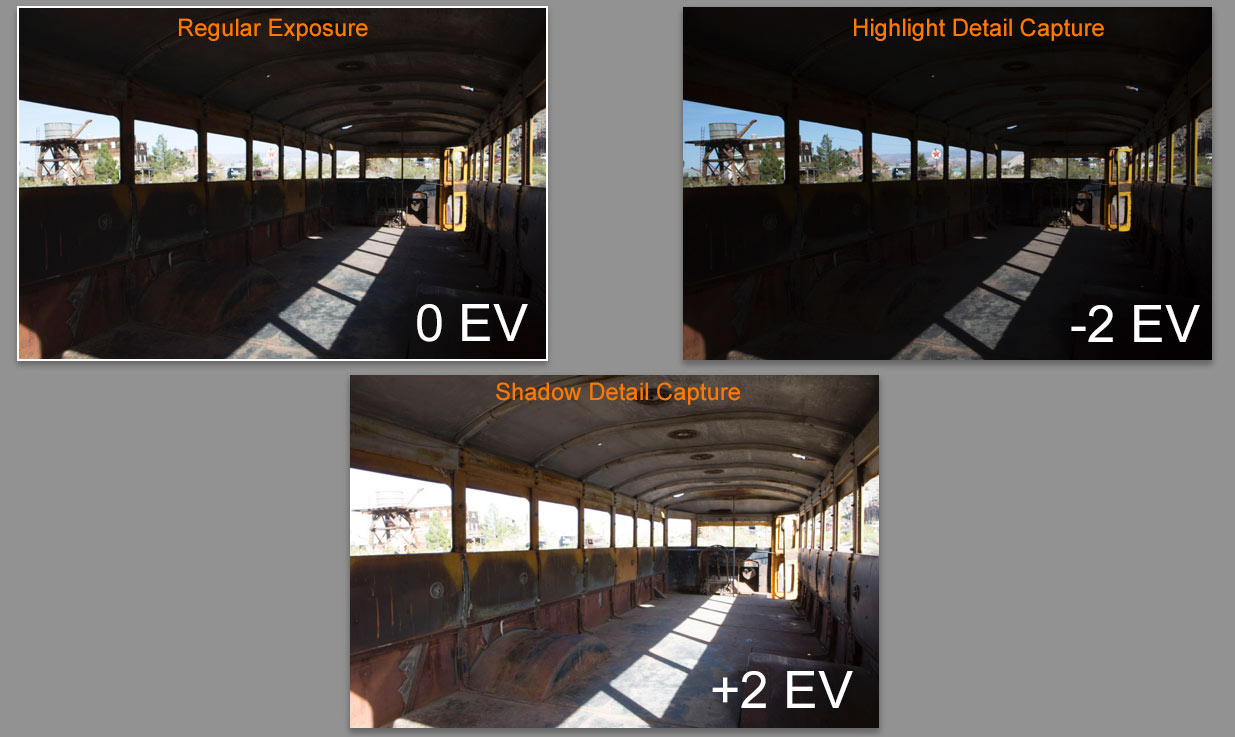
2. Select all 3 photos, then go to Photo>Photo Merge>HDR
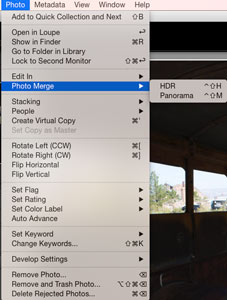
3. Lightroom creates a preview of the 3 merged files. There are 3 main options
- Auto Align: This will align the images if there was movement between shots (not on a tripod)
- Auto Tone: This button creates a balanced preview which is a good place to start
- Deghost Amount: If there is movement between the 3 captures such as people walking, leaves and water movement etc they can be repaired by choosing a level of “de-ghosting.”
4. Click Merge and the images will be merged into a new 16-bit floating point DNG file.
As you can see here the file will be called originalFileName-HDR.dng
![]()
5. Initially the image will show more detail than the original 3 images (if auto tone is on).
This is a raw file that contains all the dynamic range and information from the 3 photos (Note: It doesn’t have to be 3 images, it could be 2, 5, 7 or more. 3 is the most common)

6. Now you can process the DNG file in Lightroom just like a regular photograph, but you have a lot more information in the shadows and highlights to play with. This results in a much better looking photograph that can mimic what you saw when you took the photograph initially.
I’m very excited about this new feature because Adobe are innovating the HDR space and allowing us to do it very quickly and easily. There are times when you can still get better results in Photoshop but this is pretty amazing and it does a really nice job.
Tip: Go headless. You can choose Ctrl+Shift+H to process the HDR images in the background and skip the merge window. This allows you to continue working while all the processing goes on in the background.
Merge Panorama
Along the lines of HDR merge, is the ability to stitch panoramic photographs together from within Lightroom.
Take a camera and shoot multiple photos, panning a little bit in between to create a sweeping panorama. In this case I have shot these images from the air, using a quadcopter drone. (how to create aerial panoramas).

1. Choose Photo>Photo Merge>Panorama (Ctrl+Shift+M for headless mode)
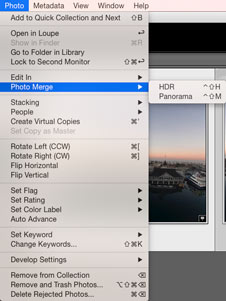
2. Lightroom stitches the images together into a preview
You can change the projection type so see different results. Auto works well most of the time.
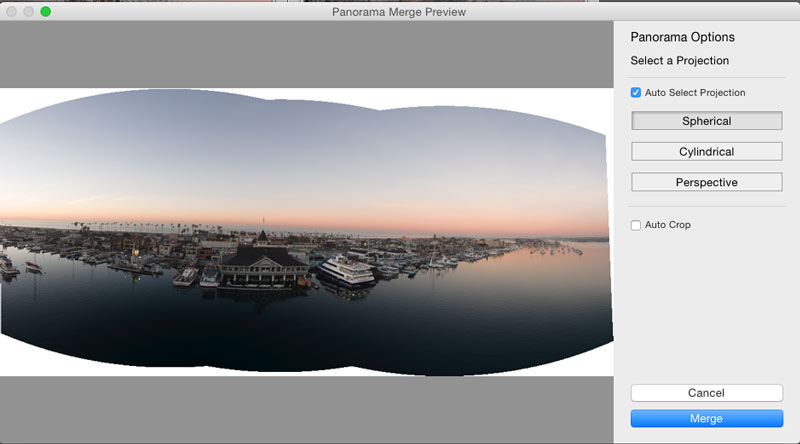
Auto Crop will hide all the transparency around the edges. Don’t worry, it’s non-destructive so you can change your mind later. Note: There is also a new auto option in the crop tool itself which does the same thing. Watch the video above to see it in action.
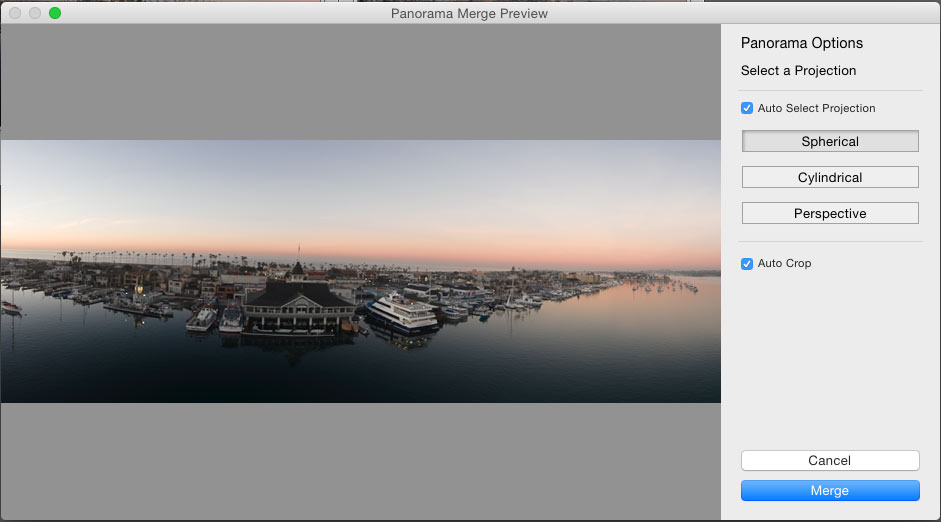
3. Click Merge to create a new DNG file of the merged images
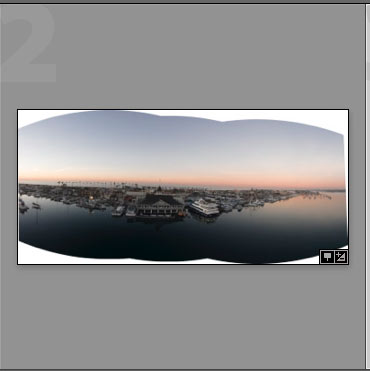
You can process the panorama just like a regular image in Lightroom to get some decent results.

For lots more free Lightroom tutorials go here.
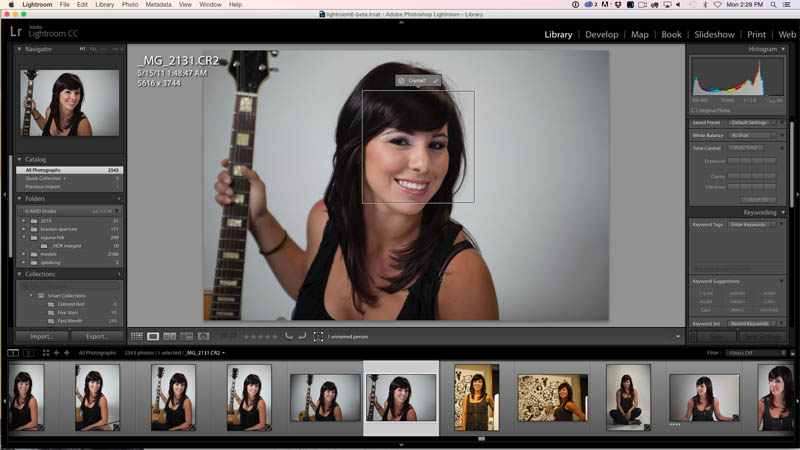
Face Tagging.
Lightroom now has the ability to sort photos based on the people in the photographs. Facial recognition is used to identify that its a face and then who that face is. As we group the faces and name them, Lightroom gets smarter.
When you first go the faces view (O key) Lightroom will ask you if you want to turn on auto face detection, which will run the process in the background while you are working, or if you want to, you can manually do it on demand. These options can always be changed by selecting or deselecting Face Detection in the Identity Plate.
When you begin, go to face view by pressing “o” on the keyboard or clicking the image of the face
![]()
Lightroom will go through your catalog looking for faces.
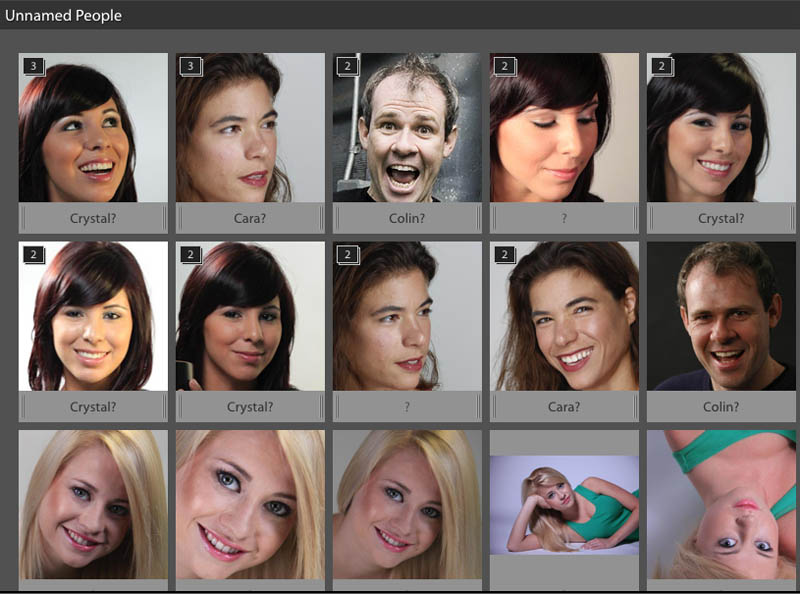
When it has found them, it will load them up into stacks under “Unnamed People”. You will initially find that there are several stacks of the same people. You will also get some “false positives” these are images that aren’t in fact people. Press the delete key to remove them from faces view, they won’t be deleted, just removed from this view.
You will now start to identify the faces. Click on the ? and type in the name. Press Shift+Enter to apply. As you start to add more names, you will see auto suggest to help you.
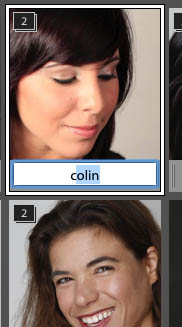
As you start to identify the faces, they will be moved into a Named People Section. You can speed up the process by dragging stacks from the unnamed into the names and they will be added to the stacks.
Tip: Ctrl+Click and drag several stacks at a time to save time.
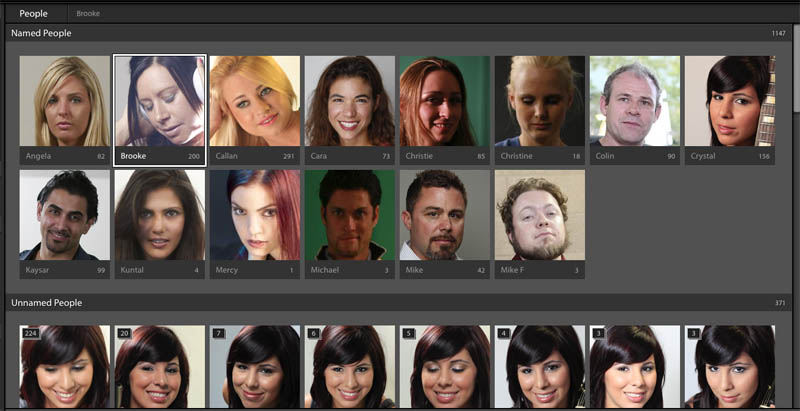
You will see that as you start to work, Lightroom will start to guess who the people are. The more you work, the smarter it gets.
When you roll over a suggestion, you can click one of the 2 options to accept or reject the suggestion. When you accept the suggestion, the image will be added to the Named faces stack.
![]()
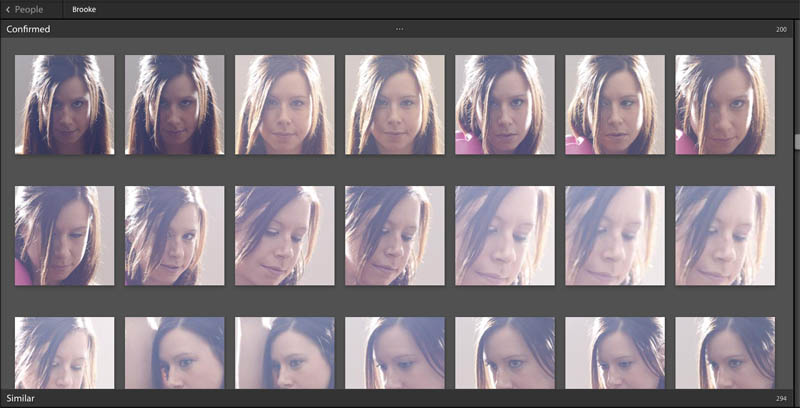
Once you have finished tagging all the images, you will need to check the stacks to make sure that it’s correct. You can double click on the stack or press S to open it. You can also long press the S key to open the stack, when you release the key, it will collapse the stack again.
Here is an example of the images inside a stack. If you scroll down to the bottom of the stack, you will see “similar” faces where Lightroom suggests other photos that might contain the Confirmed person.
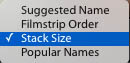
At the bottom of the faces view is a dropdown list of different ways to sort the suggested faces. This can really help speed up the process.
Just bear in mind that you are going to have to put aside a little time to set all this up as it’s not all automatic, although Lightroom will do most of the heavy lifting for you.
Manually tagging faces
You can also do manual tagging, or draw a face region in loupe view.
Click on the faces tool at the bottom of the loupe
![]()
Now Click and drag over the face to define a region. Lightroom will offer a suggestion of who it thinks the face is.
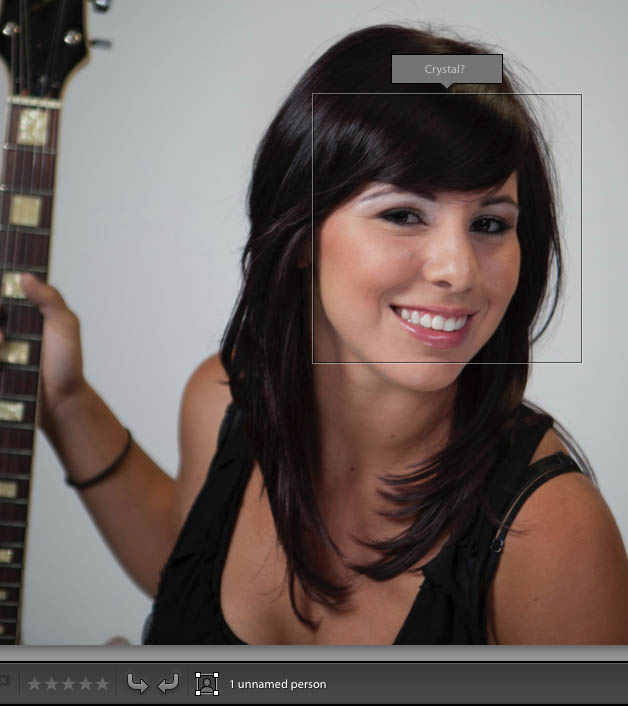
Click on the tab and click the checkmark or the no symbol and type in the correct name.
Once you have added all the tags, the overlays can be shown or hidden on the individual images by toggling the faces button. The images below show the on and the off state.
When the face tagging is turned on, you will see a box and a named label over the images as you work.

Click the icon next to the name to hide the overlay from all the photos until you enable it again.
Filter Brushes
Filter brushes have actually sneaked their way into Camera Raw a while ago, some people haven’t noticed. But they are brand new in Lightroom and they are AWESOME! (Did I mention I like them?) What are they? They are the ability to paint on masks created by gradient and Radial filters.
In this example (Balboa, CA), we would like to drop the exposure in the sky to bring back some contrast and color.

So, we apply the gradient filter with the exposure turned down. The sky looks good, but it also darkens the buildings.

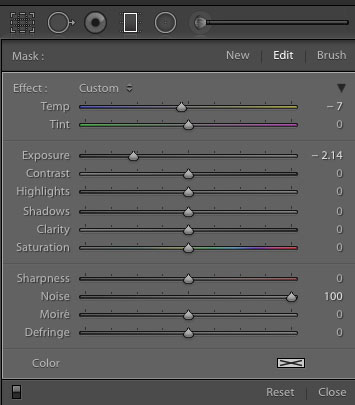
If you look in the Gradient panel, you will notice a new option at the end. Brush!
Click on Brush, you can add to the filter, or paint it away where you don’t want an adjustment. Hold down the alt/Option key to paint away.
Quickly paint away the areas that you want to revert to before the gradient. I ran the brush across all the buildings and then turned on Auto Mask for the tower in the center.

And the result. The sky is darker without darkening the buildings.
This same option is also available for the Radial Filter. Because of the GPU acceleration, the performance of this tool is decent too.
Activity center
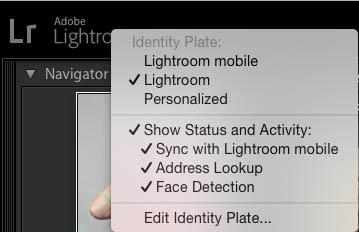
In nice addition is adding functionality to the Identity plate. There are actually 3 different plates you can choose now.
Lightroom Mobile

Personalized

Lightroom Standard

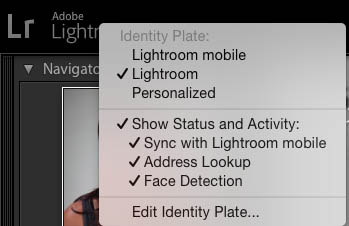
If you right click on the ID plate, you will see the option to change the plate.
You will also see checkboxes where you can control the sync of different features.
- Lightroom Mobile
- Address Lookup (For the maps module)
- Face Detection (Background scanning of faces)
If you click on the plate you will see the new Activity Center that shows various status updates including a task bar in dark gray indicating the progress of each background task.
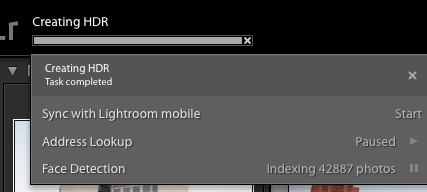
Performance
A big unsung hero of Lightroom 6 / Lightroom CC is the performance. Speeds have been increased across the board. You will particularly notice it with tasks like importing to a catalog, Thumbnail loading and exporting which can now export 3 files at a time.
GPU support is now added and it smoothens the workflow with things like the adjustment brush. GPU also helps with:
- Adjustments with the sliders, almost no lag anymore
- Better display on high resolution screens such as Apple 5K
Other things
I hate to call these smaller things because they are very important, but here are some additional new features.
Touch enabled PCs (AKA Surface 3 Tablets)
For those of you with a Microsoft Surface Pro (anyone at Adobe MAX last year?) or similar I have good news for you. This could be your favorite feature of all. Lightroom now has touch capabilities. I remember trying to do something in Lightroom 5 with a Surface and it was a total disaster. But, those days are now gone, you can scroll your way through different panels etc. But it gets better, MUCH better! If you have a touch device, you will see a button for a touch workspace. Enter this workspace and it looks and works very much like on Lightroom mobile. Now that’s slick thinking. (Stay tuned for a free tutorial on this soon).
Import Directly to a Collection
You can choose a collection from the Import Dialog box and automatically add your photos to an existing (Or create a new) collection while you are importing images. I find this very useful because I always add to a collection and having to constantly choose “Previous Import” and then add them to a collection manually slows down importing from multiple SD cards.
Auto Preview size
There is a new Auto setting for preview, that will crete a preview at the maximum size of your monitor. This increases efficiency because no unneeded pixels are generated. (This doesn’t matter if your monitor is over 2880 pixels across, which is the maximum size from Auto Previews.)
Keywords added to Painter tool
The painter tool is really useful for quickly working with metadata across multiple images. You can now choose existing keyword sets and create new ones to quickly add them to the images. I go into this in Depth on the Lightroom 6 For Digital Photographers training videos.
Easy Preference Reset
Following suit from Photoshop, you can now reset Lightroom’s preferences by holding down the Alt/Option+Shift on Launch (Photoshop is Ctrl/Cmd+Alt/Option+Shift)
Pet Eye
For animal photographers, another option is added to red eye reduction, it’s called pet eye. This will not only get rid of the demonic glow, it will allow you to add a custom catchlight to add some life.
Slideshow
If you are a Slideshow user, you now have a couple of highly requested options.
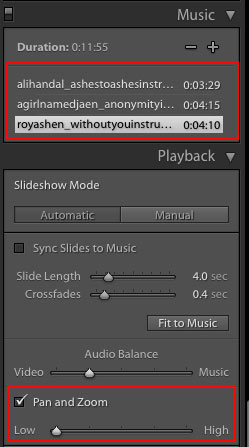
First up, you can now load in Multiple audio tracks (up to 10). Have the slides timed to the music if you like. A really interesting option is Sync Slides to Music. This option tries to make the slides fit the timing of the music and transition to the beat and it’s actually quite accurate.
Control pan/zoom
Yep, here it is, the Ken Burns Effect. You can have the images in the slideshow pan and zoom (move). If the slider is set to low, the image won’t be zoomed so much and the movement will be slow. If you push it to High, then the zooming and panning will be exaggerated and fast.
Web module
Gone are the Flash Galleries! Poof! Bye Flash! There are some nice, shiny, new HTML 5 galleries.
Lightroom Mobile
Lightroom Mobile, isn’t new, but it has some nice integration into Lightroom CC.
First of all, you can choose the Lightroom Mobile Identity plate (See section on activity Center for more info). Make sure that syncing is turned on by right clicking on the Identity plate.
When you are synching with a collection from a mobile phone or tablet, you will see something like this in the Collections.

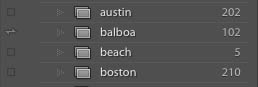
You can have a Lightroom mobile collection if you like, but you aren’t limited to that. You can actually make any collection sync with Lightroom mobile. You will see some little squares to the left of your collections.
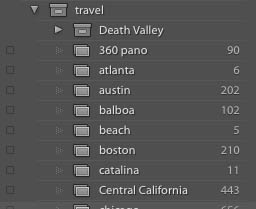
Click inside any of the boxes to activate a little sync arrow. Once you see that arrow the collection will automatically sync with your mobile device and share photos with it. (Once you have downloaded the free Lightroom Mobile app from the iTunes or Android store).
If you make any adjustments on the mobile device, they will update in Lightroom and vice versa. You can change things like develop settings, flags, stars and ratings and even some presets. These will all sync between your desktop and your mobile version of Lightroom.
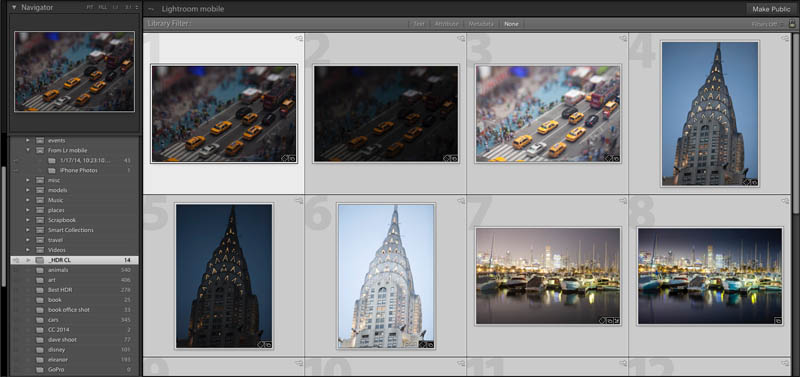
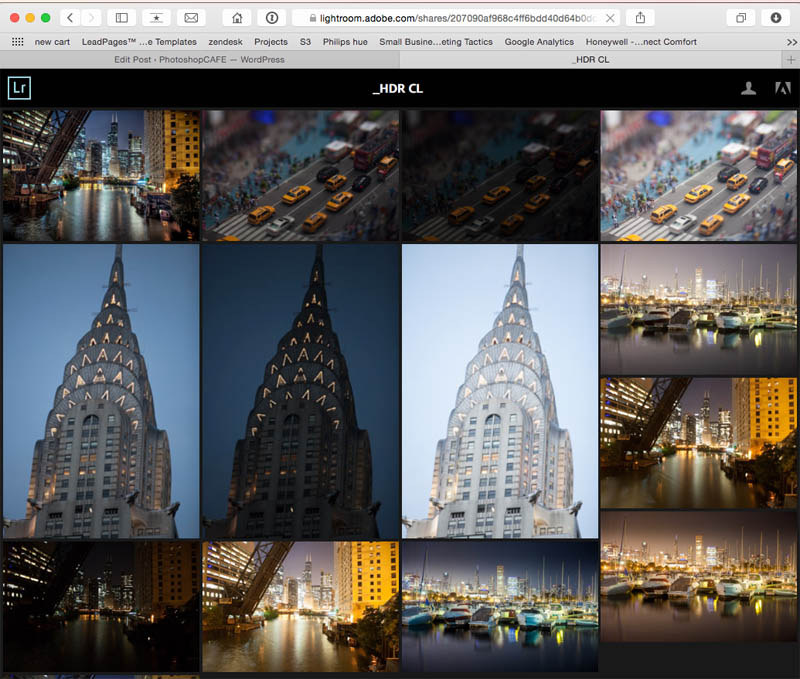
In the upper right corner, you will see an option that says Make Public. This is a great option that will build a secret website with the photos on it. A link will be generated and you can share it with anyone you like. They can go to the URL and view all the images. They can also like and comment on the images. Imagine how event photographers for example can have brides and grooms select the images that they want printed from the comfort of their own home.
![]()
A private URL is generated that you can share, or click on to visit the site yourself.
![]()
The page will load up in a standard web browser, where the visitor can click on any of the images to see it full size.
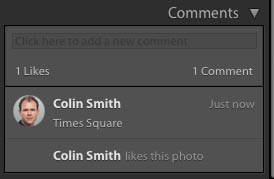
Once you are looking at an individual image, there are some options. The lower left shows like and comment tags. Nothing has been added to this image yet.
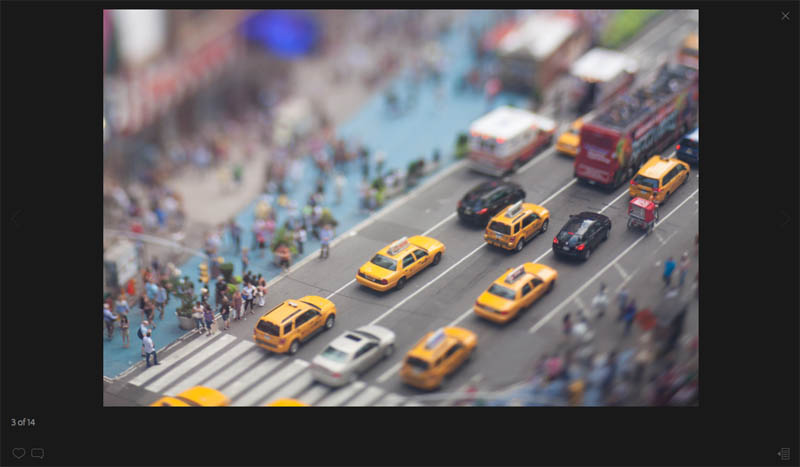
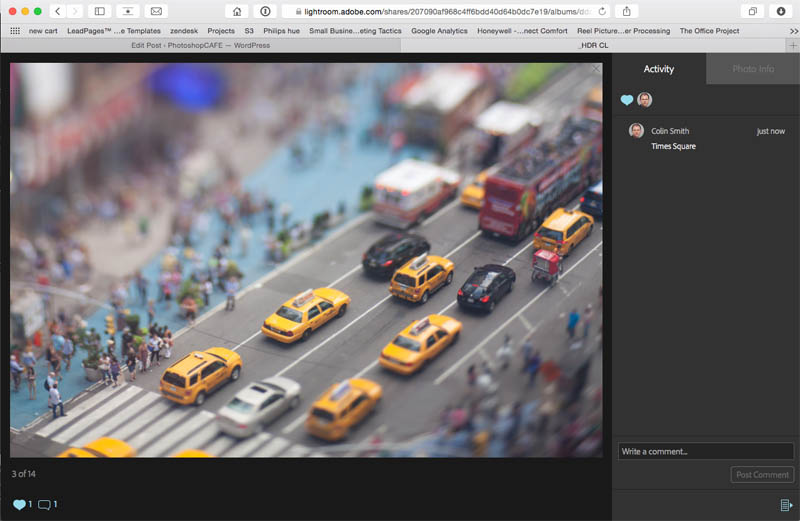
Also, notice in the lower right corner, there is an option to expand and see the commenting pane. Click the button and see what happens.

If you want to add a like or add a comment, you will need to log in. The browser uses your Creative Cloud account, so if you are already logged into CC, you can just go ahead and comment, otherwise you will need to add your username and password. If your visitor wants to add a comment, they can sign up for a free account right on the page. Anyone can view the images without an account. But they will need to create an account to add comments.
When you are back in Lightroom, you will see a little yellow tag on the bottom right corner to indicate a comment has been left.
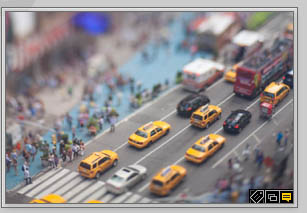
Double click the yellow tag or go to the comments pane in the Library module where you can see all the likes and comments. You can add your own comments here and they will be synced with the website and the Lightroom mobile app. Yes, that’s right, the app can also display the comments.
In a large nutshell, that’s what’s new in Lightroom. For lots more Lightroom resources and free tutorials go here. I think with the HDR, Panorama and face tagging, this is a pretty decent upgrade as these are pretty big features to integrate, such as the facial recognition. We will be adding new Lightroom tutorials and digging deeper into different parts of the application as well as announcing new features to this page.
© All images and text Colin Smith | photoshopcafe.com
|
We also have a course for the latest Lightroom Classic
See previous Lightroom content
Lightroom 2: filter bar
Lightroom 3: Tethering, connect to social networks, importer, smart collections
Lightroom 4 mapping, develop settings, video, books, soft proof
Lightroom 5 Launch site
free Lightroom resources
Learn Lightroom in 15 minutes!
PS Don’t forget to follow us on Social Media for more tips.. (I've been posting some fun Instagram and Facebook Stories lately)
You can get my free Layer Blending modes ebook along with dozens of exclusive Photoshop Goodies here

3 big features of Generative Remove in Lightroom and ACR ai.