
How to Photoshop a person into a photo, complete, easy, free Photoshop tutorial
How to Photoshop a Person into a Photo
How to put a person into a photo in Photoshop 2022. Colin Smith shows you how to place a person onto a different background. In this easy photoshop compositing tutorial learn how to cut out a person, combine images, match the colors and add shadows in Photoshop.
In this Photoshop tutorial we will put a person into a photo.
This is a simple tutorial, but it will touch on everything you need to know to convincingly put a person into a photo. This tutorial is created for the newest versions of Photoshop, but it will work on all versions.
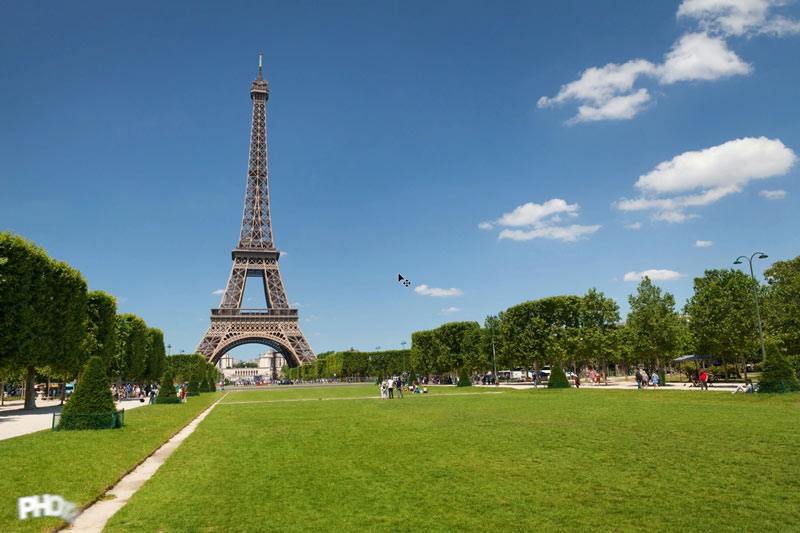
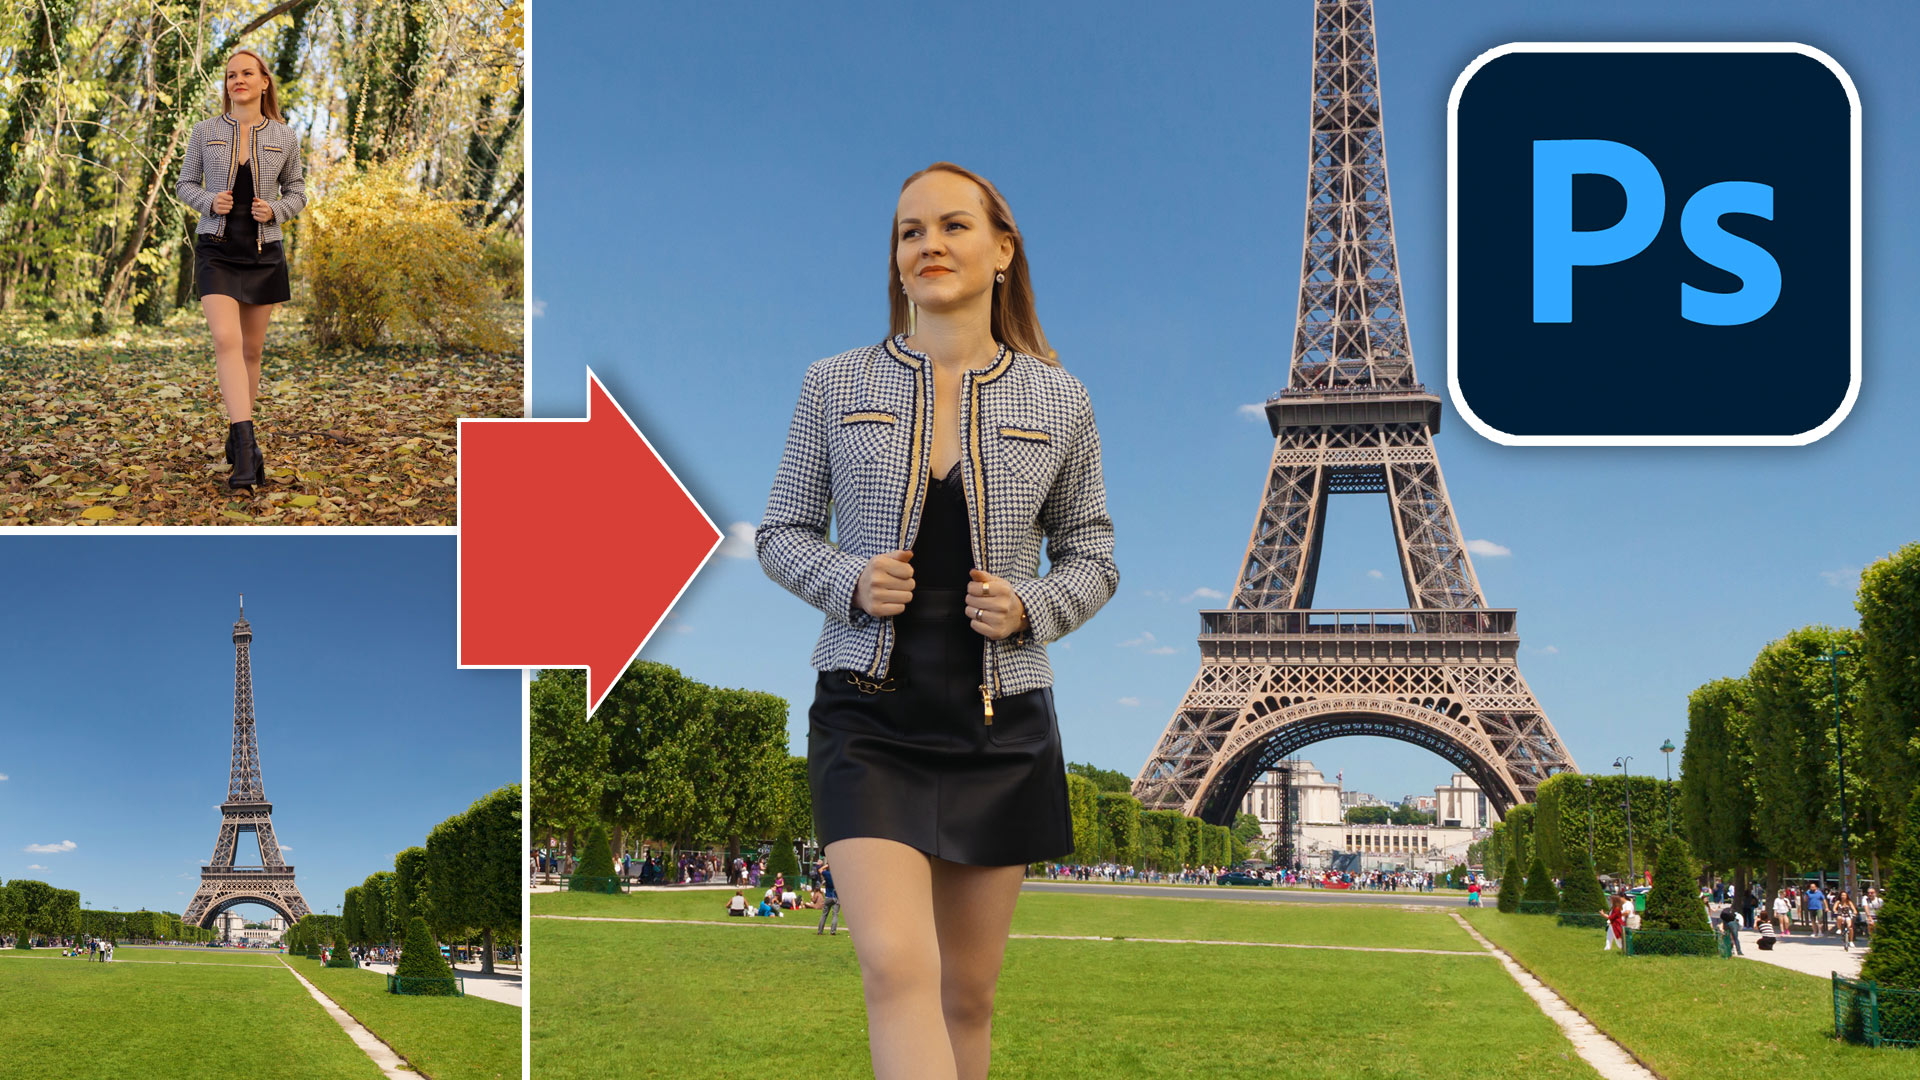
Here we have the Eiffel Tower and we want add add a person as if they were there.

There are a few key steps to this tutorial. Watch the quick video above to see all the steps in action.
Step 1: Cut out a person in Photoshop
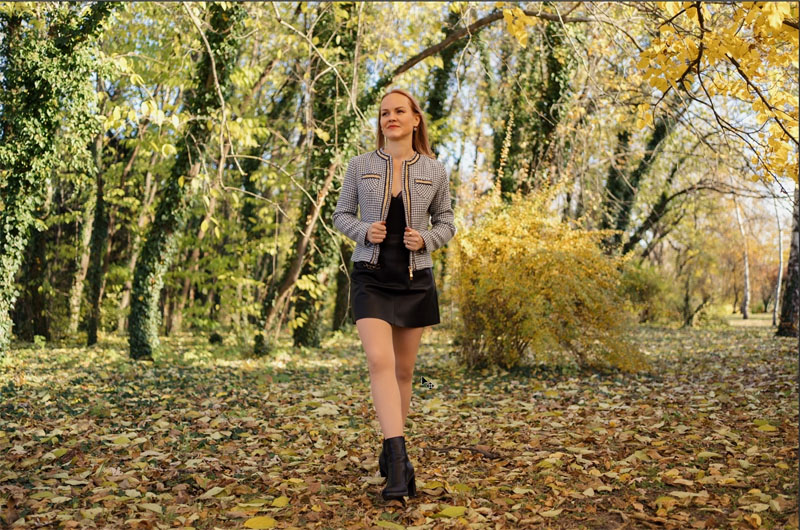
Use a photo of the person you want to transport into the new photo.
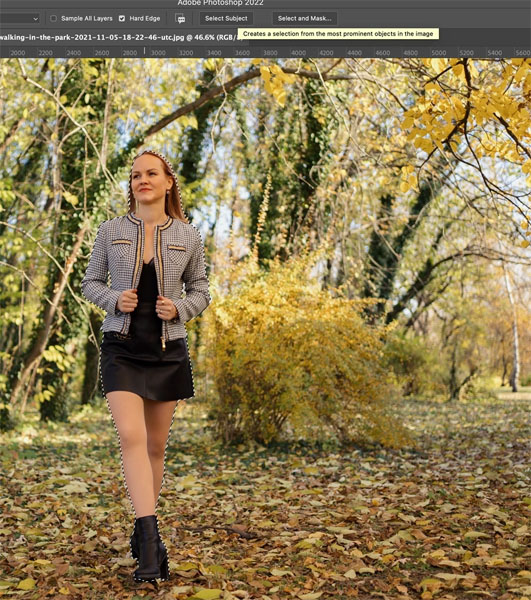
Choose the object selection tool in newer versions of Photoshop. For older versions, use the quick selection to cut out the person.
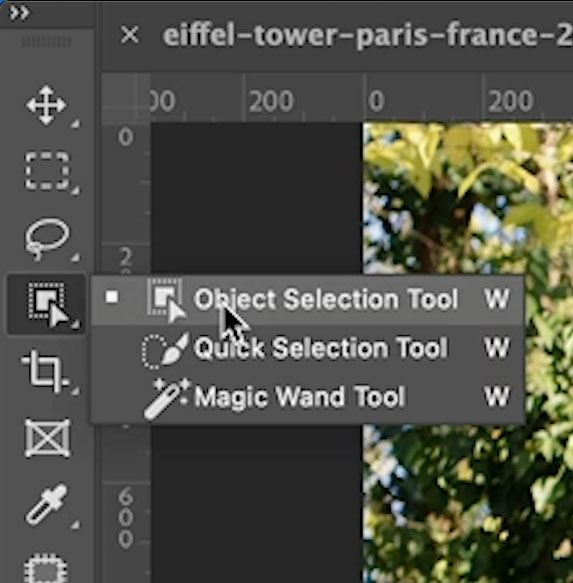
Choose Select Subject at the top

You will see a selection around the person (CS6, make the selection with quick selection tool).
Refining the selection
Click Select and Mask from the top. This is where we make the selection edges better.
Set the radius to 1 to get started.

If you see jaggy edges where it should be smooth, add some feather and contrast to smoothen it out.
If there are no jaggy edges skip this step.

Choose the refine brush for the left.

Use the refine brush on the edges to make them better. Here is a tutorial and tips on the refine brush.

Turn on Decontaminate Colors and choose “New Layer with Layer Mask” from Output.
Click ok

Step 2: Combining Photos in Photoshop
You will now see our image with the background removed. This layer is in a layer mask. We need to combine this photo with the new background.
Choose the move tool active (V key)

Click down and hold, drag the photo up to the tab of the image we are moving the photo into. Wait for the image to open, don’t let go yet. This tutorial shows the basics of combining photos.

Drag your cursor into the middle of the photo and let go.
You will now have 2 layers. We need to make the new layer match the background.
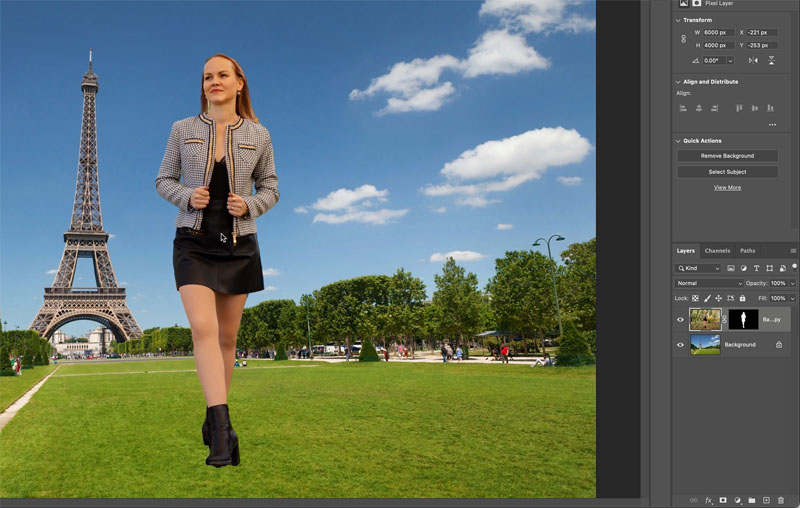
Step 3: Matching the lighting of the layers
Notice the angle of the sun on the background photo.
It’s going he opposite direction on the person.

Let’s flip the person and change the size.
Press Cmd/Ctrl+T for Free transform.
Choose Flip Horizontal.

This will flip the person to the opposite direction, so that the light is coming from the correct side.
Let’s make her smaller. With Free Transform still active, zoom out on the image until you can see the transform handles. (Alt/Option + scroll wheel on mouse).

Drag the corner handle to make the person smaller. When you are happy with the size and position, press Enter to apply the transformation.

Step 4 Matching Colors between person and background
Currently the color tones and saturation are different from the person from the new background. Let’s fix this now.
Make sure the persons layer is the currently active layer.
In Photoshop 2022 and newer choose Filter>Neural Filters
In earlier versions use Image>Adjustments>Match Color
Choose the Harmonization option, by clicking the slider in Photoshop 2022 and newer.

Click Select a Layer
Choose the background

You will see the color of the person change to match the background.

Sometimes the effect is too strong. Adjust the Strength and Brightness, until the images looks good.

Click ok the apply. You will have a new layer on top.

Adding a matching Shadow in Photoshop
Currently the person looks like they are just floating in space. An important (and often overlooked) step is to add a cast shadow. This shadow does magic, in making it look like the person in the photo is really there and not just stuck in the photo.
Choose FX and Drop Shadow.

Change the Size of the shadow to change its softness.
Click ok

To separate the shadow out as its own layer, right-click on the word FX in the layers Panel.
Choose Create Layer

Now you will get a separate layer that can be manipulated.
Make sure the Shadow layer is selected
Lets shape it

Choose Ctrl/Cmd+T for Free Transform, as we did earlier in this tutorial.

Drag down on the bounding box to make the shadow short, so it looks like it matches the photo.

Right-Click and choose Skew.

Drag the top of the shadow to set the angle.
The shadow always goes on the opposite side of the light source. If its mid-day like this photo, the shadow should be short. If its earlier or later in the day, the shadow will be linger, this is demonstrated in the video at the top of the page. For more on creating shadows in Photoshop see this tutorial on casting shadows.
Press ok to apply.

If you need to soften the edges of the shadow more, choose filter>Blur>Gaussian Blur.

The final step is lowering the opacity of the shadow to match the image,
With the shadow layer selected, adjust the opacity. 63% works nicely here.

Here is our result. You can apply these steps for any photo, tp put yourself into a scene anywhere you like. I focused more on showing you the specific steps to combine images that trying to get this one perfect, these are the generic steps that will work on any composite. I have many more tutorials here that will help you learn how to composite in Photoshop, as well as these 2 course. Sky City Project, and Compositing secrets in Photoshop.
I hope you enjoyed this Photoshop tutorial. Check out more tutorials here at PhotoshopCAFE.
As always, It’s great to have you here at the CAFE!
Colin
PS Don’t forget to follow us on Social Media for more tips.. (I've been posting some fun Instagram and Facebook Stories lately)
You can get my free Layer Blending modes ebook along with dozens of exclusive Photoshop Goodies here

18 thoughts on “How to Photoshop a person into a photo, complete, easy, free Photoshop tutorial”
Leave a Reply
New Adjust Color in Photoshop makes it easy to change colors and to make certain colors pop in a photo

How to make a duotone image in Photoshop. Graphic Designers can use this guide to make prints, photographers can use...
More collaging techniques for Photoshop, using channels and layers.This is a bit more in depth than some of the other...


Love the “jaggy edges”. You can take the boy out of Glasgow…!
Great little tutorial. Sadly, I have not been using the drop down menu. This was a reminder to use them.
I had was missing you in this holiday and welcome back Mr colin Smith.
We have also reported back to university here in Uganda in fact, we started on 3rd of Jan.
Thanks for not getting tired while sending me your emails. I hope to learn more about photoshop from you.
I think it is great that you provide written instructions. It is very difficult to watch a video and reproduce the steps.
Brilliant Colin, thank you and so easy !
Thank you Colin. What a difference all those little touches will make on my selections! Much appreciated.
Clear, concise instructions. Can’t wait to try them. Thank you!
Hi Colin,
Thank you for your videos. i am using the latest PS version (Adobe Photoshop Version: 22.5.4 20211208.r.631 a0cb269 x64} and it does not have the “Harmonization” Filter….Can you tell me why?
Thank you in advance
Thanks Colin. Easy, but helpful
Thank you, Colin, I do so like these simple videos as an elderly person and slower than the young ones they are very helpful to me.
I really appreciate your teaching style, clarity, encouragement and humor!
I feel very fortunate to be a member of the Photoshop Cafe!
THANK YOU!
Great! Very easy to follow.
Thank you very much as I am learning to compose composites these days…perfect timing.
How do I cut out a face and put it over a face say as in the last supper?
Use lasso and feather to cut out the face and then drop it into new image
Thank you Colin a very easy and simple method to follow. Nice pace to the video instructions. The written instructions are a nice bonus touch.
Glad to help
Great tutorial! I really appreciate the step-by-step instructions, especially the tips on blending and shadows. Can’t wait to try this out and see how my edits turn out! Thanks, PhotoshopCAFE!