
How to Extend a Video in Photoshop with Generative Fill, ai Cinemagraph
This tutorial shows you how to extend a video to change its shape with Generative Fill in Photoshop.
Most video are horizontal. Sometimes you want to change a horizontal video to vertical or to square for social media such as Instagram reel, Youtube shorts or tie Tok. Or maybe you just want to recompose a video and need to extend the edges. Here is how.
On the left is before, on the right is after. Its generative fill, but this is working on a video in Photoshop.


Choose file>Open and choose your video, it will open in Photoshop and the timeline will appear. (Not all video formats are supported, but .mov H.264 is the most commonly used and supported format.)
For more on Photoshop and video check out this tutorial

If you look in the layers panel, you will see a video group. Everything in this video group will be on a single layer on the timeline. You will see why you need to know this soon.

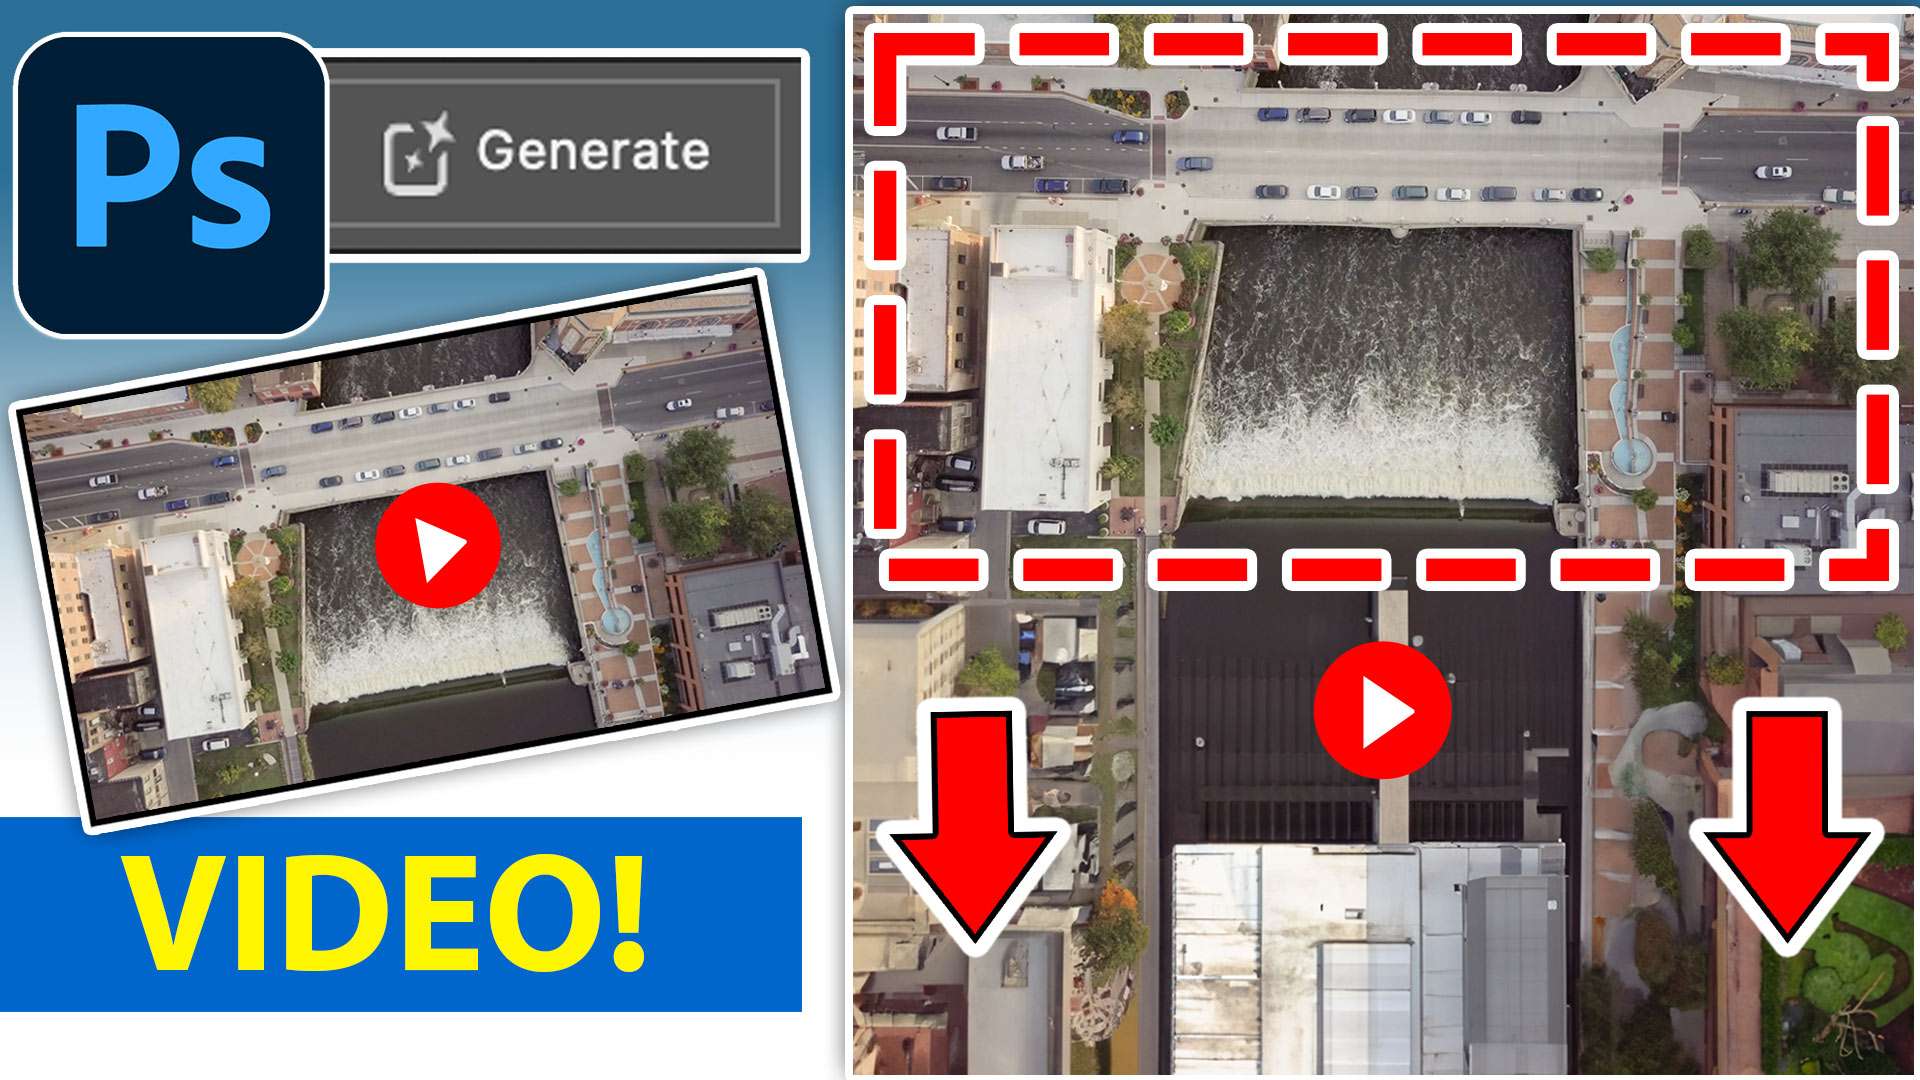
Lets extend the canvas.
Choose the crop tool

Drag out the crop to extend the top or bottom. Tip: Find an edge that doesn’t have movement, or shoot a photo that only has movement in the middle. This technique won’t work properly on a video that has edge to edge movement.

Press enter to apply the crop. We have a 1:1 square crop here.

Grab the rectangular marquee selection tool

Drag over the blank area, making sure to overlap the existing pixels a little bit.

Choose Generative fill

Enter text for what you want to fill the blank layer with and then press generate

Because we are in the Video group in the layers panel, you will notice the generated layer (in purple) is added at the end of the timeline, rather than stacked on top of the video

Grab the Generated layer and drag it above the Video group in the Layers panel.


Drag the clip to the beginning of the timeline.

Drag the end of the generated layer in the timeline, so it’s the same duration as the video.

You can see its now extended.
Choose your favorite out of the variations (How to use Generative Fill in Photoshop)

Press the spacebar for the video to play. Notice how convincing this is. We have essentially created a Cinemagraph

Exporting the video
Once you have created this, you can save it as a PSD and everything will be as it was when you reopen the file. To share or distribute the result, it needs to be encoded as a video.
In Photoshop choose File>Export>Render Video
Use the default format or H.264
If you use the high quality preset, the video will render using the current dimensions.

You can choose different options from presets if you want to share the video on a specific platform, as it contains YouTube presets and more.
To learn more about video in Photoshop, I have created 2 courses
Video In Photoshop (Also available as a book from Peachpit press, authored by myself, Colin Smith)

Check out the video above to see this in action.
I hope you found this tutorial helpful, browse 100s more here at the CAFE
See ya,
Colin
Also follow me on Instagram, Tik Tik and Twitter. for shorts and reels.
My new course on Generative Fill in Photoshop: https://photoshopcafe.com/shop/generative-fill-in-photoshop-introduction-course/

PS Don’t forget to follow us on Social Media for more tips.. (I've been posting some fun Instagram and Facebook Stories lately)
You can get my free Layer Blending modes ebook along with dozens of exclusive Photoshop Goodies here


The DJI Mavic 2 Pro and Mavic 2 Zoom have been announced this morning. A big feature is hyper lapse,...

How to turn a photo into a comic book effect. Learn how to make a Cartoon from a photo in...

Learn how this mermaid composite was made. By combining photographs, 3D and Photoshop, you can create CG composites that defy...


