
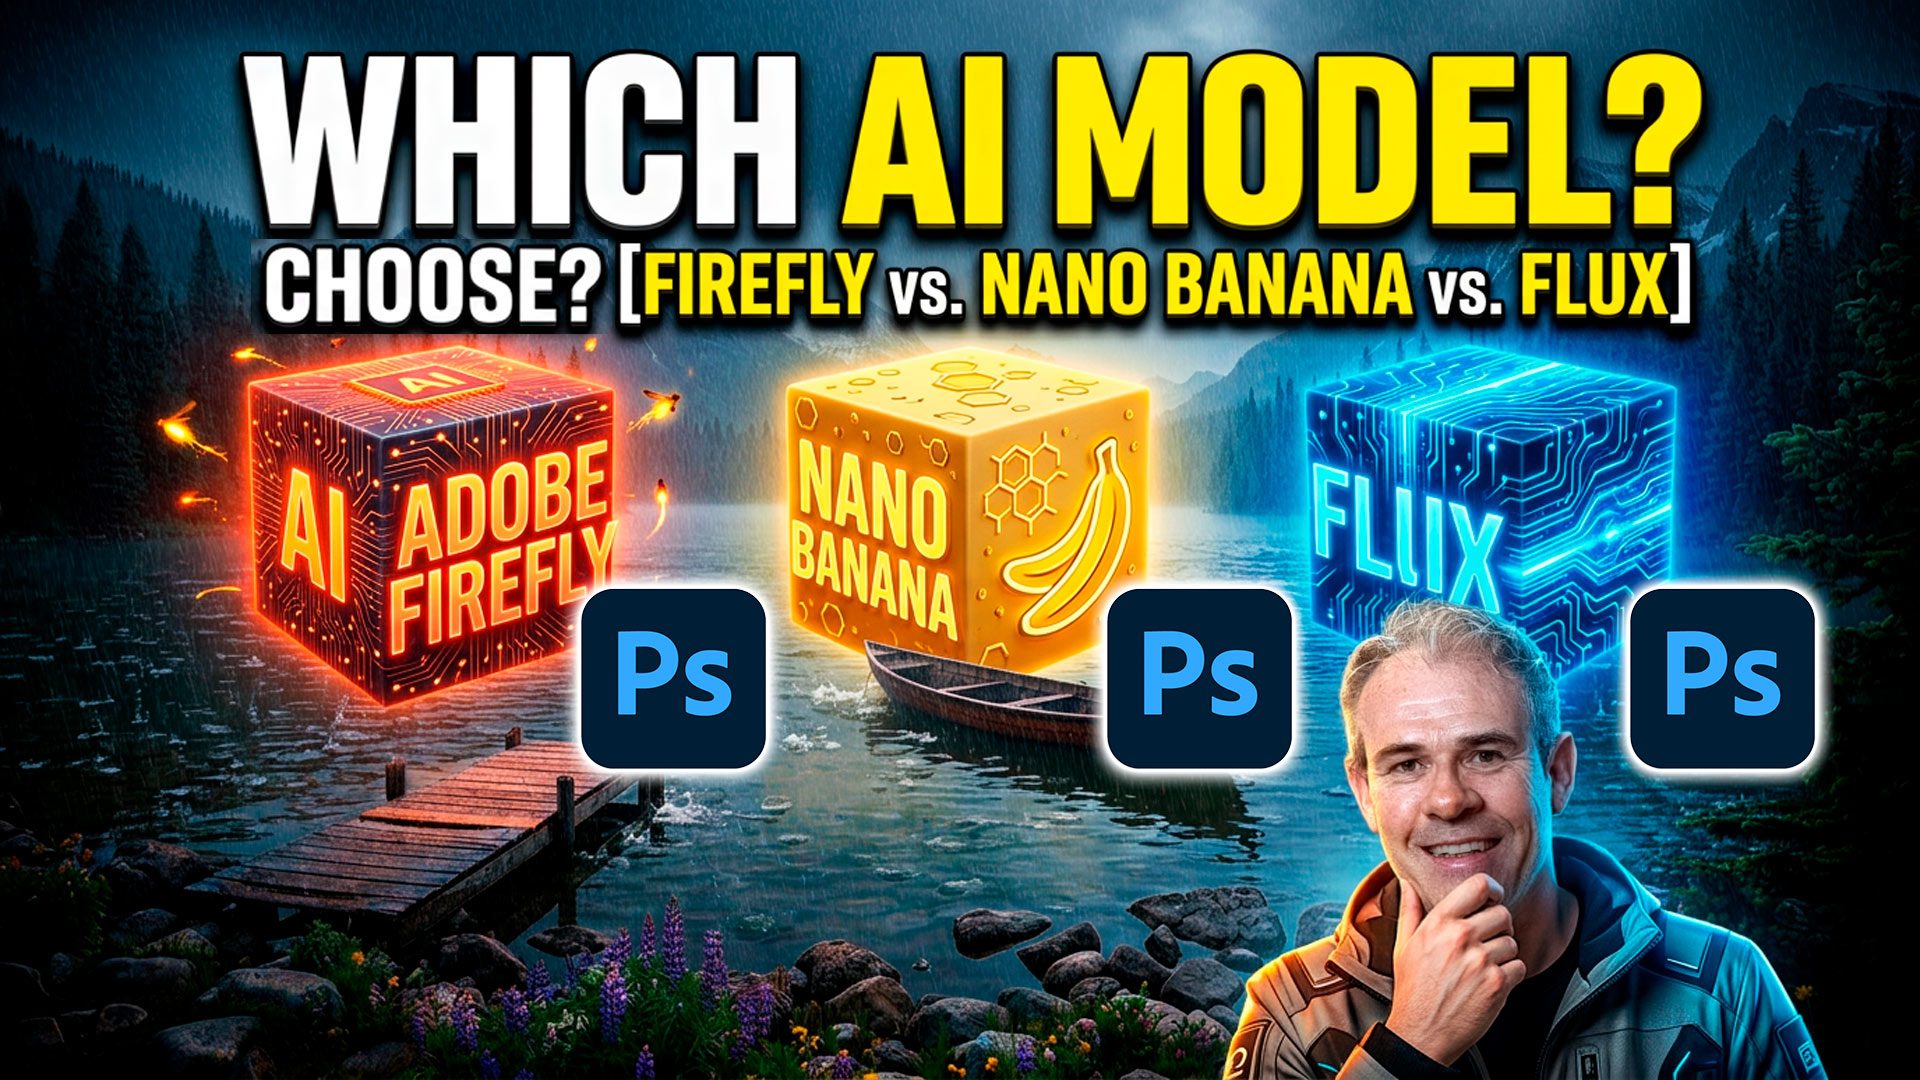
How to choose the best Generative ai Model in Photoshop
Stop wasting Generative Credits and use the correct Model in Photoshop the first time
Here is a simple guide for the different Photoshop ai models. I think you’ll find it very helpful. Before you Generate, you might see all these different ai Models and wonder which one to choose.
I spent a lot of time (and Generative Credits) testing all the different models and I have broken it down to some simple choices. It turns out, there isn’t a best model. There are best choices, for different tasks. Let’s see what the best model is for what you need to generate or edit.
Accessing the Ai Models in Photoshop
There are 2 different types of Generative ai models. There are Generating Models and there are editing models. The latter have the ability to edit an image without making specific selections.
Let’s start a document, so I can demonstrate.
File>New choose a size. I did 1920px x 1080px which is HD size.
Select the entire document; Ctrl/Cmd+A
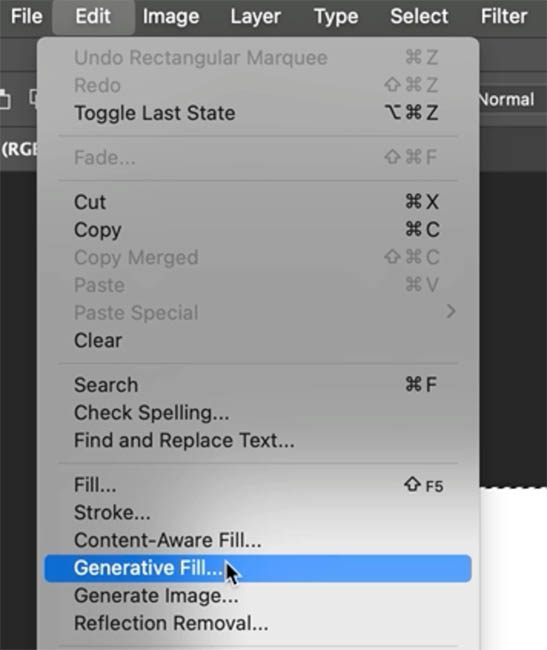
Choose Generative Fill from the Contextual Task bar. If you only see Generate Image and have no options for Models (as shown in the screen capture) do this.
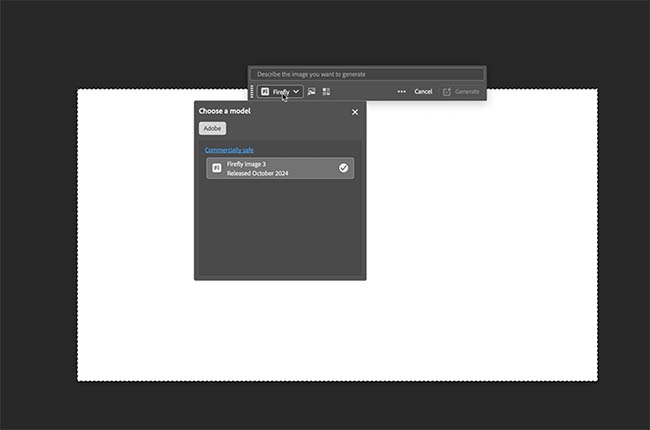
Choose Edit>Generative Fill.
This option is always available from the menu, even if you don’t see it in the Task Bar.
You will see a button at the bottom that allows you to choose the model. A model is the specific ai tool that you will use.
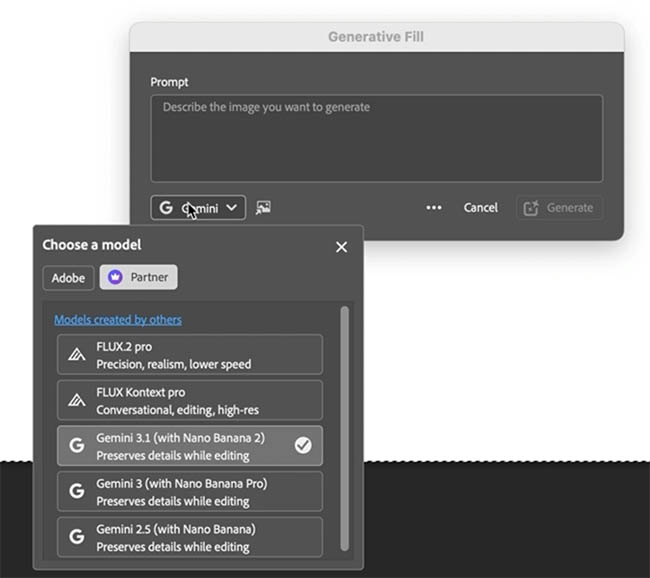
There are 2 categories of Models, Adobe and Partner Models. Grab the free Cheat Sheet to learn about the different models here.
Partner Models
The current partner models are developed and maintained by 2 companies outside of Adobe. (This could fluctuate over time as other companies and models may be added or removed). Here is a super high-level breakdown.
Gemini, aka Nano Banana made by Google
Flux made by Black Forest Labs.
We can simplify these even more.
Nano Banana. Only use Gemini 3.1 (Nano Banana 2). Gemini 2.5 is old and obsolete. Gemini 3 Nano banana Pro is lower resolution (inside Photoshop), so it won’t produce as high quality results.
Nano Banana 2 is a hybrid model, which generates and edits well.
Flux: Flux.2 pro is best for generating from scratch. Flux Kontext Pro is best as an editing model.
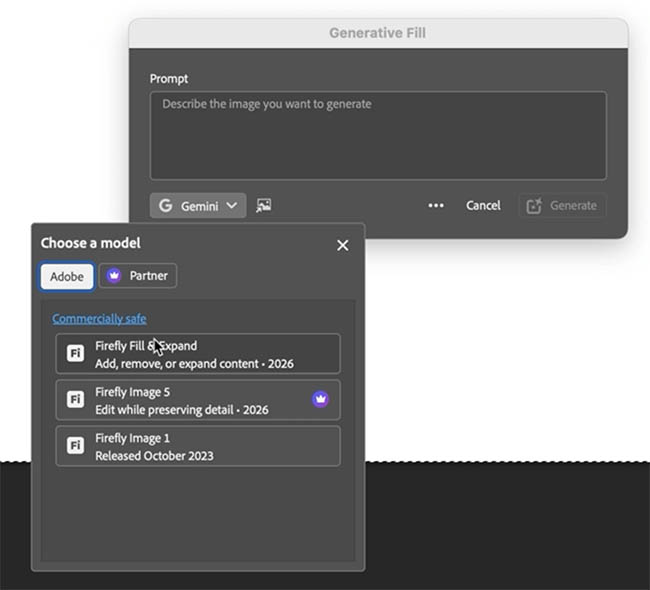
Adobe Firefly
If we click on the Adobe tab, we will see 3 models.
Ignore Firefly image 1 unless everything else fails and use it as a fallback. It’s old and doesn’t work well.
Use Firefly Fill and expand for extending the size of your canvas, or in-painting – Generative Fill (replacing or adding something within a selection).
Use Firefly Image 5 for generating from scratch or editing (It’s Adobe’s first editing model and surprisingly good).
Ok, we have now narrowed it down to 3 usable partner models and 2 Adobe ones. Let’s test them out.
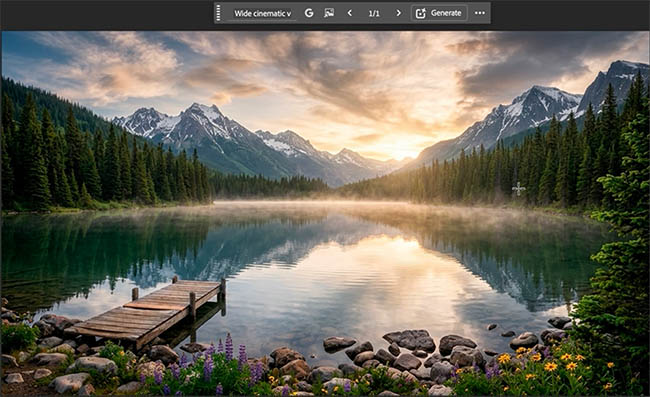
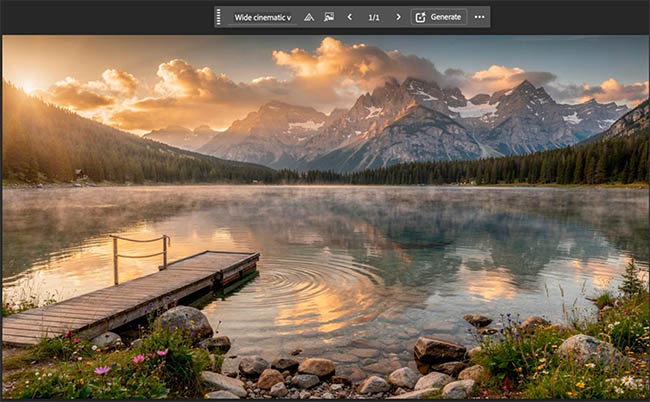
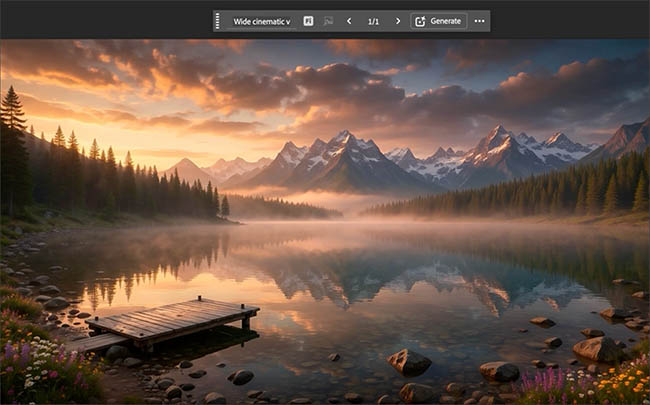
We will add a prompt and try the 3 generative models. Nano Banana 2, Flux2. pro and Firefly Image 5.
If you want to try this at home, here is the complete prompt I used:
Wide cinematic view of a peaceful alpine lake at sunrise, crystal clear water reflecting towering snow-capped mountains and dense pine forests, soft golden morning light, light mist drifting across the water, small wooden dock in the foreground, wildflowers and smooth rocks along the shoreline, ultra-detailed nature photography, atmospheric depth, realistic textures, calm and serene mood, subtle ripples in the water, dramatic clouds catching warm sunlight, shot on a full-frame DSLR with a 24mm lens, National Geographic style, photorealistic, high dynamic range, natural colors, masterpiece composition.Wide cinematic view of a peaceful alpine lake at sunrise, crystal clear water reflecting towering snow-capped mountains and dense pine forests, soft golden morning light, light mist drifting across the water, small wooden dock in the foreground, wildflowers and smooth rocks along the shoreline, ultra-detailed nature photography, atmospheric depth, realistic textures, calm and serene mood, subtle ripples in the water, dramatic clouds catching warm sunlight, shot on a full-frame DSLR with a 24mm lens, National Geographic style, photorealistic, high dynamic range, natural colors, masterpiece composition.
Bear in mind, this test is a single image (generalization) and doesn’t reflect the full range of abilities of each model. My conclusions are based on looking at many images, not just the ones shown here.
The first result is Nano Banana 2. It generates with very detailed and dynamic results. It can be a bit over the top and unnatural at times.
Flux2. pro usually generates the most photographic looking results.
Firefly image 5 produced a more painterly, but detailed result for this example.
Note that none of these results are wrong, they are different and depending on the type of result you are looking for, choose the best model.
If it were shootout, I would choose Nano Banana 2 as the winner for this.
Generative Fill AKA In-painting
For the next test, let’s try in-painting, which is making a selection and changing or inserting an object.
Pro TIP: Don’t use Generative Fill for removing, because there are ai removal tools in Photoshop that work well without the cost of Generative Credits. (the exception is clicking the remove button in Gen fill which doesn’t consume credits either).
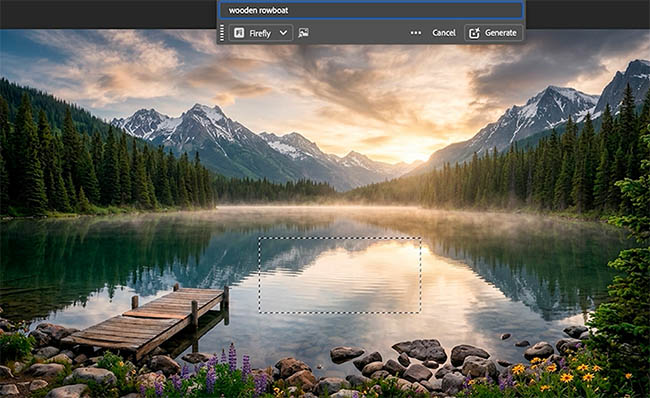
Let’s make a selection with the rectangular marquee tool. (you could use any selection tool including the selection brush for this task).
Click Generative Fill, Type in Wooden Rowboat as the prompt
For model, use Adobe Firefly and the model to use for this type of task is Firefly Fill and Expand.
In firefly Fill and Expand we get a great result, including realistic reflections. There are 3 variations and all worked well.

When you use a Partner model, (Nano Banana 2) there is mismatching around the edges in Nano Banana and Flux can’t do this at all. Only Firefly Fill and expand can do this correctly.
If you want to use Nano Banana 2 there are some options:
- Make a perfectly square selection, so that the proportions aren’t stretched.
- Generate with lots of space, so you can blend in the edges with a mask.
- You can select the entire image and ask it add an object without a local selection (It will still be squished if it’s not square). This will regenerate the entire image though, so you will lose any grain structure and the entire image will technically be ai and not technically “in-painting”.

In this case, Firefly Fill and Expand is the best and only true option.
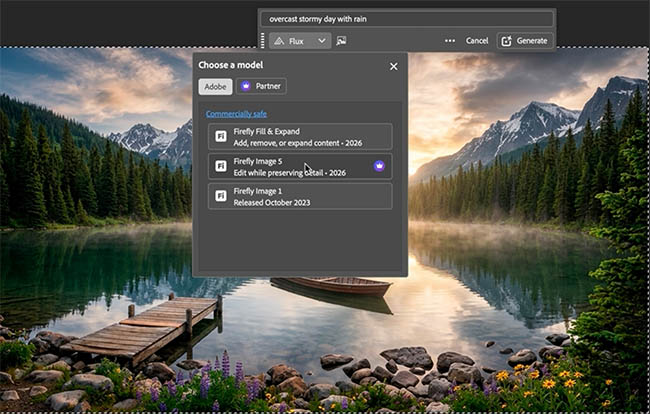
Text Based Editing
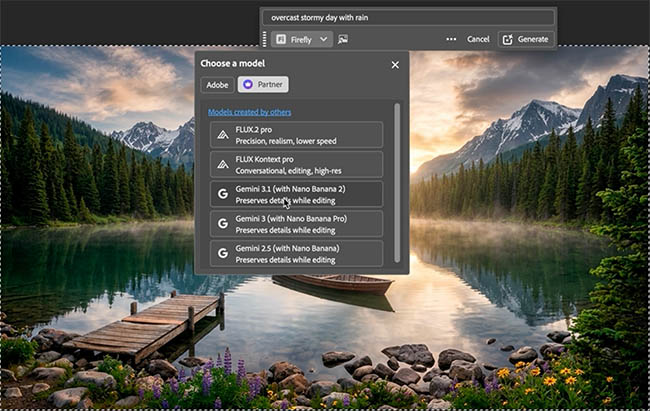
For the 3rd example, we are going to use the Editing models, which there are 3 available. This is where we select the entire image and ask the model to change or edit the entire image.
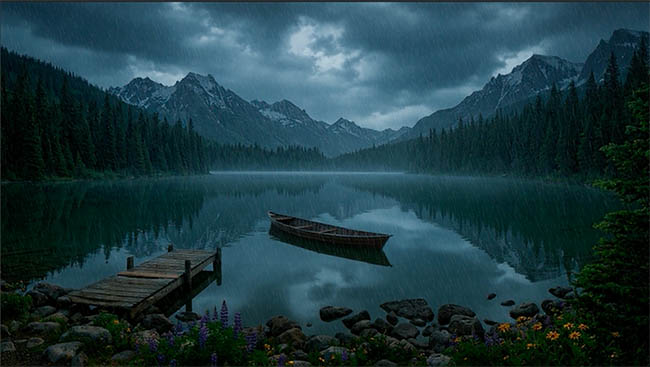
We will use the same starting image for all 3.
Select all, Ctrl/Cmd+A
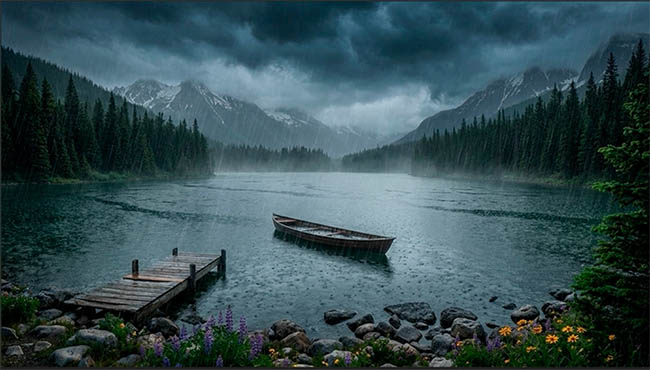
Lets choose Nano Banana 2 and type this prompt: Overcast stormy day with rain
Here we can see a great result, dramatic, in true nano banana style.
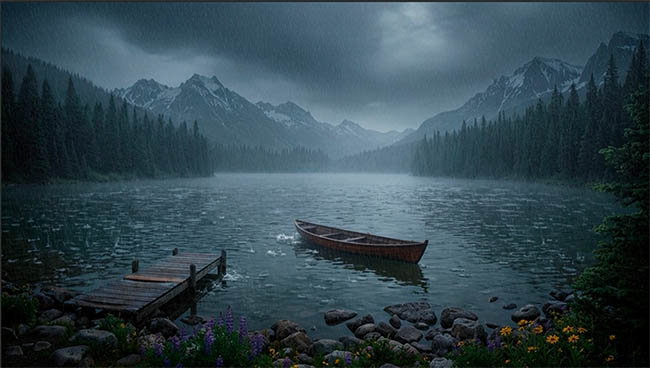
Let’s do the same with the Flux editing Model: Flux Kontext pro.
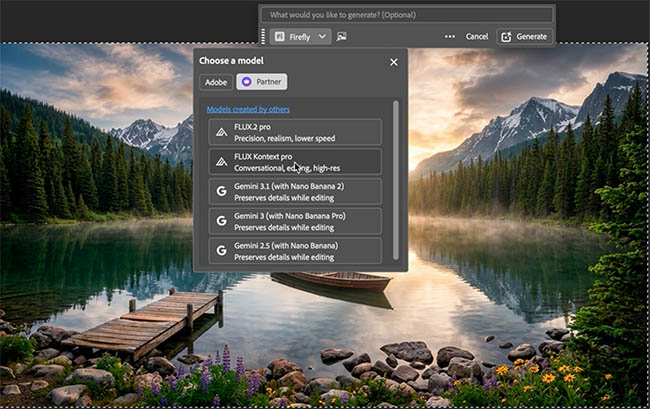
As you can see Flux Kontext pro goes for a non stylized and realistic result, not reaching for the dramatic, but for realism.
Now its time for Adobe Firefly Image 5.
And the result is really good, maybe the best of all three. Firefly Image 5 is Adobe’s first text based editing model and I can say with a lot of testing, it’s up there with the very best of them.
As you can see, when you use the correct model for the task, you are going to get much better results and less fails.
Other things to bear in mind are the costs in Generative Credits which can vary by model as well as resolution and commercially safe. Adobe Firefly is the only Commercially safe model because it’s trained only on Adobe Stock and public domain images. It won’t let you generate images that are a violation of ip (Intellectual Property). This can cause a warning message when you try to generate, which can be annoying for some users. The partner models are much more forgiving, but be careful if you use the results for commercial work, that they aren’t violating and ip or copyrights.
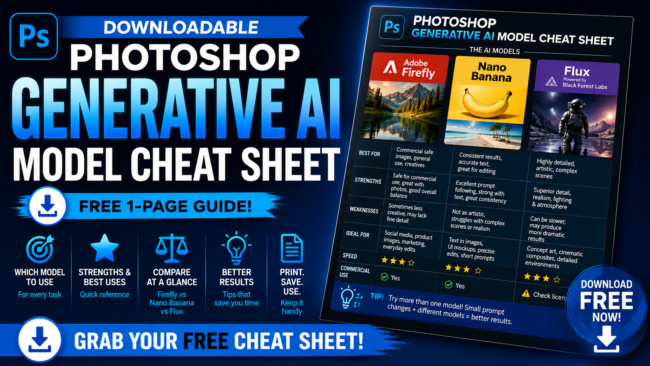
If you want a single page detailed guide to all the different models, comparing their cost in Generative Credits, output resolution, Strengths, weaknesses and purpose download my free Generative ai Model in Photoshop Cheat Sheet.
If you want to go much deeper into Photoshop ai and get up to speed on all the latest features and the best way to use all the new tools, check out my new course. The complete Guide to ai in Photoshop. This goes beyond just Generative ai and covers the 3 different areas of ai inside Photoshop today.
I hope you found this tutorial useful, let me know in the comments if you feel like you now have a better understanding about the different ai Models in Photoshop!
Great to see you here at the CAFE
Colin
PS Don’t forget to follow us on Social Media for more tips..
(I've been posting some fun Instagram and Facebook Stories lately)
You can get my free Layer Blending modes ebook along with dozens of exclusive Photoshop Goodies here

2 thoughts on “How to choose the best Generative ai Model in Photoshop”
Leave a Reply

DJI Mavic Pro drone, review pt2, tips and hacks. Portrait mode, hyperlapse, focus, handheld, calibration and more tips. Your questions...
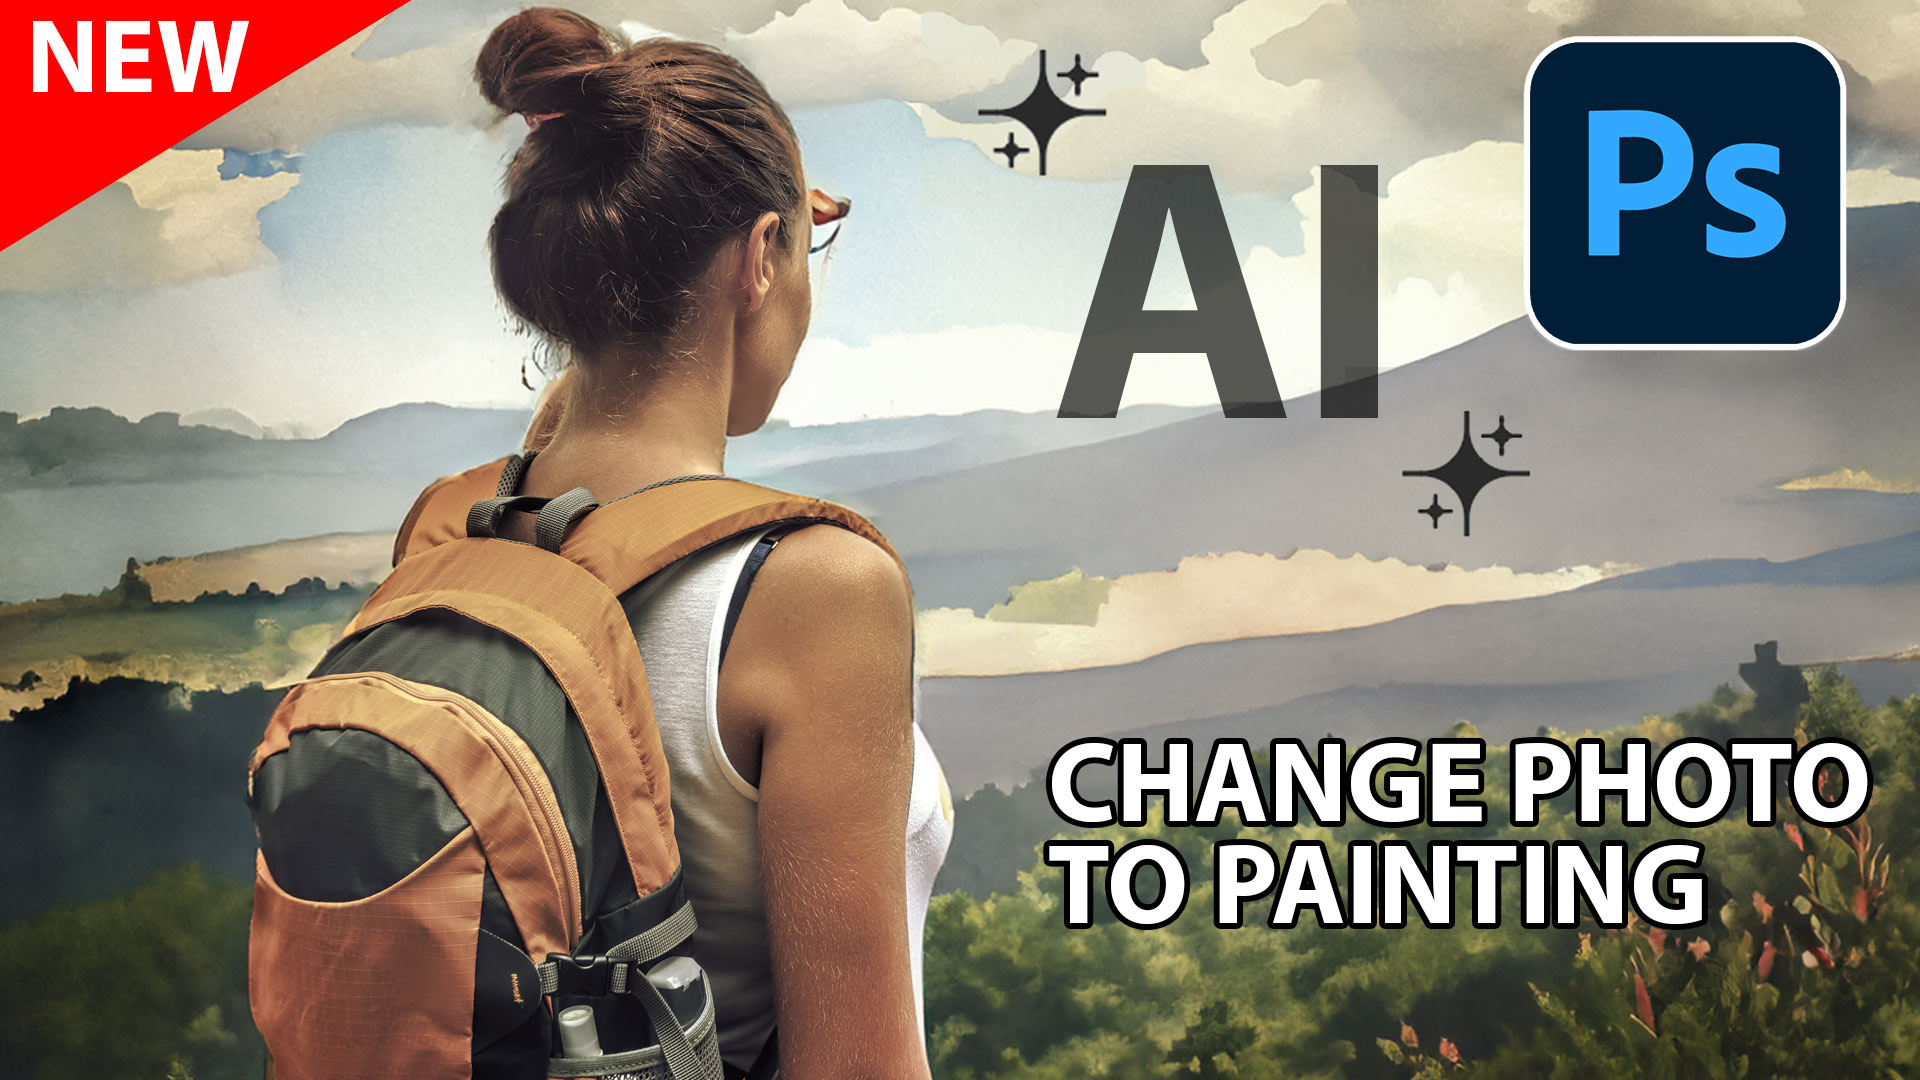
how to convert a photo into a painting using Generative ai in Photoshop. Colin Smith also shows how to convert...
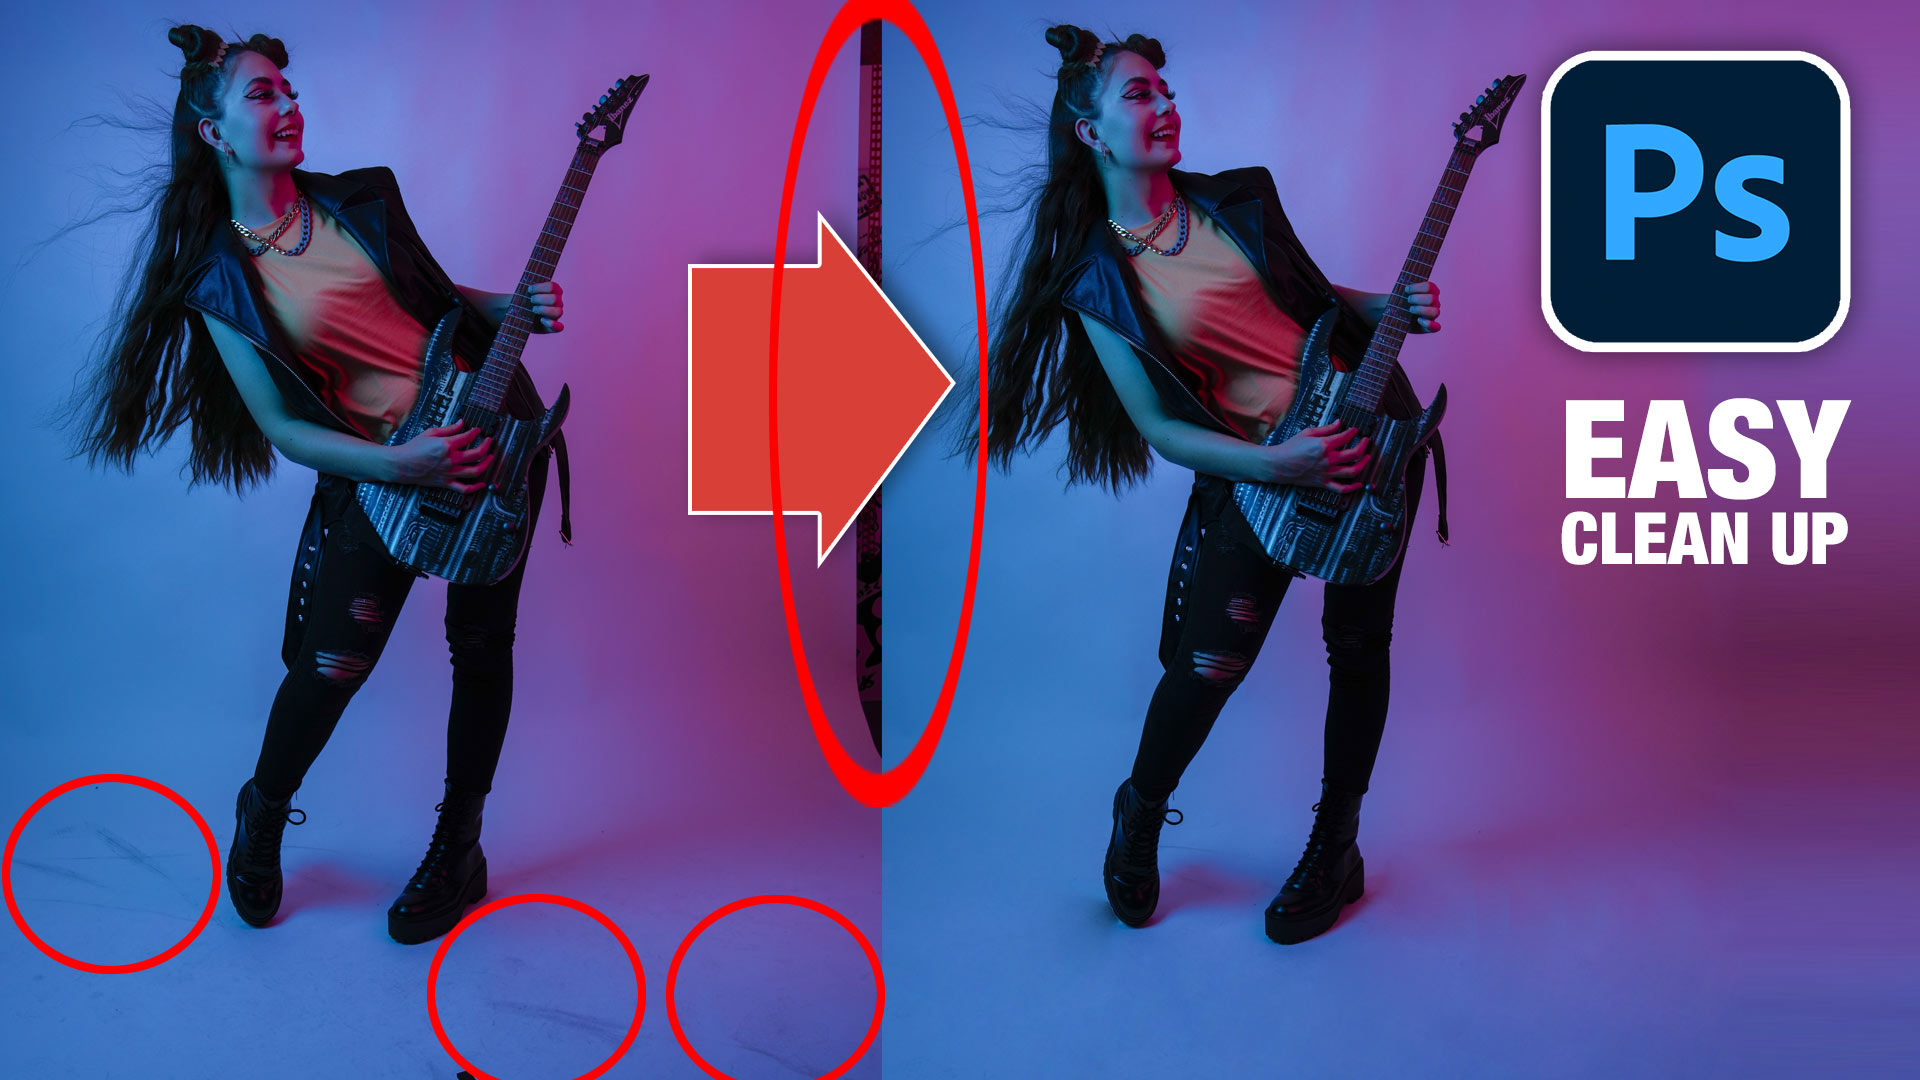
How to use the patch tool in Photoshop to quickly clean up smudges and dirt and remove distractions. Difference between...


Hey Colin. got some great Drag Racing this year. Checkout the schedule at race barona.com. Let me know when you want to come I will get you in. Pete
Thanks Pete! Love to join you again.