
Color Curves in Masks in Lightroom and Camera RAW
A more recent edition to Lightroom and Adobe Camera RAW are the AI masks. There is something more important than you realize missing from Lightroom, that was the ability to use curves on the masks. I saw was, because that feature has now been added. It was already in Camera Raw. It doesn’t matter if you use Lightroom or Camera RAW, this tutorial will apply. In fact it applies to all curves in Lightroom and Photoshop. I do have a more detailed tutorial here for Photoshop though.
I also have a course on Camera Raw, Lightroom and another one for Curves
Curves in Masks in Lightroom
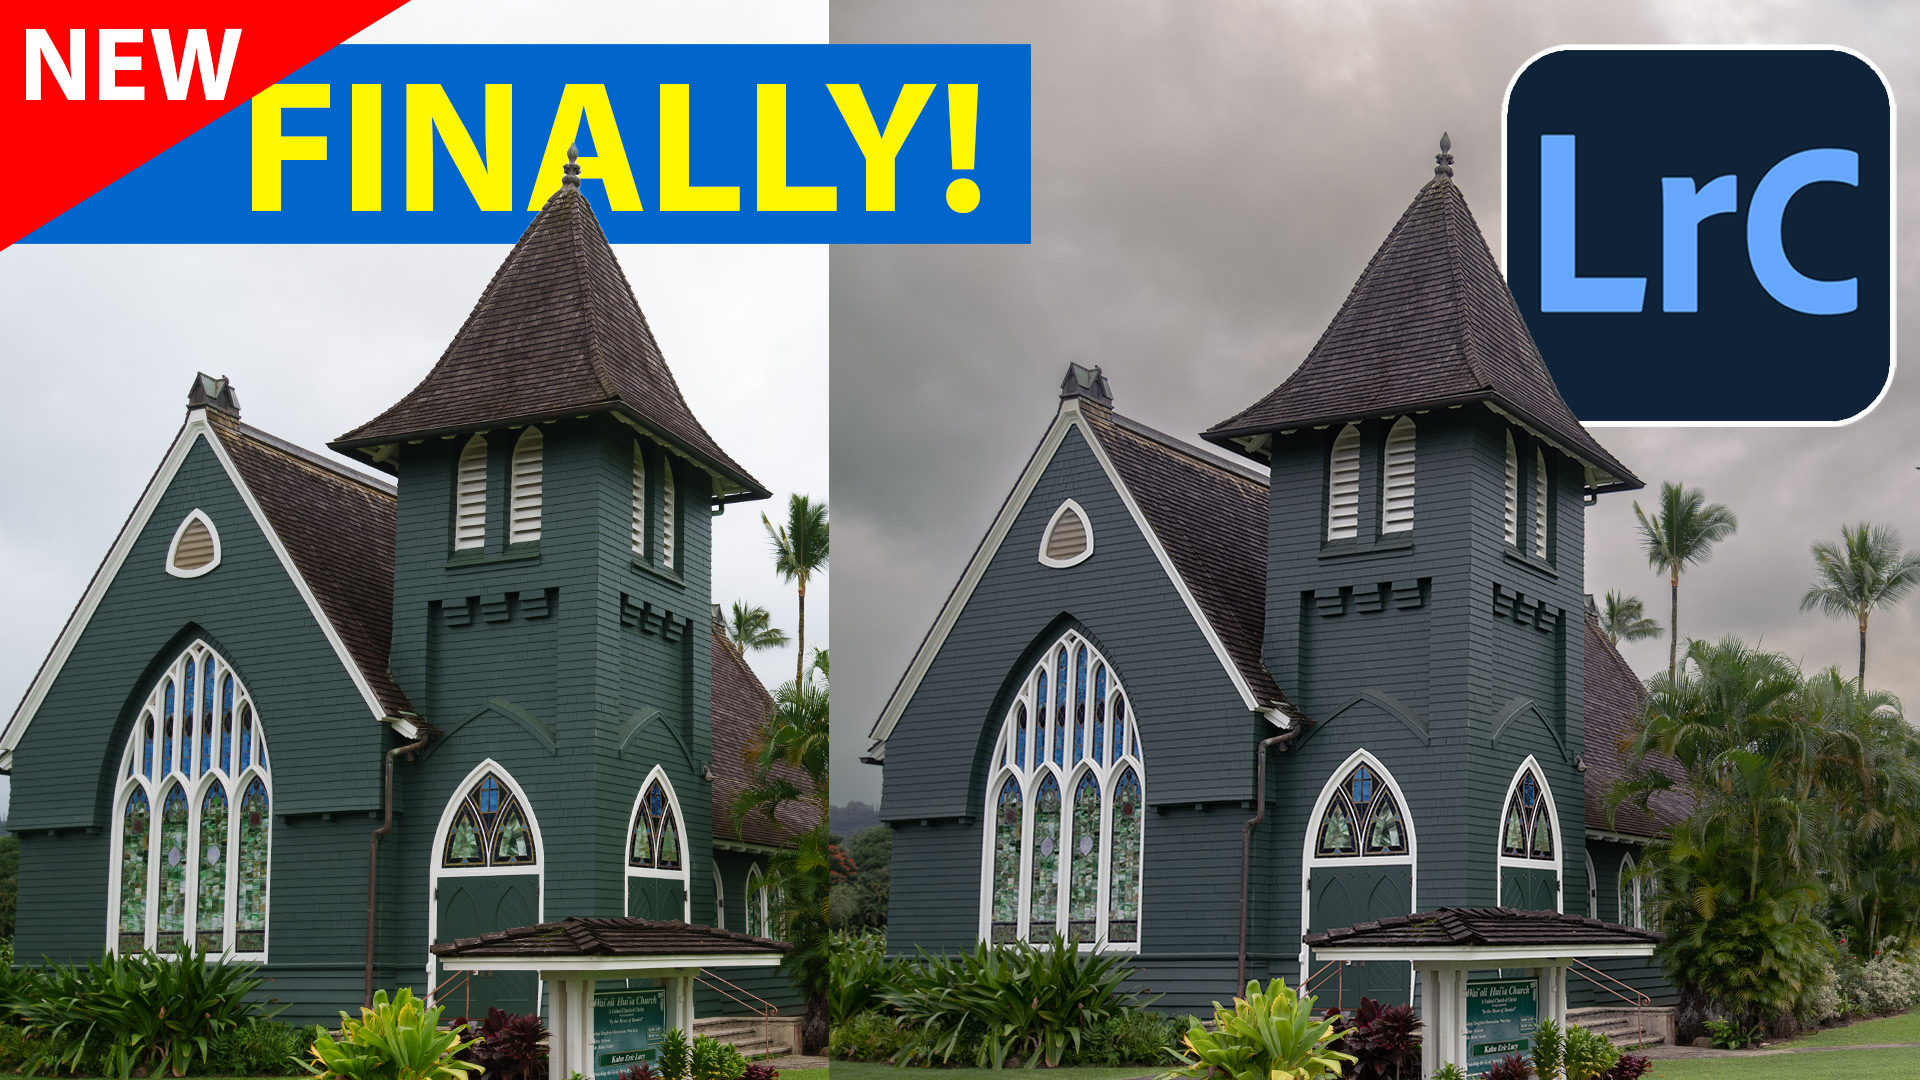
Let’s start with this photo I shot in Kauai, Hawaii.

Choose the Develop module and create a mask

Choose sky.

Make adjustments with exposure and Highlights to recover details in the sky.

The 5 sliders in Lightroom and Camera Raw cover 5 regions: Black, Shadows, Exposure (Midtones), Highlights and Whites.

You can also observe these regions on the histogram and actually adjust them by dragging on the histogram.

If you want more control over any of the regions, use the curves.
If you click the picker, you can drag up or down on your image to brighten and darken specific tones. (you need to add 2 points to get an effective curve) Lets see how they work..

Let’s create a new mask for everything but the sky.
Choose Create Mask and select sky.

Click on the 3 dot menu and choose Invert, this will swap the mask. (you could also have chosen Duplicate and Invert Mask from the previous mask for the same result.)

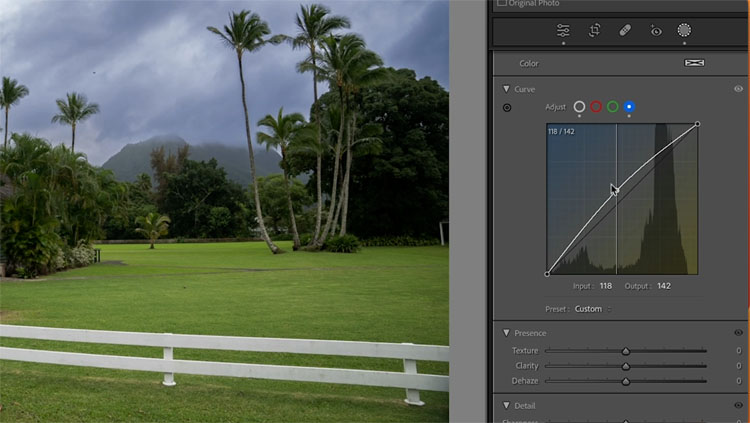
In curves the darks are to the left, the highlights to the right. Drag up to brighten, down to darken.
Drag up in the shadow area to open up the brightness of the image.

Notice the grass is too bright.

Drag down on the tones where the grass is. This will remove the brightening effect from the mids and highlights, effectively just brightening the shadow areas. (The video at the top shows this well).

Using Color in Curves, Curves Color Mode
Ok, this is really the juice of the tutorial. Using curves in Color mode is so powerful!
If you want to apply a different color to the highlights and the shadows, you would typically use Color Grading. Color Grading isn’t available in Masks. Curves can do what color grading can do, and more in the right hands.

In the curves, you will see 3 colored dots.

These represent the primary colors, (R) Red, (G) Green and (B) Blue. This is where we get the term RGB colors from. RGB are additive Primary colors, its based on light and all the colors added become white light, how the human eye sees color. But you don’t need to know that for this.

There is a second color mode you may have heard of. CMYK. (Cyan, Magenta, Yellow and black. K is black, but we are focusing on color, so C, M and Y are all we care about.
These are known as Subtractive Primaries, they function like pigment, such as paint or ink and all the colors taken away gets you whte. (You don’t NEED to know this either for this tutorial, but who doesn’t mind a little background info?)

What you will find useful (and no one talks about this in photography circles). For the purpose of Lightroom (and Photoshop) Color channels: The subtractive primaries are the opposite of the additive.
Opposite of red is Cyan
Opposite of Green is Magenta
Opposite of Blue is Yellow.

Click on the blue dot to activate the blue curve.
Drag up and the sky turns blue
Drag down and it turns yellow. Yellow is the opposite of blue.
These color channels don’t affect the tonality, they only affect the colors. (Technically, some do shift the tones a little bit, but not much)

Ok, lets get practical and put this to use.
We want to add a little orange to the Sky.
Choose the red channel. Drag up to add a little red. Not too much.

Orange is a combination or Red and Yellow.
Go to the blue channel and drag down. Now you are mixing in some yellow to get orange. Just like mixing paints.

Choose the other mask.
Now we are going to add blue to the shadows only and Orange to the highlights only

Push up the blue channel in the shadows. The shadows are to the left of the curve.
Click in the middle of the curve (midtones) and drag the curve to the center. Now it’s only adding blue to shadows and not midtones or highlights (highligts are to the right).

This is what the curve looks like

If the effect is too much, go to the top of the adjustments and you will see an Amount slider. This reduces or intensifies all the adjustments on the mask.

And here is our final. It doesn’t matter if this adjustment is to your taste or not, the point is to learn the tools so you can make your own adjustments that suit your style on your own images.

I hope you found this tutorial useful.
I have other tuts on the new Lightroom features.
What’s new in Lightroom 12.3
Denoise in Lightroom
Open Multiple images as Smart Object layers from Lightroom to Photoshop
Great to see you here at the CAFE
Colin
Masks in Lightroom and Camera RAW (in Photoshop)
Check out my brand-new course on Masking in Lightroom and Camera RAW.
If you want to master these very important image editing tools.
This new 3+ hour set of 26 tutorials will help you master the use of the new Masks in Lightroom or /and Camera RAW. Get it here
PS Don’t forget to follow us on Social Media for more tips.. (I've been posting some fun Instagram and Facebook Stories lately)
You can get my free Layer Blending modes ebook along with dozens of exclusive Photoshop Goodies here

13 thoughts on “Color Curves in Masks in Lightroom and Camera RAW”
Leave a Reply
How to make a creative photo collage with Photoshop 2026 and free Adobe Stock Photos
Hidden new features in Photoshop 2023, how to use them and how to get access

How to use the Lumetri panel in Premiere Pro to color grade your video. This 11 minute mini course teaches...


You can add this to your long list of exceptional tutorials. I realize this was mostly on new Lightroom features, but you turned it into a mini course covering multiple topics. You covered the basics of both RGB and CMYK color, and tied it in with these new LR features. I’m always impressed with how you make it interesting for both newbies and experienced users. This one was no exception.
Personally I’m still using LR/Camera Raw for speed, only when processing large batches of photos. So I might never have found out about these improvements if it weren’t for your tutorial. In fact, this and some of your other recent videos have shown that things are quickly changing, so maybe I should rethink my attitude towards LR and my workflow.
Colin, Thank you for ANOTHER wonderful tutorial. Lots of great information. on color curves, and SO clearly explained.
Good info. Many thanks.
I look forward to your emails for their clarity. The screenshots and step by step processing suit me perfectly and I enjoy the “oh by the way” tidbits of knowledge and usability.
Fantastic! Not only did I expand my knowledge of masks but also off the curve. Thanks
Fantastic quick learning video…. Thank you, Colin! These are wonderful for everyone, but very much so for those of us who have been using LR for a long time and can now, thanks to your videos, learn the new features quickly!!!
Thanks Colin. That was the best explanation of the curve panel that I’ve ever seen. Amazing!
I’v been learning how to work with photoshop throughout your tutorials and I,hope to continue doing it.Thanks.
I,agree,thanks.
Always very good videos. I love the way you teach us, you make it so simple and easy to understand. Thank you!
Your tutorials are very informative and useful. I appreciate them a lot. Have learned so much from you tutorials. It is always so easy to understand. Thank you
This is interesting and informative and I certainly will be able to apply to my PS skills. thank you so much Colin!
If I create some mask, modify the color channels curves, and finally convert the photo in black and white (for example creating a virtual copy to have a B&W version) a huge color casting is applied to the photo .. so I have to cancel the masks to come back to a B&W version … anyone knows why? Is it correct? Can I avoid it somehow?
Thanks 🙂