
HDR Photography, Merge to HDR in Adobe Camera Raw Tutorial

In the past, we have merged our photos in Photoshop using Merge to HDR. Lightroom 6/CC gave us the ability to merge HDR photos together directly from within Lightroom. A lot of people didn’t realize that we can now to the same thing in Camera Raw. Added a while back in Photoshop CC 2015 release is the ability to merge bracketed photos together in ACR (Adobe Camera Raw).
If you are new to High Dynamic Range Photography, AKA HDR Photography, see the very popular, detailed tutorial I have written on it here: Colin Smith’s HDR Tutorial.
I am a huge fan of HDR and have been for quite a while now (about 20 years). If you haven’t looked at it before, or it’s been a while, there really has been an evolution in this technology. See the latest in HDR including HDR output in Lightroom and Camera RAW here.
The limitation of megapixels
While a lot of people are still chasing megapixels, the real innovation is in dynamic range. Megapixels give you a larger image, but that doesn’t means it’s better, just larger. If you need to print larger, or crop in tighter than your camera allows, you need more megapixels. mp is just pixel dimensions, nothing more.
The advantage of dynamic range
When you want your photographs to encompass more of what you see, that is called dynamic range. Dynamic range is the amount of details that can be captured in the shadows and in the highlights at the same time. A small dynamic range will allow perfect capture of shadow, but lose all the detail in highlights, or vice versa. A photograph that is said to have a wider dynamic range is able to capture more of the shadows and highlights at the same time.
HDR explanation for beginners
Cameras are getting better and RAW has opened up the ability to capture a much wider dynamic range than was possible in the past. The camera still falls short of being able to capture all the detail that you can see. To get around this we “bracket” our photos. This means shooting the same thing but with different settings to capture the darkest shadow detail and the brightest highlight detail on separate photos. Most cameras can be set up to shoot this automatically by using AEB (Auto Exposure Bracket) mode. Hold down the shutter button and allow the camera to capture all the frames. Typically 3 shots. -2EV, 0 and +2EV. You can do a minimum of 2 and much more, usually never more than 7 or 9 are ever needed.
At this point the photos are merged together. In the past, I would use Photoshop Merge to HDR or Photomatix (still great options). Now we can use Lightroom for HDR Photography or Camera Raw to do the actual merging.
Here is a video that I have put together. This will show you step-by-step how to do HDR in ACR. Don’t forget to read the additional information and resources on this page after watching.
HDR in ACR Video
(see a sneaky tip at the end in converting to true 32 bit files)
Tone Mapping, the key to beautiful HDR Photography
Tone mapping is the 3rd step of the process. This is where you actually style the image. In the past, it was very popular to do a stylistic tone mapping that almost looked illustrative. This takes a lot of practice and know-how to get something that looks very good and is easy to botch up and has been botched a lot! Because a lot of early HDR images were poorly processed, sadly it turned a lot of people away from HDR prematurely.
3 HDR Sins
There is still a place for stylistic HDR if it enhances the story, such as my HDR Times Square photo below. This photo is very busy, but so is Times Square, so it helps with the story -telling. Notice that:
- The colors are clean and not muddy
- There aren’t halos (glows) around the large areas of detail.
- You will also notice that there is good contrast in this image.
These 3 HDR sins are the major pitfalls that many beginning HDR photographers fall into.

A return to HDR
What is becoming increasingly popular in modern HDR photography is going for a more natural result. Adding in the Shadow and highlight detail without the photograph looking so artificial.
Here is one of my more recent HDR creations, looking more like what my eye saw when I was at the location. The tone-mapping tools in Lightroom and Camera RAW can really help produce a more natural result.
See Colin Smiths HDR Gallery here

HDR Resources
Check out our free HDR resources at PhotoshopCAFE
Basic HDR explaination (Video)
Written tutorial on HDR in Camera Raw (What’s new)
Tone Mapping HDR in Lightroom and ACR
Thanks for reading / watching and don’t forget to share these resources with your friends.
See you at the CAFE!
Colin
PS Don’t forget to follow us on Social Media for more tips.. (I've been posting some fun Instagram and Facebook Stories lately)
You can get my free Layer Blending modes ebook along with dozens of exclusive Photoshop Goodies here

3 thoughts on “HDR Photography, Merge to HDR in Adobe Camera Raw Tutorial”
Leave a Reply
Learn how to quickly turn an image into a watermark in Photoshop, protect your photos with a watermark. You make...
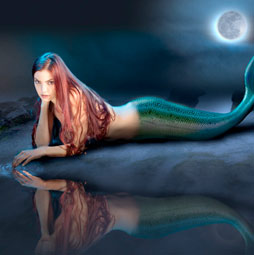
Learn how this mermaid composite was made. By combining photographs, 3D and Photoshop, you can create CG composites that defy...

An essential, but unknown tip for using Harmonization to match colors between layers in Photoshop. Match image color in Photoshop...


very informative tutorial.
In one word its very informative and helpful.
Thank you very much. It helped me a lot. I had the intuition that making the HDR through Camera Raw it was going to give me the chance to edit the HDR photography in a closer way of my vision, and it was. Big help. Thank you vermuch.ç