Photoshop CC 2015 Camera Raw 9.1 new features tutorial
Camera Raw 9.1 updates
Adobe has launched a brand new update to Photoshop CC. This major update in called Photoshop CC 2015 and includes a ton of new features covered in the Photoshop CC Learning Center here at PhotoshopCAFE. This page focuses on the new features in Camera Raw 9.1 (ACR).
See the new core Photoshop CC 2015 Features here
There is a big new feature in Camera Raw called Dehaze. While we are talking about Camera Raw, I want to also touch on a couple of updates that have actually been in for a few weeks, but you may not be aware of them. Camera Raw is always aligned with Lightroom releases, as they share the same processing engine.
The Creative Cloud Photography plan. Only $9.99mo for Photoshop, Lightroom and Lightroom Mobile.
Filter Brushes
All new local adjustments with the new Filter Brushes in ACR 9, allow you to paint on or subtract from gradient and radial filters.
Dehaze
Dehaze made its debut at Adobe MAX conference at the “sneaks” keynote presentation. I remember the crowd going wild and loving it, in similar fashion as they did with the Camera Shake Reduction 2 MAX’s before that. Personally, I like Dehaze better and will get a lot of use out of it. See the difference between Dehaze, texture and Clarity
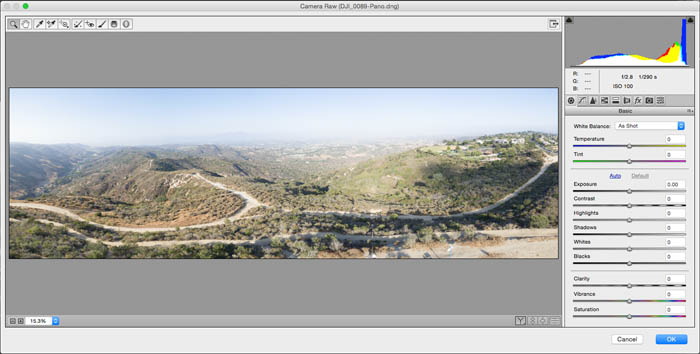
It’s quite common to get atmospheric haze in photographs (particularly when you live in Southern California). Here is an aerial panorama that I have captured on my DJI Phantom 3 Quadcopter. As you can see, the elevated position provides a long look into the distance, and the particulates in the air combined with time of day and position of the sun causes a bit of haze.
In the past, this was difficult to fix. But the new Dehaze filer added in Camera Raw, makes it easy.Choose Filter>Camera Raw filter to launch your photo in ACR
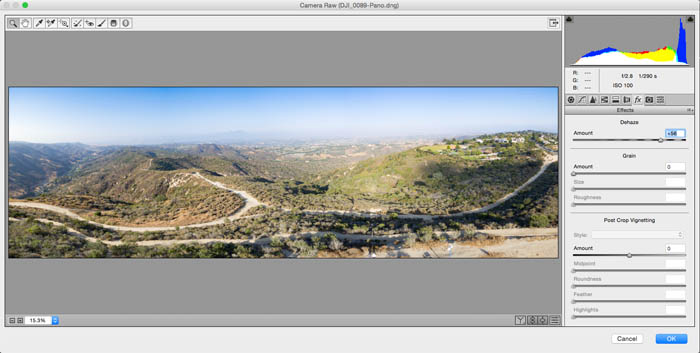
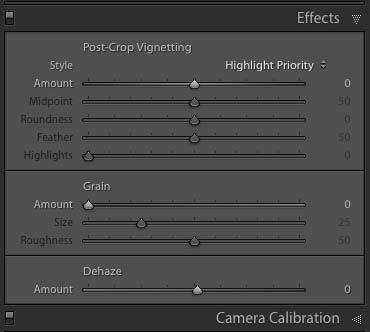
Navigate to the Effects Panel and you will see a Dehaze slider. Move to the left to add haze, and to the right to reduce it.
Move the Dehaze slider to the right to reduce the haze and bring back details to your photograph. You can see a big difference.
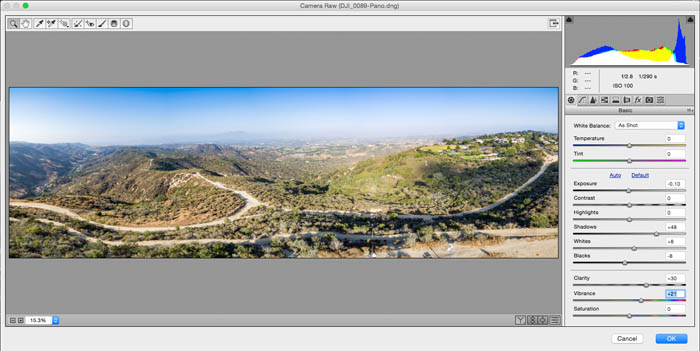
Once the haze is reduced, you may want to go back to the basic panel and tweak some of the adjustments as it tends to darken the image slightly.
Here is a before/after for you to look it

The Dehaze is also added to Lightroom CC in the Effects pane
Multi-shot mayhem
You can now merge HDR and make panoramic photographs directly from within Camera RAW. This is essentially the same technology that I have covered in detail in my Lightroom CC review. Have a look here to see more in-depth tutorials and videos on HDR in Lightroom and Panoramic merging in Lightroom
Merge to Panorama
To begin, select the photographs that are going to be stitched together from Bridge and right click. Choose Open in Camera Raw and the images will all appear in the film strip on the left. Right click and choose Merge to Panorama.
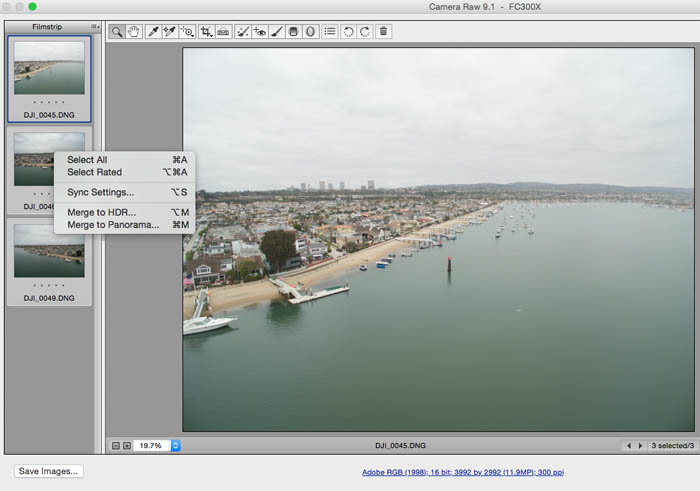
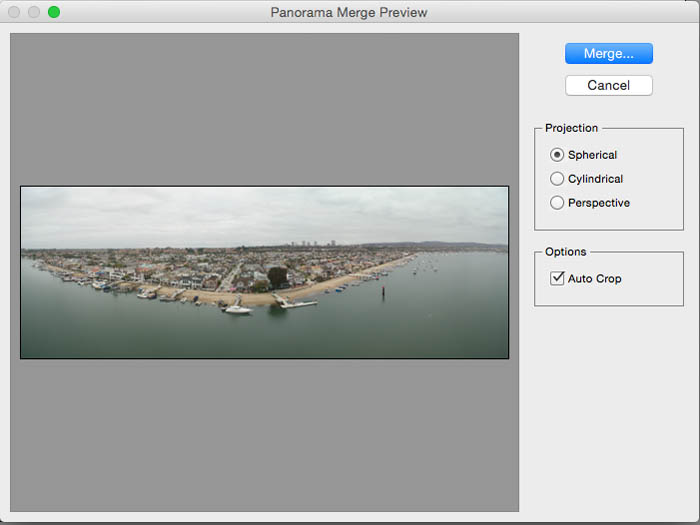
The Panorama Merge preview will open. I won’t repeat all the options in the box as they are covered in detail in the Panoramic merging in Lightroom tutorial.
Click merge to apply
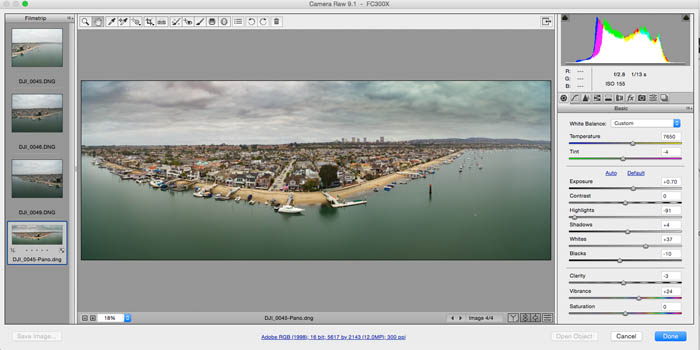
A new DNG file will be created of the merged Panorama, that you can further edit in Camera Raw.
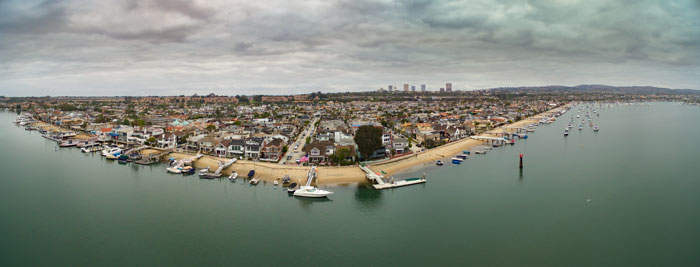
Here is the final result.
HDR in Camera Raw
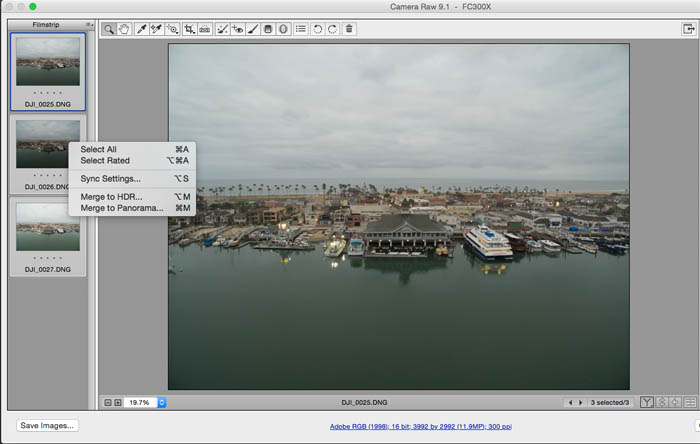
HDR, High Dynamic Range photos can be merged in Camera RAW. Select the bracketed photos from Bridge and right click. Choose “Open in Camera Raw”.
Right-click on one of the thumbnails on the left and choose Merge to HDR
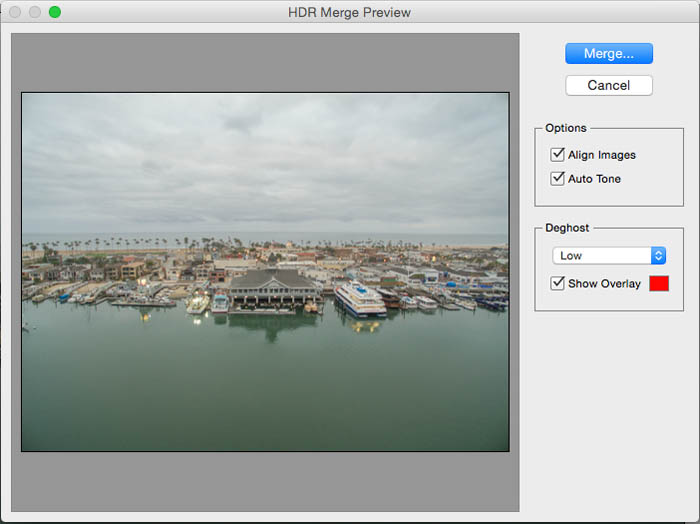
You will see the Merge to HDR dialog box with all the same options as in my HDR in Lightroom tutorial. Click Merge to combine them.
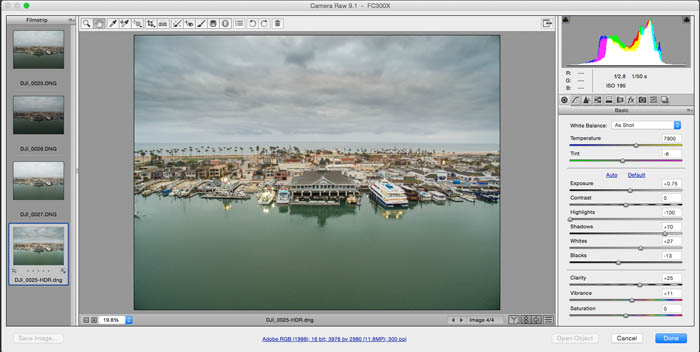
A new DNG file with be created with “HDR” appended to the name and added to the bottom on the filmstrip. This can be edited in Camera Raw
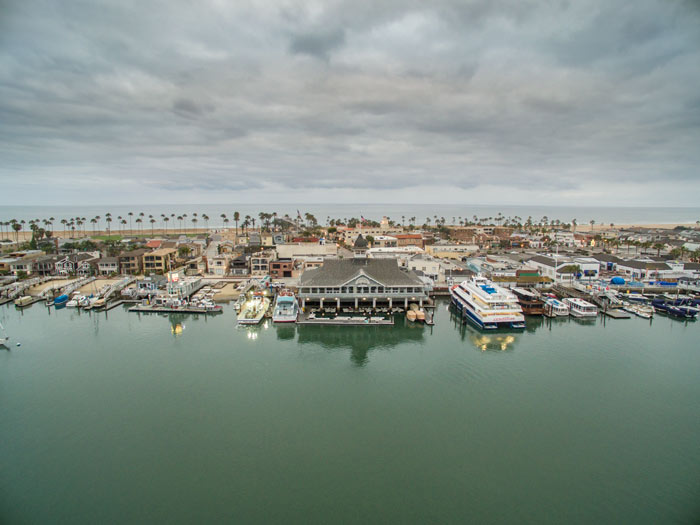
And here is the final result.
Alright, there you have it, my summary of all the new features of Camera RAW in Photoshop CC 2015 release. Check out all our new feature guides on the Photoshop CC Superguide.
PS Don’t forget to follow us on Social Media for more tips.. (I've been posting some fun Instagram and Facebook Stories lately)
You can get my free Layer Blending modes ebook along with dozens of exclusive Photoshop Goodies here

2 thoughts on “Photoshop CC 2015 Camera Raw 9.1 new features tutorial”
Leave a Reply
In this Photoshop tutorial, learn how to quickly and easily make stunning art in Photoshop by combining photos. Learn how...
Rotate Object in Photoshop turns photos into 3D models, perfect for compositing
Learn how to convert a photo to a cartoon, This Photoshop tutorial shows you how to add halftone dots, inked...






Really wonderful tutorial. Very easy to do.
Your step by step description is helping me very much.