
How to Match colors between photos in Photoshop
How to match colors between layers in Photoshop
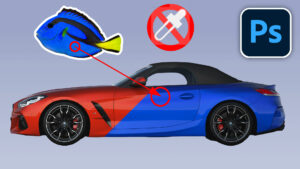
This free Photoshop tutorial shows you how to perfectly match the colors and tones of different photos in Photoshop. so your manipulations will look real.
Hey CAFE Crew,
You know what can be difficult? When you combine photos in Photoshop, (also known as photo compositing) the different photos often don’t match. The colors and tones are different and it makes the final composite look fake. I’m going to show you how to match the layers and blend them together so your photo collages look so real people won’t know you did it in Photoshop. Best part? It’s actually really easy.
This Photoshop tutorial works on most versions of Photoshop and it’s about a 4 out of 10 in difficulty.
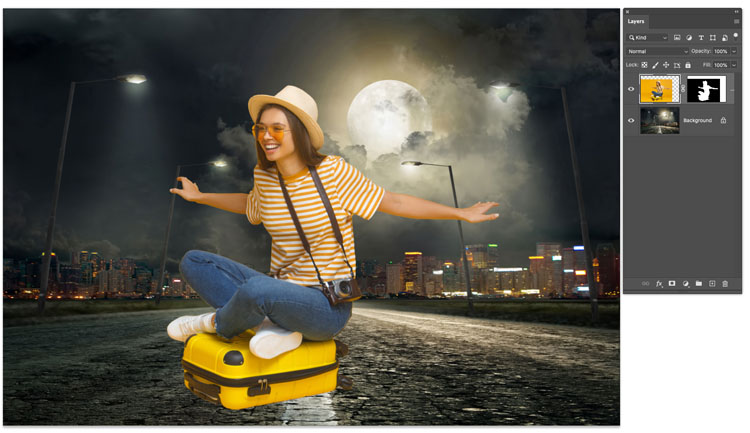
Here are two photos from Adobe stock. I cut out the top layer and dropped it onto a background photo. Clearly they don’t match. That is the focus of this tutorial, getting them pesky layers to match, so they look real.
If you are newer at Photoshop, quickly look at these tutorials on How to cut out a photo and How to combine photos in Adobe Photoshop.
Step 1
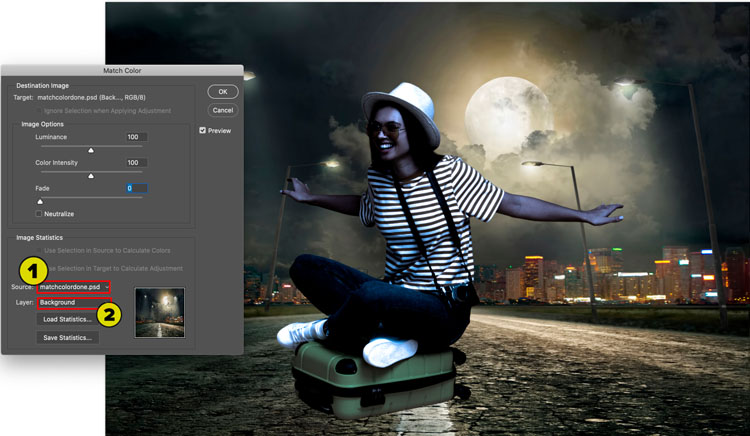
With the top layer selected, Choose Image>Adjustments>Match Color
We need to choose what to match it with. Set the source to the name of the current window (document).
Now select the later you want to use, background in this case.
Your image will probably look a little weird right now, thats normal.
Step 2
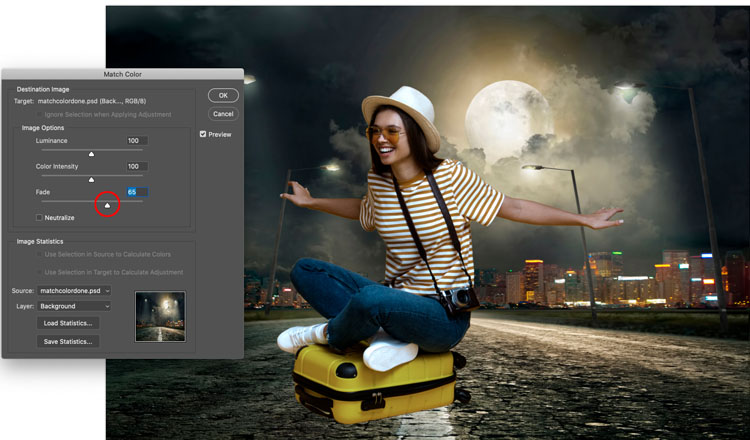
Slide the Fade slider (saturation of added tone and color), until it looks nicely balanced. The number will be different for every photo you use, but you will see when it looks the best.
Step 3
Now, adjust the Color intensity slider if you need to (saturation of original colors).
Adjust the luminance to make the brightness of the original layer match the brightness of the background. (There are some more advanced steps and explanations included in the video above).
Click ok.
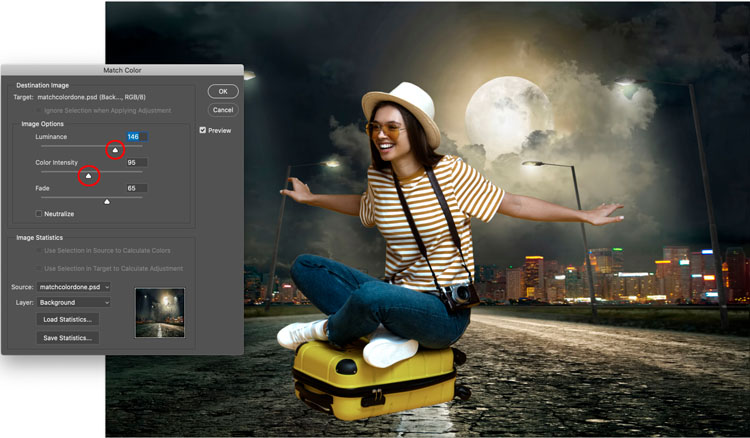
Thats about it for matching color and tone.
This image desperately needs a grounding shadow. Let’s quickly make one.
Step 4: Making a Grounding shadow
To stop the appearance of the person floating, we will add a grounding shadow.
Duplicate the top layer and fill the shape with black.
a/ If you are using a layer mask, just fill the pixels with black and the mask will take care of the outline, or…
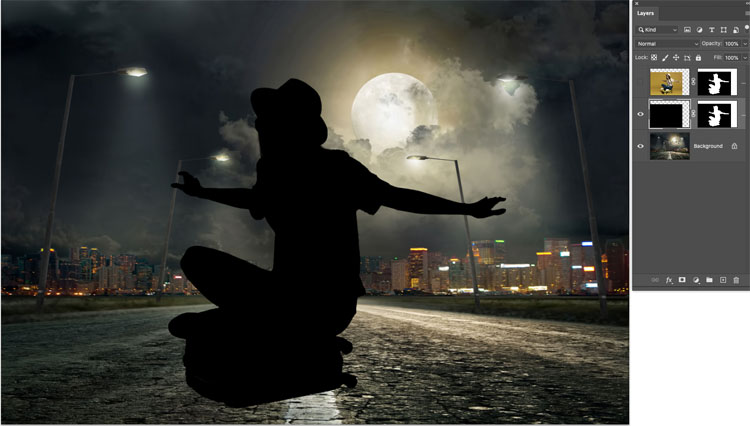
b/ If you aren’t using a mask, choose the move tool, press the D key to reset colors.
Press Alt/Option+Shift+Backspace to fill with black.
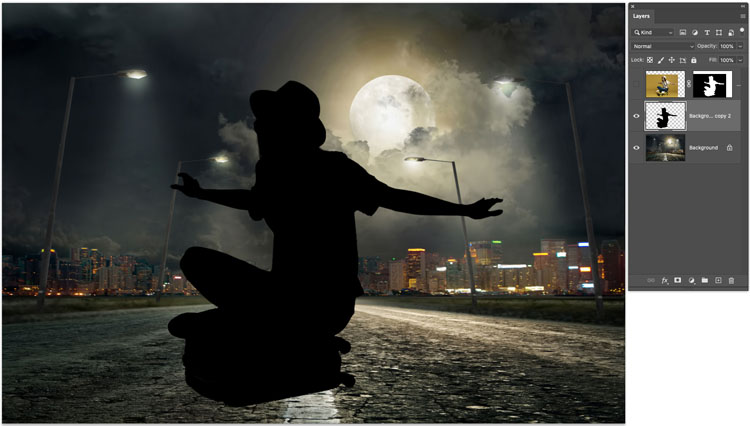
Step 5
Press the down arrow key a few times to nudge the shadow under the suitcase.
You will also see it under other parts of the photo, don’t worry, we will fix that soon.
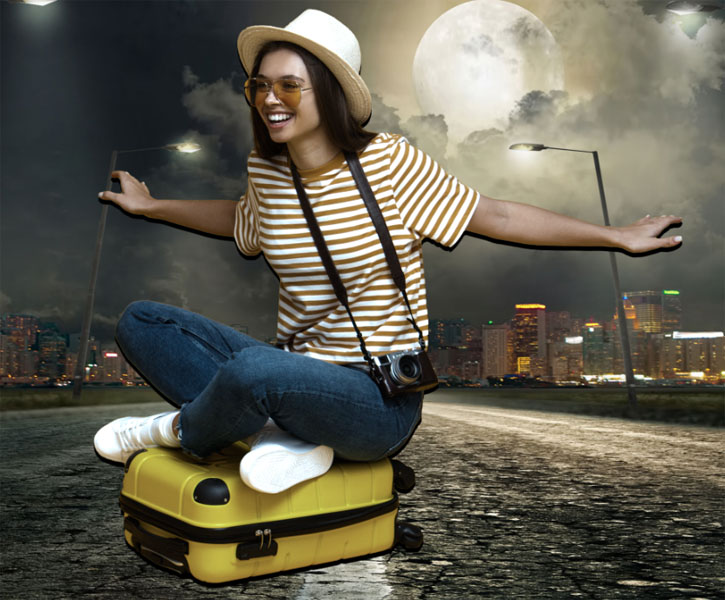
Step 6
Shadows look better when they are blurred. Choose Filter>Blur>Gaussian blur. Usually a setting between 2-5 looks about right.
Click ok
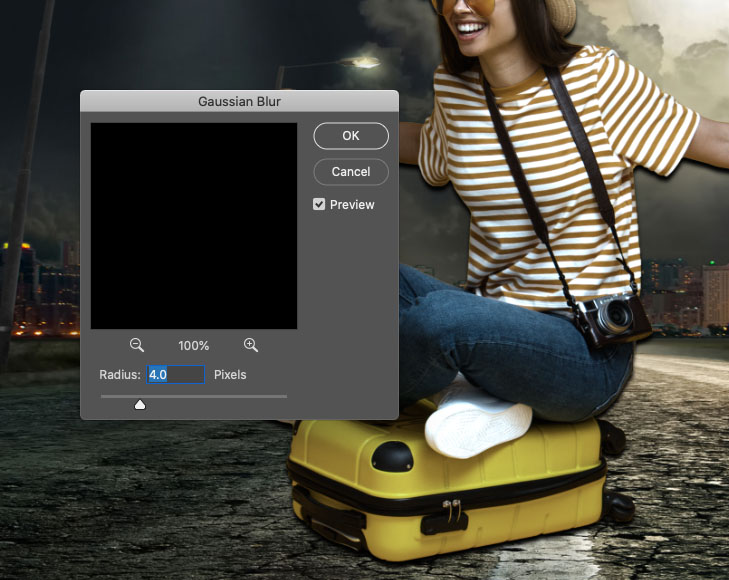
Step 7
Ok, time to put the shadow just where we need it.
Hold down the Alt/Option key and click on the mask icon in the layers panel. (The rectangle with the circle in it).
You now have a black mask (inverted)
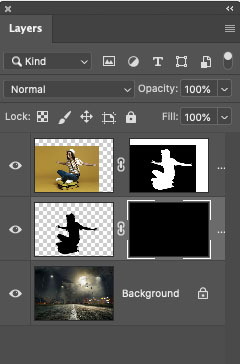
Because we have a black mask, the shadow layer is hidden.
Step 8
Choose the brush tool from the toolbox.
Choose white as the foreground color.
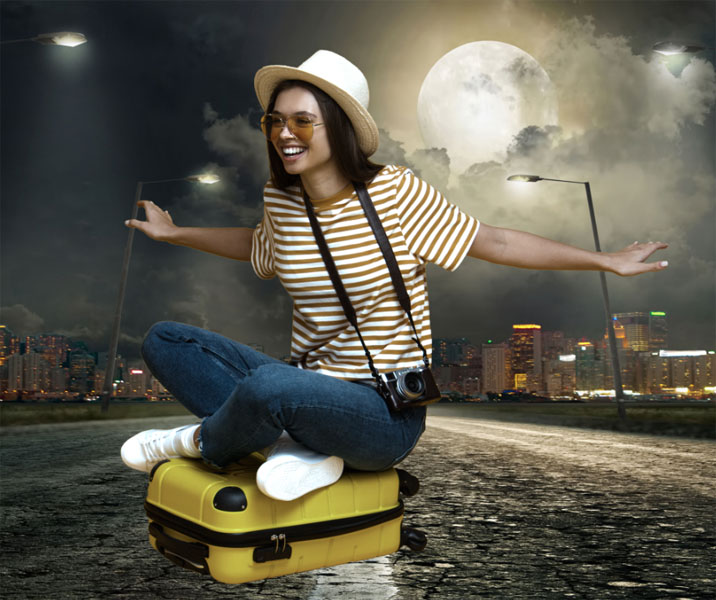
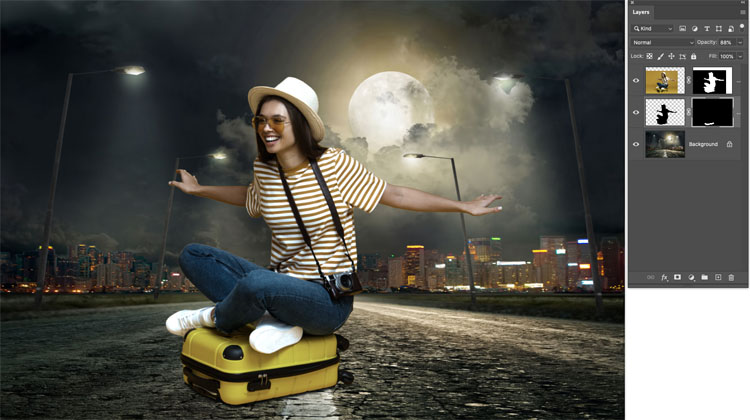
With a soft edges brush, paint near the bottom of the suitcase to add the grounding shadow just where you want it.
If you need to; adjust the layer opacity until it looks just right.
Thanks for checking out this week’s Photoshop tutorial here at the CAFE.
I hope you enjoyed it, if you did, tell all your friends 🙂
Browse our hundreds of other free tutorials here, or search for what you are looking for in the search at the top of the page.
Great to see you here at the CAFE,
Colin

Keep growing with Premium Courses
Photoshop 2026 for Digital Photographers
Learn Photoshop properly, from the basics to pro retouching, step by step.
$129.00 · one-time purchase · instant download

Free for you
The Photoshop Vault
Get my free Layer Blending Modes ebook along with dozens of exclusive Photoshop goodies: actions, brushes, presets and cheat sheets.
You're on the list, so your free goodies are waiting for you in the Vault.
Get Free Photoshop Goodies Open the Vault
Secret setting in Harmonization, to match colors between photos in Photoshop
An essential, but unknown tip for using Harmonization to match colors between layers in Photoshop. Match image color in Photoshop composites. Read tutorial
Auto Blend layers in Photoshop with Harmonize, includes Resolution Hack
Harmonize Layers in Photoshop and how to get BETTER results from new Harmonize Read tutorial
Layer Blending Mode tips in Photoshop tutorial, combining photos with style
How to use layer blending modes in photoshop to create amazing collages and compositions. This free Photoshop tutorial shows how to combine... Read tutorial
How to combine photos in Photoshop for beginners
How to combine photos and match the colors in Photoshop. Free photoshop tutorial for beginners. Read tutorial
How to combine and blend photos in Photoshop: night sky
How to combine photos in Photoshop and blend them seamlessly. How to match the colors between layers, Photoshop tutorial from Colin Smith... Read tutorial









Hi, Colin,
I love watching your tutorials and it has taught me a lot, but I feel I have hardly scratched the surface on what Photoshop can do, but I’m gradually getting there. What I have been waiting for from you is a tutorial on how to make hair in a photo look wet, do you have one that shows this, I know it has something to do with the plastic wrap but all of those I’ve seen don’t explain it as well as you.
Colin, you’re simply the best. Better than all the rest. Thank you for your tutorials.
Thanks so much for the really nice words
Another very useful tutorial Colin – thank you, and please keep them coming!
Hi Colin
I am so pleased you have done this tutorial with step by step instructions! I have been switching back and forth to the video and now I have a cab sheet as well.
Many Thanks
Bill
Great lesson Colin. Appreciate your sharing
The way you explain the reasons of your application is extremely useful. Thank you so much!
I know this is six-months after the fact, but I just saw this video — probably the only one I’ve missed over the past year. However, I have a comment: Just adding a Black & White adjustment layer is not enough. For example, if two colors are at the same brightness (HSB) they will be nearly the same shade of gray (black or white). Try an experiment: draw a gradient from left to left (or up and down), say from red to yellow (Blue to cyan, etc) at the same brightness. Add the B&W adjustment layer and you get a solid gray (but perception-wise we humans would see the red as darker than the yellow, etc). It’s possible with the Blue to Cyan gradient (and a few others) to see a bit of the gradient to come through but not much. You need to change the Blend Mode of the B&W layer to Color. Otherwise, great tutorial. Keep it up.