
How to make a sticker in Photoshop
How to make a Sticker in Photoshop
In this tutorial, I’ll show you how to turn a photo into a sticker in Photoshop. First of all, we will make a sticker effect.
I will also show you how to export a digital sticker with a transparent background. I’ll also tell you how to make it a print sticker..

Start with a photo, or an illustration.

Separate the image from the background.
Choose the Object selection tool

Click Select subject.

Use the selection tools to refine the selection, hold shift to add to the selection and Alt/Option to remove from selection.
This isn’t a selection tutorial, but I have plenty here. More tutorials on removing an image from the background here.
You should see your marching ants selection.

Press Cmd/Ctrl+J to copy the selection to a new layer.
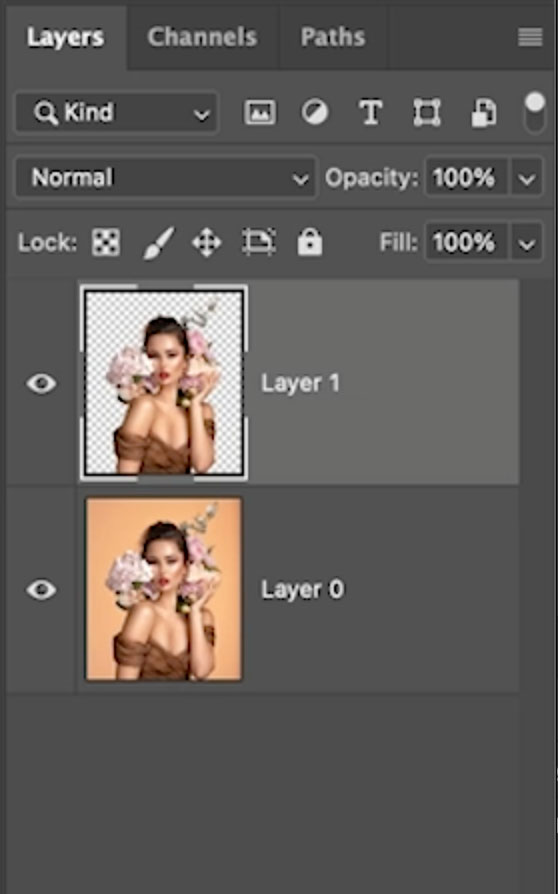
Click FX to add layer styles.
Choose stroke

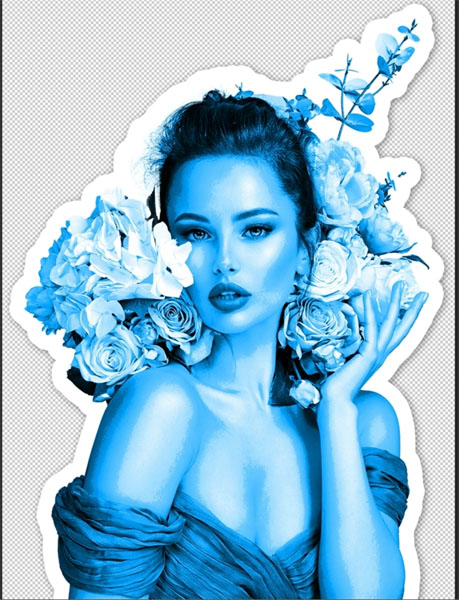
Give it a nice thick white outer stroke.
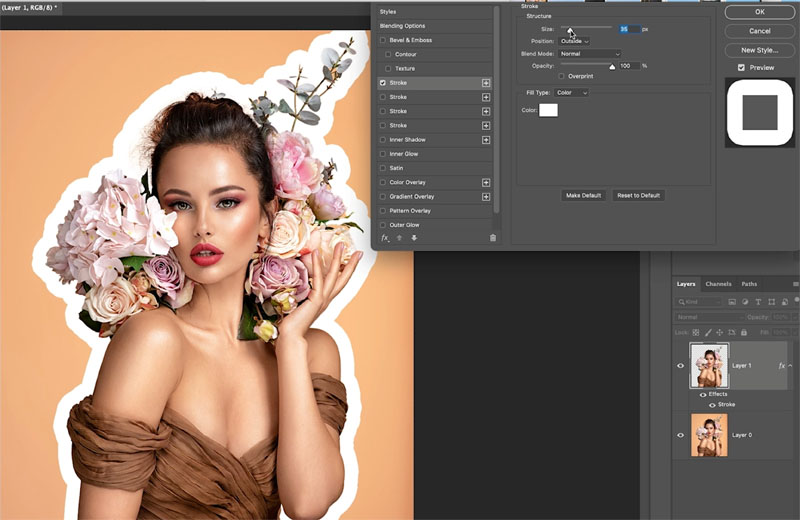
Optional: Click on Color overlay and give it a solid color. This is just an option of you want that.

Add a drop shadow to lift it off the background.

Click ok.
Lets make it look a little bit more like a poster effect.
Click on new adjustment layer and Posterize.

Set levels to 3.
Click the icon to clip the effect to just the layer we are working on. (See the red box).

If you want to reduce the posterization effect, lower the opacity of the Posterize adjustment layer.

How to save an image with a transparent background from Photoshop
Lets look at creating a digital sticker with transparency.
Hide the background layer.
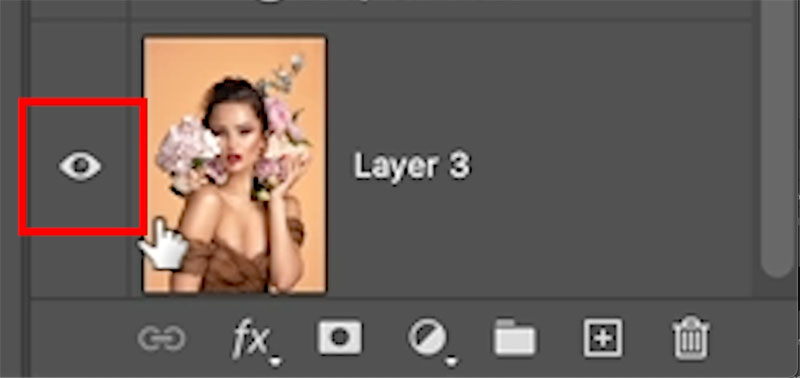
You should see a checkerboard pattern. This is transparency in Photoshop.

Let’s trim off the extra canvas around the transparent shape. You don’t need to crop, because Photoshop has a nice tool.
Choose Image>Trim
Select Transparent Pixels and click ok.

Let’s export it.
Choose File>Export>Save For Web
Choose PNG-24 and make sure transparency is checked.
Click ok
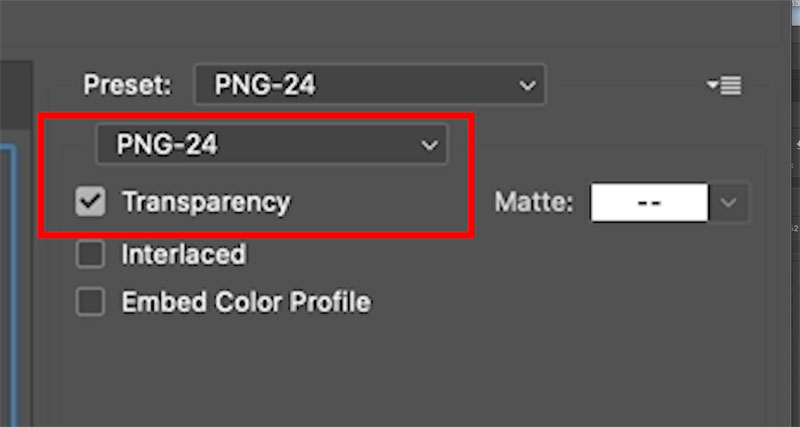
Save your file.
Now you can use it on documents and the transparency will show.
Making a printed sticker.
The important thing here is making sure you are at print resolution.
Set the resolution Image>Image size to 300ppi (dpi). Resolution explained here
When you have finished designing your sticker, convert to CMYK mode. Image>Mode CMYK.
Some things to bear in mind. If you are using an irregular edge, the printer will have to create a die and die-cut the shape. This is more expensive than making a rectangular/square/circular sticker.
More info on prepping a file for commercial printing.
I hope you found this tutorial helpful!
Colin
Keep growing with Premium Courses
Photoshop 2026 for Digital Photographers
Learn Photoshop properly, from the basics to pro retouching, step by step.
$129.00 · one-time purchase · instant download

Free for you
The Photoshop Vault
Get my free Layer Blending Modes ebook along with dozens of exclusive Photoshop goodies: actions, brushes, presets and cheat sheets.
You're on the list, so your free goodies are waiting for you in the Vault.
Get Free Photoshop Goodies Open the Vault
Getting started with Layer styles, Photoshop Tutorial
Maybe you are unfamiliar with Layer Styles as yet, and so I'll cover them briefly. Layer Styles are simply groups of commands... Read tutorial
Metal and Glass Layer style basics in Photoshop
Nearly anyone can create a bevel on type, but not many realize that from this foundation we can create glass, plastic, metal,... Read tutorial
How to color grade a photo using gradient maps in Photoshop
How to do high end color grading instantly with gradient maps. This Photoshop tutorial shows you how to quickly get professional looking... Read tutorial
How to make a vintage Toy camera effect in Photoshop Tutorial
In this Photoshop Tutorial, I'm going to show you how to make a lomography toy camera effect in Photoshop. We are going... Read tutorial
How to use Blend if in Photoshop – Remove backgrounds without selections
How to use blend if to cut out objects and remove backgrounds in Photoshop without selections. Quick and powerful masking tool Read tutorial






Hi Colin,
Thank you for an excellent tutorial. Would this work with a Mac or are there different steps/instructions. I am trying to make a baby mobile for my granddaughter which is very personalised. Cutting out the shapes of the objects in plywood from photos then applying this to the plywood cut outs would be no problem but painting them would be, in addition to obtaining child proof/safe paints.
Best regards,
John Wilson.
This is done on mac
I clicked the link for “More info on prepping a file for commercial printing” because that’s something that I often have to teach to colleagues. I am not succinct enough so I was looking for help. Is that a really old document? It suggests .eps files and doesn’t mention .pdf files. Thanks.
Yes, this was written quite a while ago
Making stickers for a thing. Some I’ve drawn using illustrator, others – using photoshop. It appears it is required of me to have a blue offset path as a cutting guide. So this technique doesn’t really do it for me. Any suggestions?
Hi
When I choose color overlay it only allows me to choose black. Is there a reason I am unable to select blue? Thank you
Thank you so much for this brilliant tutorial. So easy to follow. I wish the ones on Photoshop were this clear.