
Creating Starburst glints of light in Photoshop Photoshop Tutorial

How to create glints of light in Photoshop, starburst effect.
Step 1
First thing we need to do is create a new document. I set my background to black to that I can see the white glint that we will prepare.
![]() Create a new layer and choose the line tool (Hidden under the rectangle shape tool in the toolbox)
Create a new layer and choose the line tool (Hidden under the rectangle shape tool in the toolbox)
Choose 2 pixels and the draw pixel option from the options bar
Step 2

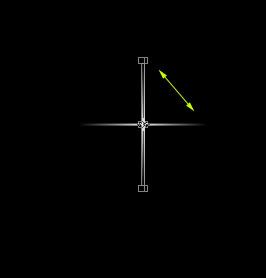
Set white as your foreground color and draw a short dash(A) Hold the Shift key to constrain the rotation to a horizontal line
Choose Filter>Blur>Motion Blur as shown in (B). Add enough distance to get a nice tapered look. Make sure the angle matches the angle of the line.
Step 3
Duplicate the Layer with the dash on it
Press Ctrl (Windows) /Cmd (Mac) +T for free transform
Rotate the dash while holding down shift to constrain the rotation
Step 4
Choose both dash Layers and press Ctrl/Cmd+E to merge them. Careful not to merge with background
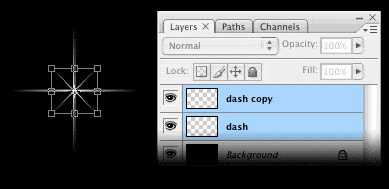 Duplicate the merged dash layer (Ctrl/Cmd+J)
Press Ctrl/Cmd+T for free transform Rotate 45 deg, grab a corner point and scale toward the center to make the new star smaller (hold down alt/option+shift to scale from center and constrain)
Step 5
You now have your starburst and you may be happy right here. For those of you who want to add a lens flare to the starburst continue…
 Create a new Layer
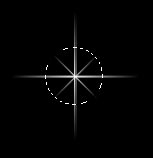
Grab the elliptical marquee tool (circular selection tool)
Create a selection over the starburst
Step 6
 Choose Edit>Stroke
Choose a 1 pixel white stroke
Deselect
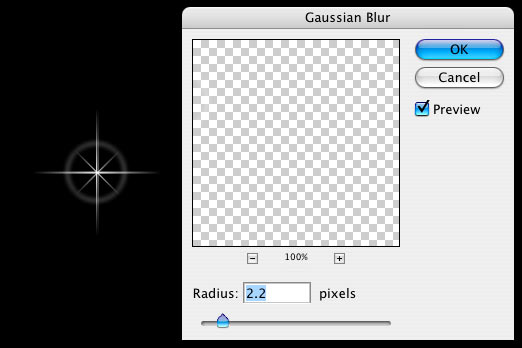
Choose Filter>Blue>Gaussian Blur to soften the effect
Click ok and we’re all done!
Step 7
Merge the layers together to use on your illustrations and photos.
Note: You can save them as a smart object, or add them to your creative cloud Library if you have cc. What is a Library and how do you use it?
Another option is to make a custom brush: Flatten the whole thing, choose Ctrl/Cmd+I to inverse and then make a selection around the starburst. Choose Edit>Define Custom Brush.
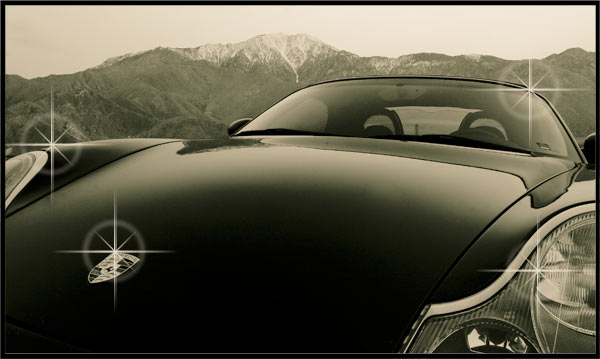
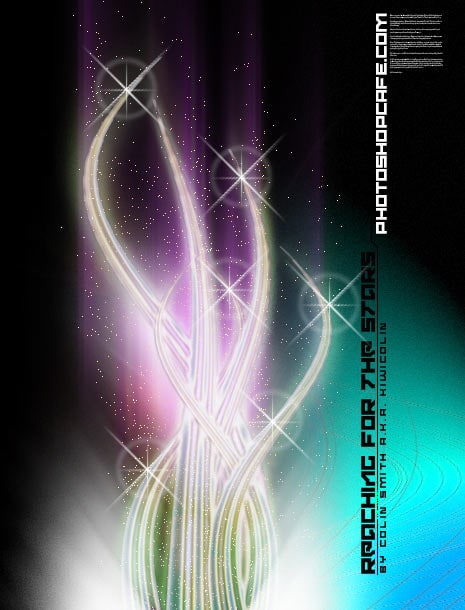
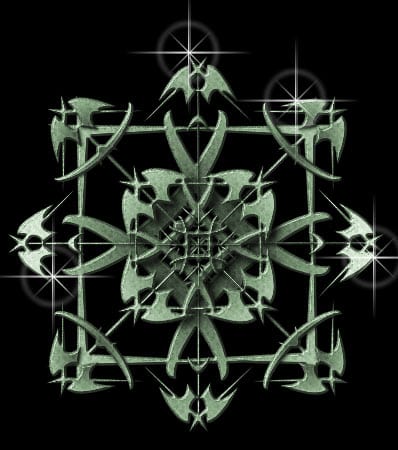
Here are a few examples of use
Enjoy.
DONE!
PS Don’t forget to follow us on Social Media for more tips.. (I've been posting some fun Instagram and Facebook Stories lately)
You can get my free Layer Blending modes ebook along with dozens of exclusive Photoshop Goodies here

Have you ever made adjustments to a photo in Camera Raw and then wanted to blend the edited version with...
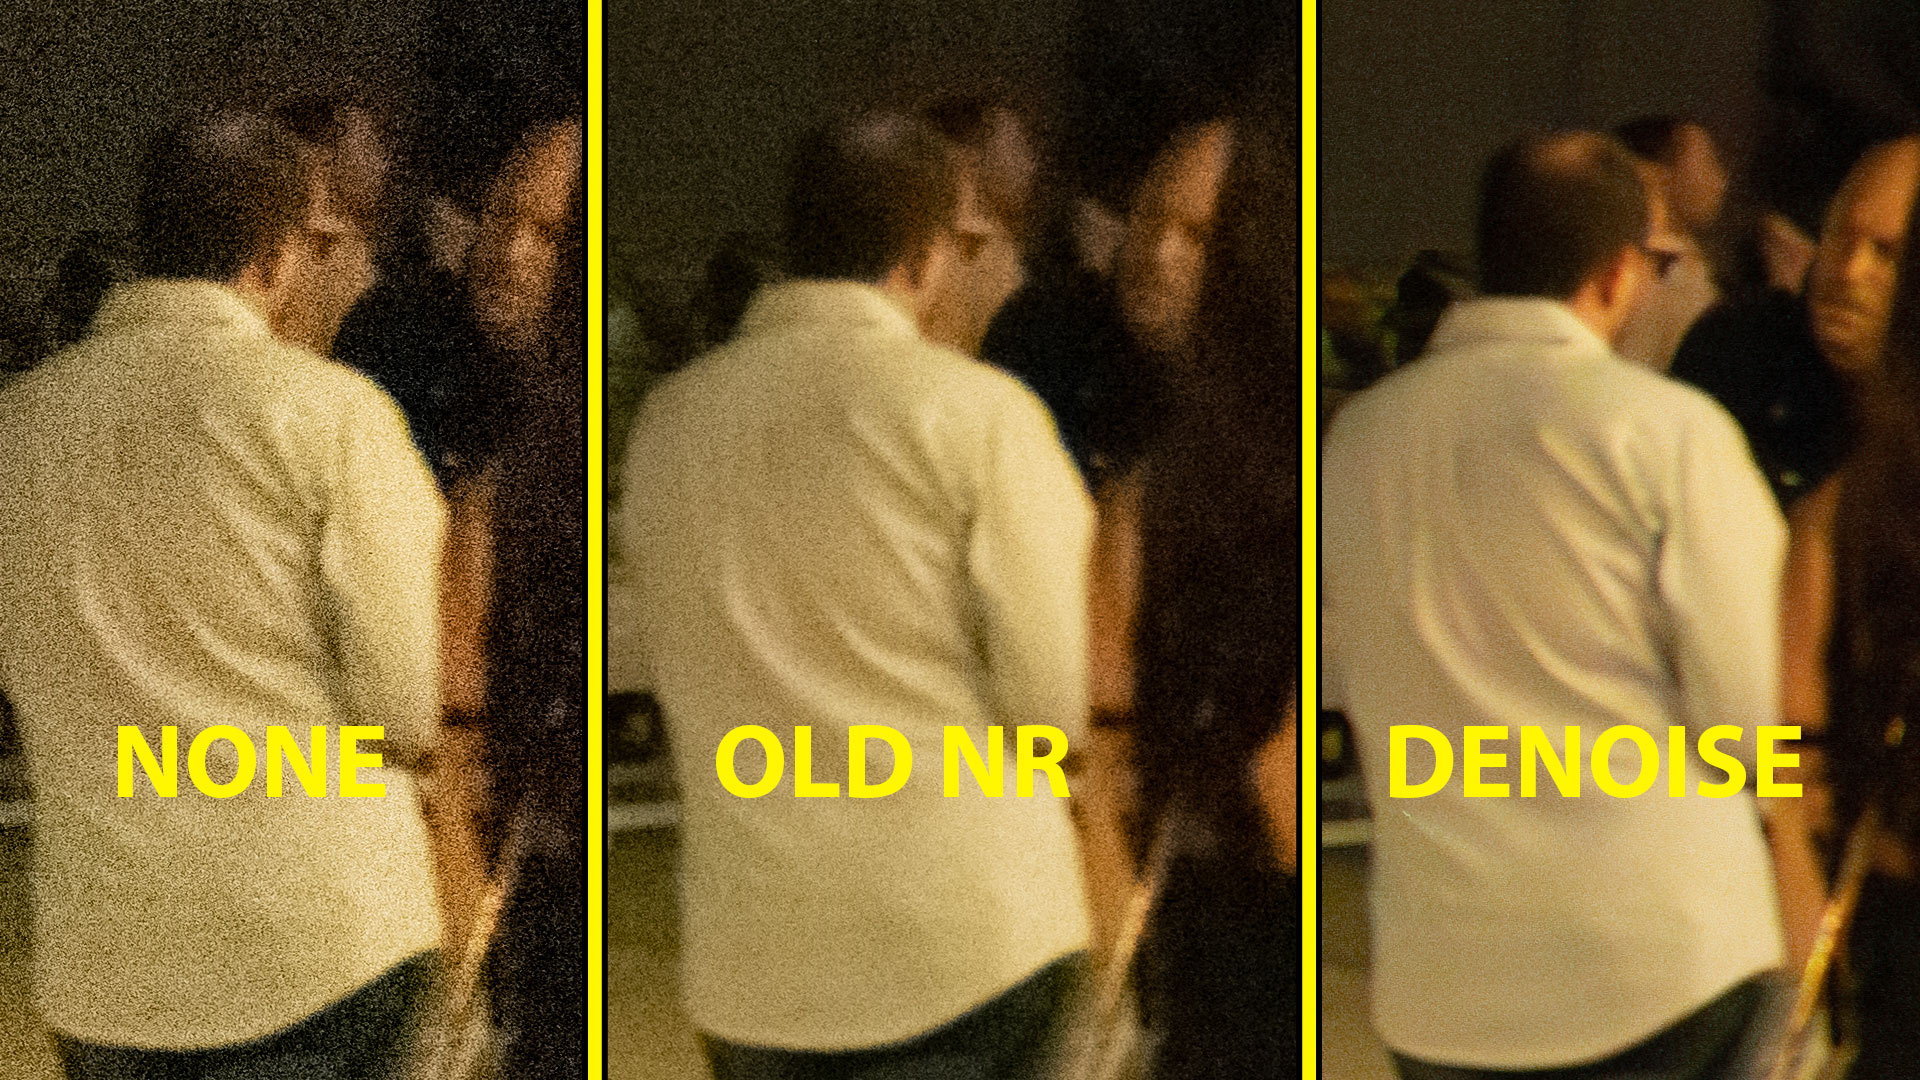
How to use the amazing new Adobe denoise, AI noise reduction in Lightroom and Adobe Camera Raw and examples.

How to use ai selections in the Adjustment Brush to edit part of a photo in Photoshop 2024.


