Making semi-transparent selections with Alpha channels

Making semi-transparent selections with Alpha channels
Alpha channels work in exactly the same way as layer masks. The difference is that Channels can affect any layer, whereas masks only affect the layer that they are on. The purpose of this tutorial is to help you understand how Alpha channels work and to shed any remaining fear you may harbor towards channels. To follow along with this exercise, load up a document with 2 layers and a different picture on each layer
Step 1
Create a new Alpha channel
Choose the channels panel. Click the new channels button. It’s the second to the right, at the bottom of the channels palette. The alpha channel will now display, resulting in a black canvas. There is nothing currently selected so there is no white on the channel.
Step 2
Fill with a gradient
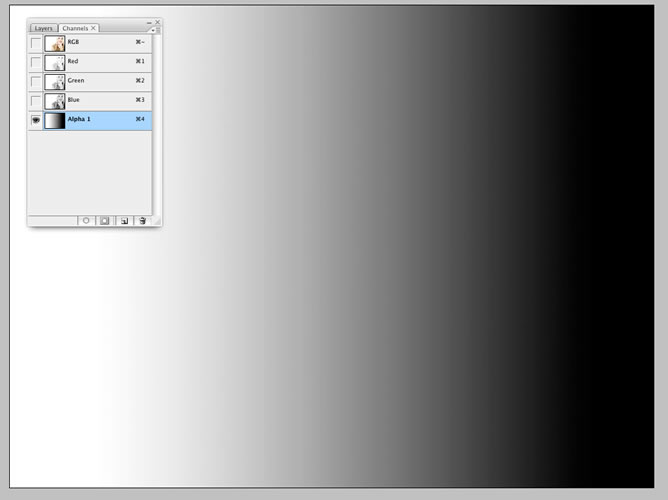
Choose the Gradient tool with white as the foreground and black as the background. Use the linear foreground to background option. Drag the gradient from left to right. You should now see something like this.
Step 3
Load as a selection
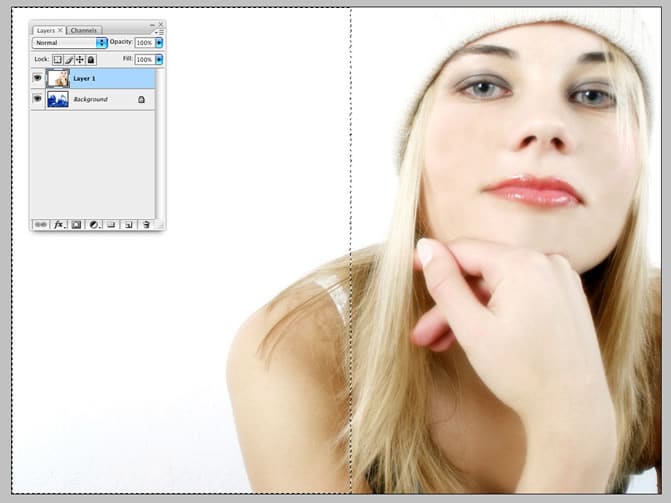
Load the channel as a selection. Ctrl(Cmd) Click the Alpha 1 thumbnail. You will now see the marching ants. Notice that anything less than 50% selected will not show in the selection marching ants. Click the RGB thumbnail at the top of the Channels palette to display the composite. If you see a reddish tint, that’s because the alpha channels is also displayed. If this is the case, click the eye icon to the left of the Alpha 1 thumbnail to hide the channel and only display the selected composite.
Step 4
Delete selection
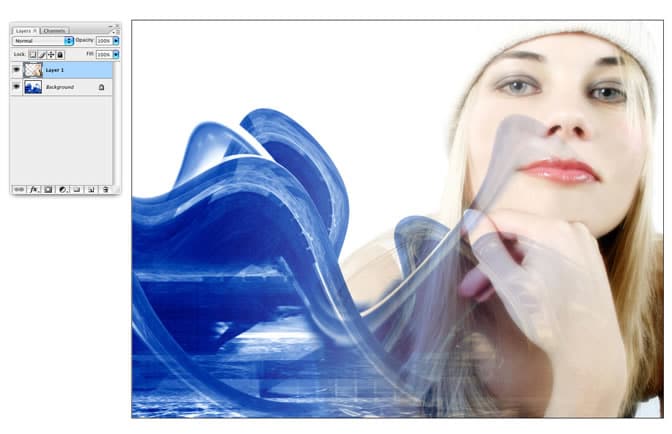
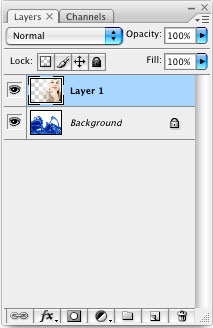
Choose the Layers palette. Choose the top layer and press the delete key (Or create a layer mask, this is the best way). You will now see the background image showing through. See how the semi transparent areas are displayed because those parts of the channel were gray. That’s the real point of this exercise, for you to see that.
Notice that the blue background is showing through on the woman’s face? Not too good looking is it? Ready for some advanced Channels work? Ok, press Ctrl-Z to undo the deletion, We will fix it now. If there is a selection active press Ctrl-D to turn it off.
Step 5
Paint on the Channel
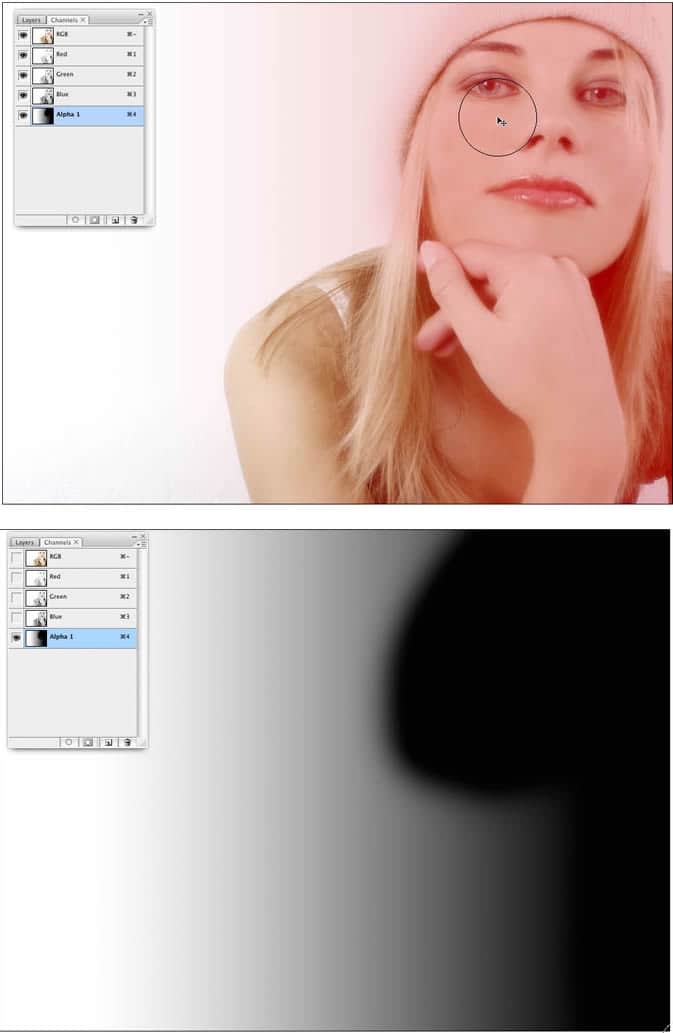
Open the channels palette. You are going to paint onto the channel to affect the selection. You know that black is unselected while white is selected. That’s means if you want to protect a part of the image you will need to make that portion black in the alpha channel. (Starting to understand yet? You will). Click on the eye icon to the left of the Alpha 1 channel (Or press the \ backslash key). You should now see a rubylith color (or whatever color your mask is set to) where the gradient is created. Choose a soft brush and black as the color. Click on the Alpha 1 channel in the channels palette. It should now be the selected channel. Paint with the black brush in the area of the woman’s face. You are now fully excluding it from the selection. White is selected, black isn’t.The screen capture shows the channel displayed with the composite and displayed on its own. Click the eye icons to control the display.
Step 6
Load as selection
Make sure that only the RGB composite is showing by clicking the RGB thumbnail. If the alpha is showing click the eye icon to hide it. Ctrl-(Cmd) + Click on the alpha 1 thumbnail. You can load a selection off a channel even when it’s hidden! Useful to know
Step 7
Choose the layers palette. Select the top layer and press the delete key. Notice that the area that you painted black is not deleted anymore? The face is no longer covered by the blue image.
See, just like a Quick mask or layer mask. Alpha Channels are not all that mystical after all.
PS Don’t forget to follow us on Social Media for more tips.. (I've been posting some fun Instagram and Facebook Stories lately)
You can get my free Layer Blending modes ebook along with dozens of exclusive Photoshop Goodies here

2 thoughts on “Making semi-transparent selections with Alpha channels”
Leave a Reply
In this Photoshop tutorial, Colin Smith shows how to instantly and easily change the color of something in a photo...
Watch this video to discover how to best work between Photoshop and Lightroom. Find out how to keep your Lightroom...
Here is a tutorial submitted from Hermie (One of our Community Managers at the forums) This will show you how...








I’ve been using Photoshop for about 20 years. Each time I access one of your tutorials I get a “I never knew that” moment, thank you.
Thanks 🙂