
Tone Panel, most important settings in Lightroom and Adobe Camera RAW
Most important Lightroom settings
This tutorial focuses on the Tone adjustments in Lightroom and ACR. These are the most important settings to begin editing your images.
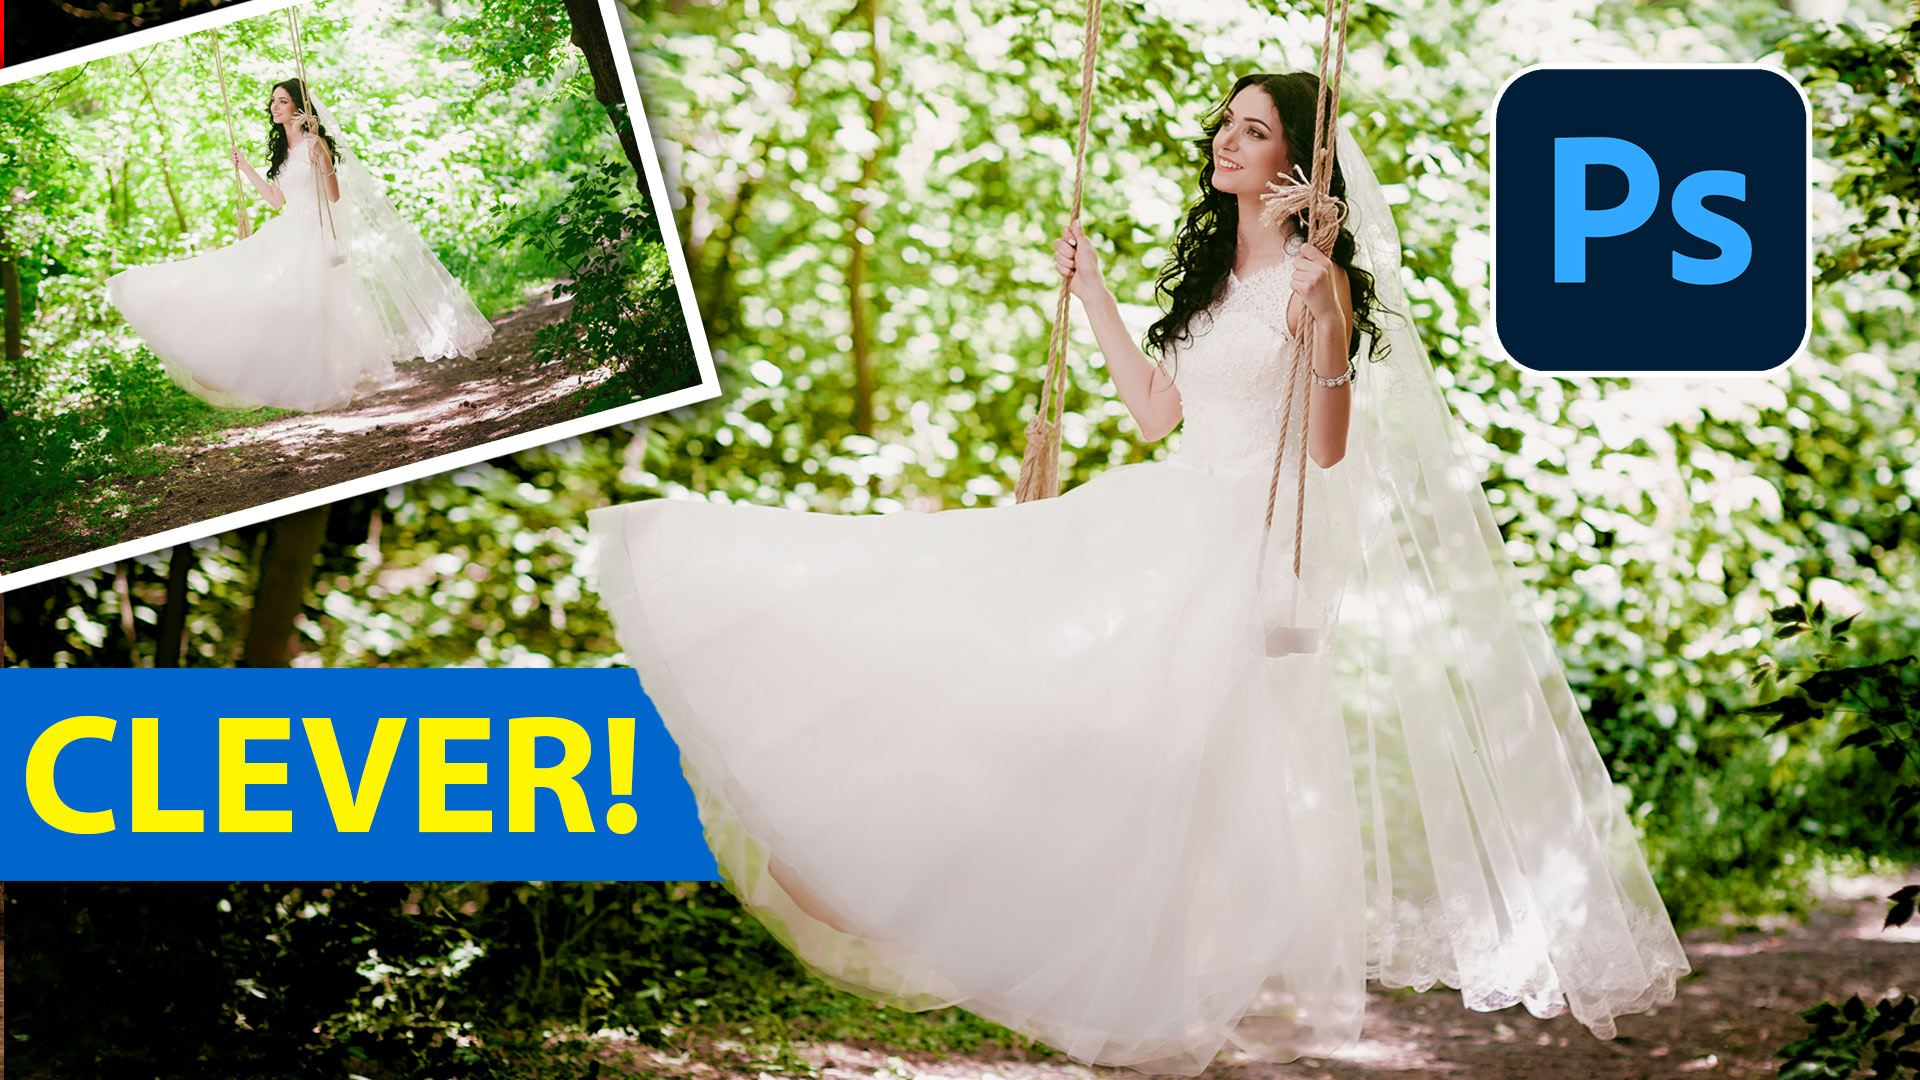
This simple tutorial shows you an effective way to prepare your photos for further enhancement. It gives you a solid base of quality image details. (In many cases this is all you will need).
This tutorial works with Lightroom Classic, Lightroom and Adobe Camera RAW

A quick tip to start.
If you are using Lightroom, drag the develop panel to the left to widern the panel and elongate the sliders. See the red )original length) thia gives u almost 2x the amount of control.

Recover details
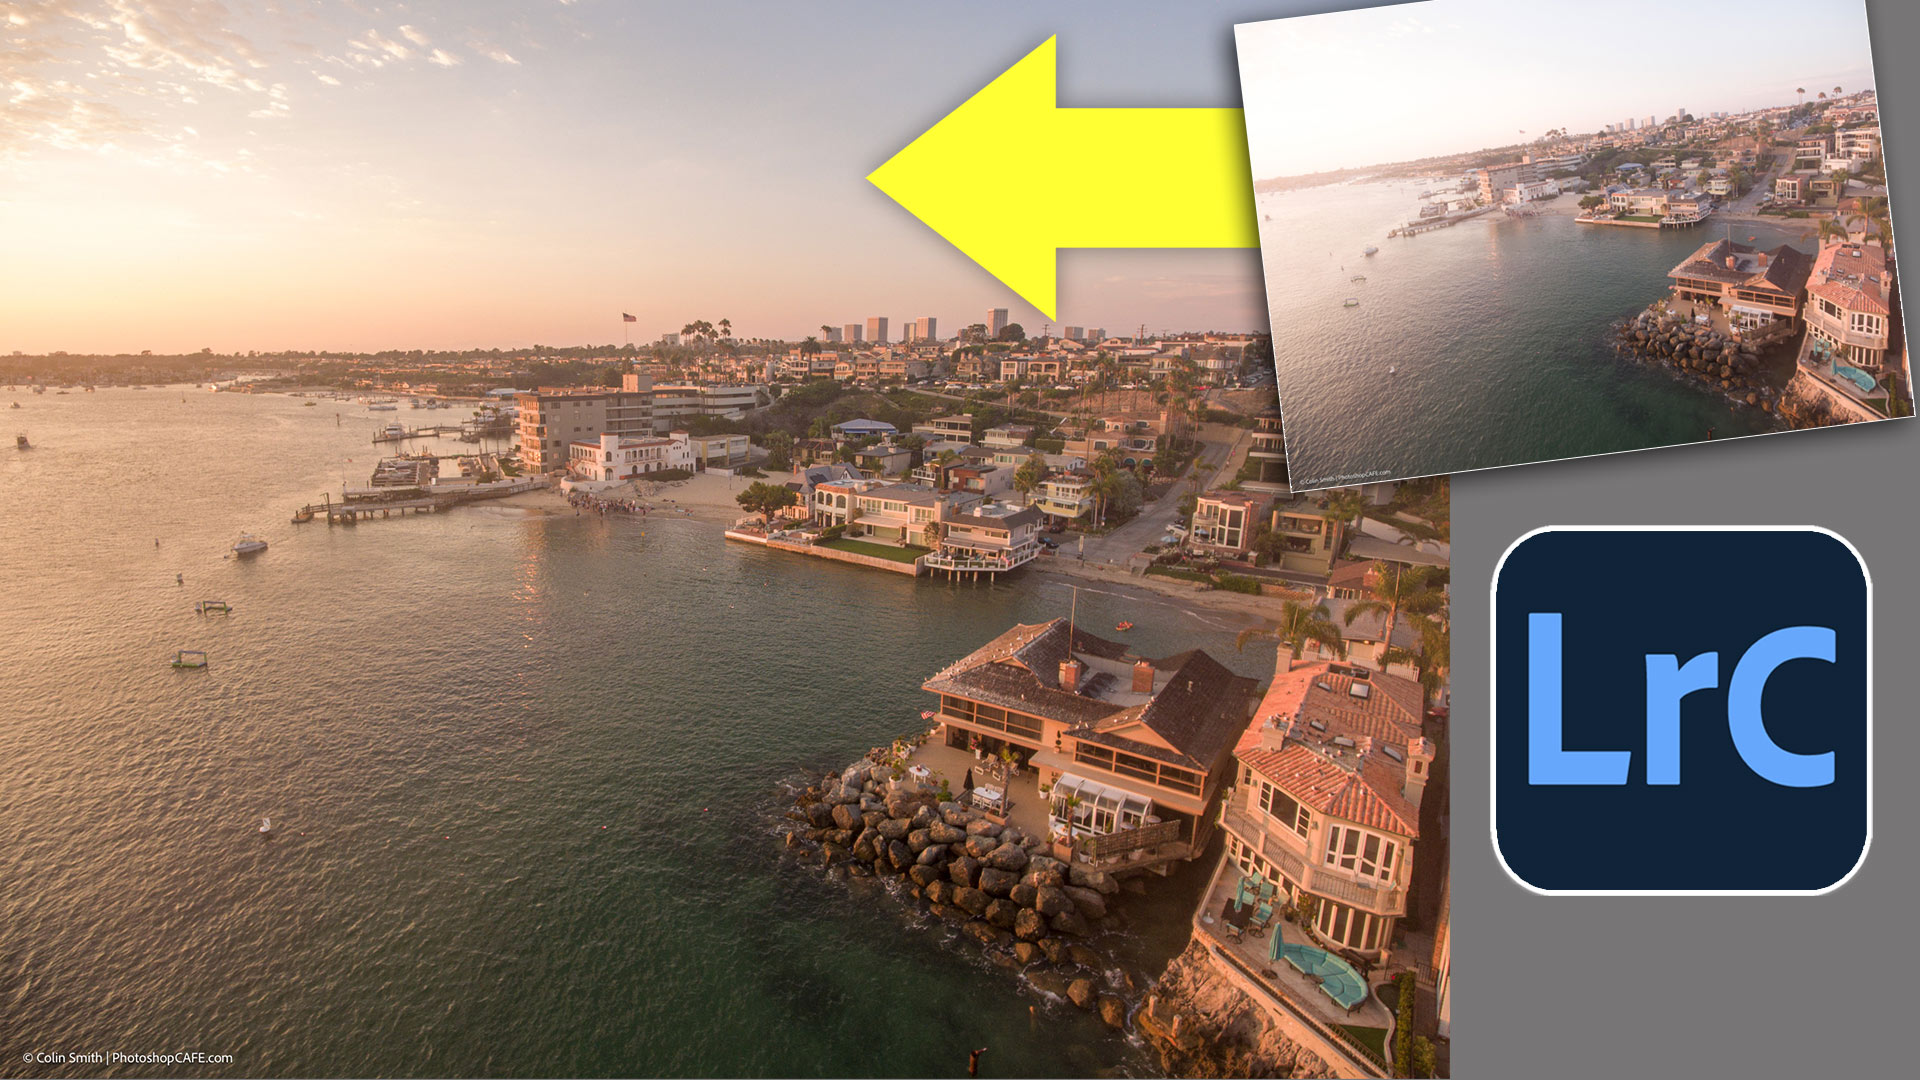
Here is the original image showing a loss of detail in the bight areas in the sky and on the left of the image.

We will use the Tone panel and this is the order I use it.
First, we want to reveal as much detail in the highlights and shadows as we need.
Drag the highlight slider to the left to reveal details in the sky. (Dehaze also reveals the details, but it also increases contrast, so it shouldn’t be used yet.)

If you still need more details, (depends on the image) reduce the exposure slightly.
I like to slightly reduce the contrast slider to open up more detail (See this tutorial on Contrast to see why)

Lets reveal detail in the shadows (lower right of the image)
Slide the Shadow slider to the right.
Use the Shadow and the highlight sliders as recovery sliders. Always more the Shadows to the right

And always push the highlights to the left.
Note: The amount you move these will vary from image to image and from camera to camera. These are shot on a drone with low dynamic range files, so they are pushed more aggressively that I would need to move them on camera like the Sony A1 for example.

Now we have opened up the details in the image. Next we want to add some punch.
The Whites and Blacks are used to add the contrast back into the image with minimum loss of details.
Lets do the whites first.
Hold down the Alt/Option key as you move the whites. You will see clipping indications on the screen. This lets us know if we have gone too far and lost highlight details.

Move the whites to the right to clean up milky areas in the highlights. This image is already bright, so it doesn’t need much.
Move the blacks to the left to add punch to the shadows. (Hold down alt/Option to see clipping too).

At this point, you can go on and use other tools including curves and Presence. This tutorial is focusing on the tone adjustments and I hope this helps you get to a good start point in getting better edits!
Check out this companion tutorial on Contrast vs Whites/Blacks that fits right in with this tutorial.
Great to see you at the CAFE
Colin
See newest Lightroom content
- Landscape masks in ACR and Lightroom
- Where are the missing tools in Camera RAW?
- Adaptive Profiles in Lightroom and ACR, 1 click pop on all your photos
- Miraculous reflections removal from photos in Lightroom and Camera RAW
PS Don’t forget to follow us on Social Media for more tips.. (I've been posting some fun Instagram and Facebook Stories lately)
You can get my free Layer Blending modes ebook along with dozens of exclusive Photoshop Goodies here

18 thoughts on “Tone Panel, most important settings in Lightroom and Adobe Camera RAW”
Leave a Reply
Use Black and White, to darken and lighten COLORS in Photoshop. How to do color-based luminosity masking in Photoshop

Keyboard shortcuts for Photoshop. Work faster with these 5 keyboard shortcuts, to get things done faster and to do things...
In this tutorial we will share some techniques how to shoot and retouch for a high-key effect in architectural photography....


Thanks Colin,
Cleared up a couple of things especially Texture vs Clarity
Hi Colin,
Thank you for this good tutorial.
However, when bringing out detail in the sky why did you not use the Dehaze slider?
I do, check out my newer auto on Dehaze, texture and clarity. I was saving those sliders for a separate tutorial 🙂
Hi Colin, I always enjoy your tutorials! Thanks for sharing so many great tips. Looking forward to your next one!
Thanks Cathy
Thank you for confirming techniques I had been using for years. However I’ve deviated fromit after watching videos by other trainers. Some concentrate on the histogram; which takes longer with marginal results. Your technique is more organized than my old technique. It will allow be be quickly process a large number of images!
Glad to help. I keep an eye on the histogram to make sure I’m not clipping important details, but it’s just a guide, I use my eye for tasteful edits.
It’s like sound mixers in my band days, some looked at the meters and had a terrible sounding mix. The best ones used their ears.
Colin, great tutorial… Original LrC users. Using the Highlight/Shadow sliders before touching the Exposure slider is a really effective option. Also liked your Contrast tutorial.
Thanks
Thanks for the great explanation of the difference between highlights/shadows and whites/blacks. I sometimes like to use the dehaze slider to add some “snap” to dull photos (I mean lighting, not subject content :). Do you have a tutorial that covers dehaze? I haven’t seen a clear explanation of just what dehaze does in terms of colors and contrast. Thanks.
I just made one recently (since this comment) have you seen it yet?
https://photoshopcafe.com/texture-clarity-and-dehaze-in-lightroom-acr-explained-the-ultimate-comparision/
Very nice Colin! I thought I was getting pretty good results when adjusting the tonal values on some of pictures., only to find out, that I was doing it all wrong. What I mean is, once I found a happy medium for one photo, I would apply to a series of like photos. Looking back at that, sometimes the results were good, other times ah not so good. Guess that’s what happens when you get lazy and look for quick fixes.
We will always find better and better ways of doing things.I also think our tastes change over time too
Great video! Shooting raw, I always work to add punch and detail to my photos. This explains a very clear way to do just that. I am curious as to when you feel is best in the editing process to apply sharpening and noise reduction? Thank you for your videos. I really enjoy them!
Melania
Check out my new video on texture clarity and Dehaze if you haven’t seen it, that also covers sharpening a little. I need to do one on noise reduction some time, I didi do one a while back with the experimental noise reduction
So helpful to have a Tutorial that works for those of us that refuse to be on the Adobe pkgs and are still using the Ancient LR 6.14. It is all I need and supports my Portrait and Boudoir captures. Thanks again as you address things other than the Amazing AI crap the new talent deprived photographer of today needs soo much.
Glad to help
I now do very little editing in the main panel. I go to the masking and edit the sky and foreground separately as a minimum. Tutorial work well here as well Thanks