
Photoshop removes anything instantly with General Distractions
Detect and remove distractions in a photo with Photoshop ai tool, General Distractions
The latest addition to the remove tool is General Distractions, available right now in Photoshop Beta.
With the remove tool, we can simply paint over areas to remove them. This tool may or may not use ai (we can set the options). There are auto detect options that include remove People, wires and cables and now, the General Distractions options. The remove tool and these options do NOT require Generative Credits.
Let’s have a look shall we?
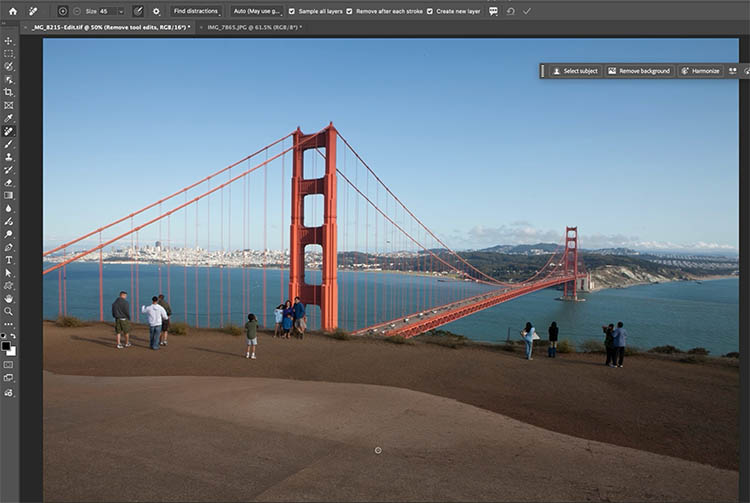
Choose the remove tool in the toolbox.
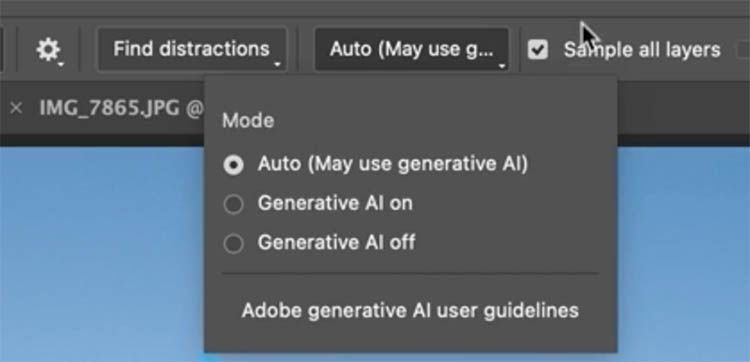
Under Mode, choose the option to use Generative ai or not.
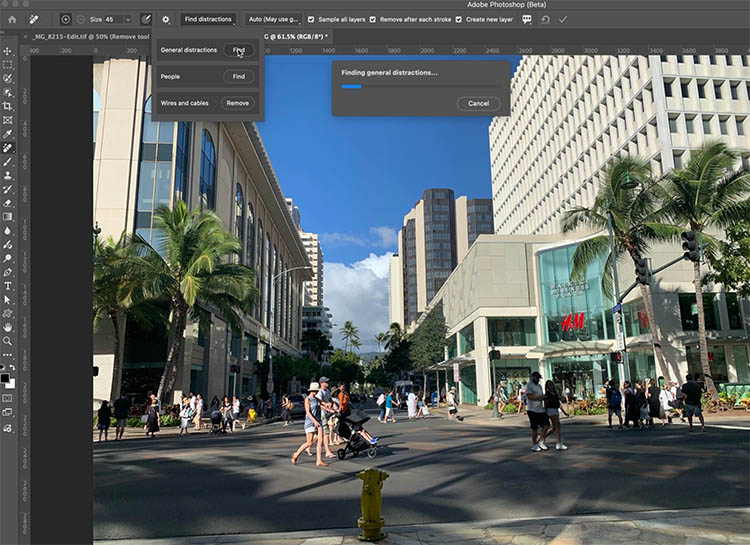
Click at the top and choose Find Distractions
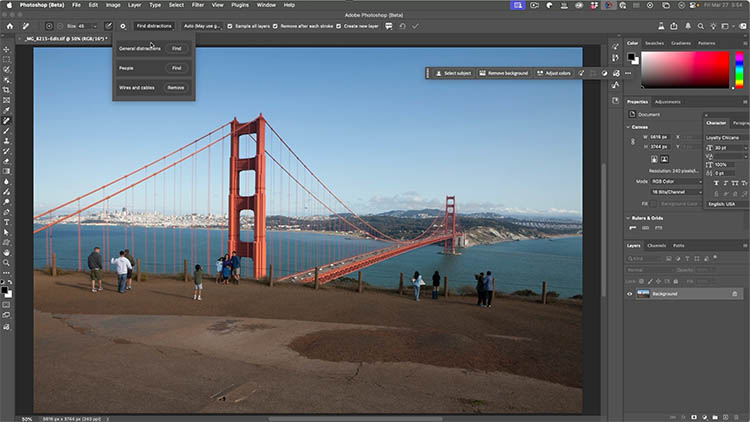
Click on Find in General Distractions
You will see a progress bar as Photoshop analyzes the image.
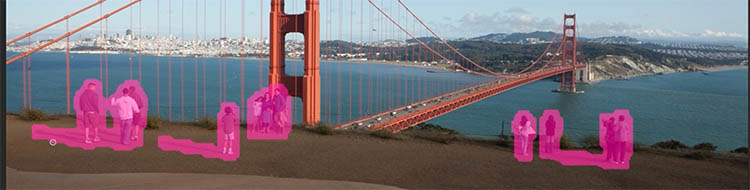
All the detected areas will have colored overlays.

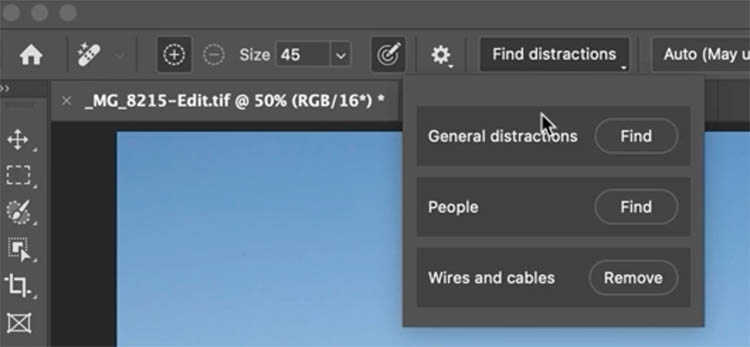
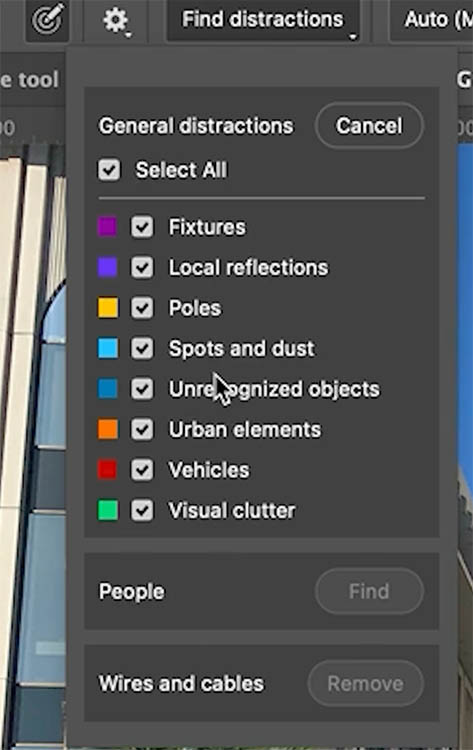
Once again, click Find distractions to open the General distractions panel.
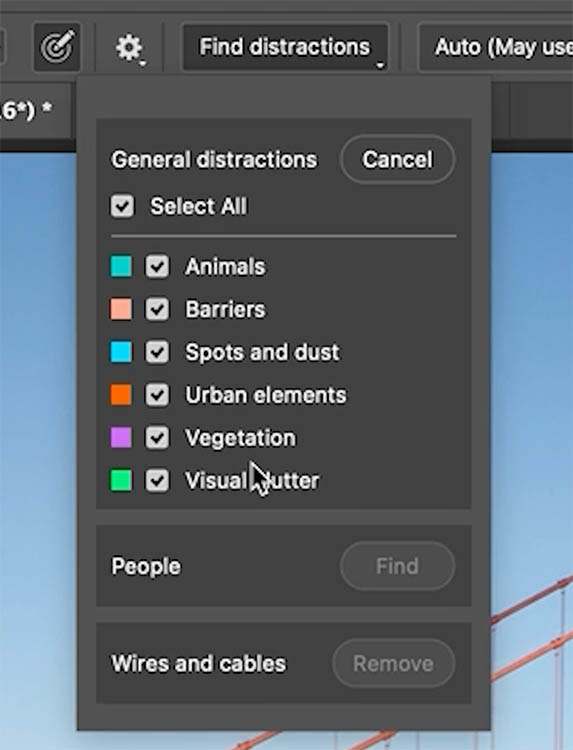
Here you can see a list of the detected objects. It can detect more types of objects, but only the ones that appear in the image will be shown.
We will look at the options in a moment. For now, let’s just see how it works.
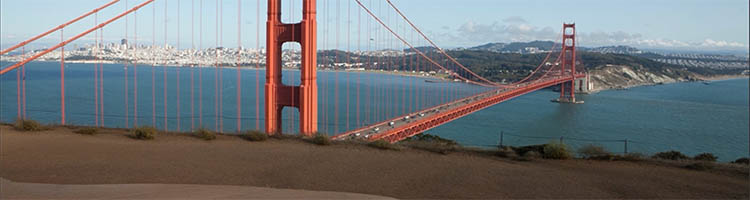
Press the checkmark, or the Enter key to apply. I noticed, it can take a while for it to register that you applied it.
As you can see General Distractions did a good job of removing everything that was highlighted.
General Distractions, doesn’t remove people, because we have a separate, remove people option. Let’s Remove people too.

Notice that it doesn’t just highlight the people, it also highlights their shadow. This isn’t brand new, but it’s a more recent addition.
Apply and the people are removed.
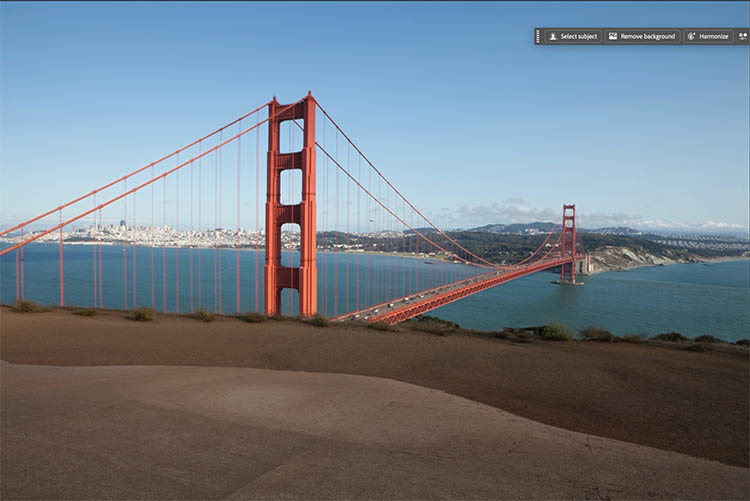
There are little bits of fence left over. These can be removed by painting with the remove tool.

After, you can see everything has been removed.
(In a real shoot, I wouldn’t remove the fence on this image. I’d also adjust the composition—like moving forward—but here we’re focusing on using the Photoshop tool and this image is good to demonstrate that.)
A closer look at General Distraction features.
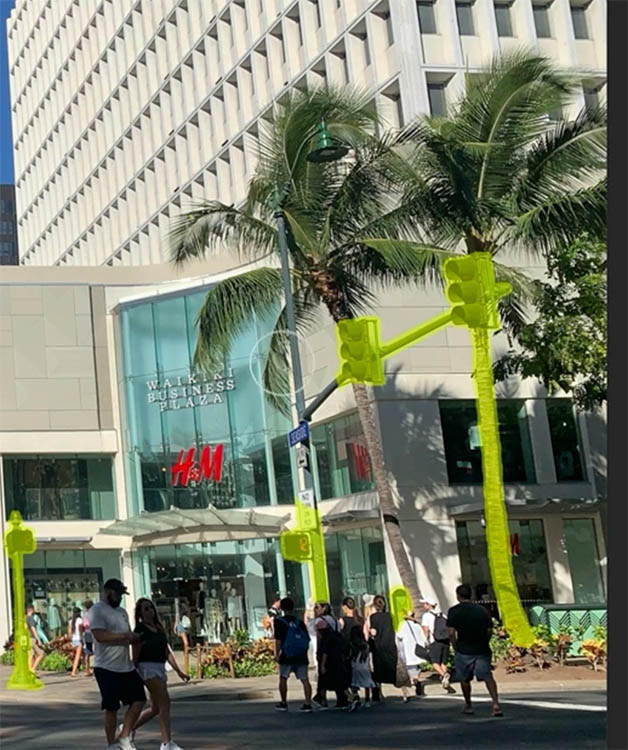
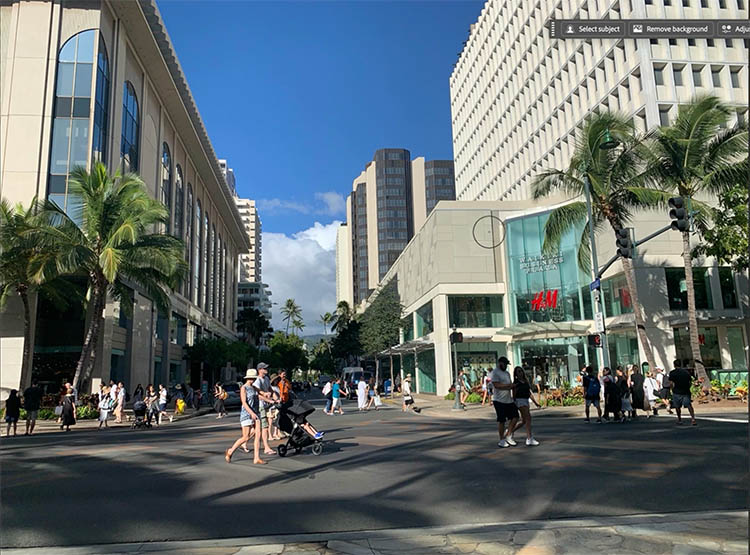
Let’s use this photo of downtown Waikiki Beach, Honolulu to see some different types of distractions.
Grab the Remove tool>Find Distractions>General Distractions.
Now, we see different types of things highlighted.
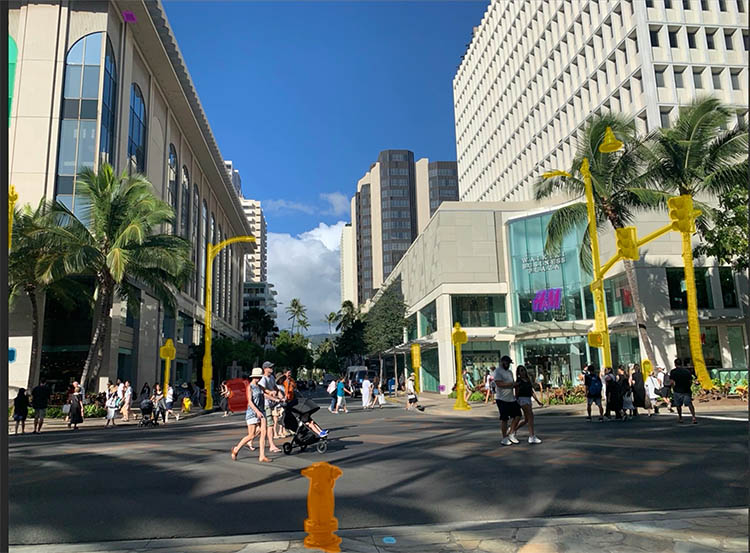
You can turn off the objects you don’t want to remove. In the real world, I wouldn’t remove things like the traffic lights.
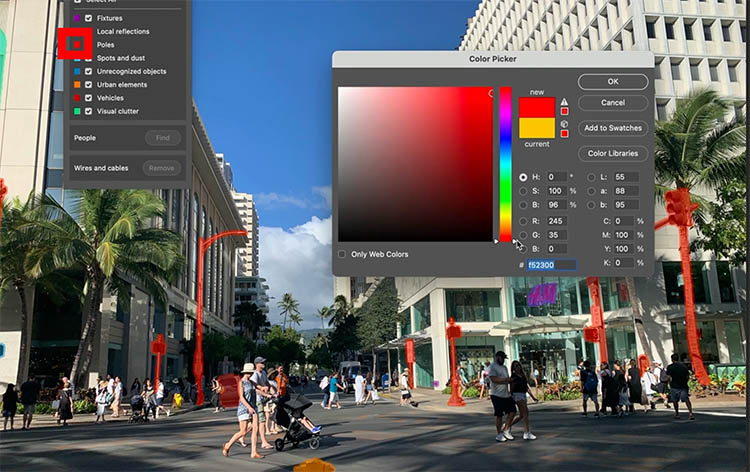
Sometimes a highlight is difficult to see. You can change the highlight color of any distraction by clicking on the color swatch.

The color picker appears and you can choose any color you like.
If you want to manually remove part of a distraction, you can hold down the Alt (Windows) / Option (Mac) key and paint away the areas to exclude.
You can also paint over any areas to include.
Here we applied the adjustment to test how well it works.
If you wanted to remove all the people, use the remove tool. If you have multiple shots, the best way is to use the Layers stacks trick to remove people.
I hope you enjoyed this tutorial, drop a comment and let me know if you would use this tool.
If you are looking to get serious about learning Photoshop, check out my Flagship Course on Photoshop 2026.
See you next week with another new tutorial!
Colin
Unsure which ai model to use in Photoshop? Don’t waste your credits, I tested them all for you, grab the detailed 1 page cheat sheet here.

PS Don’t forget to follow us on Social Media for more tips..
(I've been posting some fun Instagram and Facebook Stories lately)
You can get my free Layer Blending modes ebook along with dozens of exclusive Photoshop Goodies here


14 thoughts on “Photoshop removes anything instantly with General Distractions”
Leave a Reply
How to brighten the shadows in a photo in Photoshop using an easy Parametric curves trick. Make all your photos...

New Photoshop ai selection against difficult backgrounds. How to make instant cutouts with busy backgrounds in Photoshop


I’m quasi-retired after 40 years as a freelance Corporate photographer. My website was taken down 10+ years ago. I’m 77 working for my wife; we own a REMAX franchise.
Thank! 👍
If people want to know if this is a “real” photo or a fictionalized one, how do you label the picture? How do you accomodate people who will be at the location of your pictures and see a different scene than you presented? A big issue in our society is misinformation. At what point do our photos contribute to the problem? Thanks for considering this. i enjoy all your presentations. Lou
You can definitely mention that in the post if its on social media, and label it when appropriate, especially if its a famous location etc. I would treat it the same way you do with other retouching. If I removed a trash can or temporary object, I wouldn’t mention it unless I had a reason to. The real answer to this is a really big “depends” on what the image is and what you are using it for.
Great addition. I do restoratoin on old historical photos and I believe this will help a lot on degraded images.
I hope it works well for you
I think this is a fantastic new addition to the Photoshop repertoire, simply because of the time and ease of use. I would definitely be interested in a more advanced version of this video.
Thank you for everything,
Rob
Thanks Rob
Great feature in PS. I plan on using it quite extensibly. Thank you Collin for the great tutorials.
I love this feature. I can’t wait to use it. Thanks for showing this in an easy to understand video.
Glad you like it!
I hope it comes out of BETA soon; it’s a really good feature. Thanks for bringing it to our attention. Any further exploration of this feature would be appreciated.
Thank you
anytime!