
5 big new features in Photoshop 2026 August update
5 New Photoshop 2026 Features You Need to Know
Adobe has added a number of new features to Photoshop 2026, and some of them can make a significant difference to the way we work.
There’s one addition in particular that I think is extremely useful because it handles something I do on almost every image: recovering highlight and shadow detail while maximizing the usable dynamic range.
We also have new glow effects in Camera Raw, better text fitting on paths, a new AI Assisted workspace, and some very useful improvements for controlling exactly where generated content appears.
Let’s look at the five features and, more importantly, where they can actually fit into a real workflow.
1. The New Light Adjustment
Let’s start with what I consider one of the most useful additions to Photoshop in a long time: the new Light adjustment.
You’ll find Light with the adjustment layers.
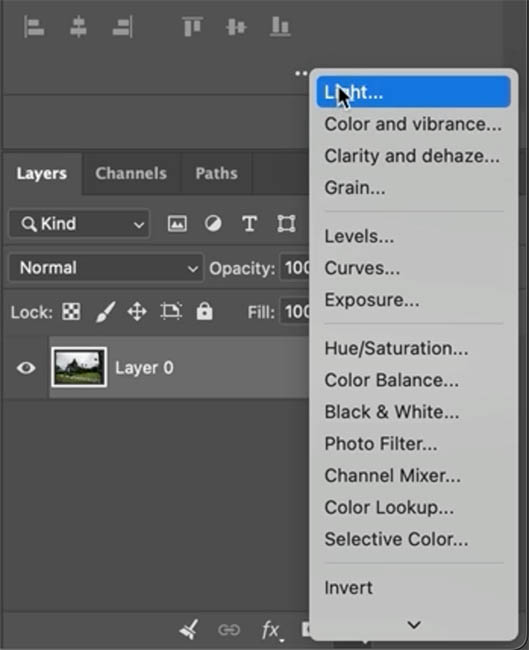
If you normally begin with a raw file, there will still be plenty of situations where it makes sense to start in Camera Raw or Lightroom. But there are also many times when you’re already working inside Photoshop and simply want to recover some tonal information without making another trip into Camera Raw, because these are the same tools that are in the basic panel of Lightroom and ACR.
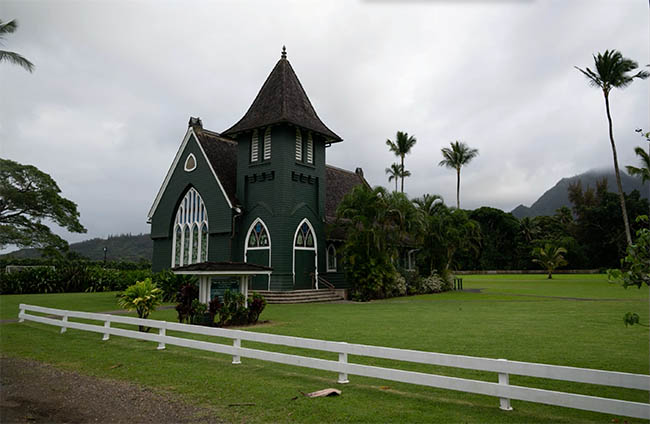
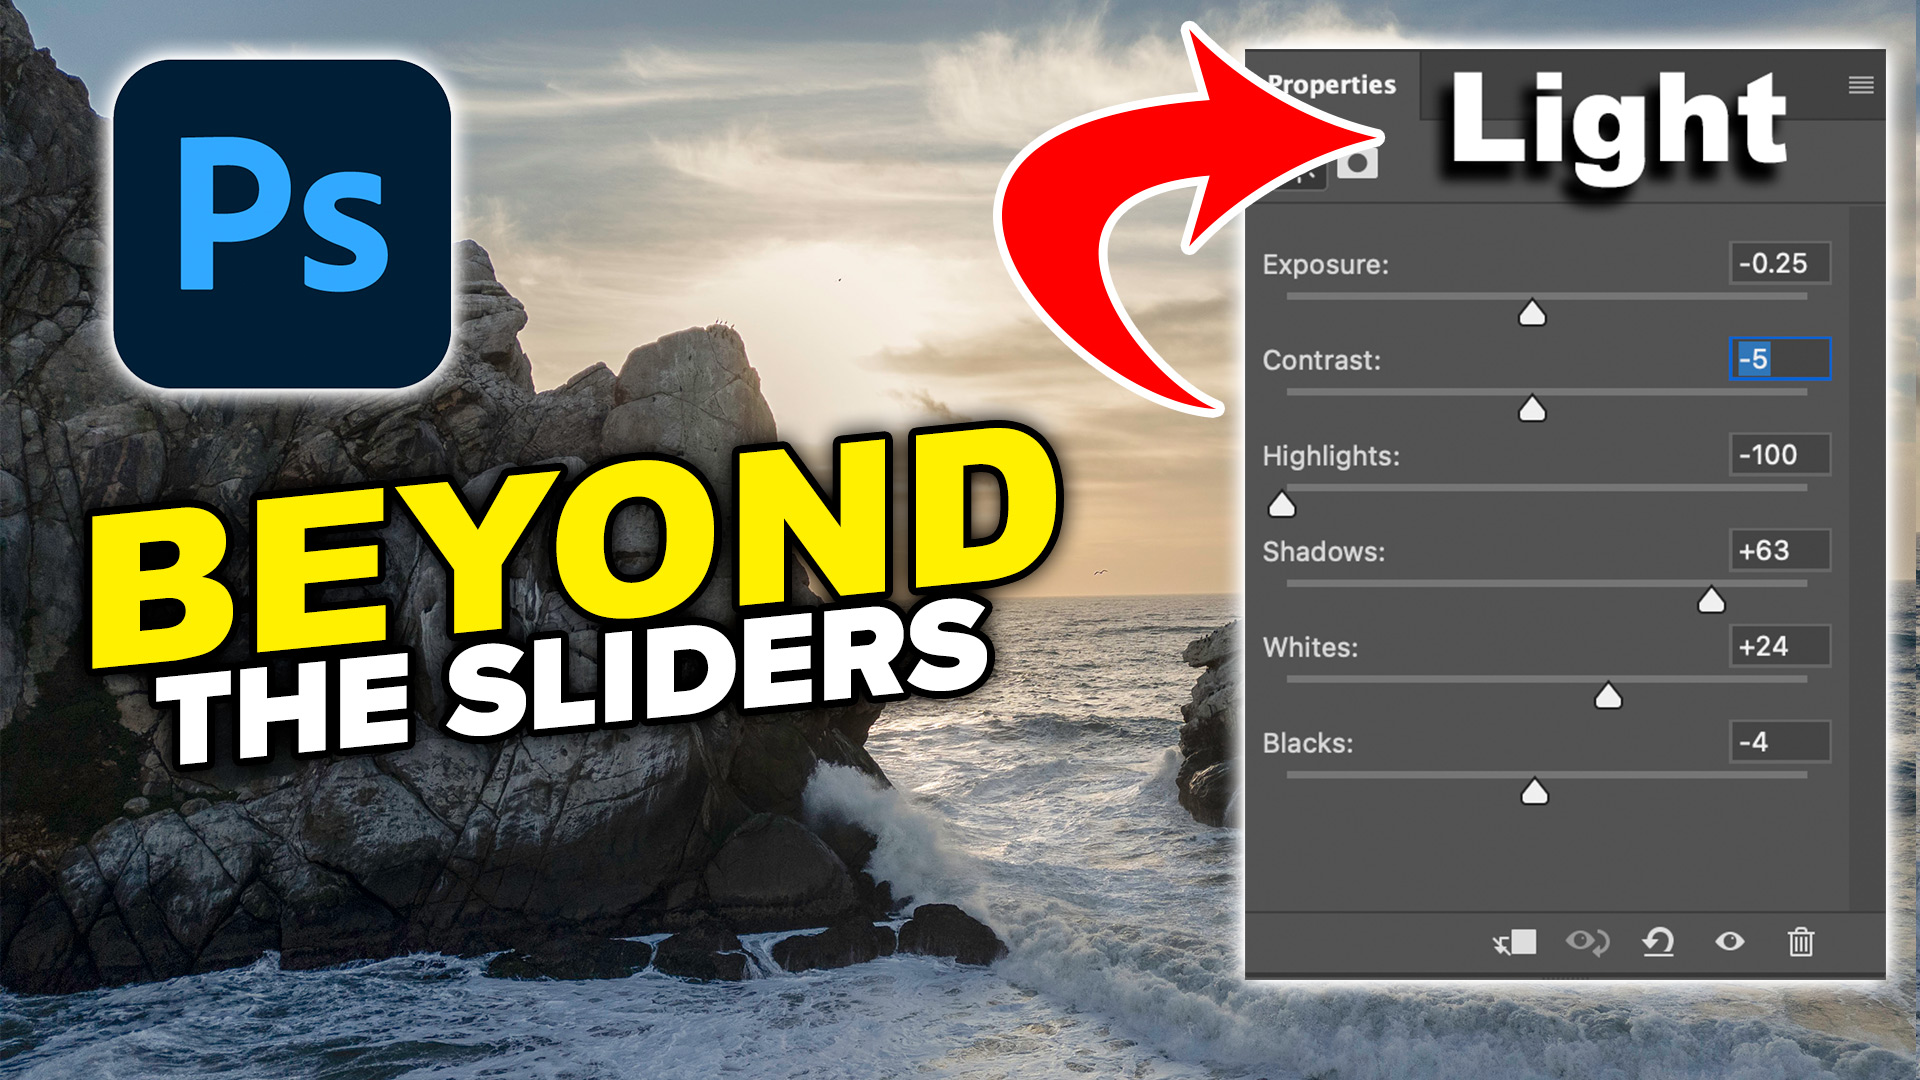
A good starting point is to pull down the highlights. If the sky is too bright, reducing the highlights can bring a surprising amount of detail back.
You can also lower the exposure slightly if the overall image needs it.
Now move to the shadows and open those up. This allows us to recover detail in areas that might otherwise appear as almost solid black.
In previous versions of Photoshop, one way of doing this directly inside Photoshop was with the Shadow/Highlight adjustment. The new Light adjustment gives us a much more convenient way of working with these tonal ranges as part of an adjustment-layer workflow.
I also like to reduce the contrast slightly at this stage.
That might seem strange because we usually want our finished images to have good contrast, but there’s a reason for doing it.
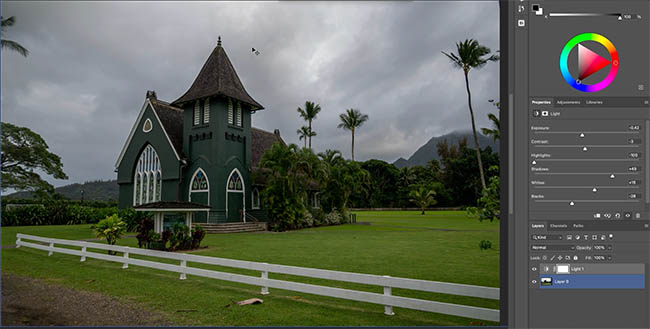
At the beginning of the edit, I’m trying to maximize dynamic range. I want to recover as much information as possible from the highlights and shadows before deciding how much contrast to put back into the image.
Once that information is recovered, use the Whites and Blacks controls independently.
Increasing the whites can restore brightness and punch to the lighter parts of the image. Adjusting the blacks lets us establish a solid black point without unnecessarily crushing all the shadow detail we just recovered.
This gives us much more control than simply pushing the Contrast slider.
This makes the Light adjustment a very practical way to begin an edit, particularly when you’re already inside Photoshop.
And because it works with layers, it fits naturally into a nondestructive Photoshop workflow.
2. New Glow Effects in Camera Raw
The next feature is inside Camera Raw, and this one is a lot of fun.
Choose Filter > Camera Raw Filter and open the Effects section.
Near the bottom, you’ll find the new Glow controls.
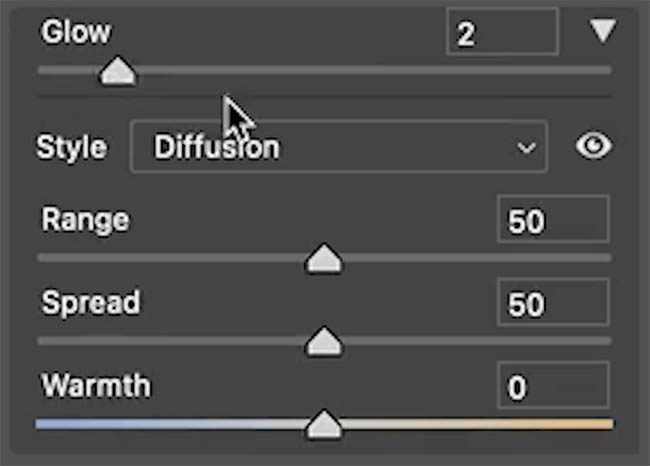
Increase the Glow amount and you’ll immediately begin to see a soft glow developing around portions of the image.
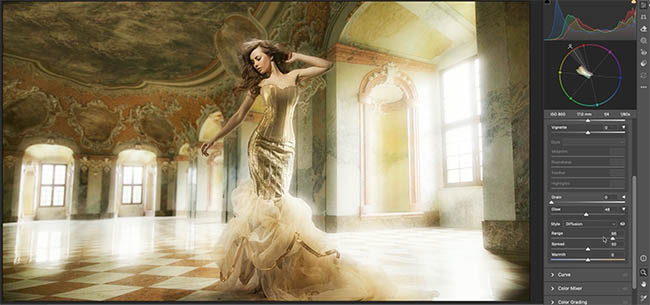
There are three different types of glow:
- Diffusion
- Bloom
- Halation
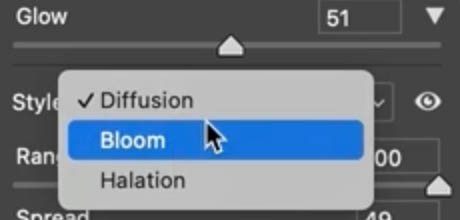
They each behave differently and are useful for different looks.
Diffusion
Diffusion creates an effect that has some similarities to the classic Orton effect.
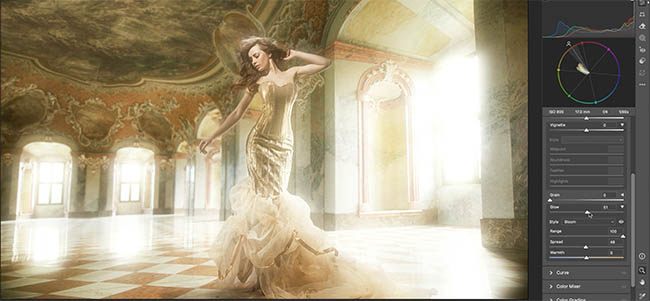
Traditionally, we could create an Orton-style look directly in Photoshop by duplicating a layer, changing its blending mode to something such as Overlay, applying a Gaussian Blur, and then reducing the opacity until we found the right balance.
Using a lighter blending mode such as Screen or Lighten can produce something closer to the way the Camera Raw diffusion effect concentrates on brighter areas.
The new Diffusion control gives us another way to create this type of soft, glowing treatment without building the entire effect manually.
There are several controls that determine how that glow behaves.
The important thing here is finding the sweet spot.
Range controls which brightness values are receiving the effect.
With the range pushed toward one side, the glow can be limited primarily to the brightest whites. Move the control and progressively more of the lighter midtones can become involved.
Spread determines how far the glow extends.
With a smaller spread, the glow stays tighter around the affected areas. Increase the spread and the light appears to extend farther into the surrounding image.
Glow determines the overall strength of the effect.
It’s very similar to building an Orton effect manually. Too little and you barely see it. Too much and the image becomes obviously processed.
Usually there’s a point in the middle where the glow enhances the photograph without taking it over.
Bloom
The second type is Bloom.
Bloom makes bright areas appear to expand or spill into their surroundings.
You’ve probably seen this naturally around very bright windows or strong light sources. Technically, this is often something photographers try to control or avoid when capturing an image, but creatively it can produce a beautiful result.
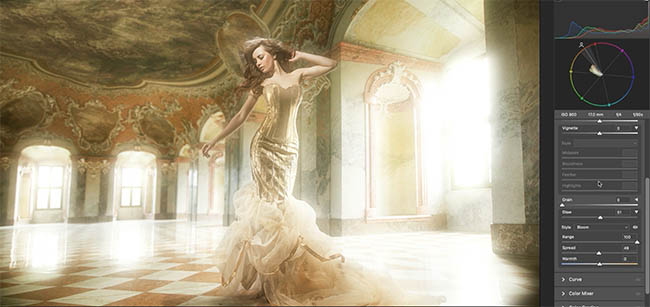
For example, imagine a bright window in a room.
Using Bloom, we can allow that window light to spread farther into the scene and create a softer atmosphere.
The effect becomes even more useful when you combine it with masks.
Instead of applying Bloom across the entire photograph, create a mask in Camera Raw. A simple gradient can be enough.
Drag the gradient across the portion of the image where the window light is entering.
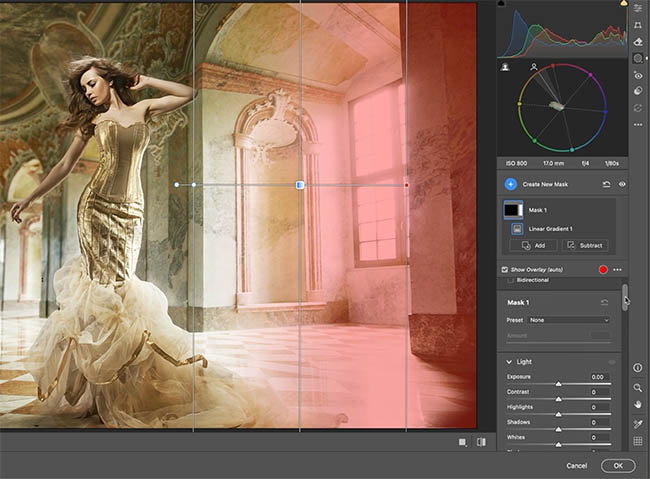
Now return to the Glow controls inside that mask and increase Bloom.
Because the effect is being applied through the mask, we can enhance the window light without changing everything else in the photograph.
Adjust Spread to determine how far the light travels, and use Warmth if you want to give the light a warmer appearance.
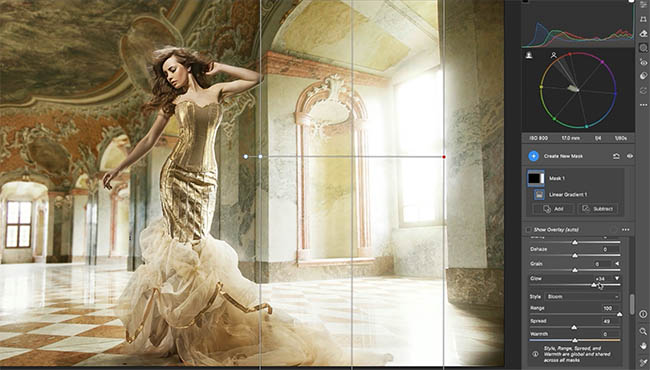
This is a much more controlled way of using the effect than simply adding glow globally.
Tip: Bloom usually looks more convincing when it has an obvious visual source. Try applying it around a window, lamp, reflection, or another area that could naturally produce strong light.
Halation
The third Glow type is Halation.
This one is particularly interesting if you like a filmic look.
Halation is based on an artifact associated with film. Light can interact with the film structure in a way that creates a reddish glow around certain bright areas and high-contrast edges.
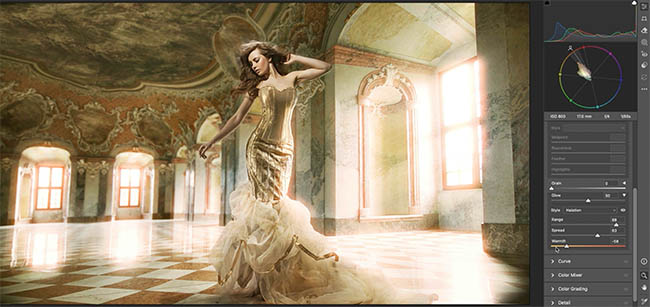
That warm edge glow has become part of the visual character people associate with some film and cinema looks.
Increase Halation and watch the edges around brighter portions of the photograph.
You’ll begin to see that characteristic glow developing.
The Warmth control behaves a little differently here because the warm coloration is fundamental to the appearance of halation.
With Diffusion or Bloom, we can create either a cooler or warmer effect depending on the image.
Halation is specifically designed around that warmer film-style response.
Used carefully, it can add some nice character when you’re trying to create a more cinematic or analog feeling.
As with all of these effects, subtlety is usually the key.
3. Dynamic Fit for Text on a Path
The next addition deals with text, and it solves a small but common problem when designing type along a custom path.
Start by choosing the Freeform Pen Tool.
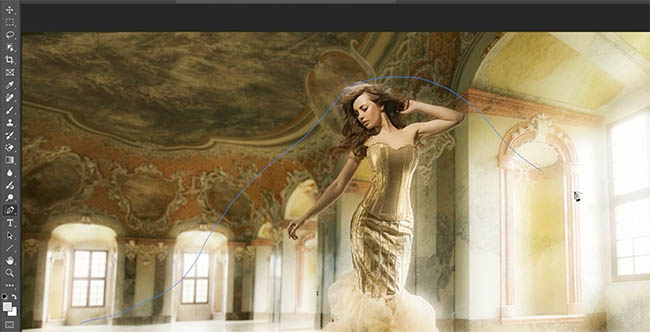
Draw any curve or shape you want.
Now grab the Type Tool and click directly on the path.
Photoshop places the text on that path, beginning from the point where you clicked.
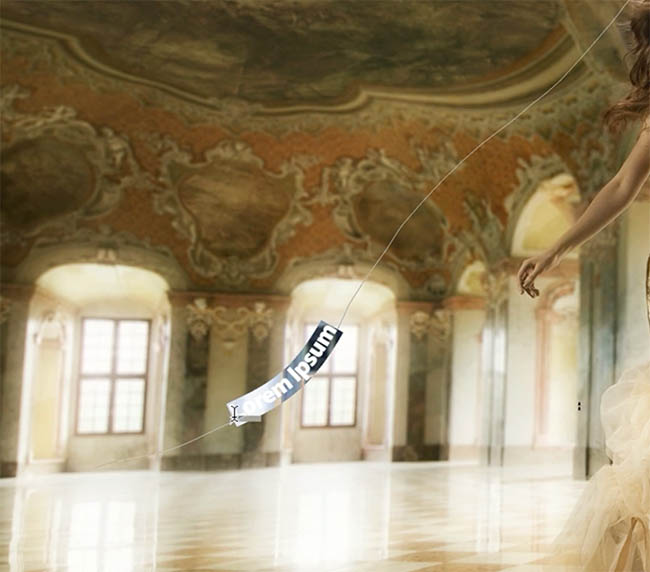
You can replace the placeholder text with your own wording and format it normally. Change the font, size, color, or other typography settings just as you would with regular text.
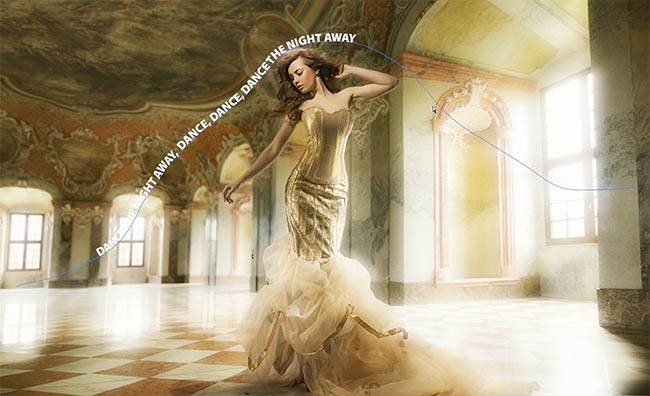
We can also continue editing the underlying path.
Use the Direct Selection Tool or Path Selection Tool to reshape or reposition it.
You can also move the text itself along the path to determine exactly where the lettering begins and ends.
That part of the workflow will already be familiar if you’ve used type on a path before.
The interesting addition is Dynamic Fit in the Properties panel.
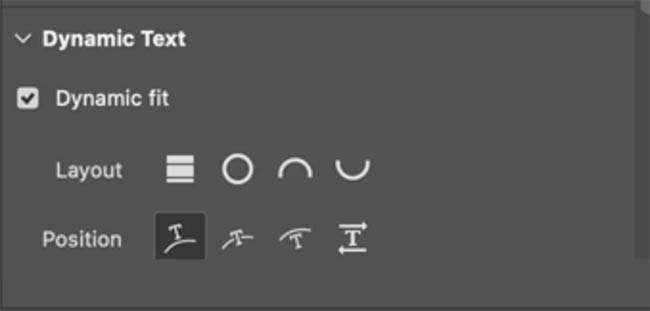
Choose Dynamic Fit and Photoshop automatically fits the type across the available path.
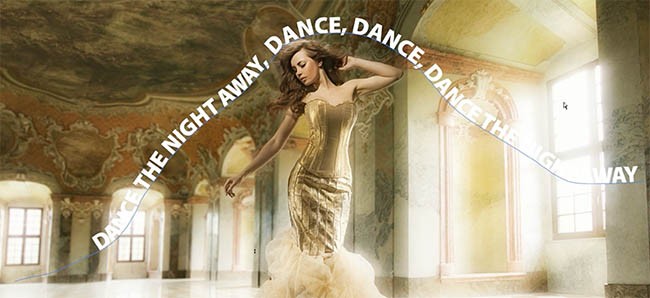
Instead of manually adjusting the text until it fills the curve correctly, Photoshop takes care of fitting it to the entire area.
This can save quite a bit of fiddling around when you’re designing logos, badges, posters, circular typography, curved headlines, or other graphics where the text needs to conform closely to a shape.
4. The New AI Assisted Workspace
There’s also a new workspace option in Photoshop.
The traditional Photoshop environment is now identified as Pro Editor. This is essentially the normal Photoshop workspace we already know.
You may also see options such as Prompt to Edit, which connects to the existing generative editing workflow.
The new option is AI Assisted.
Switch from Pro Editor to AI Assisted and Photoshop moves the document into a different workspace built around AI-driven editing.
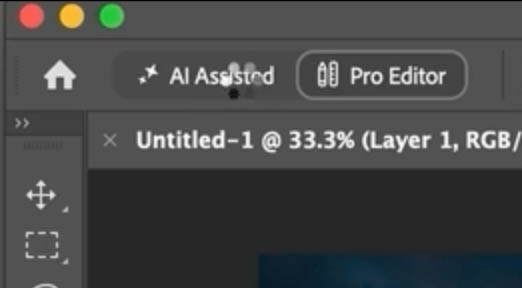
Your layered document is brought into this environment, where you can work with Firefly-related functionality directly inside Photoshop.
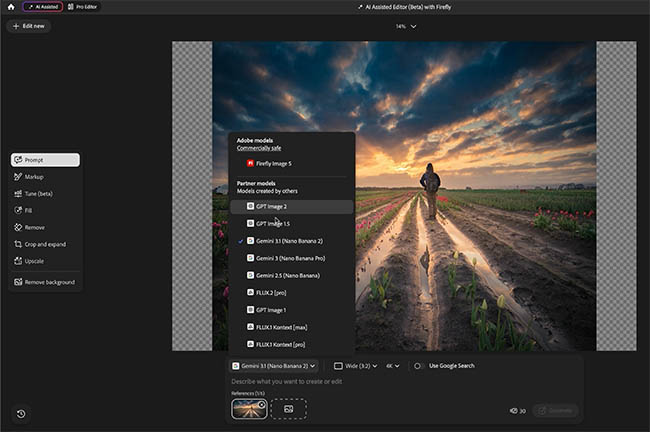
At the time demonstrated here, this workspace is still labeled beta, so don’t be surprised if parts of the interface or workflow feel less polished than the traditional Photoshop environment.
The important idea is that Adobe is bringing more of Firefly-style editing experience directly into Photoshop rather than requiring you to leave the application.
Depending on the model you choose, the workspace can provide additional generative options, model selection, resolution controls and aspect-ratio choices.
The demonstration also shows access to partner models, including GPT and Google’s Nano Banana models.
Nano Banana 2 is used in the example because it currently provides the strongest results of the available Nano Banana choices demonstrated inside Photoshop.
The workspace can also support higher-resolution generation, including a 4K option with Nano Banana 2 in the workflow shown.
When working with Gemini-based functionality, Google Search can also be enabled.
That becomes interesting because the model can potentially use information from the web as context.
For example, if you’re creating something connected to a specific period, weather condition, location or time of day, access to search can provide additional real-world context for the generation.
For a simple demonstration, enter a prompt such as “add rain.”
Photoshop tells you the credit cost for the generation, and you can then generate the result.
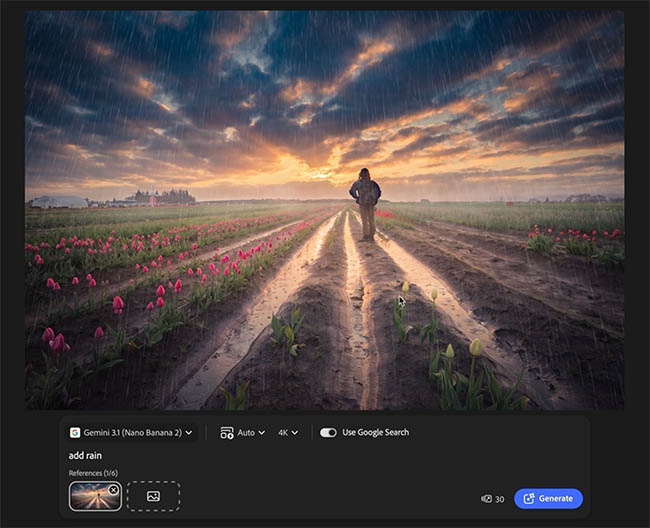
In the example, the model adds visible rainfall along with details such as splashes in the water, while working at the selected resolution.
When you’ve finished, choose Pro Editor to return to the normal Photoshop environment.
Your original layers are still available, and the newly generated result is added as another layer.
Rather than completely replacing the familiar Photoshop workflow, AI Assisted currently behaves more like an additional editing environment that you can enter and leave.
I wouldn’t think of it as a replacement for Photoshop’s traditional tools. It’s another way of accessing generative features while keeping the document connected to Photoshop.
And because this is a beta workspace, it’s also an area I’d expect to continue changing.
5. Better Control Over Generative Fill With Annotations and Masks
The final group of improvements gives us much more control over where generated elements appear.
This is one of the most important problems in generative editing.
It’s easy to tell an AI model what you want. The harder part is often telling it exactly where you want it.
Photoshop now provides better ways to communicate that placement.
Positioning Generated Objects With Annotations
Open Prompt to Edit, which connects to the Generative Fill workflow.
Choose the model you want to work with.
For the annotation-based workflow demonstrated here, a partner model is used because these on-screen annotations are working with Nano Banana.
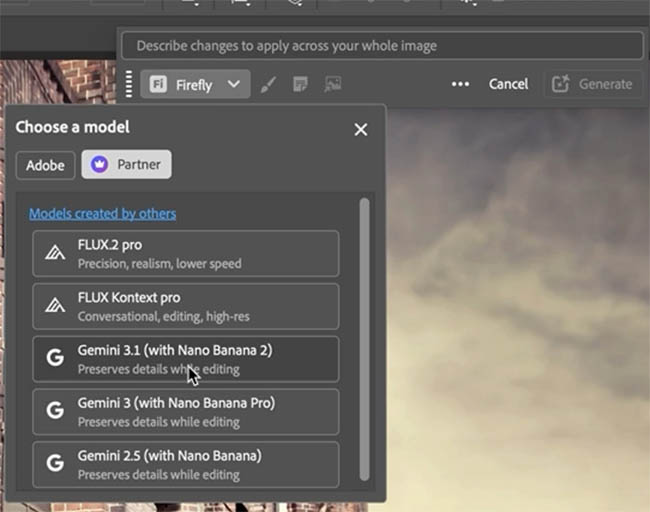
You’ll notice new controls that allow you to draw directly onto the image.

Use the brush to roughly indicate where an object should appear.
For example, if we want a guitar amplifier in one part of a photograph, draw a simple box in that location.
If we want a guitar next to it, sketch the basic shape of a guitar.
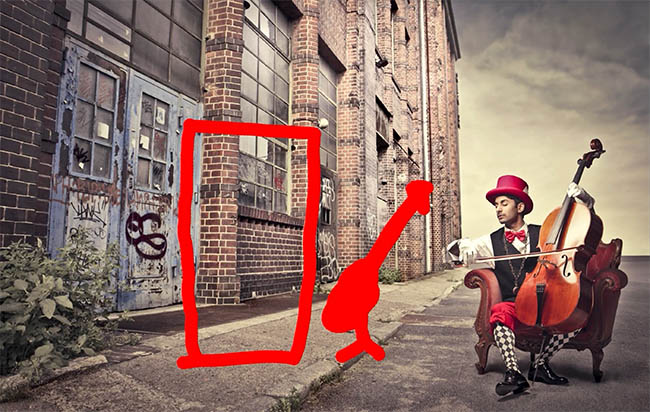
It doesn’t need to be a good drawing.
The sketch isn’t supposed to become the finished artwork. It’s simply giving the model spatial information.
Now use the annotation control to label those areas.
Label one shape “guitar amplifier.”
Label the second shape “guitar.”
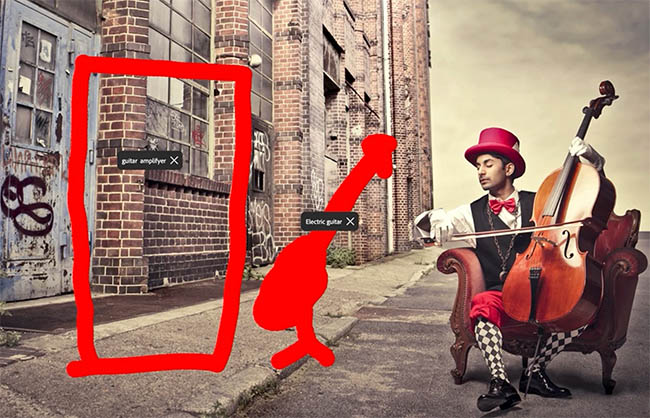
Generate the result.
Because we’ve provided both a written description and visual placement information, the model has a much clearer understanding of what belongs where.

In the demonstration, it creates a convincing guitar-and-amplifier combination in the requested positions.
This becomes even more useful in complicated photographs.
Imagine you have four people in an image and you want to add a hat to only one person.
A text prompt by itself may leave the model guessing which person you mean.
With an annotation, you can indicate the exact person and specify what should be changed.
Generate Only Inside a Mask
The other useful addition is the ability to use a mask to define exactly where Firefly should generate.
Start with the Selection Brush Tool and paint over the area where you want new content.
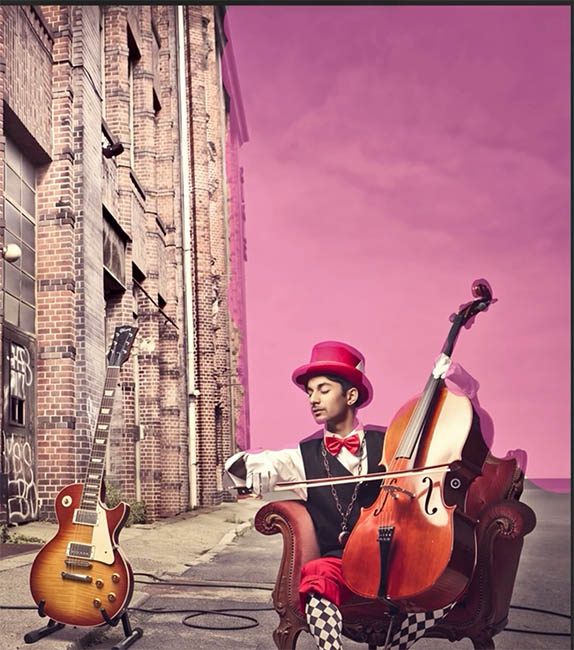
The selection does not have to be perfect.
Once the general area is defined, choose Generative Fill.
For the example, select Adobe’s Firefly Image 5 model and enter a prompt such as “add a city.”
Now generate.
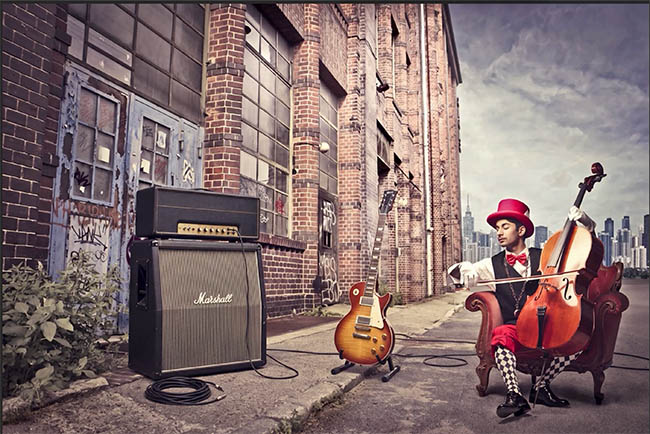
Photoshop restricts the generation to the masked area. The rest of the photograph remains unchanged.
Even though the brush strokes creating the mask may be rough, the model understands that the selection represents the region where the generation belongs.
This gives us a much more predictable way to build generative edits into an existing image.
Rather than asking the AI to reinterpret the entire scene, we can define a controlled working area and allow it to change only that portion.
Which New Photoshop Feature Is the Most Useful?
There are several different ideas packed into this update.
The new Light adjustment is probably the feature I’ll reach for most often because highlight and shadow recovery is something I do constantly.
The Camera Raw Glow controls provide some nice creative options, particularly when they’re combined with masks instead of being applied globally.
Dynamic Fit makes text on a path easier to manage.
And the AI additions show an important shift toward giving us more control over generated edits. Being able to specify an object’s location with annotations or constrain a generation to a particular mask is much more useful than simply entering a prompt and hoping the model understands what we had in mind.
The AI Assisted workspace is still in beta, so I wouldn’t expect every part of that experience to feel finished yet. But the ability to move between it and the regular Pro Editor while preserving the Photoshop document makes it worth watching.
Which of these new Photoshop features would be the most useful in your own work, and which one would you like to see explored in a deeper tutorial? Drop a comment and let me know.
It’s great to see you here at the CAFE
Colin
PS Don’t forget to follow us on Social Media for more tips.. (I've been posting some fun Instagram and Facebook Stories lately)
You can get my free Layer Blending modes ebook along with dozens of exclusive Photoshop Goodies here

7 thoughts on “5 big new features in Photoshop 2026 August update”
Leave a Reply

How to paint hair and fur in Photoshop. This free Photoshop tutorial shows how to make custom hair and fur...

Here we will learn how to get realistic mirror reflections in photoshop. This will work for any object, not just...
How to remove a color cast from a photo in Photoshop. 4 different ways to fix color on photographs instantly...






Thank you so much Colin for these tutorials. You definitely help to keep me up to date with my work. Is it possible to explain how the crop tool works now? I seem to be a little lost on this one as some of the tools are now gone in Pro Editor. Thx so much!
Hi Linda, the crop tool should still work the same way as before.
I would be very interested in a in depth tutorial about the AI features in photoshop.
Thanks for letting me know!
The Cafe is a fun place to be. I’d like more videos like today’s. Thanks. Lou
Thanks, There are more coming
Excellent as always Collin. Thank you so much. Always give me great insight into things I’ve missed.