
Photoshop 2025 New Features
The important new features in Photoshop 2025
Adobe has released Photoshop 2025. This is the annual big update where all the new stuff comes together.
You may have seen some of these new features before in beta, and now they’re in the main Photoshop version. There are other features you have never seen before.
I’m just going to touch on everything very quickly in this tutorial so you get an overview, bird’s-eye view, so to speak, of what’s new. I have made separate in-depth tutorials on the imporatant new features. I’ll link to those, so you can get an in-depth look at each feature.
Auto Remove people in Photoshop
The first new feature is remove people. This uses the Distraction detection feature. This includes People and wires (also reflections and dust in Camera RAW, this is Colin from the future updating this site with the latest info).

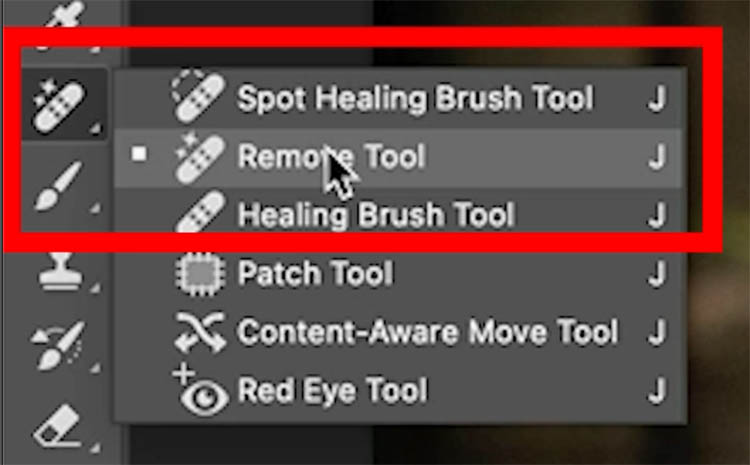
Choose the remove tool from the toolbox.
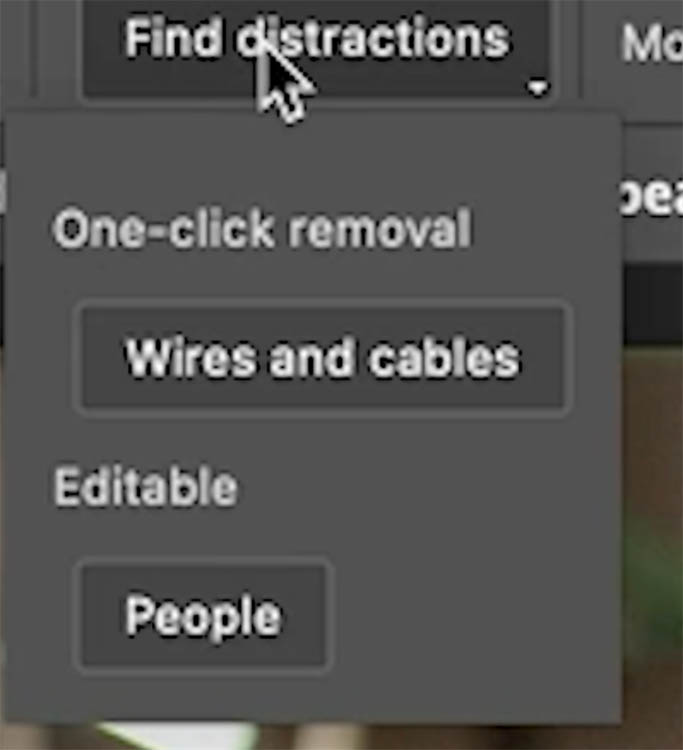
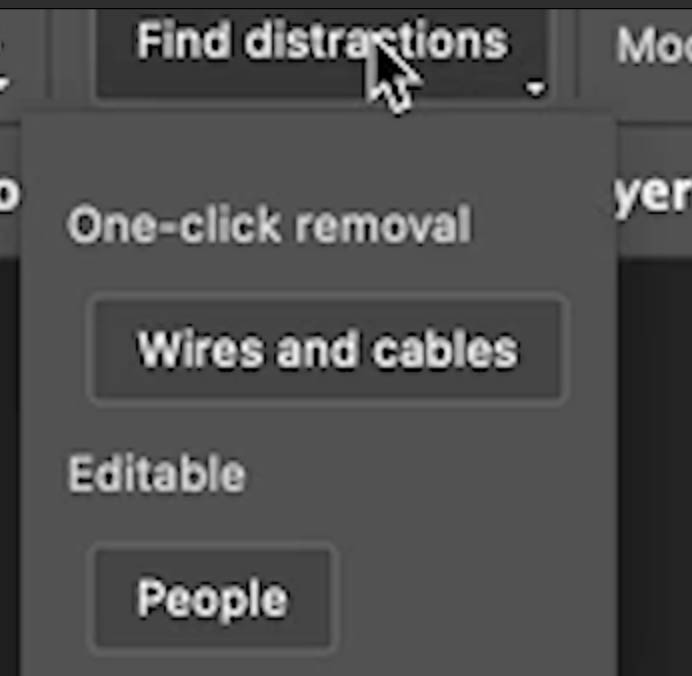
Click on Find distractions in the top toolbar
Click on people.
The people will be highlighted. You can modify this highlight manually.

Click the check mark at the top, or press Enter to apply.
The people are removed.

For more in-depth in this feature: Auto remove people
Auto remove wires in Photoshop
Power lines and cables aren’t that hard to remove, they are just time-consuming. Let’s do it automatically.

Choose Find Distractions. This time, click on wires and cables.
And the wires are removed. It won’t remove the poles, just the wires.
Check out the challenge I made on this feature, progressively using more difficult images to see where it breaks:
- Auto Remove Wires and Cables Challenge

Firefly 3 in Photoshop
The firefly model has been updated from v1 to v3, so we get better results.
In the July 2025 release there is a switcher so you can choose the version you want. (This is also Colin from the future)
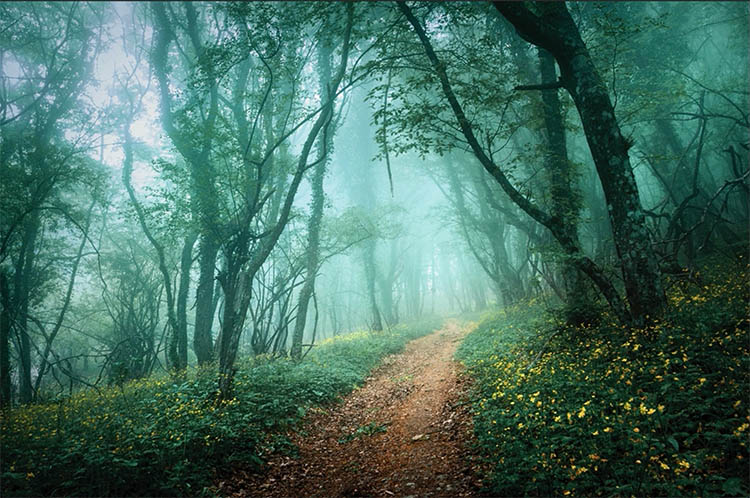
Make a selection around the path with the lasso tool. You could also use the selection brush which is in the latest version (after this tutorial was made)
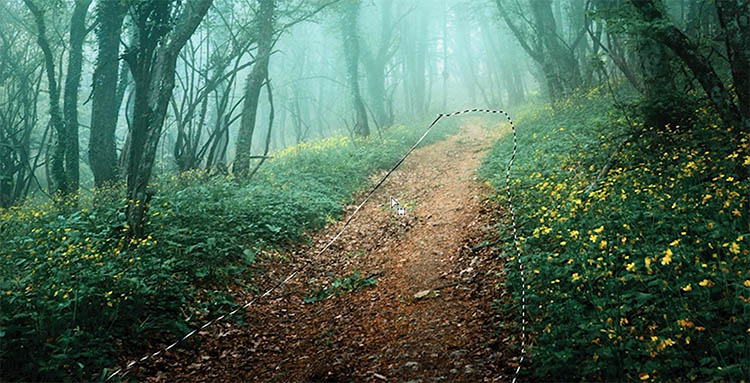
Type in cobbled path to the Task Bar.
Click on Generate
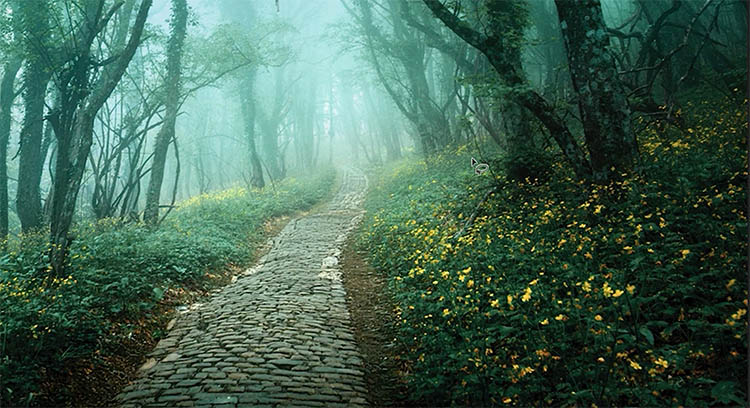
![]()
Notice how much better it looks than in the past.
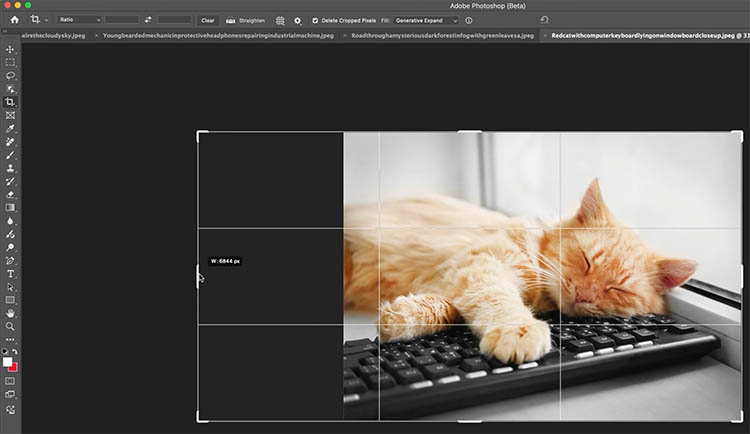
Generative Expand with Firefly model 3
Generative expand also benefits from the updated Firefly 3.

Choose the Crop tool, choose Generative Expand in the options bar.
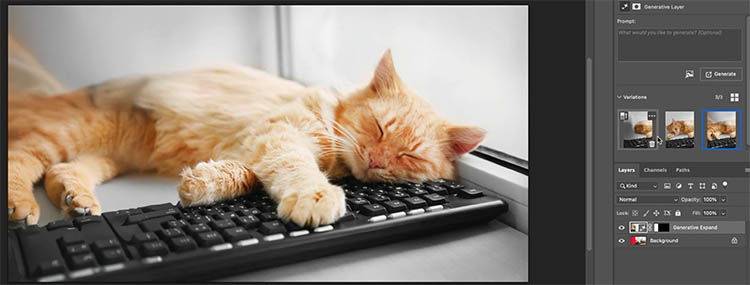
And we get a good result. There are some weird things that happen in the other 2 variations, but we get 3 to choose from.
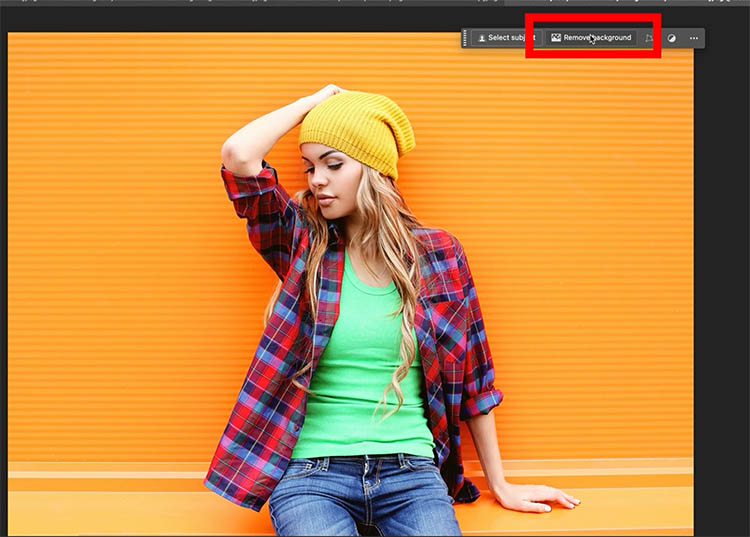
Remove Background in Photoshop
We now have a 1-click background remove, and it’s starting to get really good, especially with the recent update to the algorithm.
With the move tool selected (V key), Choose Remove Background from the Task Bar.
The background is removed.
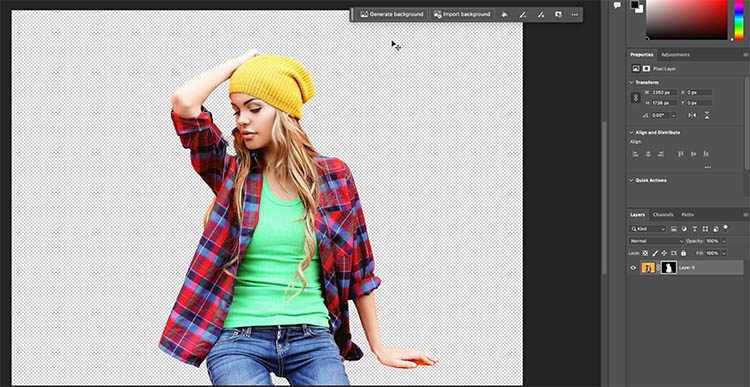
Let’s generate a new background. Type beach into the generate field.
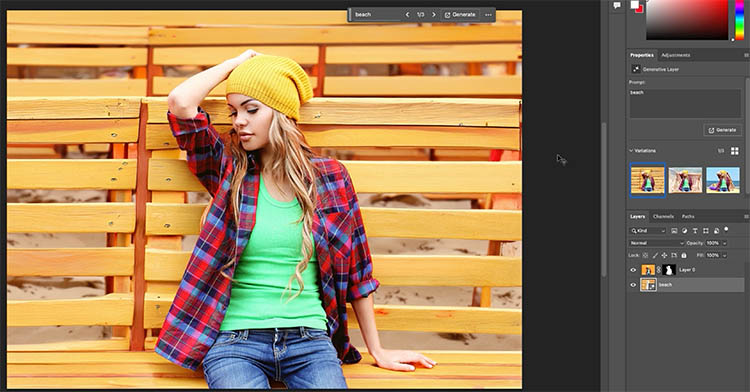
And we are now at the beach, if you wanted to see the ocean, a more descriptive prompt can be used.
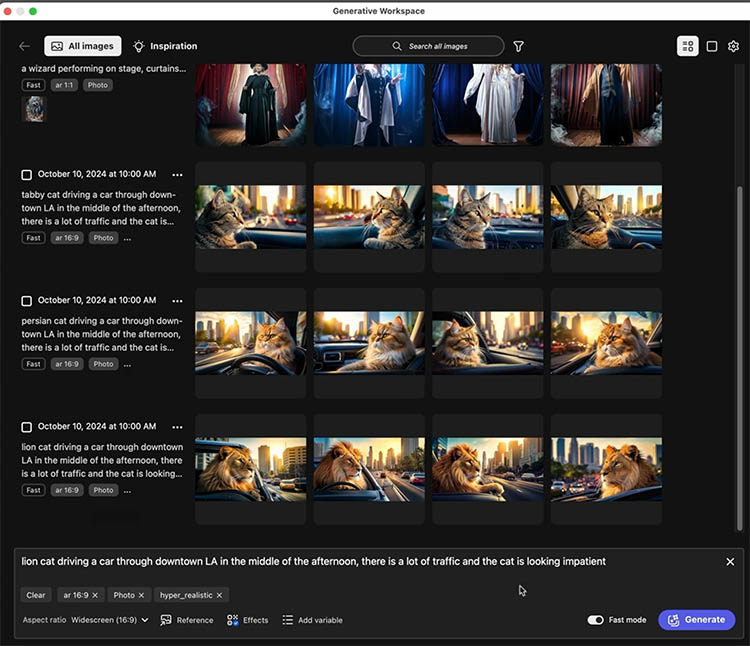
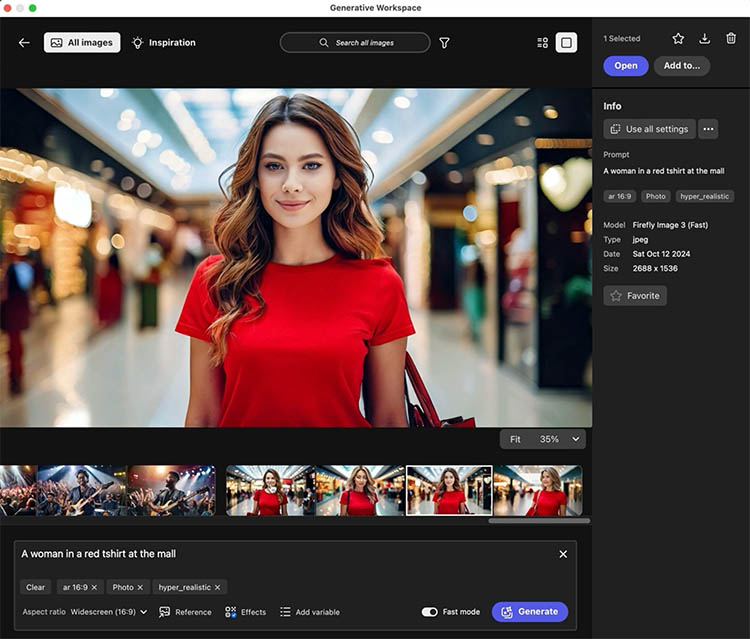
Generative Workspace – Batch process with Generative ai in Photoshop
The generative workspace is an interesting tool. Currently, this feature is only in Photoshop beta. It generates images from scratch and has the advantage of being able to generate at 2k resolution as well as batch processing.
If you want to see much more, I have an in-depth tutorial on Generative Workspace in Photoshop.
Edit>Generative Workspace
Type a prompt to generate an image and choose the options, all covered in the in-depth tutorial on this.
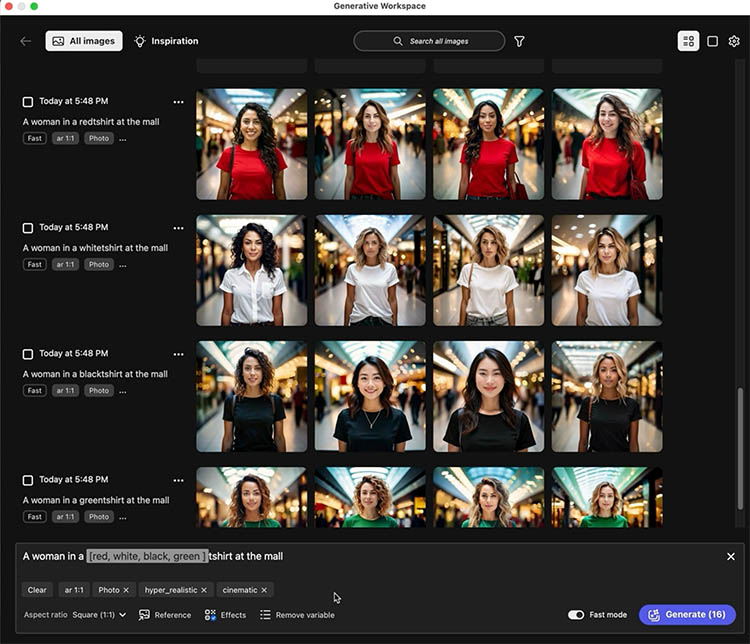
What makes Generate Workspace so powerful, is the ability to use square brackets to generate variables.
Separate the option with commas.

Now, when you generate you will get a row of 4 variations for each of the variables, saving you a lot of time.
I hope you found this introduction to the new features in Photoshop 2025 useful. Check out the latest new features in our Photoshop New Feature guide. This guide shows you every new feature as it was added, since Photoshop CS3, and EVERY version of Photoshop right up to the newest features added today (Any day, it’s a living list).
Here is the index of the video at the top to help you get to the parts you need.
- 00:42 Auto remove people
- 02:49 Auto Remove Wires and Cables
- 04:17 Firefly 3 in Generative Fill
- 05:07 Firefly 3 in Generative Expand
- 06:00 Remove Background , Generate Background
- 06:49 Batch Generate, Generative Workspace
Thanks for checking it out, see you soon more new tutorials (at least weekly)
Colin
PS Don’t forget to follow us on Social Media for more tips..
(I've been posting some fun Instagram and Facebook Stories lately)
You can get my free Layer Blending modes ebook along with dozens of exclusive Photoshop Goodies here


9 thoughts on “Photoshop 2025 New Features”
Leave a Reply
How to use the new Neural Filters in Photoshop 2021. Change the age or expression on a face and more.
upright correction allows photographers to automatically adjust keystoning and distortions. Colin shows how it's also useful for people wanting to...

How to use the new features in Photoshop 21.2, June Photoshop 2020 release. See all the new features and the...


The biggest issue I have had with gen fill is the 1024×1024 maximum resolution. Has Adobe fixed this? It looked like in the beta version you were getting more resolution.
Colin,
How is all of this generative AI photography or even art? The person is simply describing a scene and AI is creating the image using parts of images found on the internet. I’m sure eventually one of my images will be found and used so someone else can say, “Look what I created!” But they didn’t create anything ,the computer stole my work and extrapolated images from it.
I love your videos, it safes me so much time figuring everything out on my own.
Well presented too.
Great presentation of new functions as usual. Many thanks
Thank you very much for explain this news.
I received an email concerning the 2025 version of PS and was curious to watch the video. I’m glad I did. I didn’t know my version of Photoshop had all of these cool new features.
Your tutorials are always fantastic! Thanks so much.
Thanks for the great info. You’re always so clear and helpful. Wish I’d finally get the photoshop vault.
Always so much to learn from you Colin. Thank you for the heads up. I love the auto deleting of people option – great for travel photos when others get in the way…