Generative fill does an amazing job, especially with Version 3 of Firefly. The biggest setback is the lack gf resolution. In this tutorial we will look at what the issues are and 2 ways to fix it. The first way is a new tool Adobe has introduced called Enhance Detail and the 2nd is a fix I came up about a year ago that works great today. The first feature is currently only in the beta version of Photoshop. The second part will work in all versions of Photoshop.
Start with this wide shot.

Choose the crop tool and Generative expand from the toolbar.
Drag with the crop tool to outcrop; AKA crop larger than the original size.

Press Enter to apply and Generate
From a distance, it looks great.

Zoom in cose and you can see the resolution mismatch. See how the bottom is soft and blurry vs the top part of the image is crisp and sharp.

Go to the Properties panel
Roll over the variation you are using.
Click the button at the top right to apply Enhance Detail

Now when you zoom in, it looks great!

Here is before and after Enhance Detail

Enhance Detail doesn’t download a higher resolution version of the generated variation. What it does, is use Super Resolution.
To demonstrate, let’s go to Adobe Bridge. Right click this low resolution photo and choose Open in Camera Raw.

Here is our Lowe resolution cat photo.
Right-click.

Click on Enhance.

Choose Super Resolution and click Enhance.

Now we get a new image, but this one is 2x as large as before.

What Super resolution does is make the image physically 4x larger area.

It upscales and enhances the image, to appear higher resolution than before.

By upscaling the image, it makes it look much better and will work for a lot of cases. Bonus, it doesn’t use Generative Credits.
Ok, but what if we have a much larger image? Let’s look at another solution.

Grab the crop tool and choose Generative Expand from the toolbar.

Crop larger.

This time, it doesn’t even look good from a distance. This image is 11k wide.

Zoom up close and it’s a mess.
Click Enhance Detail.

We just get a sharper version of the mess.

Generative Fill only generates and maximum of 1024px x 1024px on the longest edge.

If the area to fill is larger, it stretches the pixels to fill the area, but it can result in a softer image.

I introduced this trick about a year ago, but I’ve updated and made it clearer here.
Grab the Rectangle Marquee tool.

Change to mode to Fixed size for the top toolbar.

Set it to 1024 x 1024px in the size.

If your image is flattened, click the padlock in the background, in the Layers panel, to convert to a layer
Grab the Crop tool
Choose Transparent from the options in the top toolbar. (If you don’t see transparent, your background is flattened and isn’t a layer).

Drag with the crop tool to enlarge your image.

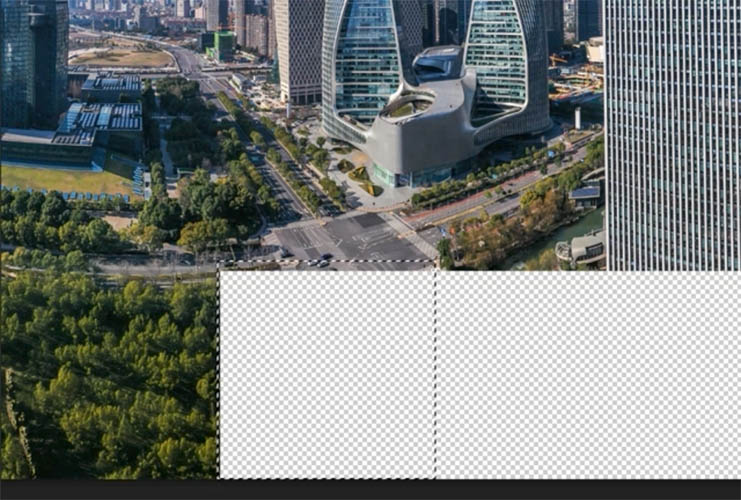
You should see a transparent background. If you don’t, back up a couple of steps and get it right.

Now, because we are using a fixed size for the marquee tool, your selection should be 1024 x 1024px which is the maximum for Generative Fill (at the time of this writing).
Make a selection in the bottom left.

Click Generative Fill in the taskbar and click generate. Leave the text prompt blank.
Now you will se a block at full resolution.

Zoom in and its perfect resolution.

Make a selection next to it with a small amount of overlap
Generate

Keep going until you have a perfect extension to your image which is sharp enough to print.

To make life easier for you, I have created a free action here.
(If you are on our newsletter, click the link to the vault from the newsletter and it’s included in the actions)
Thanks for checking this out, I hope it was helpful
See you at the CAFE
Colin
PS Don’t forget to follow us on Social Media for more tips.. (I've been posting some fun Instagram and Facebook Stories lately)
You can get my free Layer Blending modes ebook along with dozens of exclusive Photoshop Goodies here 
This site uses Akismet to reduce spam. Learn how your comment data is processed.
a deep look at the new features released in Photoshop 2022, learn the new features in a creative, practical way...
This Photoshop tutorial will show you how to remove the shadows exactly where you need them and recover blown out...
How to turn white into a color in Photoshop. In this photoshop tutorial, Colin Smith shows how to add color...

Great tip! Thanks a lot for sharing.
As always good information, many thanks.
another great resolve…. many thanks
Remarkable tools, beautifully explained.
You are a legend!
I found that you need to uncheck the delete pixels box before starting the action otherwise it stalls and gives a message about not being able to complete as the set command can not load