Here is a summary of all the new features in Photoshop beta and Photoshop April 2024 release. There are a lot of new ai features in Photoshop beta, but also some conventional features. I will be making more in-depth tutorials on each of these features.
Firefly Generate image from text is now built into Photoshop. It’s running on Firefly v3.
Create a new document or open document.
Choose Generate Image from task bar, or from bottom of the toolbar. If you don’t see these tools, look at my 1 minute Photoshop fix here


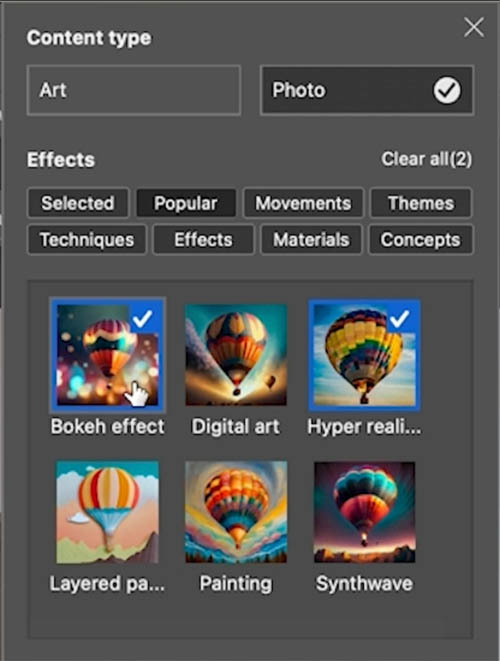
You will se a box open that contains most (not all) of the features from the online Firefly
Enter a text prompt and choose your options
Click Generate

As you can seem the quality in Firefly 3 is improved over v1 in previous Photoshop.

Click on the options on the task bar

Now you have the ability to modify the prompt and options

Here is more of a vintage aircraft in a concept art style. No, it’s not perfect yet, but getting better.
Unlike Gen fill at 1024 x 1024, Generate Image creates up to 2048px x 2048px

Make a selection in an image and type in a text prompt. Here I just did elephant.

Here we have an elephant. No, I don’t usually need to generate elephants, but we are in a lab environment for this tutorial and this shows how much better Generative fill is at creating animals than it was.

At this time, Gen fill still is limited to 1024 x 1024 blocks. But there is a new feature to help.

If you look at this elephant, perhaps you can see the pixelization on the Thin lines, or overall softness.
If you click on the Variations you will see an enhance button, if the image is over 1024 x 1024. (1024px or less is already full resolution).
Click the button to uprez

It doesn’t generate a higher resolution image like Midjourney. Photoshop is using the Super resolution algorithm to upscale the image digitally to 4x. See super resolution here

Just so you can see, I generated a person here and you can see the man looks more realistic than before.

One of the biggest drawbacks of Generative Fill is the gap between what you want and what ai thinks you want.
We can now use a reference image to help guide Gen fill.
Let’s add some pancakes. Make a selection where you want the pancakes to appear.

Enter pancakes into the prompt and click the image button

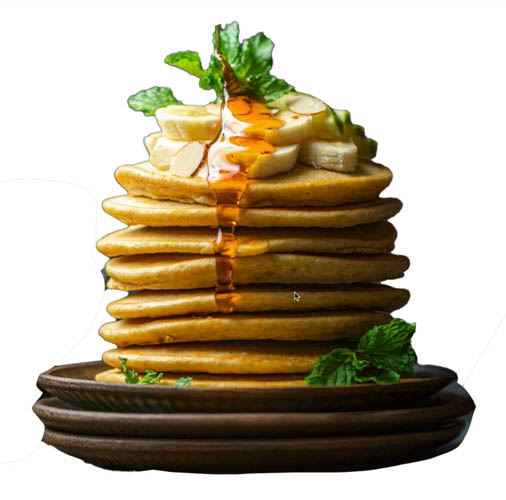
Here is a photo of the style of pancakes I want generated. I filled the bg with white to avoid confusion.

See the blue badge shows we are using a reference image.

All three variations look close to the reference image. To me, this is a HUGE feature.

Lets remove the background in a single click using Remove Background. I don’t really care about the quality of the edges for this demonstration.

Here we have the extracted image. Use whatever method you like to remove the background in your production work, I have made sooo many tuts on that already.

Click on Generate Background (or Import Background if you want to use your own photo).

Enter Mountain top as the text prompt

Here we get a matching background. Your imagination is your limit,

I recently made a tutorial on the Adjustment brush. See how to use Adjustment Brush here
Choose the Adjustment brush for the toolbar. Don’t see it? See this tutorial
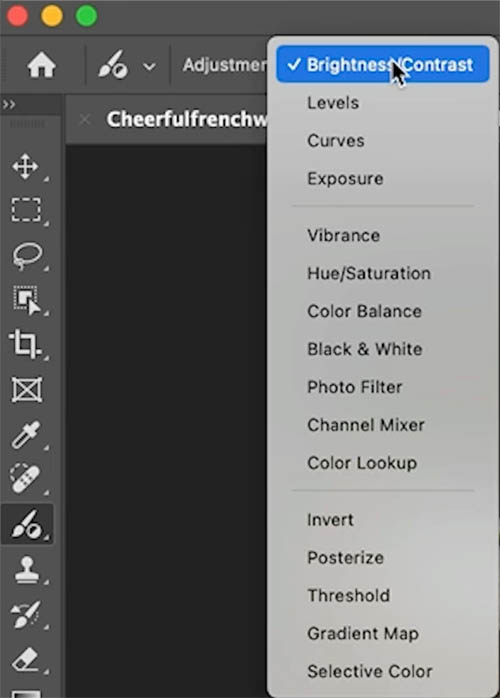
You will notice more options now, such as Levels, Curves, Color lookup etc (People who previously asked why it was in beta, here is your answer, they are still developing the feature).
You will see more brush options too, this is covered in the video at the top. You paint on your image and apply the adjustments while you paint. It’s identical to using an adjustment layer with a mask.
Your comments on this feature range from “totally useless, to best feature ever.” Can’t please everyone all the time.

This feature is in the shipping version go Photoshop, not just the beta. It got very high marks from you all in our YouTube and social media comments.
Here we have some text, but want to choose different fonts.

Open the font menu by clicking on the font name
You will see an option, More fonts
Now, you can see all the thousands of fonts from Adobe fonts including previews to the side AND on your text as you roll over the different fonts.

Choose the fonts you want and they seamlessly, automatically download. The downloaded fonts will be available in all your Adobe Creative loud apps.

I hope you enjoyed this look at the new features in Photoshop. Drop a comment and let me know your favorite feature.
Keep an eye out for more in-depth tutorials at each of these features coming soon.
Great to see you here at the CAFE
Colin
PS Don’t forget to follow us on Social Media for more tips.. (I've been posting some fun Instagram and Facebook Stories lately)
You can get my free Layer Blending modes ebook along with dozens of exclusive Photoshop Goodies here 
This site uses Akismet to reduce spam. Learn how your comment data is processed.
7 tips in Lightroom. Tips to help you work faster and better in Adobe Lightroom. How many of these do...
How to use the new features in the frame tool in Photoshop. ...
How to change a photo into a beautiful slow exposure sunset photo with different sky in Photoshop. ...

Is there a way to mark favorites (or create a favorites list by class or tag) now that PS gives us access to “millions” of fonts? My aging brain can’t keep very many in working memory and resorting to paper notes or Evernote, etc. seems silly.
I think there is a favorites feature off the top of my head
Thanks for the info. Nice to have it all in one article!
Windows 10, latest Photoshop update (supposedly with new apps built into program). PS 2024 version, desktop. My Photoshop new features do not look anything like the video you just posted re: Firefly. If I open a doc or choose to create a new doc in PS, I do not see the option to “Generate Image” – it is not in the taskbar or at the bottom of the tool bar. Using the 3 dots to edit toolbar as you suggested in your 1-minute fix, , there is no option to select the import/generate image tool and there is no icon. Restoring the default toolbar did not change anything. In the menu bar at the top of PS menu, under Window, if I enable Contextual toolbar, a toolbar appears, but the only choices are “select subject” and “remove background”. Again, there is no generate/import image option in the contextual toolbar that I see. Changing the workspace from Essentials to Photo also did not fix the issue. I do not have the beta version of Photoshop installed. Could this be the cause of the “problem”? Thank you for your thoughts on this.
i no this has nothing to do with your work,, but i cant think anyone else to ask.
I have photoshop up to date , But the Gradient not working properly,
The new layout is there but no handles to use it Any help Thanks James
Thanks again Colin, Great tutorial and I love the new brush palette especially the curves I can see me using that a lot.