
How to Create a realistic beam of sunlight in Photoshop
How to Light landscape photos with Lighting Effects, create a beam of light in a forest
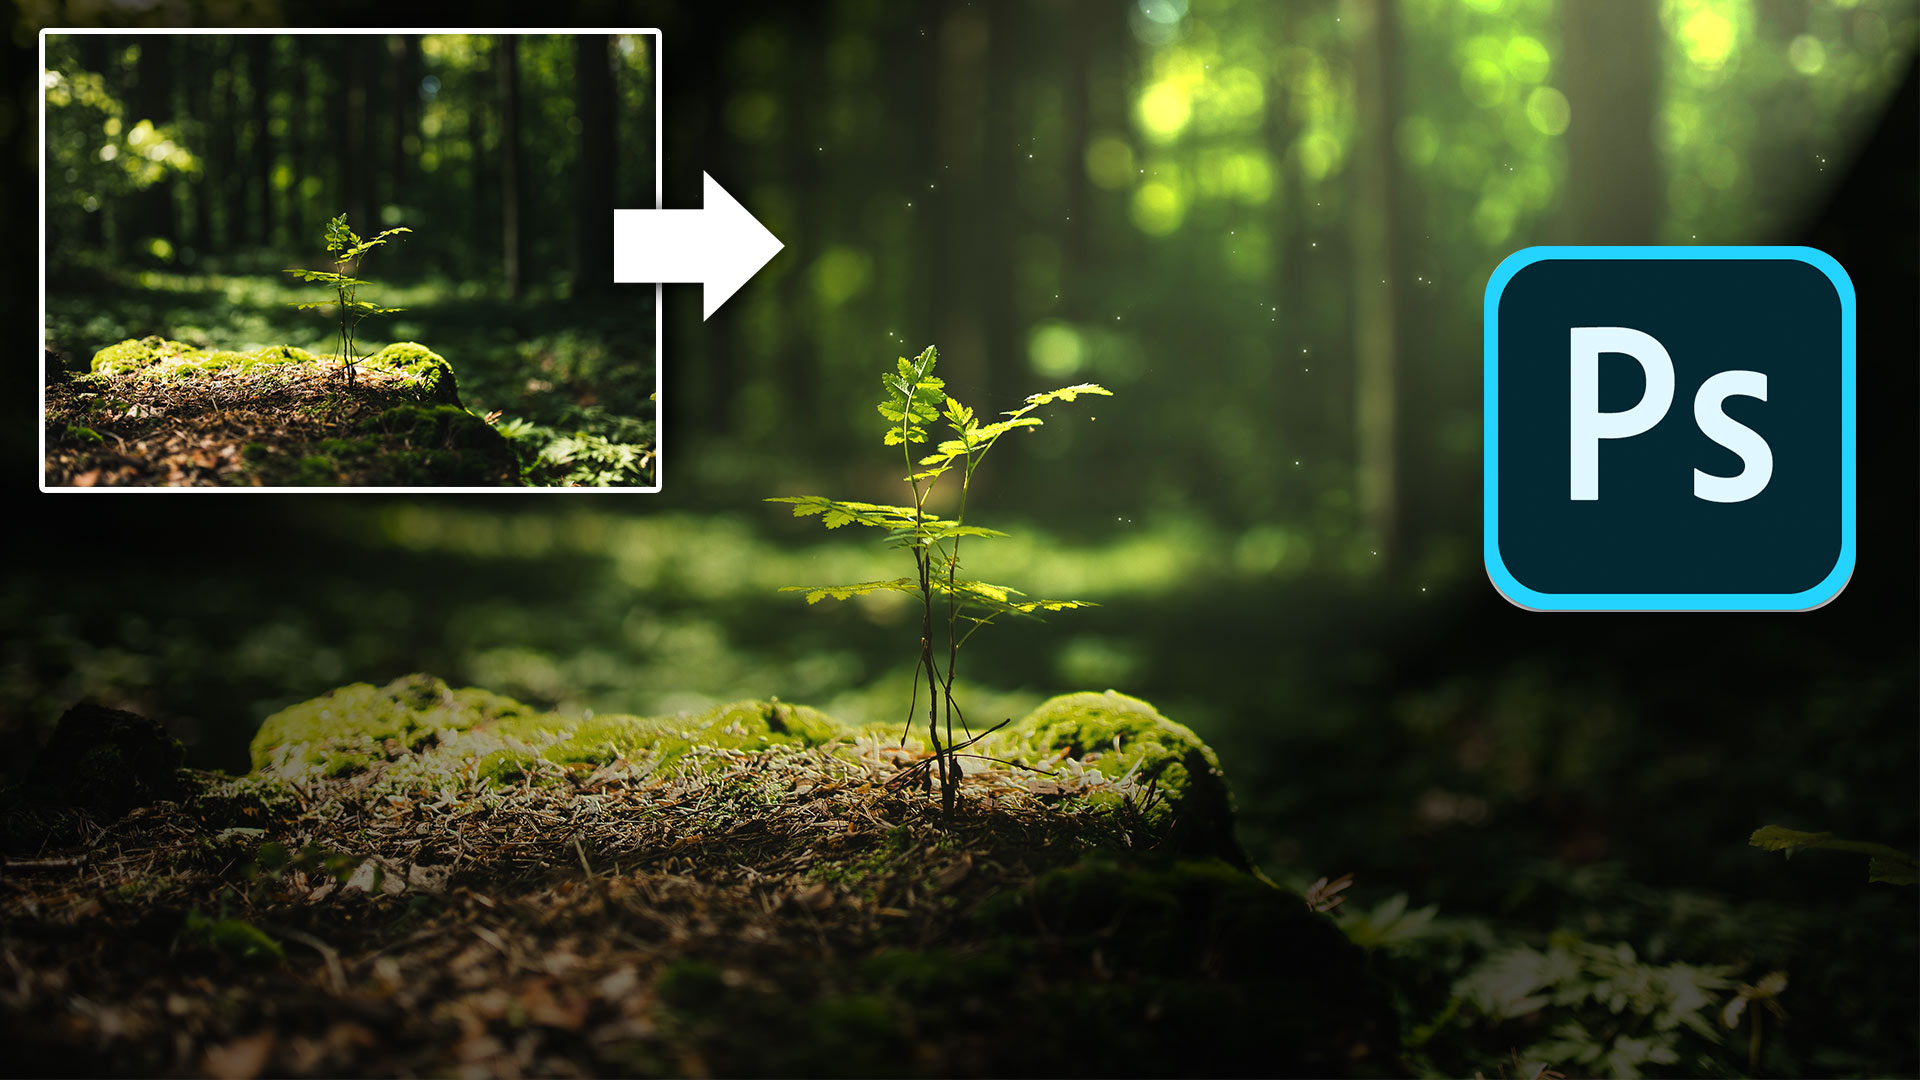
In this Photoshop tutorial you will learn how to transform a regular photos and make it more dreamy and powerful by adding a beam of sunlight and pollen dust. This can be used for landscape photographers and also for creating fantasy art, depending on how you choose to apply the steps.
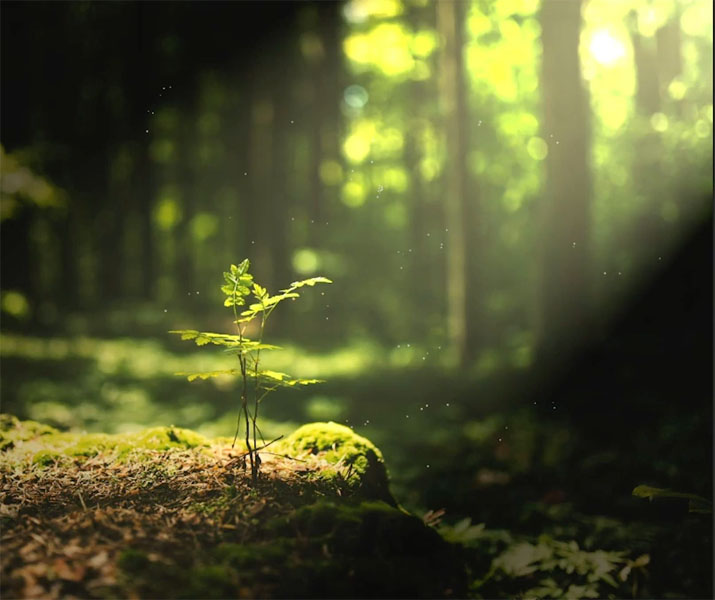
In this tutorial we are going to create a beam of sunlight falling into a forest. We will even add some pollen to make it look a little more magical.
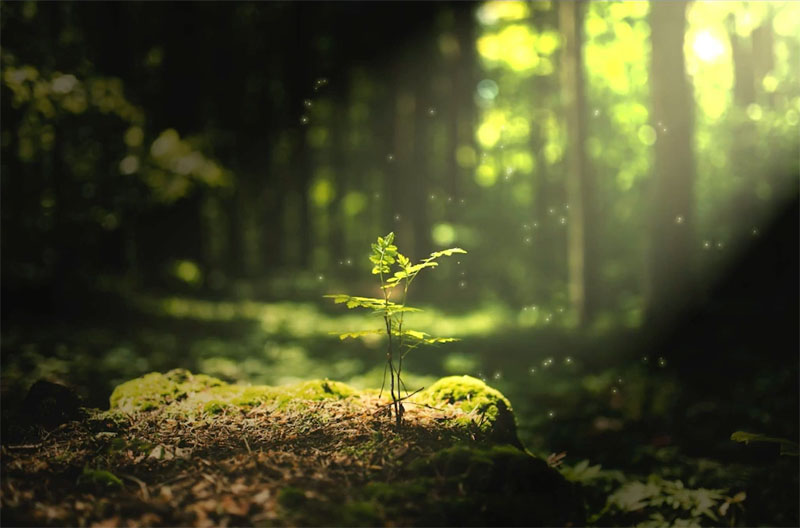
The original is an image I grabbed from Adobe Stock. Get it here

1
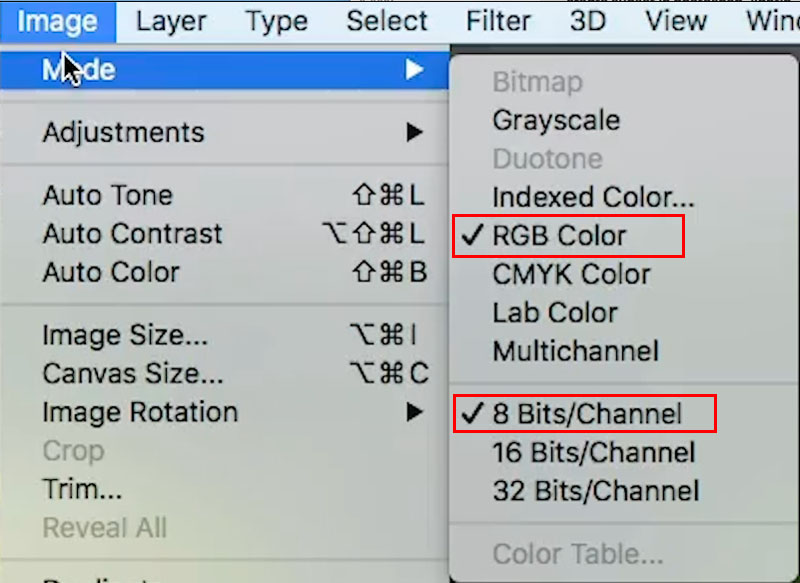
Image>Mode
Make sure you are in 8-bit RGB mode.
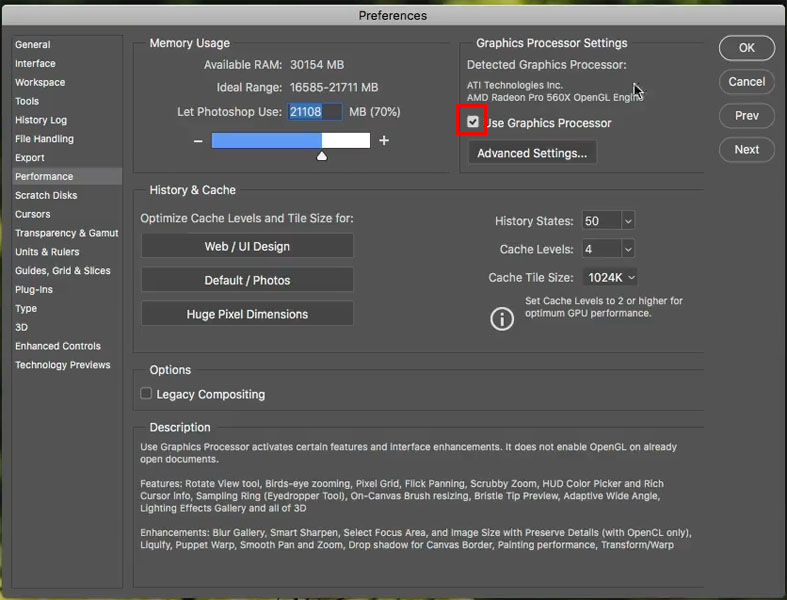
Also go to Preferences>Performance and make sure Use Graphics Processor is turned on (It should be on by default).
2.
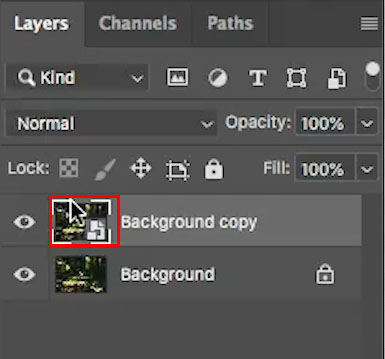
Right click on the layer name and choose Convert to Smart Object. This is optional, but will give you more flexibility if you want to change it later.
3
Unfortunately, the Lighting effects filter has recently been retired. This tutorial shows how to get lighting effects with new Gradient features. The rest of the tutorial works fine, just substitute radial gradient for lighting effects.
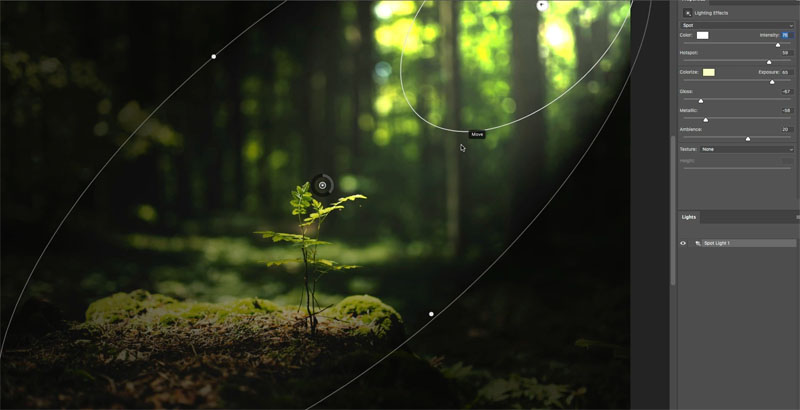
Choose Filter>Render Lighting Effects
From the presets, choose 2 o’clock Spotlight
![]()
4.
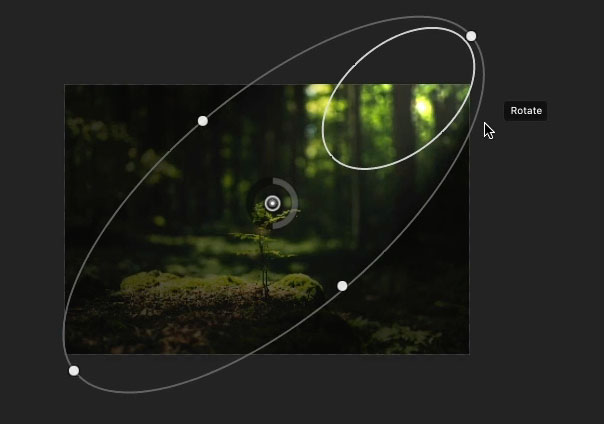
Zoom out. Drag the dots to resize the ellipses
Drag inside the ellipses to move the light
drag outside the ellipses to rotate the light.
5.
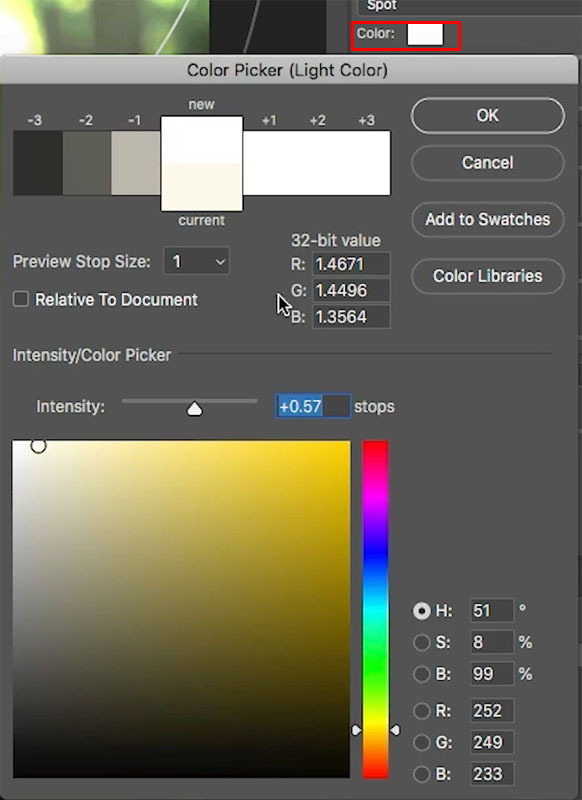
Click on color
Increase the Intensity to .57 This enables us to adjust the overall intensity more.
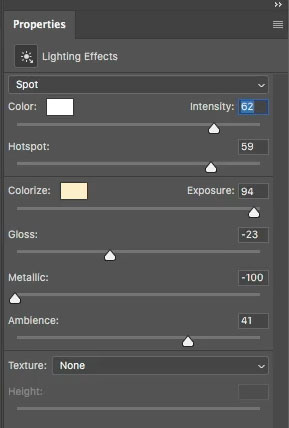
6.
Make the adjustments as shown here (also on the video you can see easier).
7. Adding dreamy sunlight
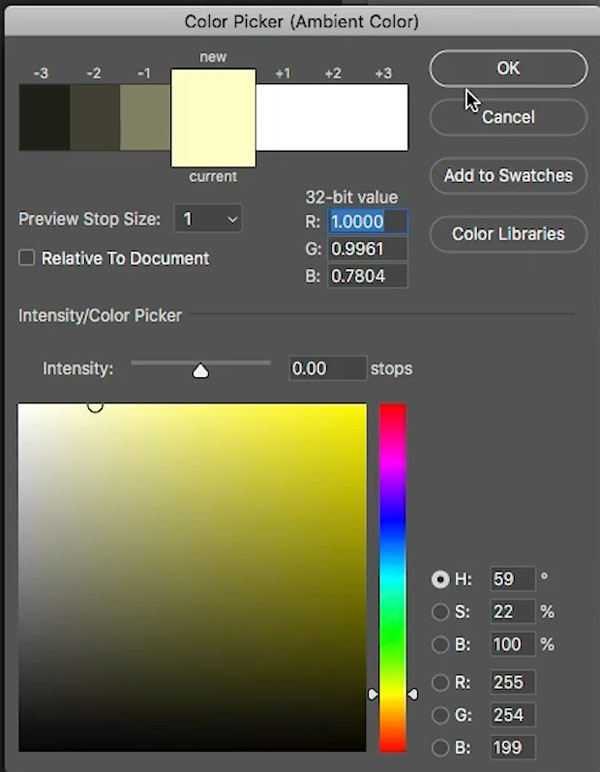
Click on colorize
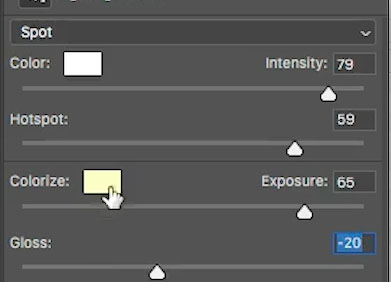
Choose a warm yellow/orange color
8
Adjust intensity for the new color.
Reduce the metallic all the way down.
Adjust the gloss to get that dreamy haze, a higher number dials up the dreaminess. 🙂

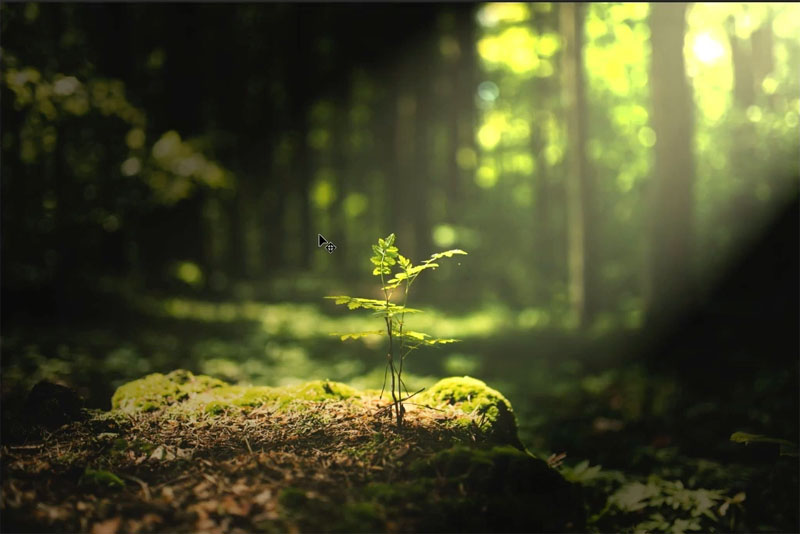
Click ok to apply and we have a much more romantic looking image. We aren’t done yet, 1 final touch. We are going to add some pollen to sell the effect.
9. Making a pollen / faerie dust brush.
Click on brushes in the tool box (B key)
At the top of the screen choose a soft round brush and set it to 0% hardness and 11 px.

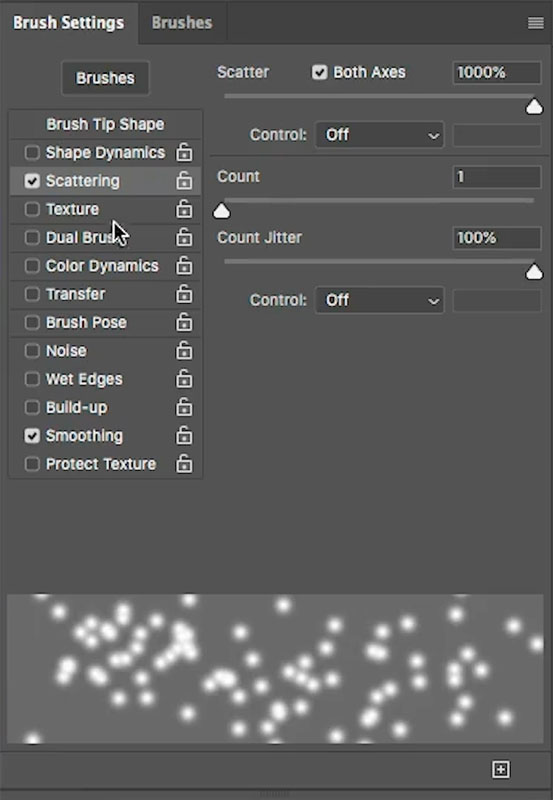
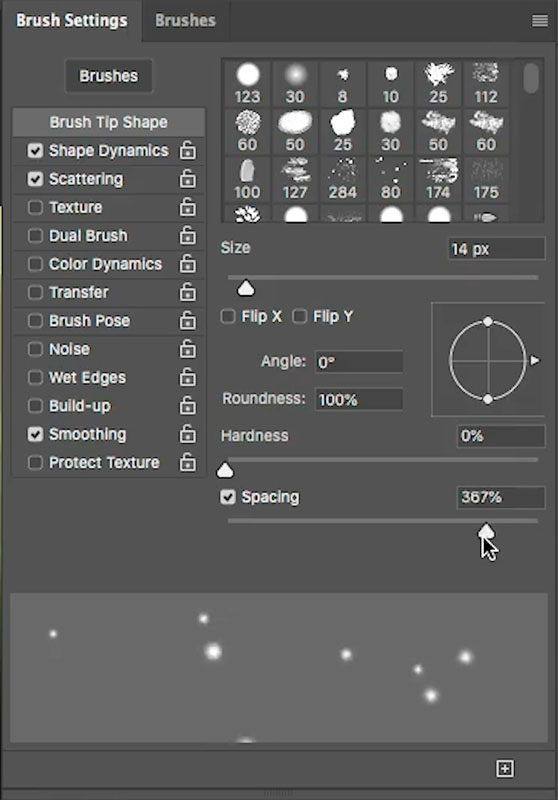
10.
Go to the Brush settings panel (Window>Brush Settings)
Choose scattering.
Click on both Axes and turn the Scatter all the way up
Count jitter 100%
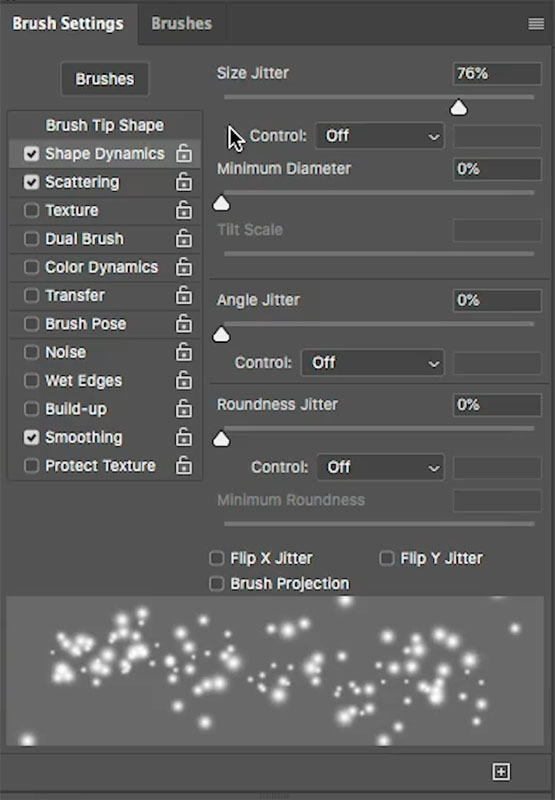
11
Shape Dynamics
Size jitter 76% or higher
12
Choose Brush Tip shape
Turn up the spacing quite high. I used 367% here
13
Create a new layer
Choose White as the foreground color
Paint in a few particles, See how they look like pollen.
You could stop here, or try the next step to enhance them.
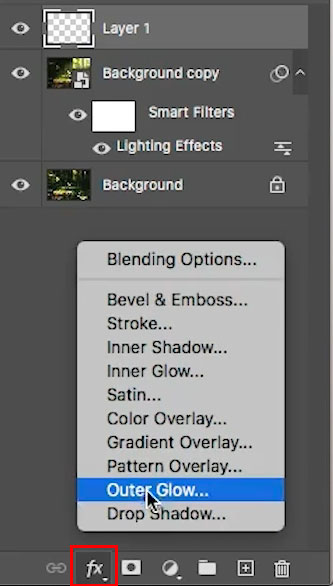
14
Choose fx and select Outer Glow
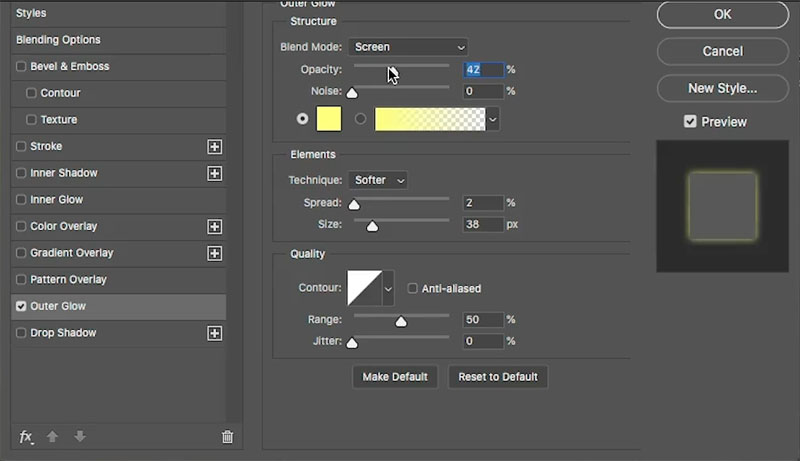
15
Choose similar settings to what is shown here. This gives them a slight magical glow.
For fantasy work, choose a different color for the glow.
And here is our final, may I say, a bit more interesting than the original?
This is part 4 of a series I’m making on Lighting effects.
If you enjoyed this please share it on social media
Great to see you here at the CAFE
Colin
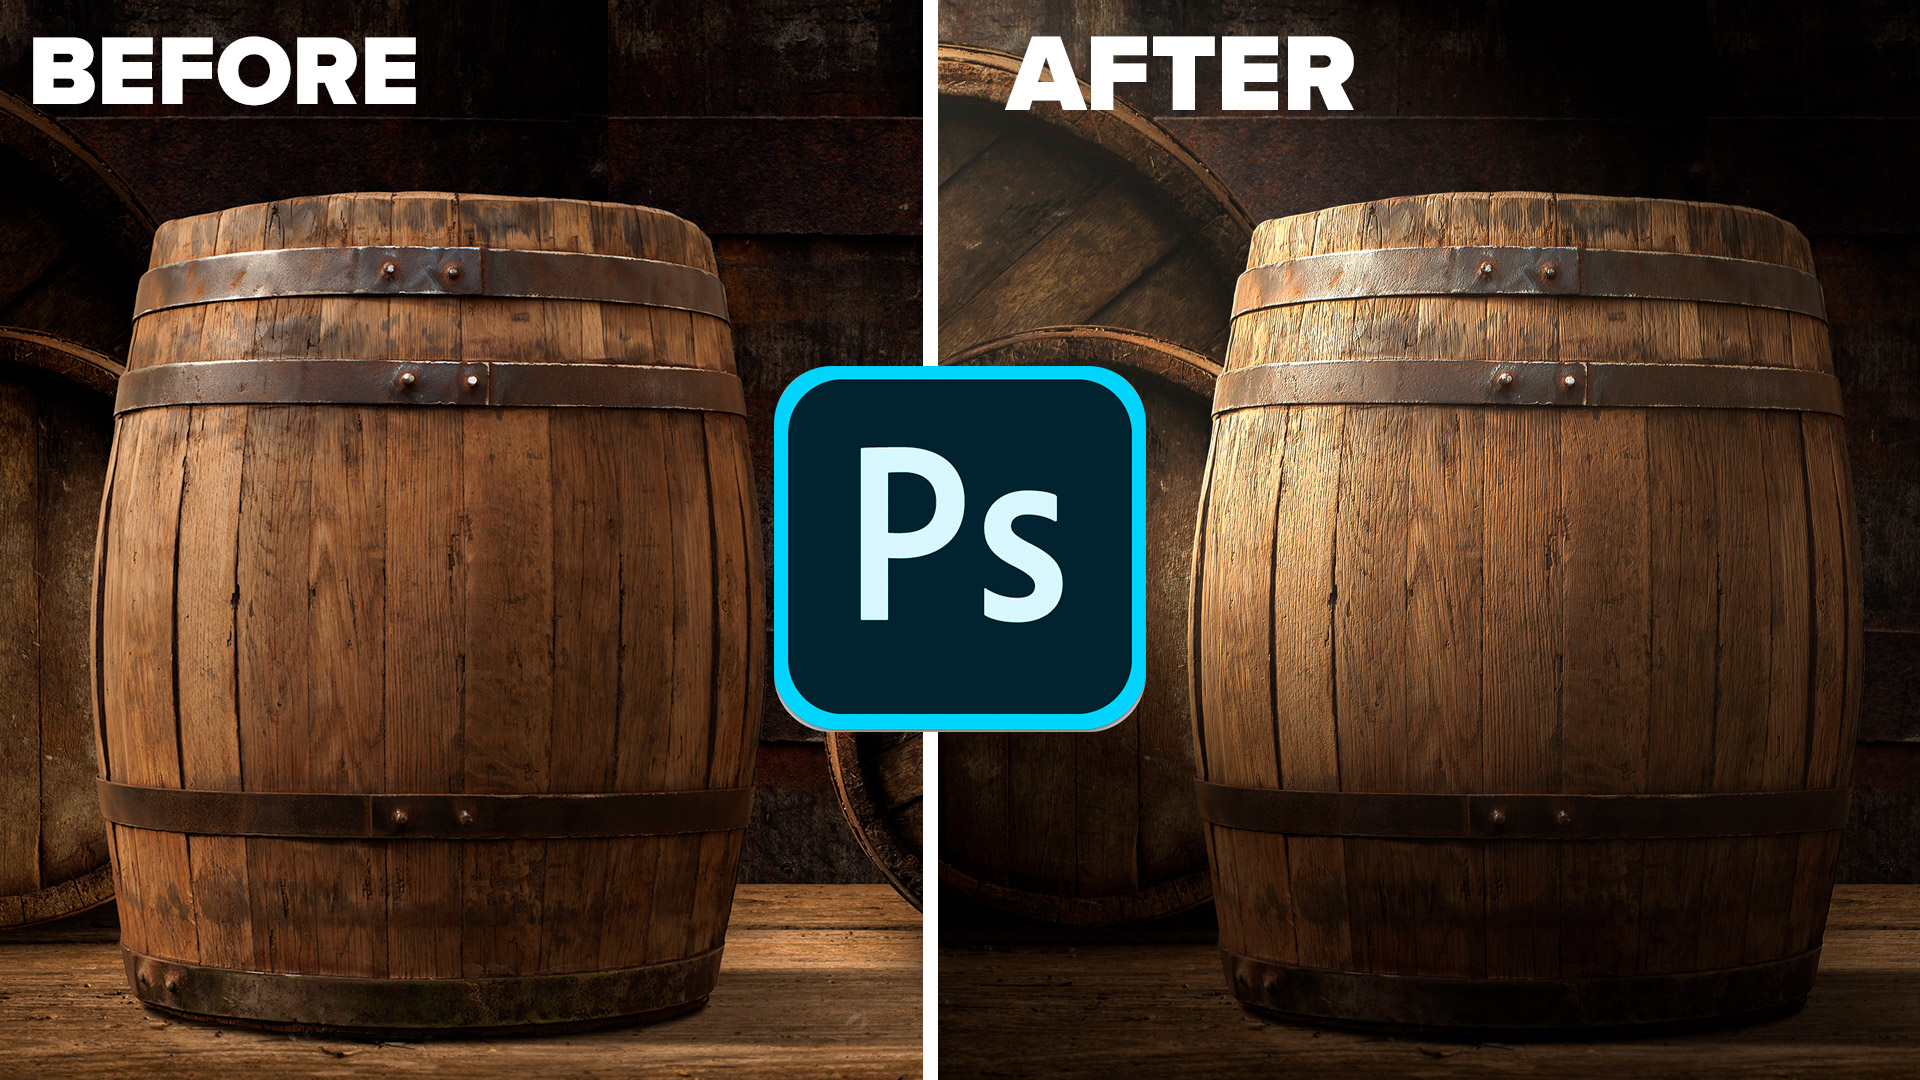
Check out part 1 here for the basics and using a color channel for texture.
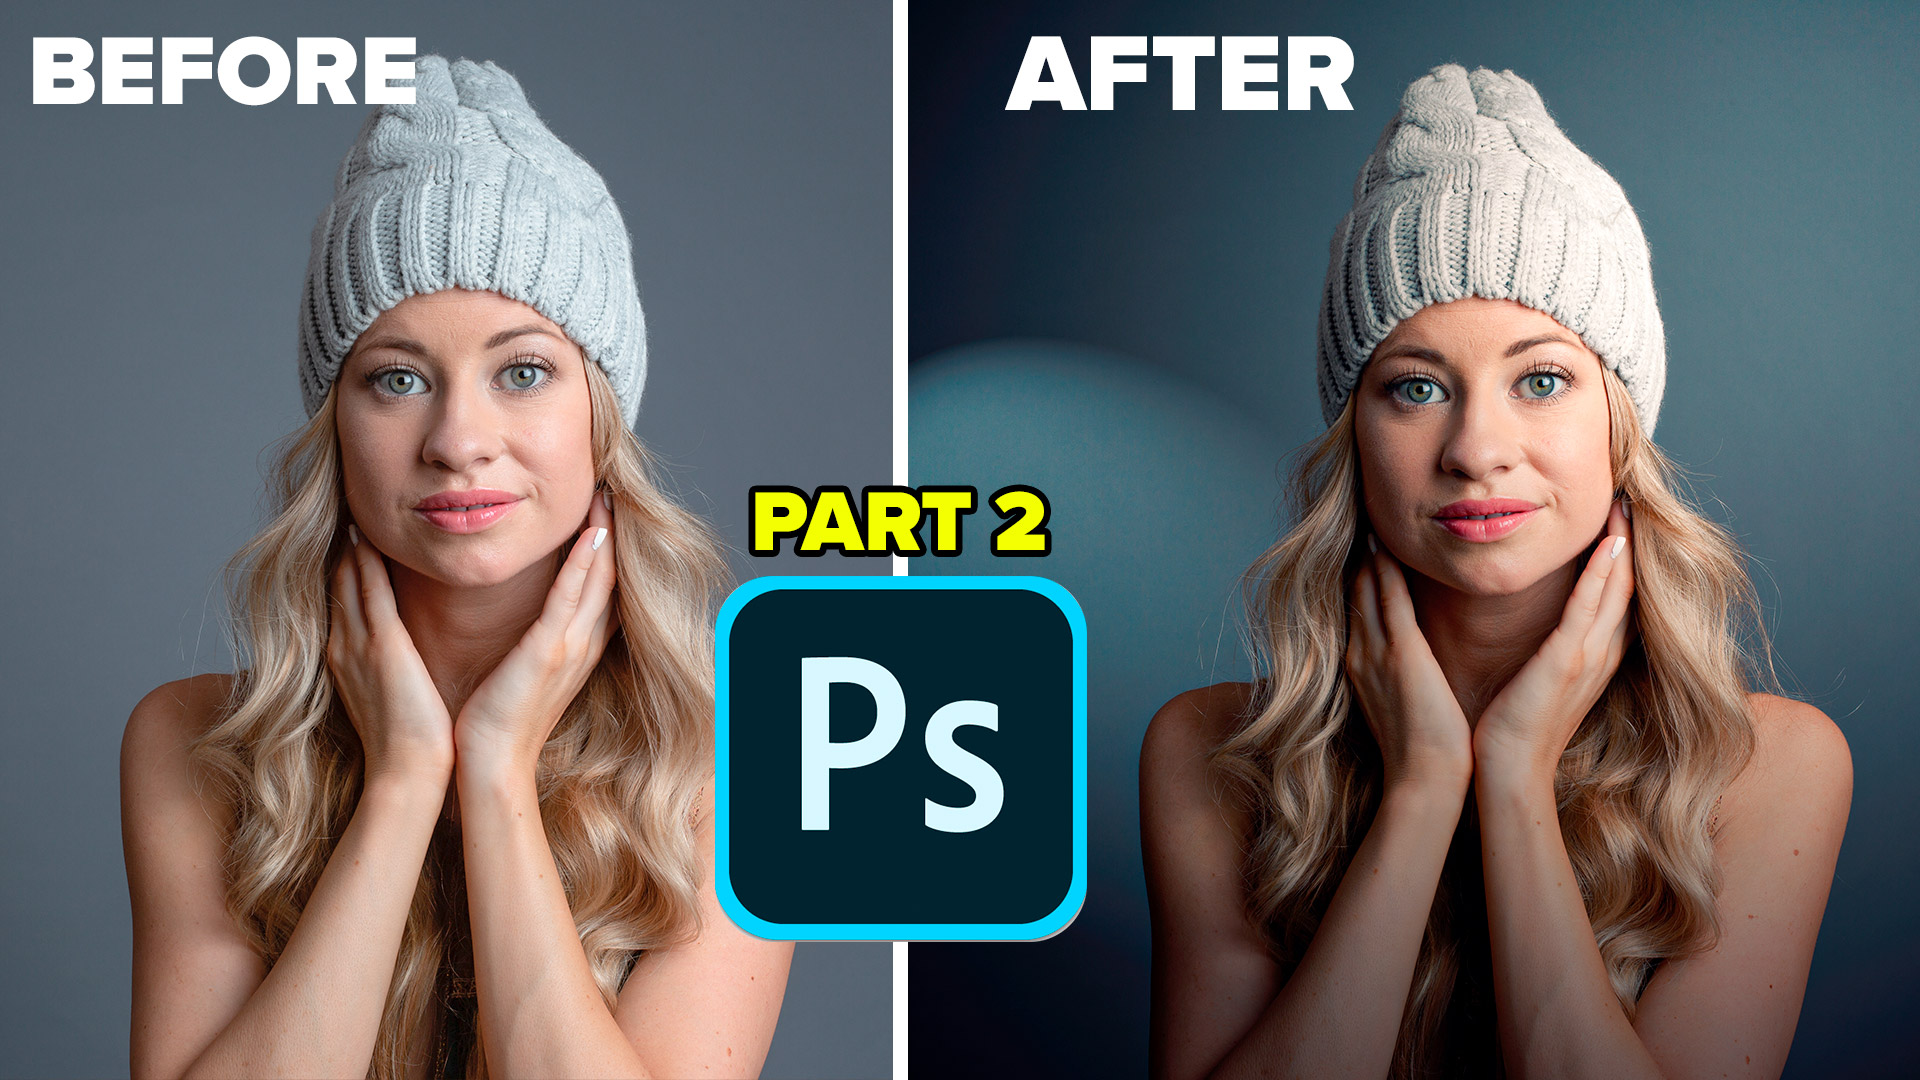
Part 2 is lighting a portrait
Part 3 is embossing a logo

Browse our hundreds of other free tutorials here, or search for what you are looking for in the search at the top of the page.
Great to see you here at the CAFE,
Colin
18 thoughts on “How to Create a realistic beam of sunlight in Photoshop”
Leave a Reply
How to create a motion blur on a background to make a photo look like its moving. We will learn...

This Photoshop tutorial shows how to make a blended background blur, the blurry background looks like the depth of field...

This is a look that I have been using in one way or another for a number of years. I...


Great tutorials. Definitely useful and practical.
Unfortunately some of us haven’t purchased the latest version of Photoshop but many tutorials still work for us.
Thanks so much for providing the written tutorial along with the video. While the video is very helpful in letting me see the actual process, I find the written instructions most helpful when I try to practice the technique on my own.
Hi Colin: this is a great series and will prove very helpful. I particularly like that the steps follow the video. When watching videos I often make notes on the steps but inevitably miss one. Your listing of the steps makes my and I suspect many others, life much easier.
Hi Colin, thanks for this tutorial. An ordinairy image turns into a great one with this lightning effect. Thanks for sharing!
Very interesting. I like the written directions as well.. I always how you make a complex subject so that us newbies can get it… Well done…
Colin
Fantastic !
I just wanted to let you know how much you mean to photography lovers with your tutorials.
New ways to inspire beyond the viewfinder view.
Things have definitely been crazy lately , but you are crashing the blues ..!
Thank you
Thanks, glad to help
Great series Colin! I have been following along through all 5. Super Job!
Thanks 🙂
If this were an Emeril Lagasse show there would be two “BAMs.” In other words, you’ve brought the Lighting Effects filter up two notches with this tutorial. I added another notch or two with two curves adjustment layers, albeit lowercase “bams.” In one curves layer, I brought the blowout in the upper right from 255 255 255 down to 242 242 242, and then added an eyedropper marker on the rock (or whatever it is) in one of the brighter spots (via Ctrl+Shift+adjustment tool eyedropper) and changed the Red Green Blue curves proportionately at that spot to brighten the rock a little (as if the sun rays affected it as well). However this might be a little advanced for some. The other curves layer was used to add a little contrast. i use these two curves layers in a similar manner for color correction, and brightness and contrast.
Hi Colin – Hello from Scotland – Great Tutorials. I learn new things every time I watch one of your videos.
I would never have known about the Lighting Filter and how to use it without having seen this series. All I have to do is practice now. Like Richard Paul I find having written instructions very useful. They are a great reminder of the techniques shown in the video
Thank you! Great video and series.
Good one Colin..learned a few things I didn’t know!
Colin, why would the lighting effects option in the panel be grayed out?
==>filter==>render==>lighting effects
Great as usual. I’ve used lighting effects in the past, but your tuts opened up lots more possibilities. Thanks
Can you say “genius”? Amazing. I love these lighting tutorials. Thanks, Colin.
Hi Colin,
loving the light effect series, learning lots of new techniques. I like the way that you teach as well. You show the steps, but you also include how to manipulate the settings to change how the the effects can influence the creative process. This then makes each image more personal rather than a subscribed image that some tutorials offer.
Thanks for your time
You’re welcome, thanks for the kind words.