
Complete guide to Layer Blending Modes in Photoshop, written, video + free ebook
Photoshop Layer Blending Modes. The Complete Guide
One of the fastest ways to get amazing looking images is by using Blending modes, because each blending mode changes the way that a layer reacts with the layer underneath it. You get a small inkling of this by adjusting the opacity of a layer. When you use blending modes, it opens up an entirely new world.
These are like sunglasses for your layers that can become x-ray specs and a whole lot more, by the way they work. There is a scientific explanation of each blending mode in the help menu of Photoshop. But, don’t get too caught up in the definitions. What matters is how it looks and the best way to determine this is to experiment.
Blending modes are not just present in Layers. You will find them in the painting tools, the layer styles, smart filters and other places in Photoshop.
Because the blending modes will work the same no matter how you use them, I’ll use layers to explain the blending modes. Layer blending modes also happen to be the most commonly used form of blending mode.
How to use Blend modes in Photoshop
Tip: Trying on Blending modes quickly just roll over the blending mode to see a preview)
Do you ever get tired of constantly clicking the blend mode drop down to try different blending modes? Here’s a tip that will make it easy to see what all the blending modes look like on your layer. Choose the move tool. Hold down shift and the plus key to cycle through all the blending modes one at a time. Choose Shift and the minus key to cycle backwards. (If a brush or gradient tool is selected the same shortcuts will cycle through the paint blending modes)
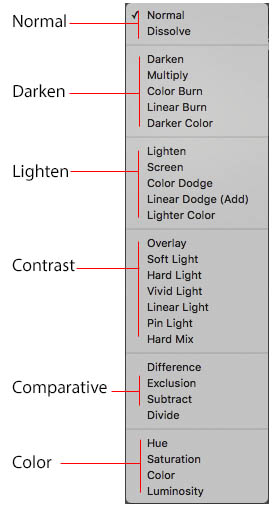
Photoshop Blending Modes in Groups
Photoshop Blending Modes are separated into six groups
- Normal: No special blending takes place, only opacity effects these
- Darken: The result darkens the image. White is invisible on the Blend layer.
- Lighten: The result lightens the image. Black is invisible on the Blend Layer.
- Contrast: Increases Contrast. 50% gray is invisible on the blend layer.
- Comparative: Difference between images is apparent, this makes them useful for working with different layers
- Color: Works on different color qualities
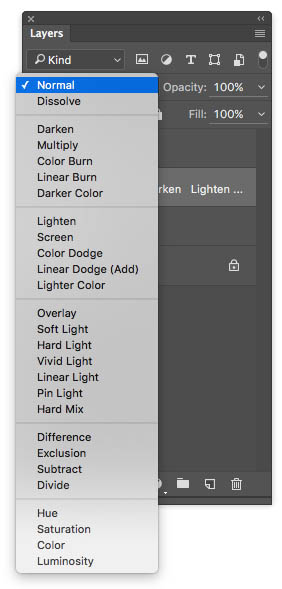
Use Photoshop Blending modes
To use a Layer Blending mode, you will need to have a document with at least two layers present, so the layers can react with each other. At the top of the Layers palette, see an option that says Normal. Click the drop-down menu to see all the available modes. Select one of the modes and see the result in your document window.
Let’s jump right into some practical uses of blending modes. To see a list of all the modes and an explanation and example of each, go to the end of this tutorial, it’s all here!
How to Use Blend Modes in Photoshop in the Real World
The ways to use the different Photoshop blending modes are limited only by your imagination and creativity. There are a few techniques I’ll share with you that make use of some of the blending modes. The real key? Experiment. The more you experiment and become comfortable with the different Blend modes in Photoshop, the better your images will look.
Dissolve blend mode
The dissolve blending mode is great for special effects. The dissolve especially lends itself to particle effects such as star fields and flying sparks. By adjusting the opacity you can control how the dissolve displays. Another way to control the dissolve pixels is to use blur filters. The spots will appear wherever there is a soft or semi transparent edge. In this case, transparency and blurs were used to get the chalk effect.

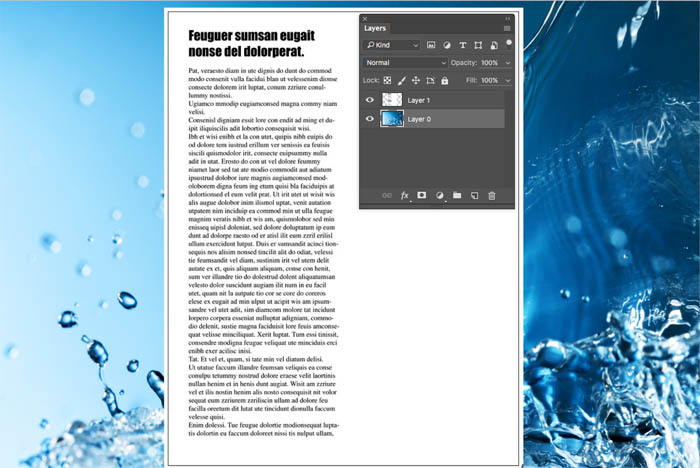
Hiding black or white. (Multiply and Screen)
Knowing that the darken and lighten blending groups hide white and black is useful information when it comes to placing things over a background. It’s not always necessary to mask out the background colors on the top layers. If these layers contain a black or white background, then the blending modes can hide these colors and make compositing a snap.
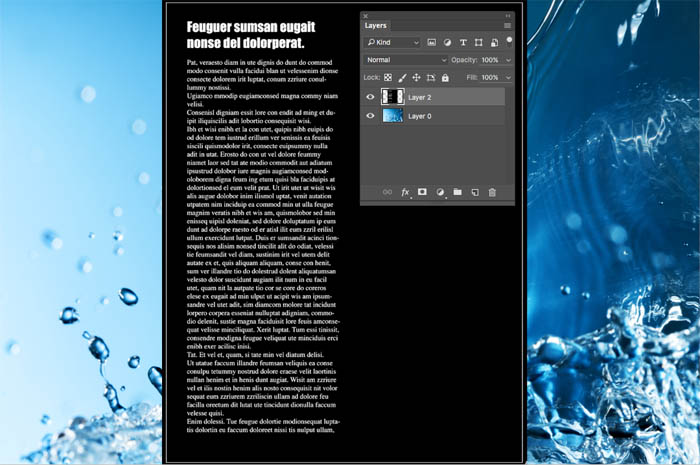
1. In this example, there is a canned page in top of an image. Just the text should be showing through and the white needs to be removed. You could reach for the masking tools such as the magic wand or color range. Blend modes make this task so easy because it’s a single click.
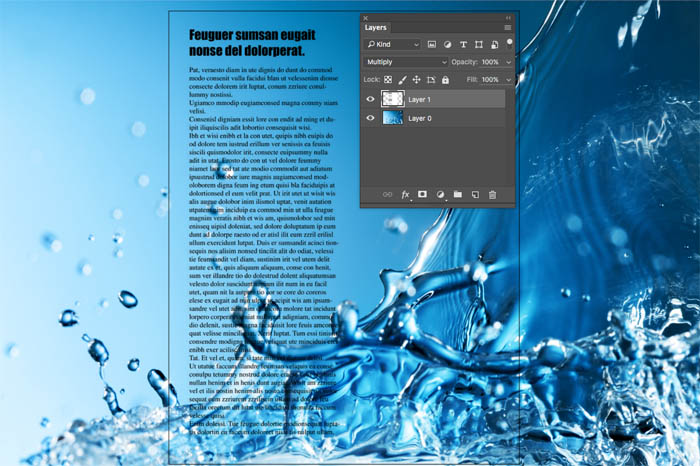
2. Change the blending mode to multiply. White is now hidden and the black text reads perfectly.
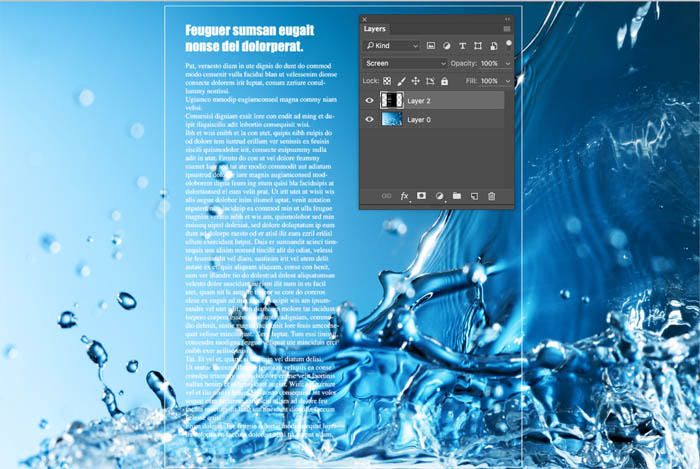
1. This means you have a strategy if you have the opposite of a previous example with white text reversed out onto a black background, because you can use other blend modes.
2. Change the blending mode to Screen and all the black disappears leaving the white text against the background image.
Quickly Blending photos Together in Photoshop – Tutorial
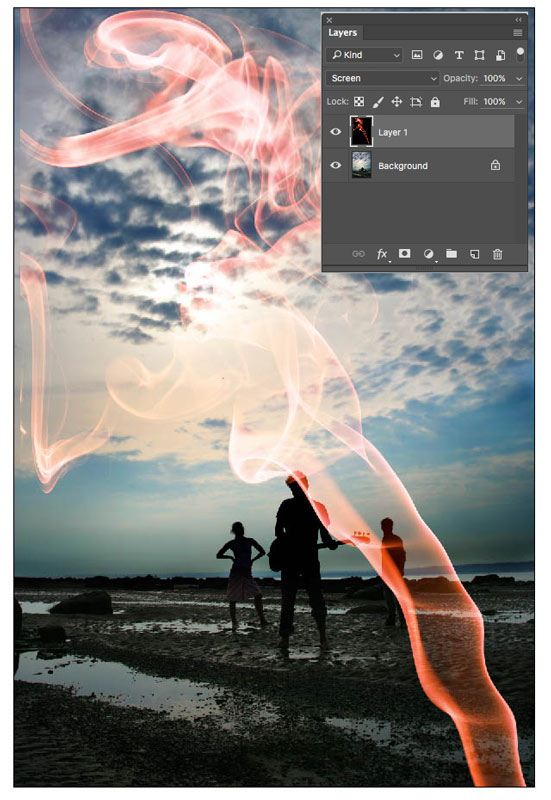
1. A particular blending mode works really well on more difficult subjects like glass, smoke, fire and lightning. Take these images for example. How would you put the smoke on top of the image of the musicians? A real mess could be made of this and it could become very difficult and time consuming.
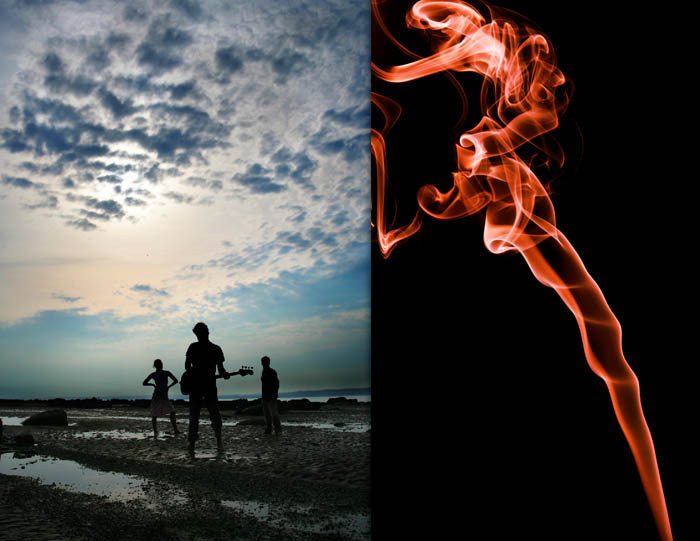
2. Aren’t you glad your reading this tutorial? All you need to do is choose screen blending mode and its perfect and quick
Making any photo look better, especially people
This next blending mode (Overlay) is guaranteed to make almost any image look better. Because, it makes it more interesting. Rather than just apply the Blending mode, add a couple of little tweaks that will make it a bit more subtle. You can just apply the blending mode for a nice finish, but try the variations.
1. Start with your photograph
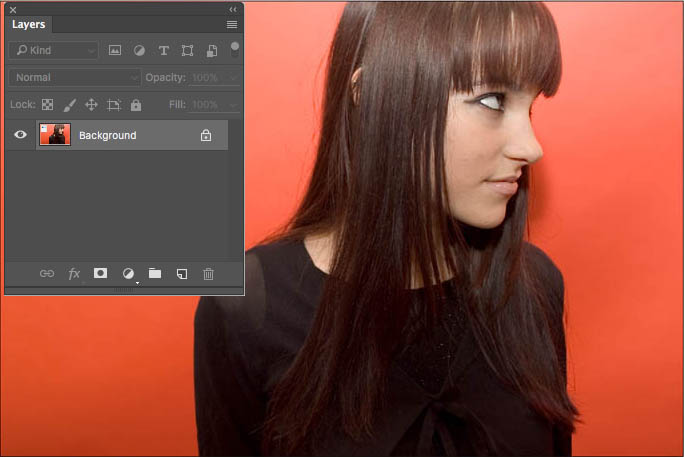
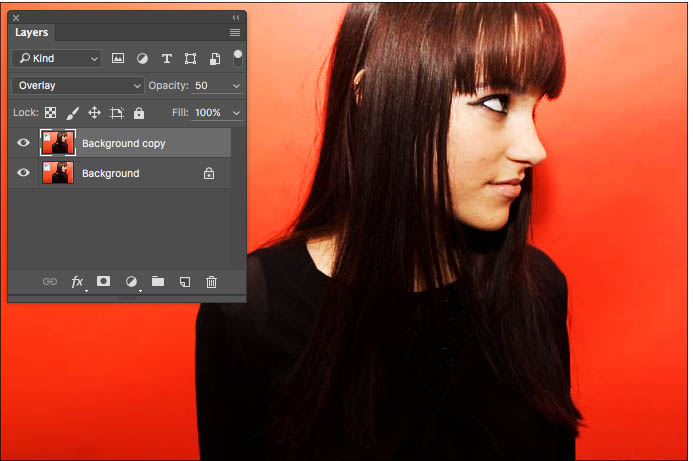
2. Duplicate the layer and change the blending mode at the top of the layers palette to overlay. Notice a huge difference in the colors and contrast right away, because of the blending modes.
3. Drop the opacity to a more natural amount if you want a less pronounced effect. Typically anything for 20-50 will work well depending on the image.
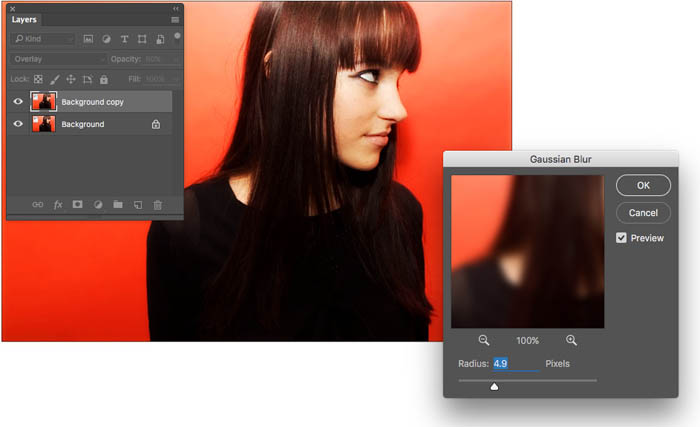
4. For some added punch and to produce a soft glow choose Filter>Blur>Gaussian blur. Choose the amount that looks good on your image. You will notice that there is a sweet spot on the slider. Go too far or not far enough and the effect doesn’t work, when your in the sweet spot there is a healthy glow around the image. This is a great way to make people look better and to smoothen out skin. Compare the results to this end image to the beginning image. It doesn’t take much to make an improvement with blending modes.
Texture and color effects
Get some really interesting and powerful effects so easily by using blending modes. It’s always a good idea to cycle through a few different modes and see what results you come up with. You may be surprised.
It’s the Blending modes that separate the pros work from the novices. Now you will look like a pro too (unless your already a pro, then you’ll look even better).
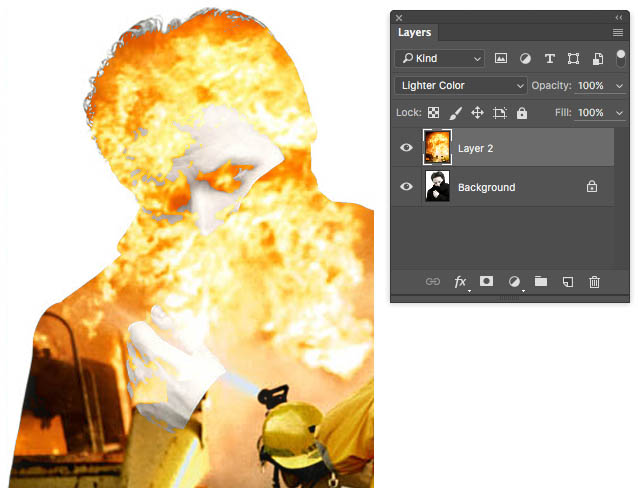
1. Take the two images of the fire and the sinister looking man. What do you think will happen with blending modes here?
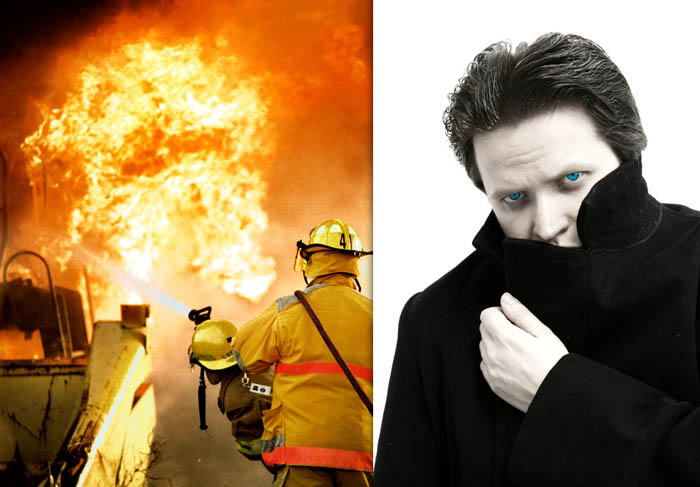
2. Put the fire on top and choose Lighter color. This produces an effect similar to one seen on a poster for a movie of a popular band (The Doors) .
Because there is white on the background of the man, it dominates and no blending happens in that area. This takes on the look of something that was carefully masked out and it only took only a second of time. See Double Exposure tutorial, to take this a step further.
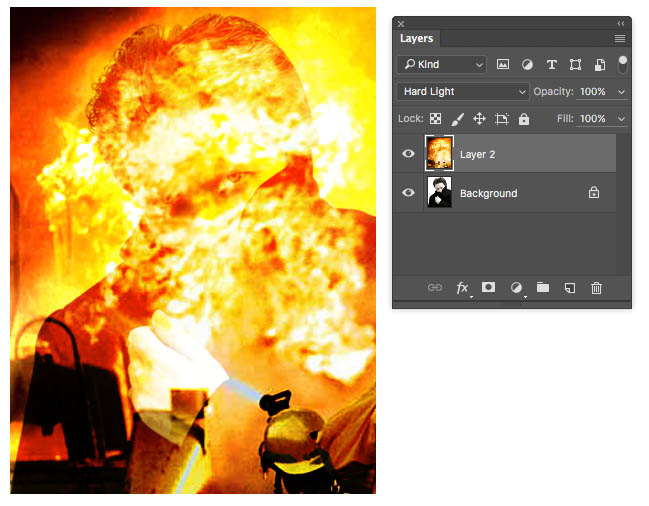
3. Take the same images and try the Hard Light Blending mode. This causes you to see something much more sinister. You could take the Patch tool and remove the firemen and just have pure flames. The Hard Light Blending mode does a good job of preserving the luminosity of the man while adding the texture and color of the flames. As you see, the blending modes are a lot of fun!
There are a number more uses for blending modes. Download the free e-book now, for lots more ideas.
Photoshop Blending modes, all explained.
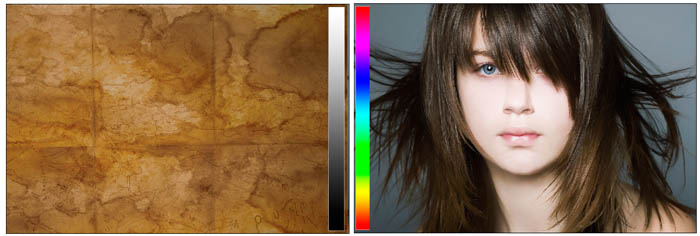
For these examples we use two images, and set them up so you can understand how they work.
- A texture with a grayscale bar added to the right is used as the bottom layer, to add texture.
- The top layer is a human face with a colored bar added to the left.This makes it uniform in how to view each mode.
When comparing modes, pay special attention to what happens to the grayscale and color bar, because this will give you extra clues to what’s happening.
Just for clarification, when Photoshop creates a Blending mode, it compares each channel of each layer. First of all, I will describe all the modes. Then, I’ll offer a few practical examples to get you started using them.
Describing Blend Modes
When describing the blending modes, there are three elements
Base: This is the bottom Layer (The texture in the example)
Blend: The top layer with the Blending mode applied to it
Result: The combination of the two layers blended with the Blending mode
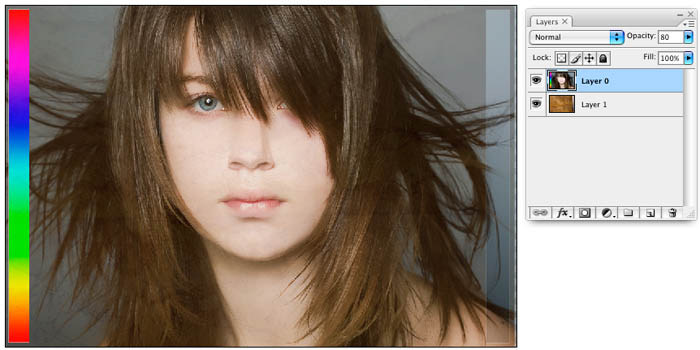
Normal Blend Mode
There are no special blending methods happening here. Lower opacity to show the layer beneath. (Shown at 80%)
Dissolve Blending Mode
This is the same as normal except no transparency effects are applied to pixels. The blend happens by dithering pixels on or off. Makes it look like snow on the picture

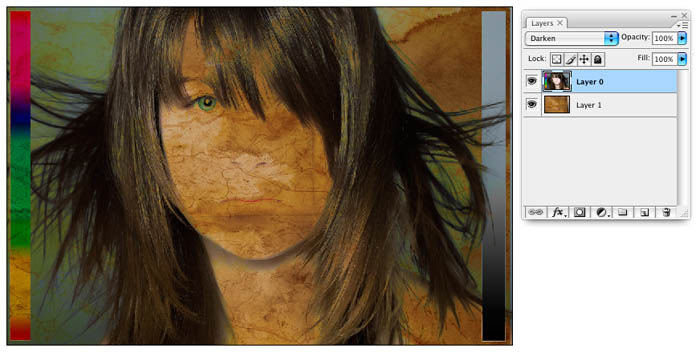
The Darken Modes
Darken
Any areas that are darker on the base color will replace the lighter colors on the blend layer. Resulting in a darker image.
Multiply
With the exception of white on the blend colors, each color is darkened. This is like taking two transparencies, placing them over each other and holding up to the light. White is ignored.

Color Burn
Darkens the base color and the blend color, increases contrast. Produces a darker and more saturated result. Blending with white produces no change.

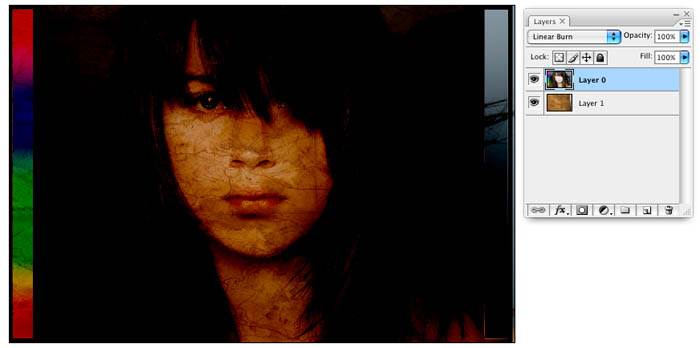
Linear Burn
Decreases the brightness of the base color. Blending with white produces no change.
Darker Color
The darkest of the base or blend pixels display. The colors aren’t altered

The Lighten Modes
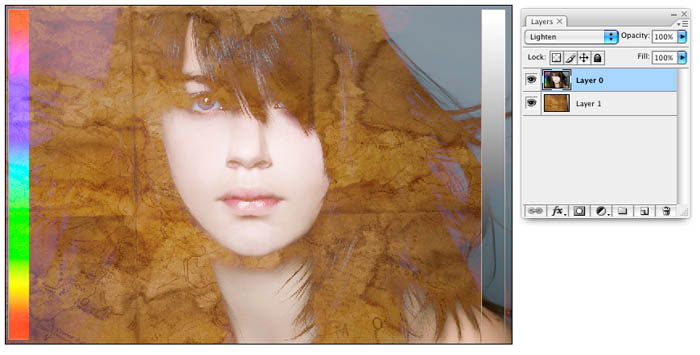
Lighten
The opposite of Darken. The resulting color that displays is the lightest of the base or blend color.
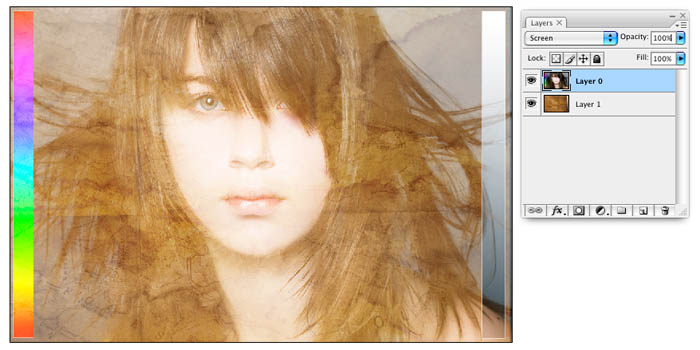
Screen
This is the opposite of multiply. This is like taking multiple exposures on a single film frame. Black is ignored.
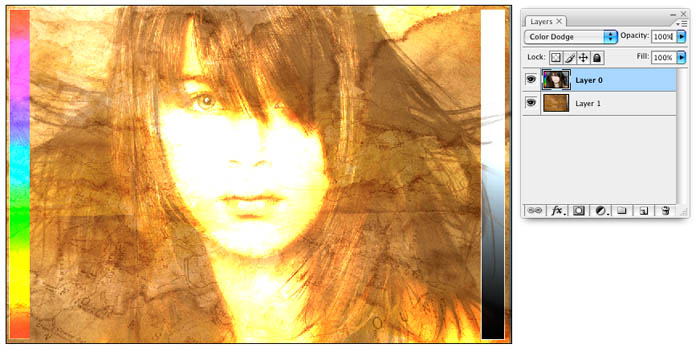
Color Dodge
Opposite of Color Burn. The base color influences and contrast is reduced. Blending with black produces no change.
Linear Dodge (Add)
Opposite of Linear Burn. Increases brightness. Blending with black produces no change.

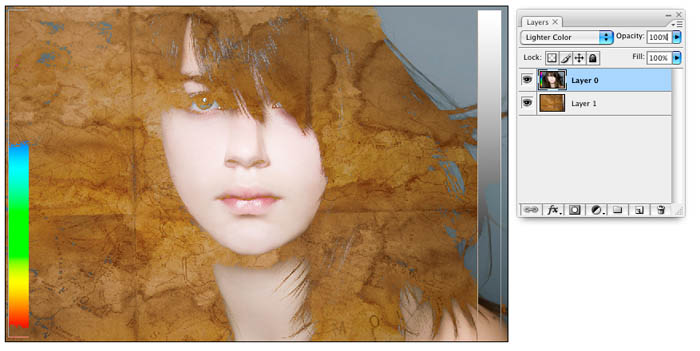
Lighter Color
Opposite of Darker color. The lighter of the base or blend pixels display. The colors aren’t altered (New in CS3)
Overlay Modes (hides 50% Gray)
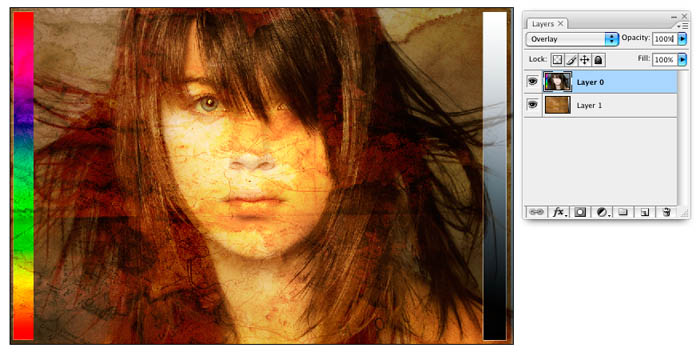
Overlay
If the colors on the blend color are darker than the base they are multiplied. If they are lighter they are screened. This produces saturated colors and pleasant contrast. Blending with 50% gray has produces no change.
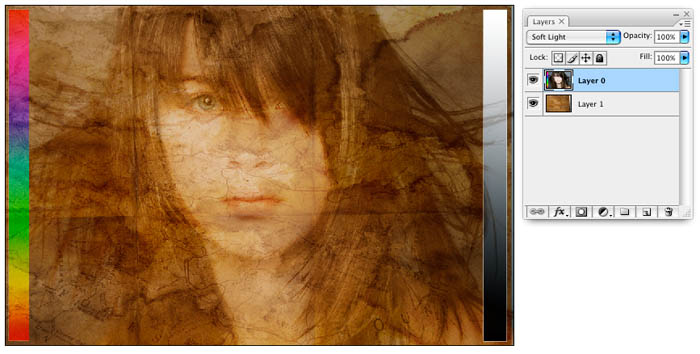
Soft Light
Similar to overlay but will less contrast because it uses darken and lighten rather than multiply and screen. This is like casting a diffused light from the blend color. Blending with 50% gray has produces no change.
Hard Light
This is like shining a harsh spotlight at the image. If the blend is darker than 50% gray if multiplies, if its lighter than 50% gray it screens.

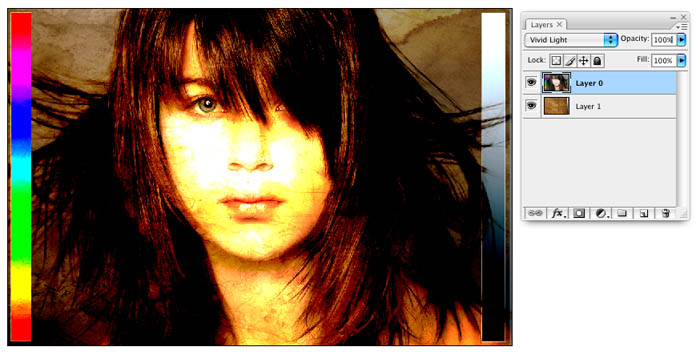
Vivid Light
Works like Hard light but uses color dodge and color burn rather than Multiply and screen. Produces a higher contrast image than Hard light.
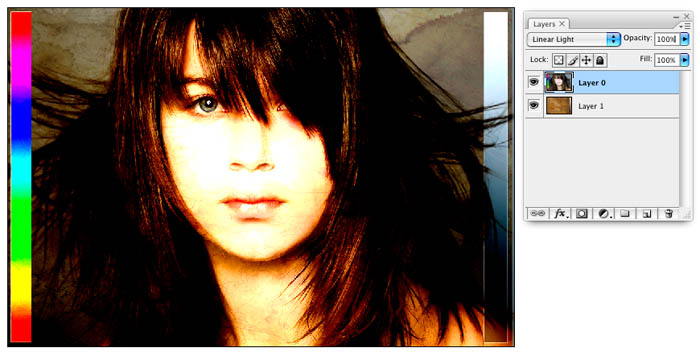
Linear Light
The blend color is the light source. If the blend color is lighter than 50% gray, the result is dodged by increasing brightness. If the blend color is darker than 50% gray, the result is burned and brightness is reduced.
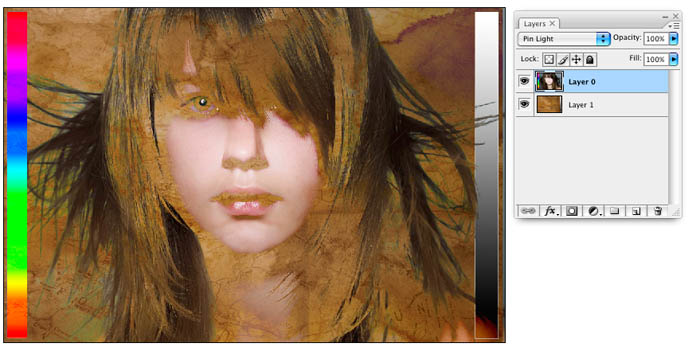
Pin Light
Where the colors are 50% gray on the blend layer, the base layer shows through. Lighter or darker than 50% gray will display on the blend color.
Hard Mix
Reduces the image to solid red, green, blue, cyan, yellow, magenta, white, or black. These are the primary colors. No gradients will be displayed in the image. This produces a posterized effect.

Difference
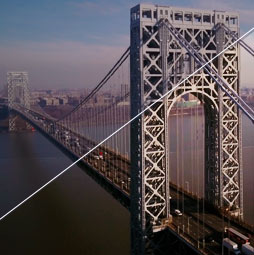
The lightest colors are subtracted from the darker colors. White inverts the base color and black produces no change. This psychedelic blend mode is useful for aligning layers together, because it shows the difference between the layers.

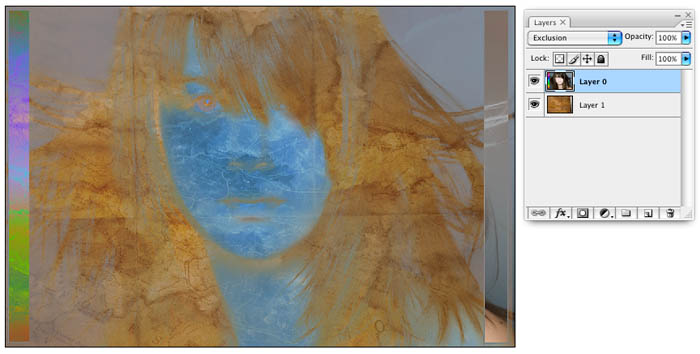
Exclusion
Similar to the difference mode, but with less saturation. The result is very little luminance is shown for the blend pixels.
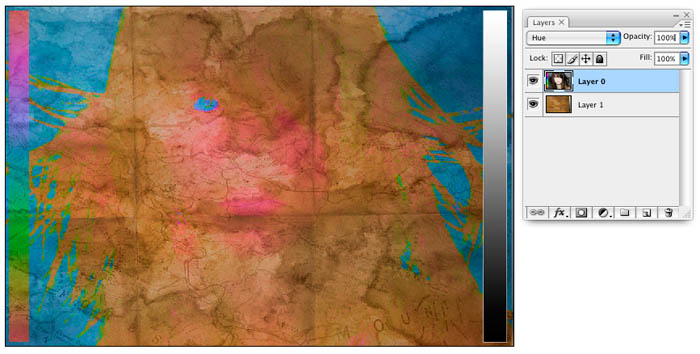
Hue
Uses the color hue of the blend color. The Saturation and the luminosity of the base pixels are used.
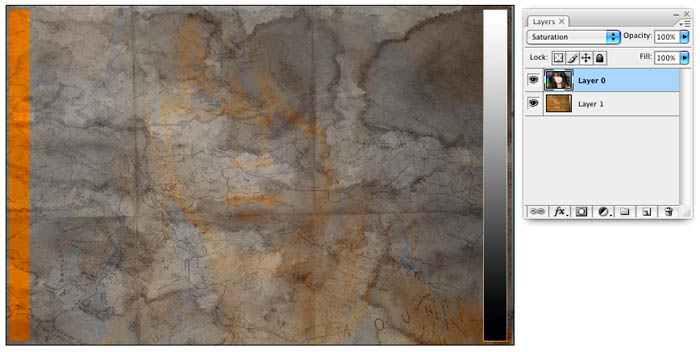
Saturation
Uses the color saturation of the blend color. The hue and the luminosity of the base pixels are used.
Color
The color from the blend color is used. The luminosity (Image detail) from the base pixels are used. This means only the color shows and not the detail.

Luminosity
All the image detail from the blend pixels is shown with the color from the base color. Opposite of Color. This makes the details show, but retains the color of the top layer.

Other Blending modes
There are two more blend modes that only appear on brushes and shape tools. These are not available for layers. Choose these other blend modes from the Control Bar with either the paint tools or the shape tool selected. They are: Behind and Clear.
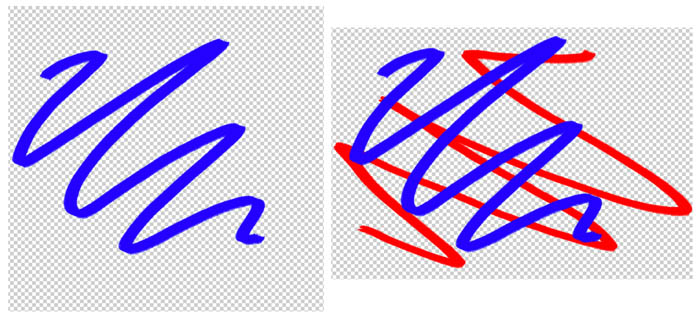
Behind
Edits or paints only on the transparent part of a layer. If you have pixels on the layer, they will not be affected.
The fist image is a scribble in blue. Change the paint brush’s blending mode to behind from the options bar. Select red and make another scribble. The blue is protected and the red only appears where there is transparency. This is all done on the same layer!
Clear
This makes the brush work just like the eraser. So what’s the big deal? Why not just use the eraser? When you use this blending mode with the shape tool, it takes on a whole new life. Who wants to make a selection, press delete and then turn off the selection? The clear mode turns the shape tool into a pixel-eating machine. (Make sure that the fill pixels option is chosen in the options bar) This is really useful for getting unusual shapes like the battle-axe.
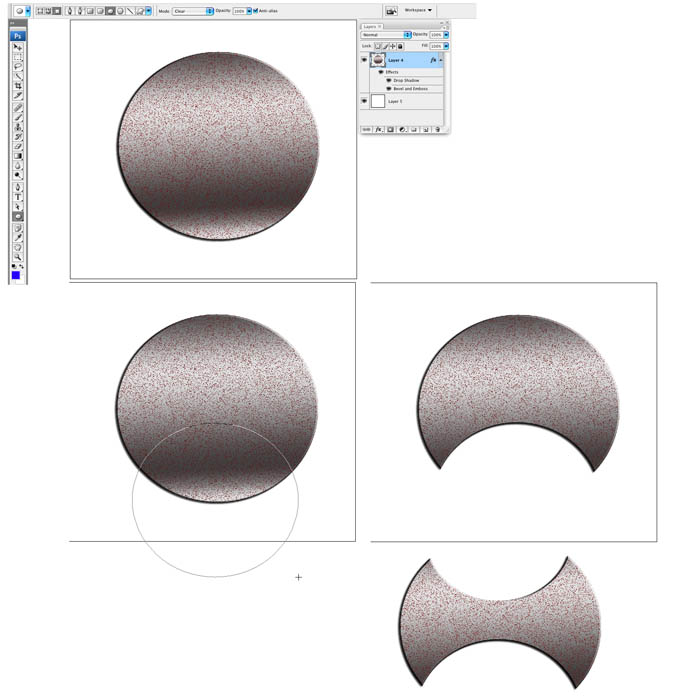
With a circle on a new layer, choose the oval shape tool. Select the clear blending mode from the options bar. As you draw with the shape tool it will now erase pixels in its shape.
Layer Blending Modes. Free eBook by Colin Smith
Don’t forget to check out the website as we add new content every week. See you at the CAFE!
Colin

48 thoughts on “Complete guide to Layer Blending Modes in Photoshop, written, video + free ebook”
Leave a Reply
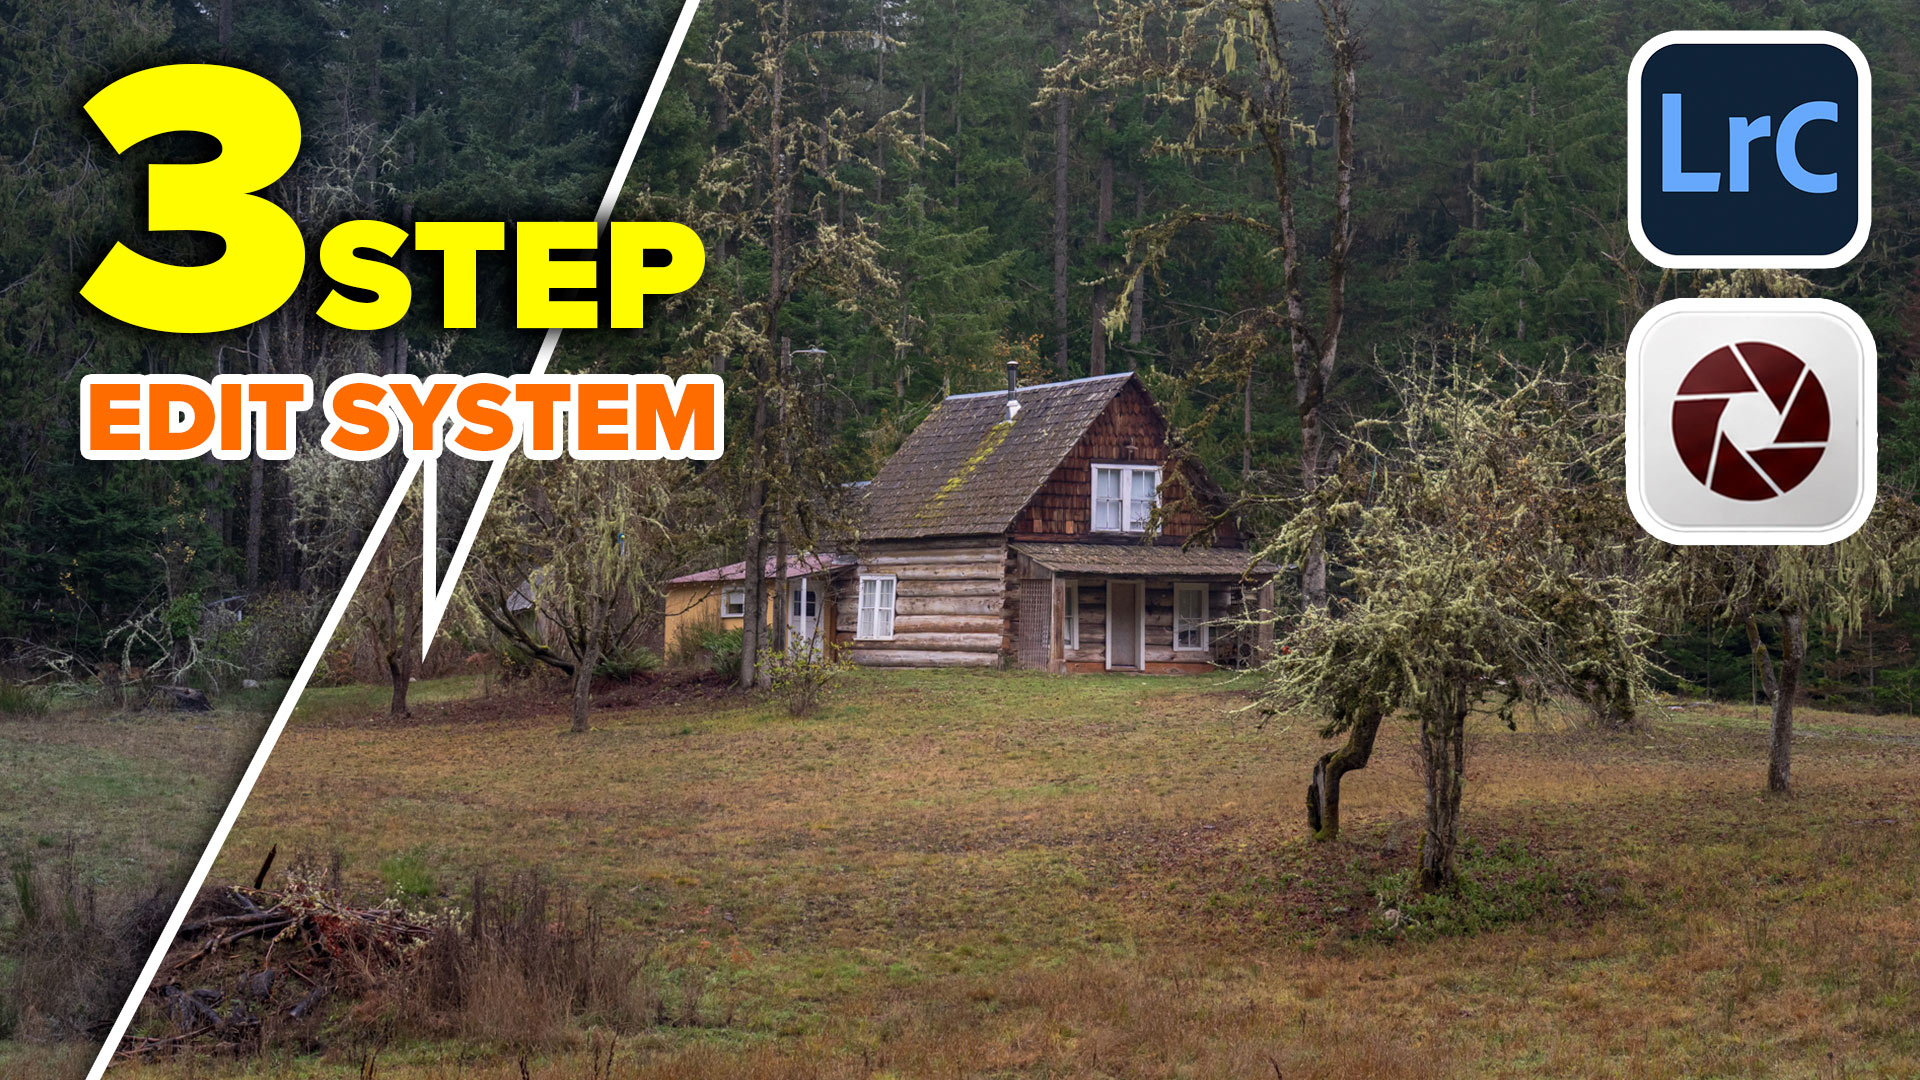
how to take what you already know in Photoshop and use it to color grade video (and photos). You can...
Photoshop CC 2019 new feature review and tutorial. Watch video and read about all the new features released in Adobe...

How to sharpen photo in Photoshop. This free Photoshop tutorial shows 2 ways to sharpen photos. Easy way to sharpen...


Great video intro to blend modes. The ebook looks quite useful. Thanks indeed!
thanks
For the multiply mode you do not need to copy the picture itself. That increases the filesize. Click as an example the contrast brightness and then do the multiply. You get the same result, without doubling the filesize
Good suggestion Edward!
Thank You so much!! You explain in a way I can understand! i have (TBI)
I’m so glad to hear it! Enjoy 🙂
Thanks for the ebook. I use the blending modes often and only really understood screen, multiply and overlay before. Your ebook is a great reference, One of the quick tricks I use is with images of birds and animals. Often I like to darken the background. Rather than dodge the whole background, I use a multiply blend layer and mask out the animal. The opacity slider allows me to control the amount of “dodging” of the background
That’s an awesome use of the multiply mode, I’ll have to try that
I have some idea about layer blending but the post increase my knowledge level. If you create a video tutorial as the post that best for beginner. Thanks
There is a video at the top
Is it possible that there are only 9 comments here? This is a great tutorial and teaching resource. I collect Blend Mode and texture tutorials for my community college classes and this is at the top of the list. Thank you very much for the excellent work.
Thanks for the encouraging words Michael
I saw you do a presentation at Washtenaw Community College in Ann Arbor, Michigan, several years ago and it was excellent. I think you do some of the best work in the Photoshop tutorial business with your consistently well done and useful tutorials. You are one of the pillars of the high quality online Photoshop community. I don’t mean to be overly effusive but you really do provide a very valuable resource for digital imaging learners. I appreciate it.
That must have been the Lightroom presentation? Thanks so much for the kinds words, it really is nice to hear 🙂
At first I will give thanks for your hard working. I have two photo editing website and it’s going well. But I’d seen different images and content here, this is really good feedback for you. I will see all parts of this tutorial and I understand, whatever, please never mind, I do not understand what you are doing here, can you explain me. Please see my uploaded file. https://uploads.disquscdn.com/images/c354973369a0e3ee0dffd86ceba262f0524b58ae66dcb8561d0b2ac0d1bfea5e.jpg
Where are you stuck?
How to make a artificial star?
I see your article even video tutorial. If i have an idea before about that but now fully clear.
I tried downloading the free ebook several times. It will open but if I try to move to the next page it crashes my PDF viewer.
Make sure you update to the latest version of Adobe Acrobat. You didn’t mention what PDF reader you are using. If you are trying to view in a browser, use a different browser.
i want know Is that a mask processing.Its a very new idea
I have filled in and submitted the form yet haven’t received any emails about the ebook download link.
I have tried this with several e-mails, but still haven’t received any. Halp :'(
Awesome, explanations of blending modes!! Great JOB!!
Awesome, explanation of blending modes you had done great job its very very easy to understand G.R. MURUGAN FROM INDIA
I tried downloading the e-book, however you never sent me the confirmation link to my email address. I’ve tried several times, but with no success. I love the tutorials from Colin, and this is definitely a tutorial that would really be of some assistance. Please help!
If you have problems getting the ebook, please contact me at https://photoshopcafe.zendesk.com/ let me know the email address you used to sign up and Ill send it to you.
Thanks for the free Ebook 🙂
Is overlay a layer blending mode in photoshop?
Hello
thank you for your tutorial . it is very useful . you are generous.
i love you
Colin, I think your line in the beginning is the best. “Don’t get too caught up in the definitions. What matters is how it looks and the best way to determine this is to experiment.” I’ve found that it can be applied to any filters and plugins. What a great piece of advice. The new blending previews are a big help in those experiments, too.
This is great. I already downloaded the E-Book on blending modes. I just watched this video. I believe you made this video before Adobe Photoshop CC 2019, which lets you view the effects of the different blend modes. Great video. Great work on all your videos and this lesson. I appreciate that you want to share your knowledge of Photoshop and photography.
Hello Colin Smith,
This is so amazing! I especially love how you explained the different blending modes. This is really a big help or shall I say a very useful guide. It had me thinking of new ideas to try. I’m impressed by your photos, so I need to follow these steps properly. Thank you for the free e-book and for sharing this post.
You are incredible in inspiration. You are perfect in presentation. You always produce great results. Thanks for everything!!!
I’ll be watching you constantly !!!
Hi Collins, thanks a lot for this website. God bless u, amem. Ur website is really great. Spent a whole day learning.
thank you very much)))
Hi Colin,
You’re YouTube presentations are wonderful. So knowledgeable and able to communicate your knowledge well. Thank you. As others above have said, you are an inspiration! A question though…I can’t seem to access the e-book. The links go to a 404 screen each time. Is it still available to download? Thanks so much.
I’m trying to figure out why some people get the 404 error and others don’t.
I have tried this with several e-mails, but still haven’t received any. Halp :'(
I have filled in and submitted the form yet haven’t received any emails about the ebook download link.
Did you check the spam filter?
Great explanation. Thanks
An excellent tutorial. I learned everything I wanted to know about layer masks.
The layer masking method. Until I read and understood this tutorial, I was unsure of this concept. Over the years, I have visited many websites related to photo editing, clipping path services, etc. I noticed their images on a variety of topics. One of them is Layer Masking. I appreciate the tutorial you provided. This topic has now been clarified for me. Would you like to tell me about layer masking and image masking. Where are the main differences here?
Thank you.
Really a wonderful and very good explanation of layer masks that I have learned more, thanks
Great comprehensive guide on Photoshop blending modes! Your tip on using Shift + Plus/Minus to cycle through modes quickly is a game-changer. It’s impressive how blending modes can transform the visual impact of an image with just a few clicks. Definitely a must-read for anyone looking to enhance their Photoshop skills.
Awesome tutorial! Thank you for all the information!
Your guides are great! Very thorough and easy to follow.
Thanks. bsalitrik
Thank you for the ebook