
5 hidden tips for cutting out and selecting photos in Photoshop
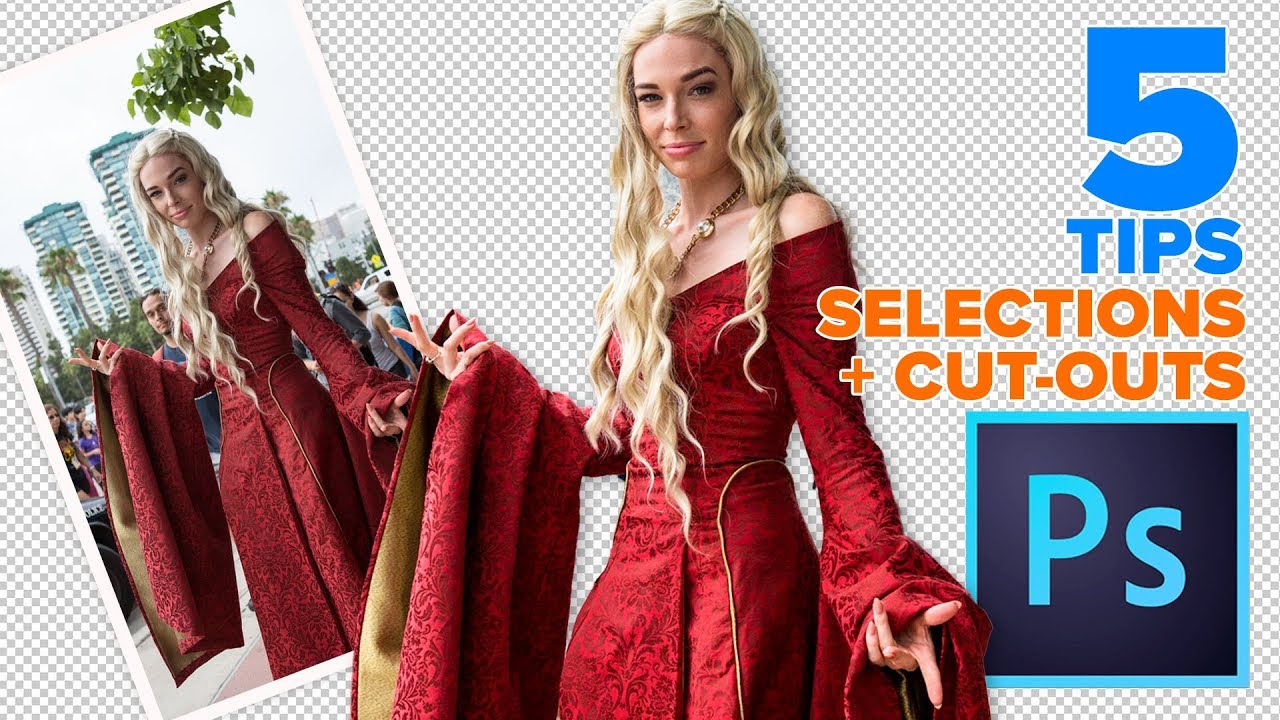
5 tips for better selections and clean edges in Photoshop
Hi everyone! This week I’ve decided to share my top 5 tips to help you get better cutouts in Photoshop. Nice clean selections with super crisp edges are the goal. We all make selections for so many things in photoshop, so this is an important skill to learn. I have listed all my cutout and masking videos below, therefore I recommend that you binge on these. It will help you so much in Photoshop. If you have never made selections before in photoshop, start with this tutorial.
This tutorial isn’t about how to make the initial selections, (I have a list right here of all my selection tutorials) we are elevating selections and showing how to make those selections better or how to avoid them all together.
Photoshop Cutout and selection tutorials.
- 3 ways of cutting out anything in Photoshop: The best ways to quickly cut out photos.
- How to extract impossible images: For those really tough cut jobs.
- Remove the background from a photo: A quick way to remove a background, easy method.
- Using the Pen tool in depth: The pen tool is the best for hard edges.
Object specific selections in Photoshop
- Cut our transparent objects: Glass, liquid and smoke.
- Extract trees in Photoshop : Trees and objects with discontiguous edges (non joined)
- How to cut out hair in Photoshop: Cutting out hair doesn’t have to be difficult.
- Replace the sky in a photo: Replacing skies can be quick and easy.
Fixing edges in Photoshop
Tips to get better cut-outs in Photoshop
Make sure you watch the video first, as there is a lot more info in the video. Then use these written instructions as a reference.
In fact with the list of all the cutout tutorials above, it’s probably worth bookmarking this page and using it as a reference page for all things Photoshop selections.
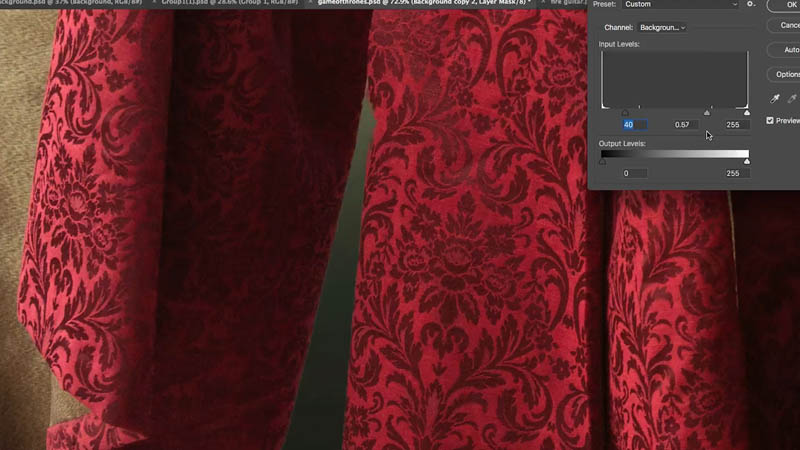
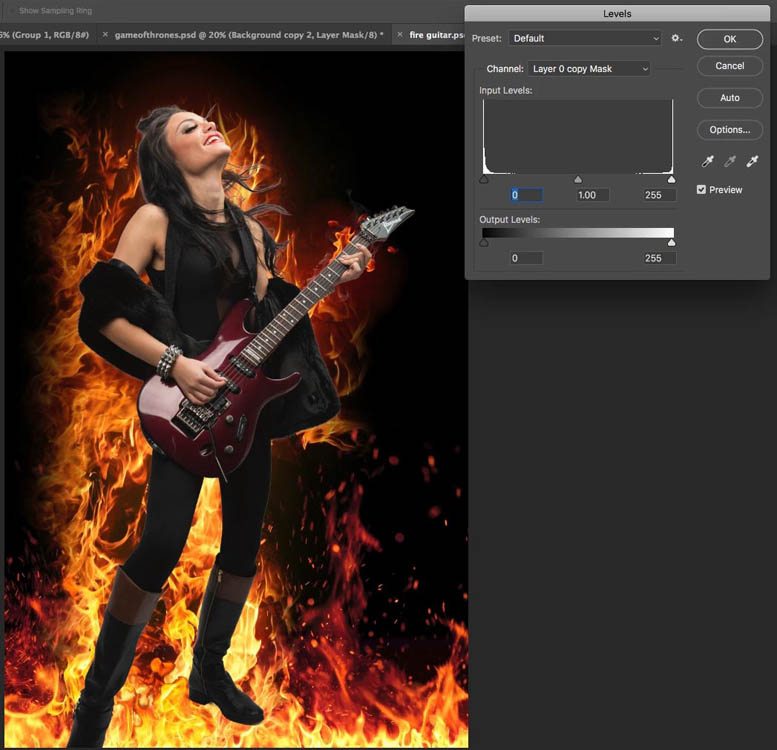
Tip 1 Choking a Photoshop mask edge
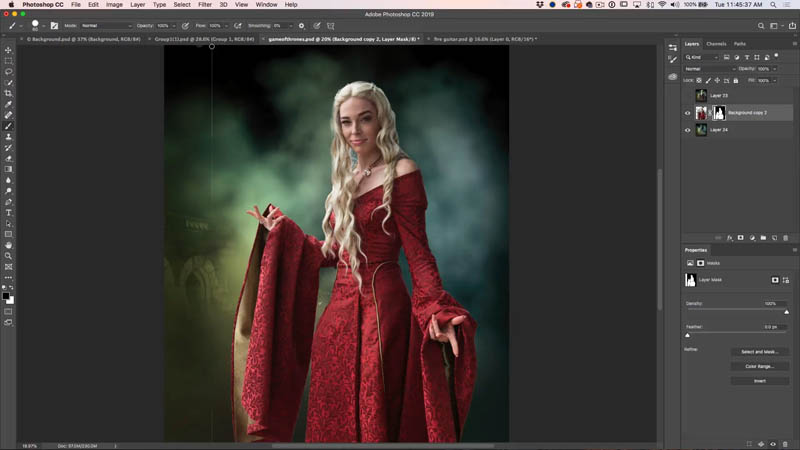
Here is a little Game of Thrones fan art I made, but the edges have to blend in perfectly for this to be believable.
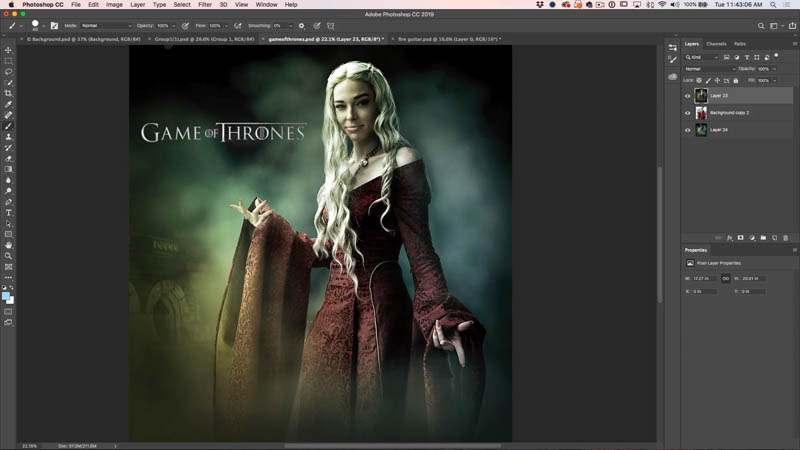
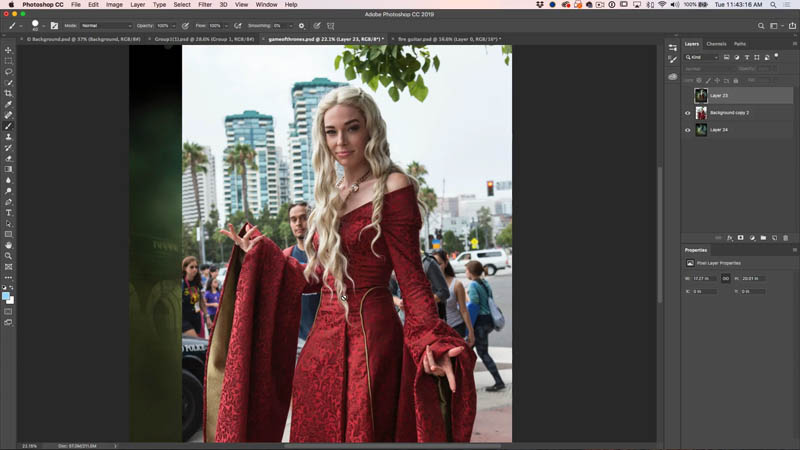
This is the photo I started with. I shot this cosplayer (Does anyone know her?) at San Diego Comic-Con. I had about 5 seconds to shoot her under a tree, so I didn’t have time for the perfect background.
Make your selection with quick select brush (lots of tutus above on selections – this tut is moving past basic selections)

Add a layer mask and we have a basic cutout.
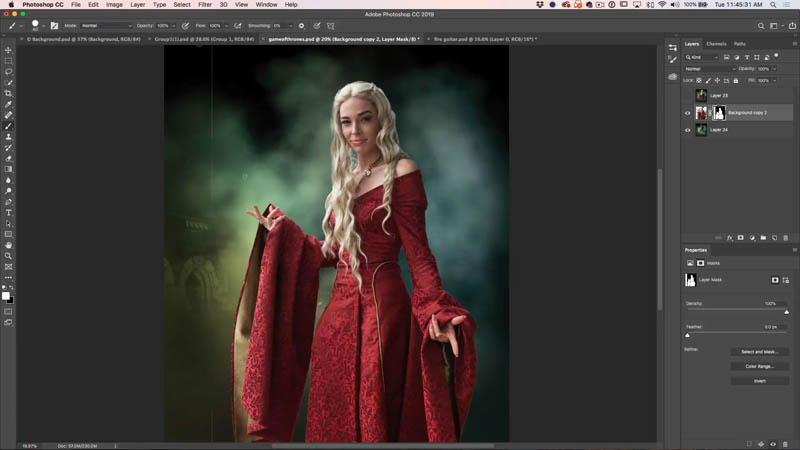
Close examination shows there is a light fringe around the edges of the dress, This won’t do.
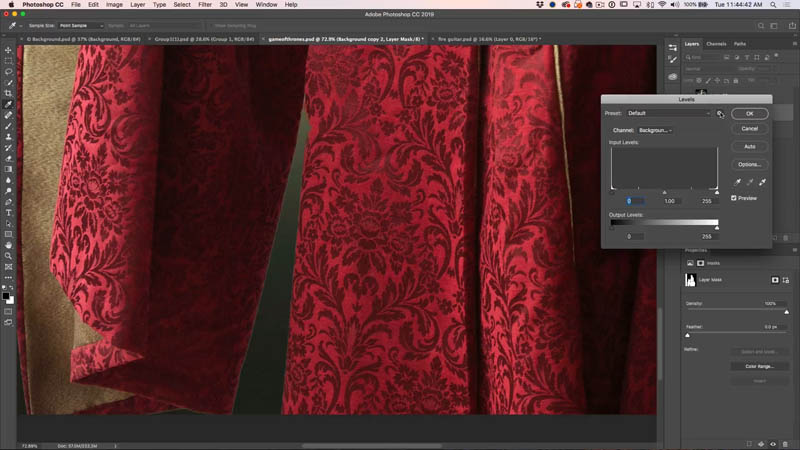
With the layer Mask selected press Cmd/Ctrl+L to open up levels. We are going to adjust levels of the mask.
Drag the black slider in a bit, the edge already looks better.

Adjust the mid slider and notice how it expands or contracts the edge. This is called chocking a mask and its a super quick way to get perfect edges.
Selection Tip 1.5 Get rid of mask edges (Bonus tips
Have you ever found a line running down the image on the edge of a mask? This is a bonus tip.
Choose the mask and a black brush.
Click at the top of the line.
Move to the bottom of the line without drawing.
Hold down Shift and click again. A straight line is drawn and it erases the edge just like that.

Tip 2. Helping Photoshop with the edges.
You make a selection and then you jump into Select and Mask.
Here is a tip to get better edges every time.
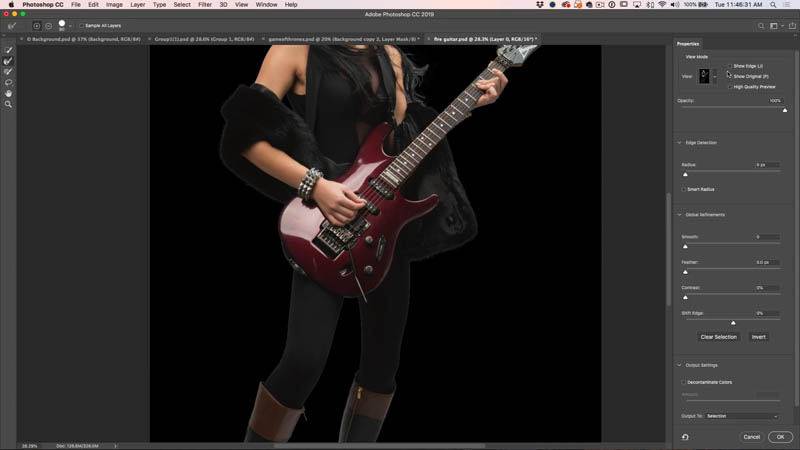
In select and mask, click on show edges at the top left. You screen will go blank. Move the Radius slider until you just begin to see an outline.
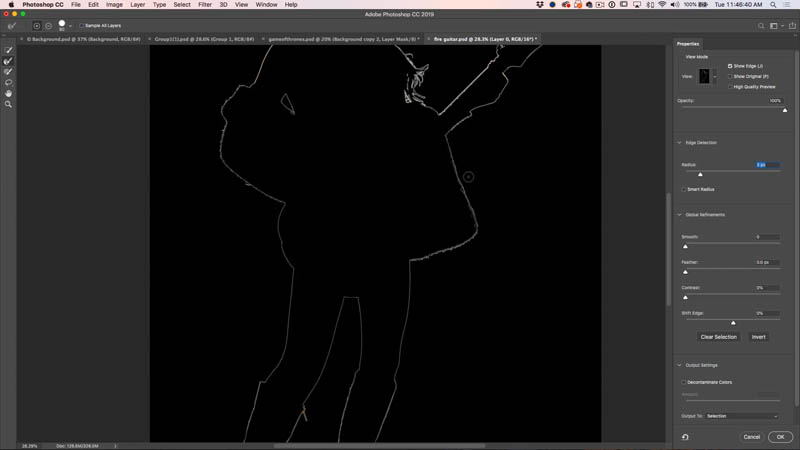
Turn off Show Edge and see how much better that edge looks now.

Don’t forget, you can always use that first tip to choke that mask and remove the fringe.
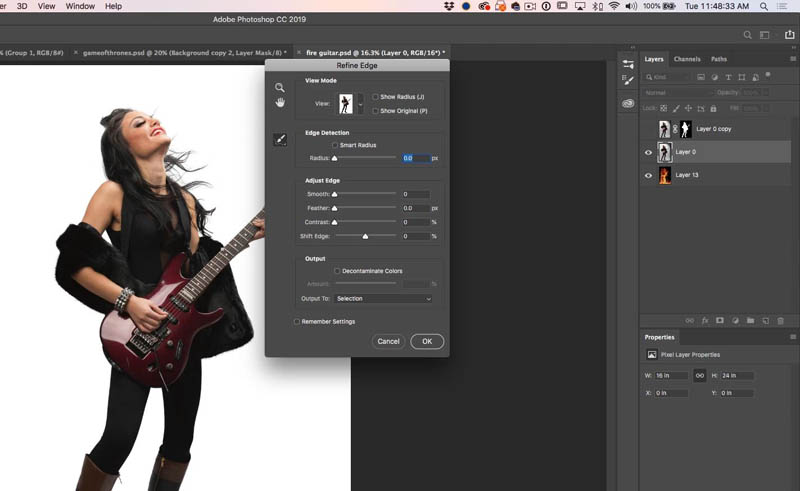
Selection tip 3. Refine Edge in Photoshop CC.
As you know, Refine Edge has been retired and replaced with Select and Mask. But there is a hidden way to get back refine edge, let me show you.
With your selection active choose Select>Select and Mask while holding down the Shift key.
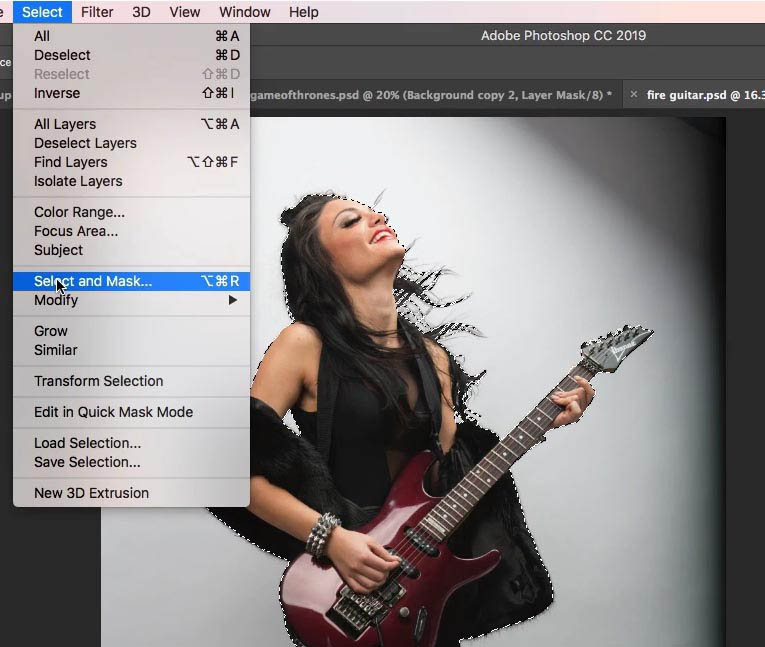
And bingo! (or Yahtzee) refine edge pops up. You’re welcome.
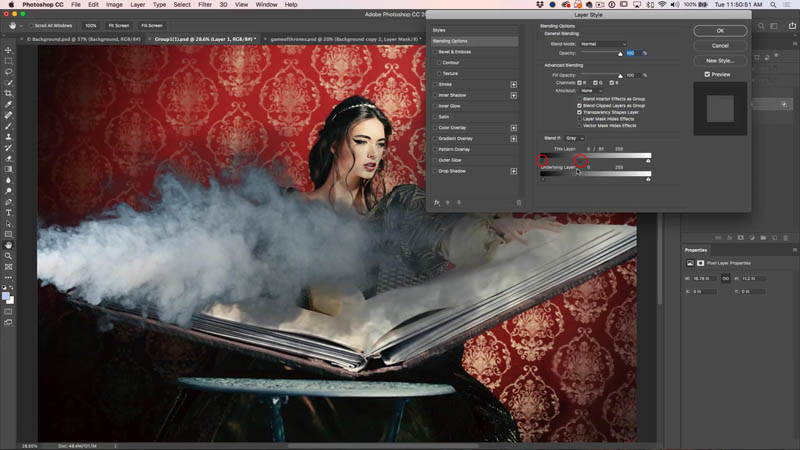
Selection tip 4. Skip the selection and use advanced blending instead.
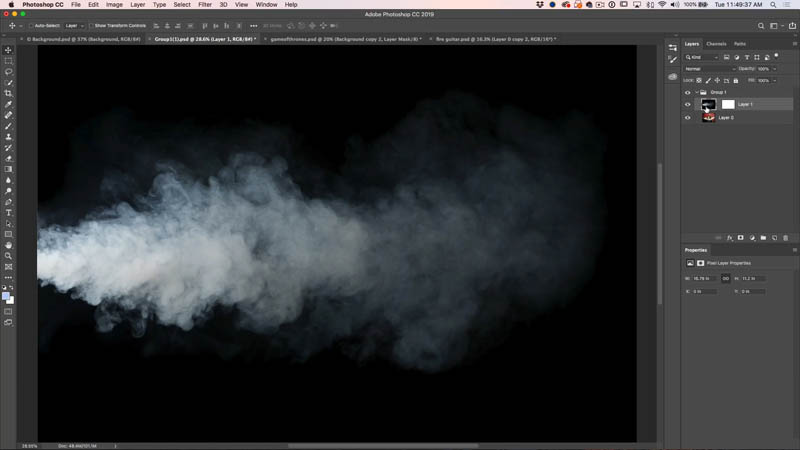
Here we have a layer of smoke above our woman on the lower layer. (I made an overlay so you can see both images at once)
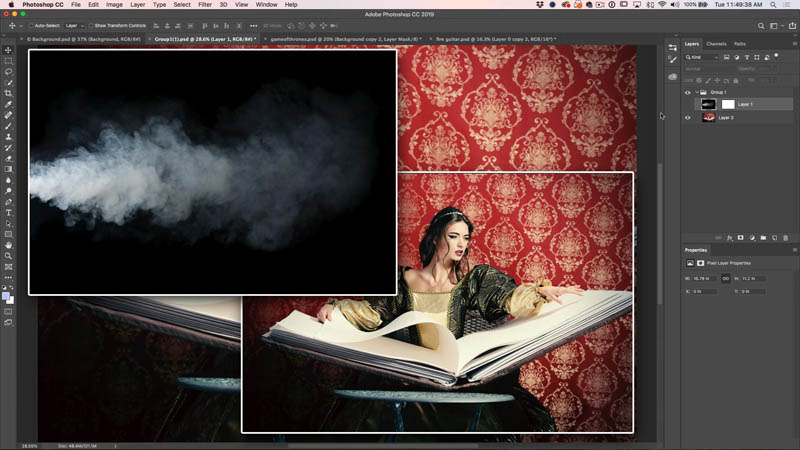
This is what it looks like in the layers panel. We want to hide the black and show the smoke. Usually I would say, use soft light, screen or lighten blend mode, but Layer blending modes won’t work, because we want to control the density of the smoke.
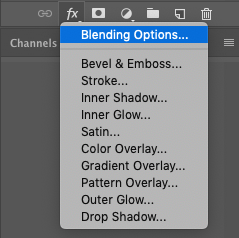
Go to the bottom of the Layers panel and click the fx, choose Blending Options at the top
Now you will see the layer style panel with advanced blending open.
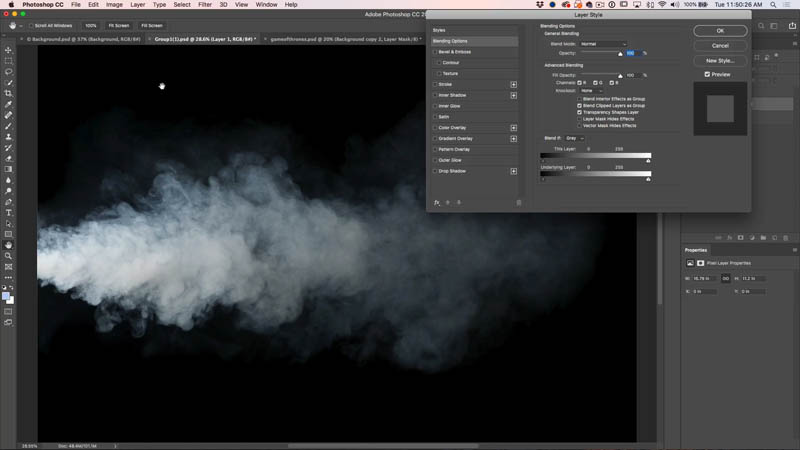
Move the black slider of the blend if option. See how the black fades away. But the edges are very harsh.
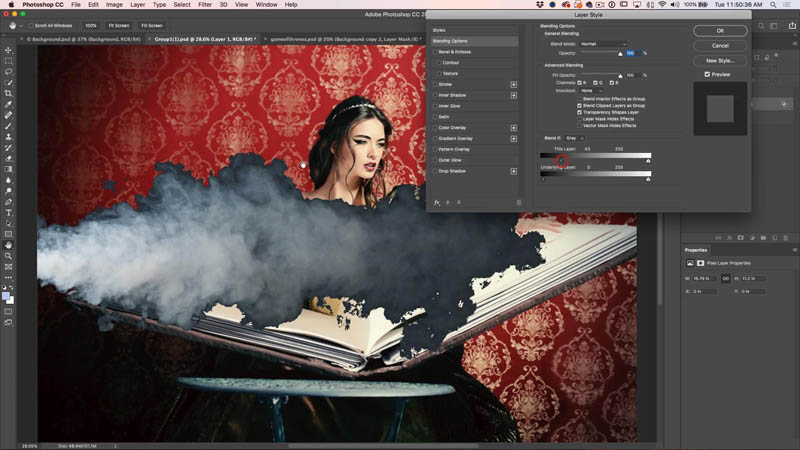
Hold down alt/Option and click on the left side of the triangle. Notice it separates into 2. Slide to the left and notice how nice the edges are now as they blend in seamlessly.
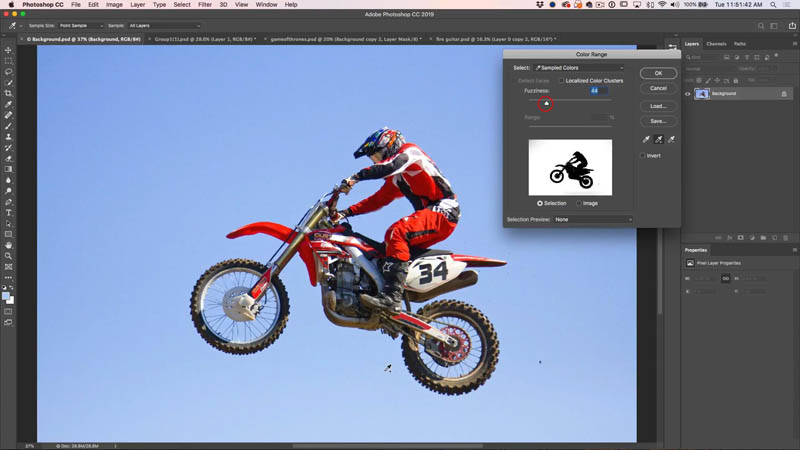
Selection tip 5. Instant clean up of selections.
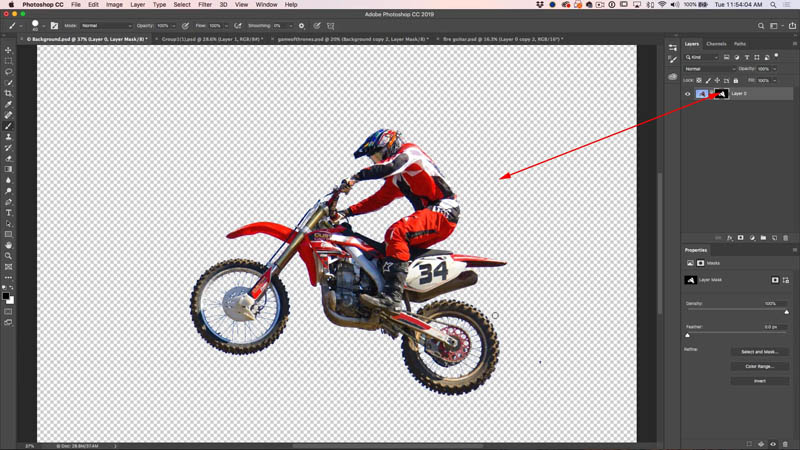
Let’s cut out this moto X rider using Color range. Select>Color Range.
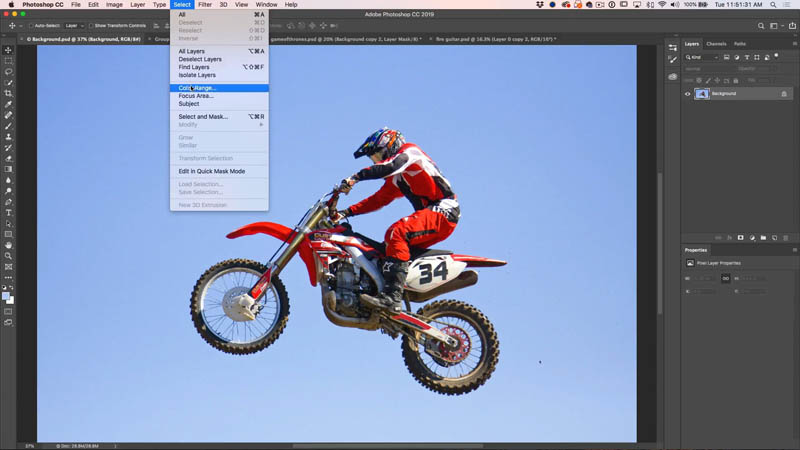
Use the + eyedropper to add to the selection (see on the video at the top of the page).
Adjust the fuzziness and it looks like a pretty clean selection.
Click ok to apply.
Press the Q key for quick mask,
Open the Channels Panel. Click on Quick mask channel and hide the other channels.
Notice the gray areas? These will come through as only partly selected and not give a clean extract.
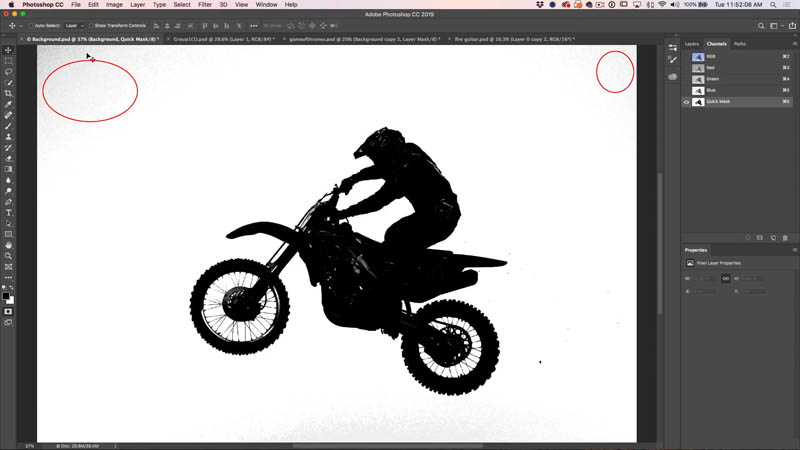
You could paint them out with a white brush, like most people do. But these is a much quicker way.
With the channel still selected, press Cmd/Ctrl+L for levels
Move the white slider to the left to clean up all the bright areas. Super easy eh?

Add your layer mask and you have a nice clean cutout.
I really hope you enjoyed this week’s tutorial and that you learned some useful things abut selections. If you did, share this page with your friends!
Thanks,
Colin
PS Don’t forget to follow us on Social Media for more tips.. (I've been posting some fun Instagram and Facebook Stories lately)
You can get my free Layer Blending modes ebook along with dozens of exclusive Photoshop Goodies here

16 thoughts on “5 hidden tips for cutting out and selecting photos in Photoshop”
Leave a Reply
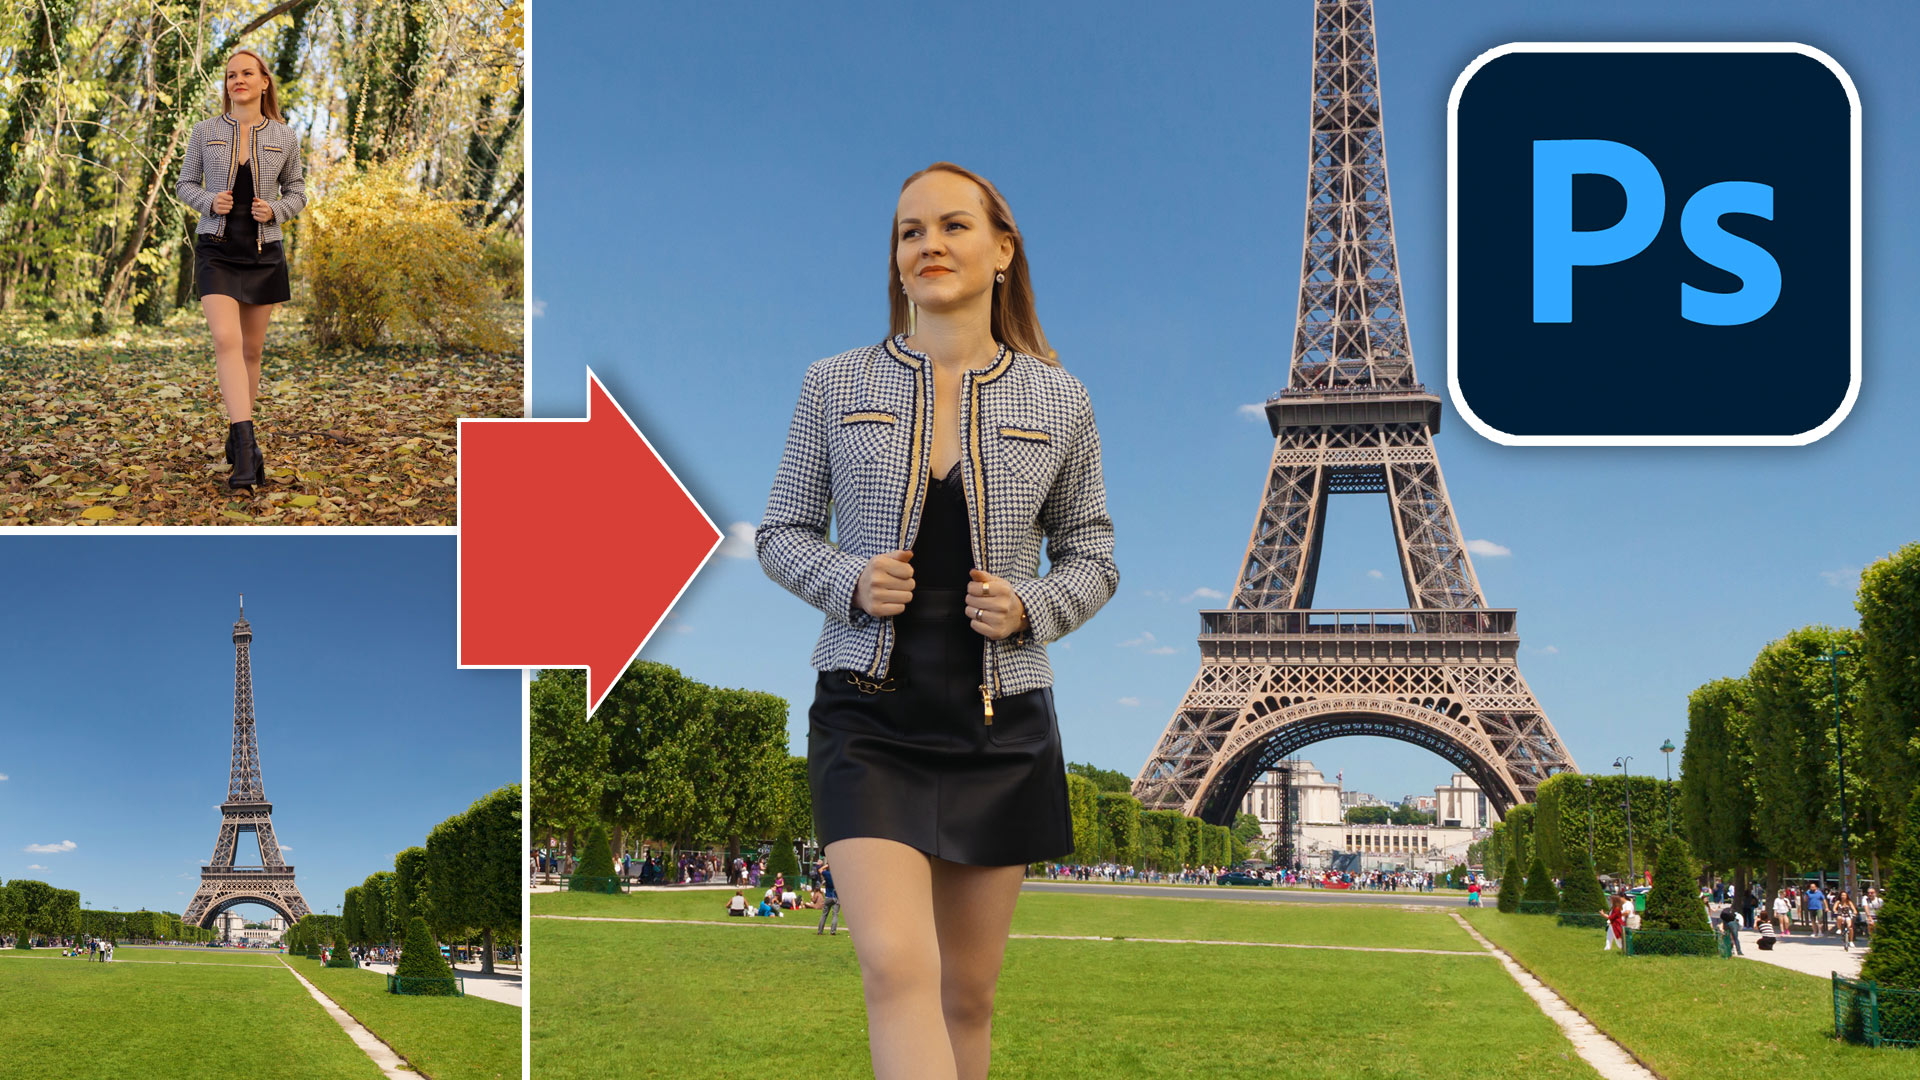
How to Photoshop a person into a photo, start to finish with all 5 steps.

18 hidden photoshop tips, vanishing point tips, super color picker, copy images between documents, copy layer, reuse adjustment layers and...

New to Lightroom, curves inside masks for powerful tone and color grading


Fantastic walkthrough, thank you so much!
I’m watching from my home office on 27 in iMac or MacBook Pro. I’m a retired Software Engineer, doing photo post-processing with Photoshop as a part-time job. Always like to check out your tutorials to make sure I’m not missing any tricks.
Thanks
This is awesome. Sometimes I have a very difficult time cutting out a complicated selection. This helps a lot, Thanks
I am watching on an iMac at a high school, where I work as a Digital Art Teacher
I am sitting in my office/Study Western Australia and watching on my PC
Greetings from small village near Brussels Belgium i amwatching on my PC
Hi Colin,
I am at home in Nashville watching on my PC
Hi, I am sitting at my desk at home in New Jersey watching on my PC!
Watching on my iMac at home
Dallas, TX in my home studio, watching on my recent-model iMac.
Hi Colin,
Watching this video in my home on my PC on The Central Coast, NSW Australia
I am watching on my mac computer in new york city.
Ciao Ken, I’m sitting at home in Italy and watch your tutorials (all of them!) on my PC.
Sitting on my family room couch watching the tutorial on my late 2013 MacbookPro.
I use Window, so every time you mentioned the CMD Option key etc. I am lost because I don’t know Apple. It would make sense if you present it using the drop down menu and select, which all Window and Apple users know what you are doing….. just from a Window user’s perspective.
I’m watching on my MacBook Pro while sitting at home. Great tutorial, as always.