4 quick ways to fix photos in under a minute in Photoshop, that you may not have known
4 Ways to quickly fix a photo, using Apply image and more in Photoshop
There are many ways to fix photos in Photoshop and I have written many tutorials about them. I want to offer some less common techniques here, so I went to the humble Apply Image tool. Lots of people have never used this powerful tool, which has been in Photoshop for a long time.
Today we are going to look at 4 ways to fix common problems including under exposure and over exposure.
Fix under exposed photo (dense)
Here is a photo that’s plugged up and dark.

Choose Image>Apply Image
Change the blending mode to Screen.
Now the photo looks much better. That took, what? Less than 10 seconds?

Fix Overexposed photo (washed out)
This work well for those washed out images.
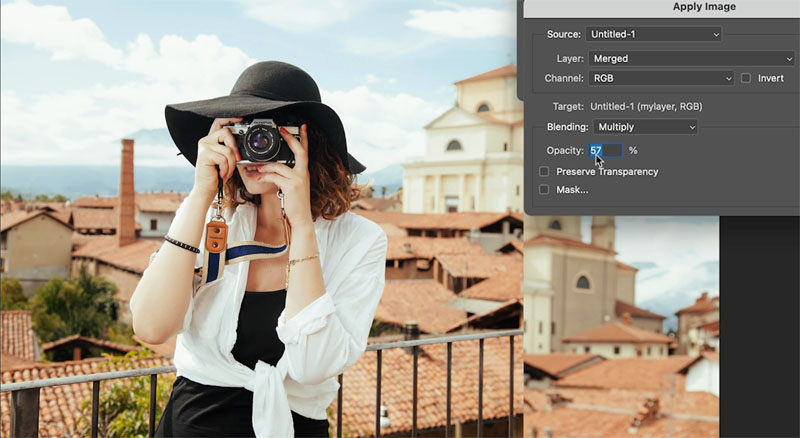
Choose Image>Apply Image

This time, change it to Multiply mode. See, all the contrast is back. Maybe too much?

Drag the opacity to a place where the result is just what you want.
Adding detail contrast to a photo
Let’s try something different on this image, we want detail to pop.

Choose Image>Apply Image
Change the blend mode to Overlay
This time, change the channel. Try all 3 to see which looks the best.

In this case The green channel looks the best.

Roll back to opacity for a nice image with detail pop.
Can you see how useful Apply Image is?

4 Sliders to make any photo look better.
When I’m in a hurry, there are 4 sliders in Camera Raw that will make your images look better fast! (For a more detailed Camera Raw tutorial, check this out)

Slide the Highlights all the way to the left
Slide the shadows all the way to the right
This shows the maximum detail in your image.

The result can look too saturated and fake.
Reduce the saturation and then increase the vibrance (more subtle this time)

You can also adjust the Exposure and contrast if you like. And of course, you can use the other tools, but thats the fastest way to get the best improvement in ACR (Camera Raw).
I hope you enjoyed this weeks tutorial!
Great to see you here at the CAFE
Colin

Keep growing with Premium Courses
Photoshop 2026 for Digital Photographers
Learn Photoshop properly, from the basics to pro retouching, step by step.
$129.00 · one-time purchase · instant download

Free for you
The Photoshop Vault
Get my free Layer Blending Modes ebook along with dozens of exclusive Photoshop goodies: actions, brushes, presets and cheat sheets.
You're on the list, so your free goodies are waiting for you in the Vault.
Get Free Photoshop Goodies Open the Vault

The 10 Best Photoshop Tutorials of 2020
The top free Photoshop and Lightroom tutorials. 12 best free Photoshop and Lightroom tutorials are right here. Read tutorial
Hidden controls in LUTs to color grade photos in Photoshop. Split LUT
The Split LUT effect, by Colin Smith, Powerful color grading tool in Photoshop, Split a LUT into color and tone Read tutorial
How to get better fur + hair cut outs in Photoshop by making a small change.
How to get better selections when cutting out hair and fur in Photoshop Read tutorial
Sneaky Trick with Color Transfer in Photoshop for amazing color grading
Sneaky hack in Adobe Photoshop AI, Instantly adds Pro looking color grade to photos. Here is how Read tutorial
Photoshop refine Mask Tricks in 2022
2 Tips to instantly make cutouts look better in Photoshop. How to refine masks in Photoshop to remove backgrounds, cut out objects... Read tutorial









awesome tutoriol ! correct you are Colin, learned a couple of new go-to’s for photo enhancing.
Love these fixes, especially the “Apply Image tricks”. Screen mode for underexposed shots was a game changer for me.
BTW, I had a few photos that wouldn’t even open in Photoshop (just showed grey or had weird glitches). Turned out they were actually corrupted, not just badly shot. If any reading my comment is facing a similar situation, let me tell you, I used stellar repair for photo to fix them.(not promoting just helping out people who are photography enthusiasts). But learned a few new tricks today.