Smart Objects are wonderful tools in Photoshop. They enable you to make unlimited changes without losing quality and provide an amazing amount of flexibility. This nondestructive way of working is really the modern workflow for Photoshop. They are also capable of doing a lot more than most people realize. If you don’t really understand Smart Objects, I am going to explain this clearly to you. If you do understand, I’m going to give you 7 tips (or workflows) and show you some things you may not be aware that you can do with Smart Objects, or even in Photoshop.
First of all, I highly recommend you watch the video, and then read the steps for clarification and reference. You will want to bookmark this page. (And share it with all your friends.
I’m going to use potatoes to explain smart objects. Imagine that this potato is your image.
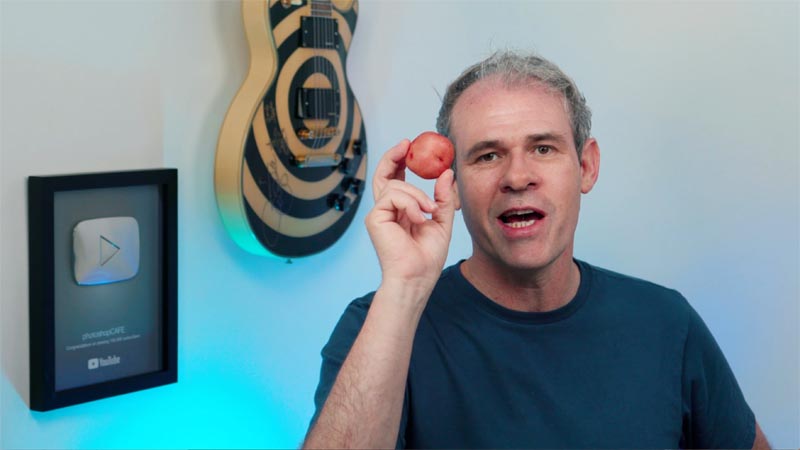
If you wanted to change the color of it, you could paint the potato, or apply substances to it to change the texture. However, if you change your mind later, it’s very hard to undo. This is the same with your images, if you paint directly on it (without layers), or apply a filter directly to the pixels, you can’t change your mind later. What you need to do, it protects your pixels and put them inside a container.
Putting the potato inside a plastic bag is the same as putting your pixels in a smart object. Now, when you paint or add texture, it will be applied to the bag or “container” and not on the potato directly. The bag is the Smart Object.
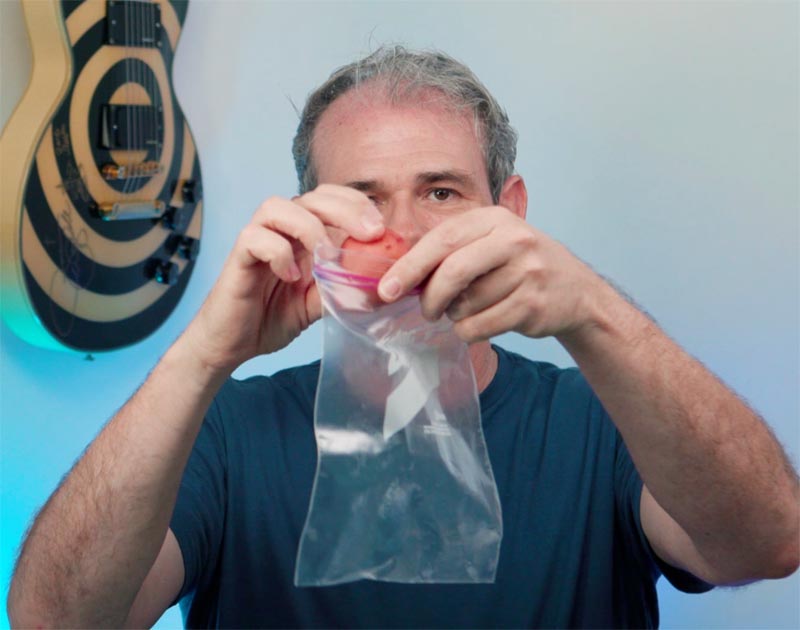
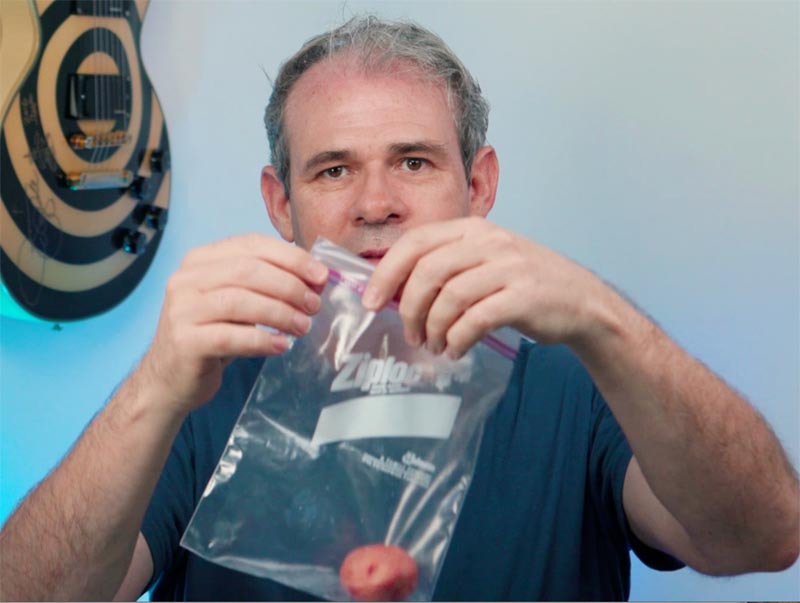
If you change your mind later, you can always remove the potato from the bag and it will be unaffected by whatever you did to the bag. (Short of boiling it). This is the same with a smart object. The changes are applied to the object (or bag). You can always remove your pixels from the Smart Object (or bag)
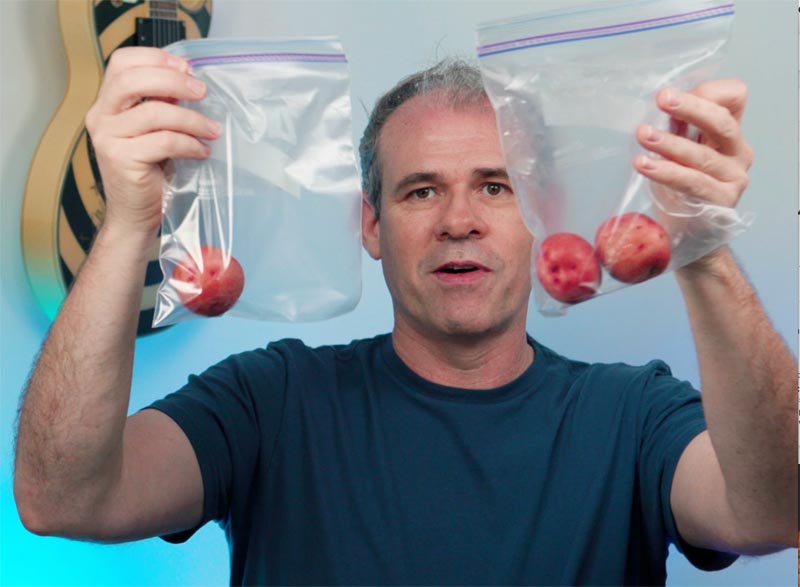
You can have multiple layers in a Smart object (Potatoes) and multiple Smart Objects (Or bags of potatoes). You can even put them inside other Smart Objects (or bags).
Hopefully, that helps a little bit, Read on and I’ll explain what Smart Objects can do and how to use them and things will become clear.
(Click to subscribe to our youtube channel for more tutorials). 

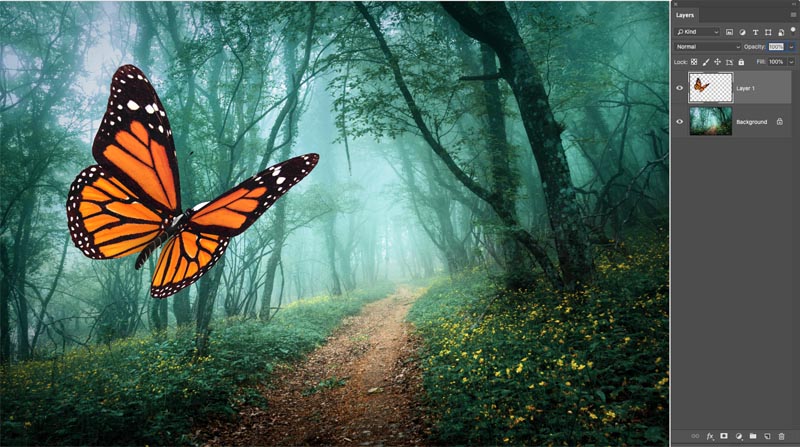
If you are going to change the size of the objects your layers, you will lose quality, unless you use a Smart Object, let me demonstrate.
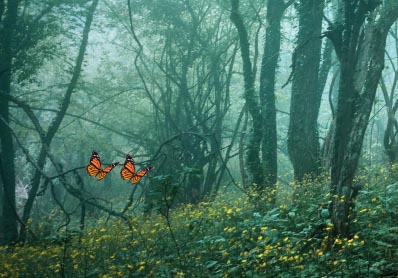
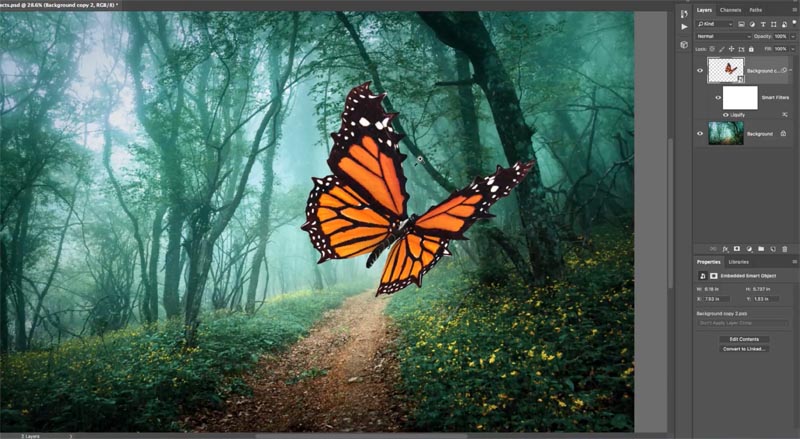
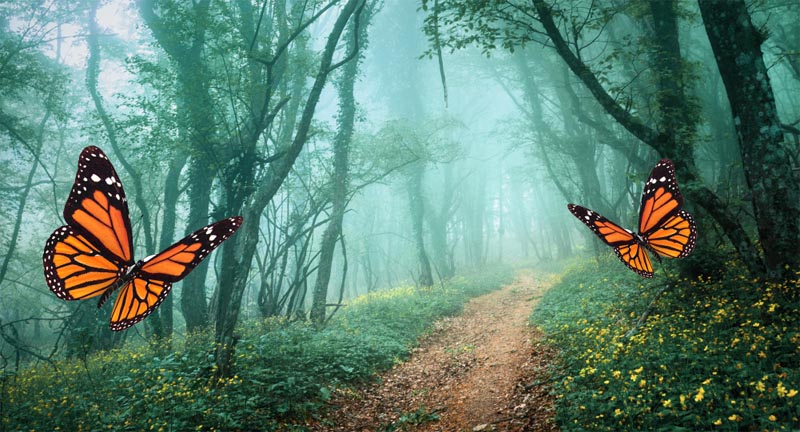
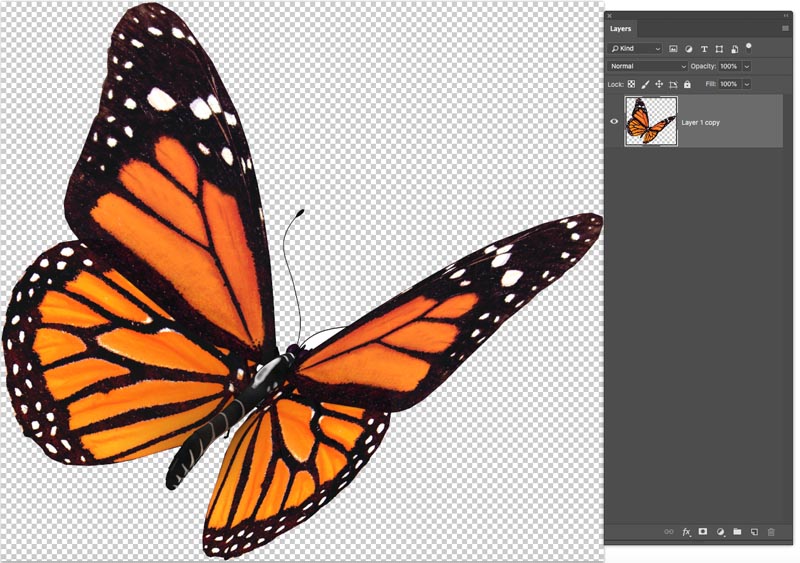
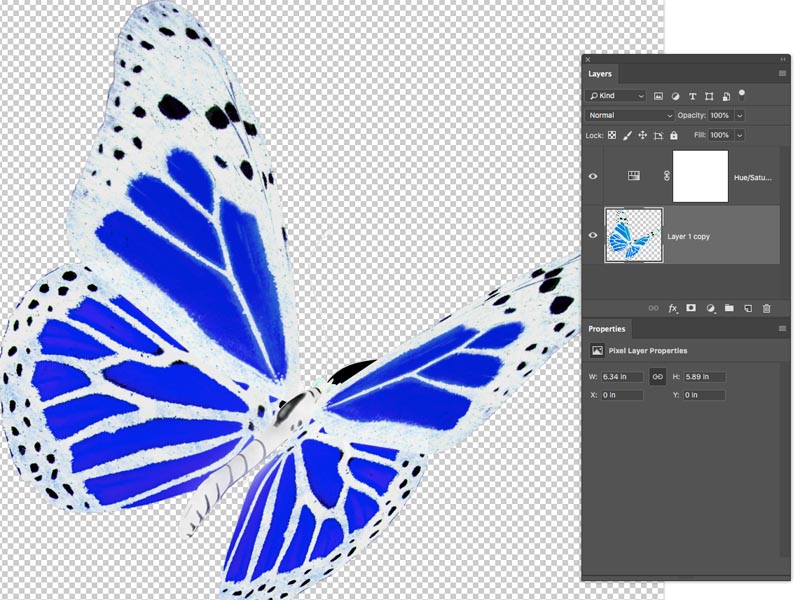
Here is an image of a butterfly on a layer above a background.
The images I’m using are from Adobe Stock.
► Become an Adobe Stock Contributor:
► 10 free images from Adobe Stock
Photos used in this tutorial:
Duplicate the butterfly layer by pressing Ctrl/Cmd+J and drag the copy next to the original.
You will see 2 layers now.
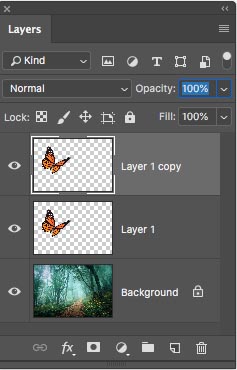
Let’s convert one of the layers into a Smart Object.
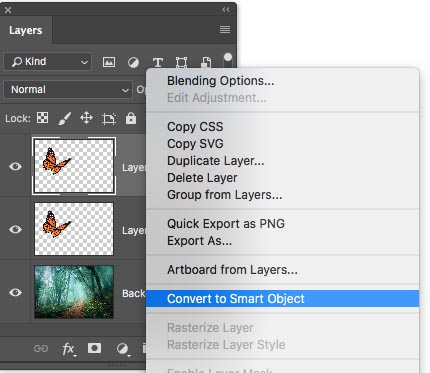
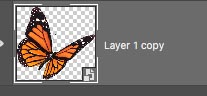
Right Click the thumbnail and choose, Convert to Smart Object
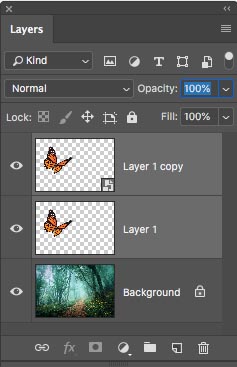
One of the layers is now a Smart Object (Or more correctly, put inside a Smart Object, remember the potato in the bag?)
You can see it’s a Smart Object because of the little badge in the bottom-Right Corner.
Select both Layers By clicking on the first and Cmd/Ctrl+Clicking on the 2nd layer.
Let’s change the size of both of these. Press Cmd/Ctrl+T for free transform.
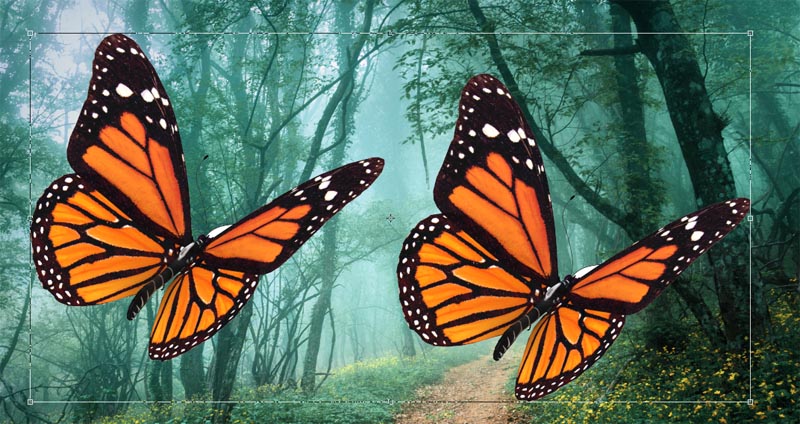
Drag one of the corner handles to scale down. Hold down th Shift key as you drag to constrain the proportions. Press Enter to apply when they are small.
Now, let’s scale them back up. Press Cmd/Ctrl+T for free transform again and scale them back up to the original size.
Notice on the right, the pixels have lost quality and are looking soft. The butterfly that is in the Smart Object is looking exactly how it was at the start, nice and sharp.
If there was no other reason to use a Smart Object other than preserving the sharpness and quality of the image, that would be enough. But read on for 6 more reasons!
When you apply a filter directly to a layer it will be backed into the image and cannot be undone later. (An adjustment layer, on the other hand, is non-destructive whatever it’s used on. See the tutorial on Adjustment Layers.
Most of Photoshop’s filters will work with Smart objects. When a filter is added to a Smart Object, it becomes a Smart Filter. It can be changes or removed at any time.
Let’s apply a filter to our butterfly that we converted to a Smert Object in the previous step.
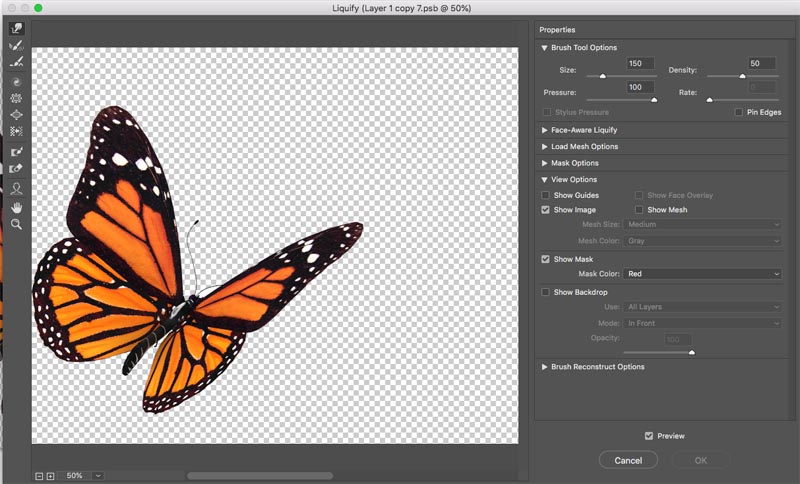
Choose Filter>Liquify
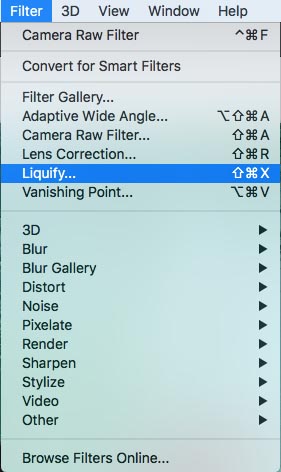
The Liquify panel will open. This is just an example, it could be any filter.
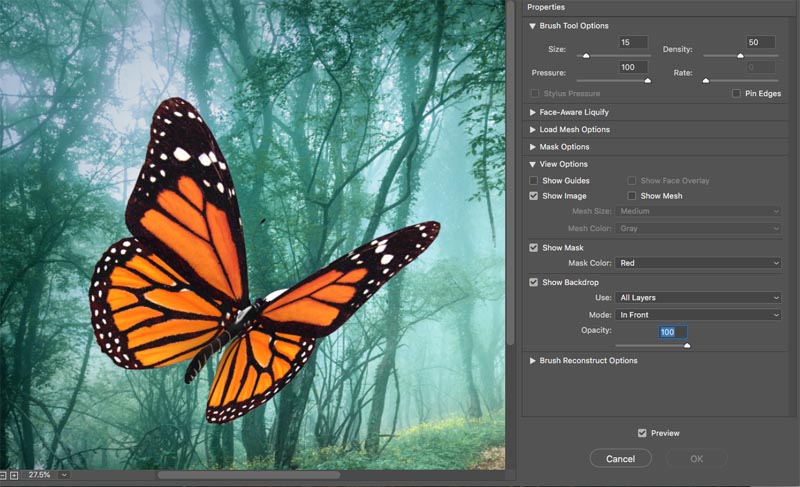
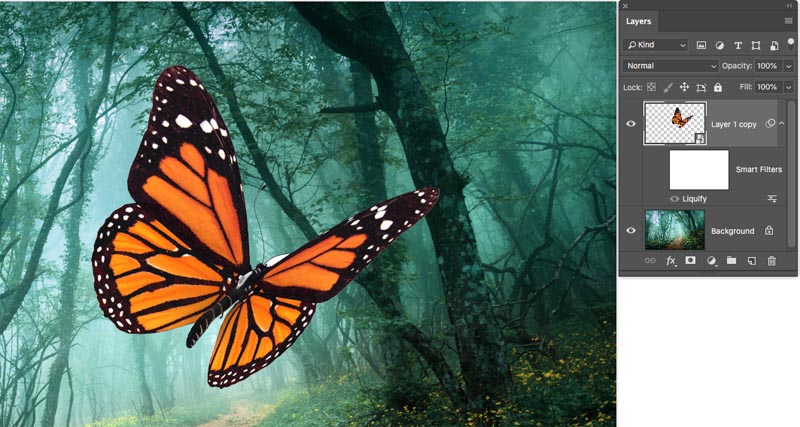
Turn off the background layer to hide it.
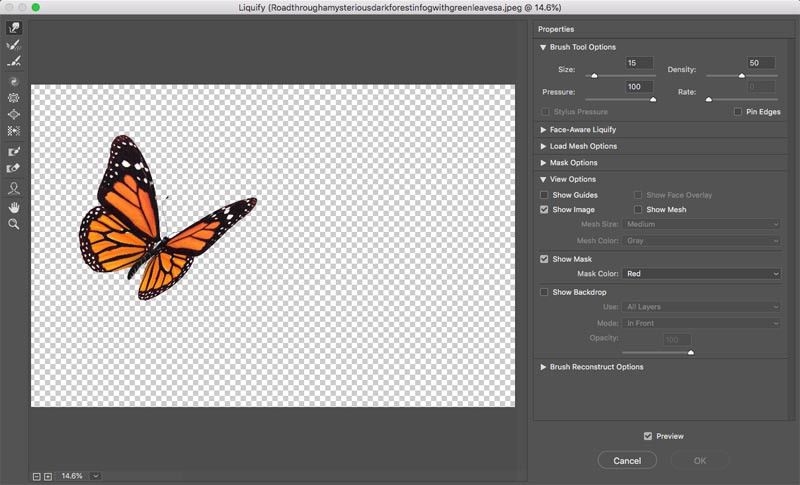
Drag on the edges of the wings with the forward warp tool at add spikes to the butterfly wings.
Click ok to apply the filter.
You can see that the smart filter in turned on in the Layers panel.
There is a lot you can do with the Smart Filter.
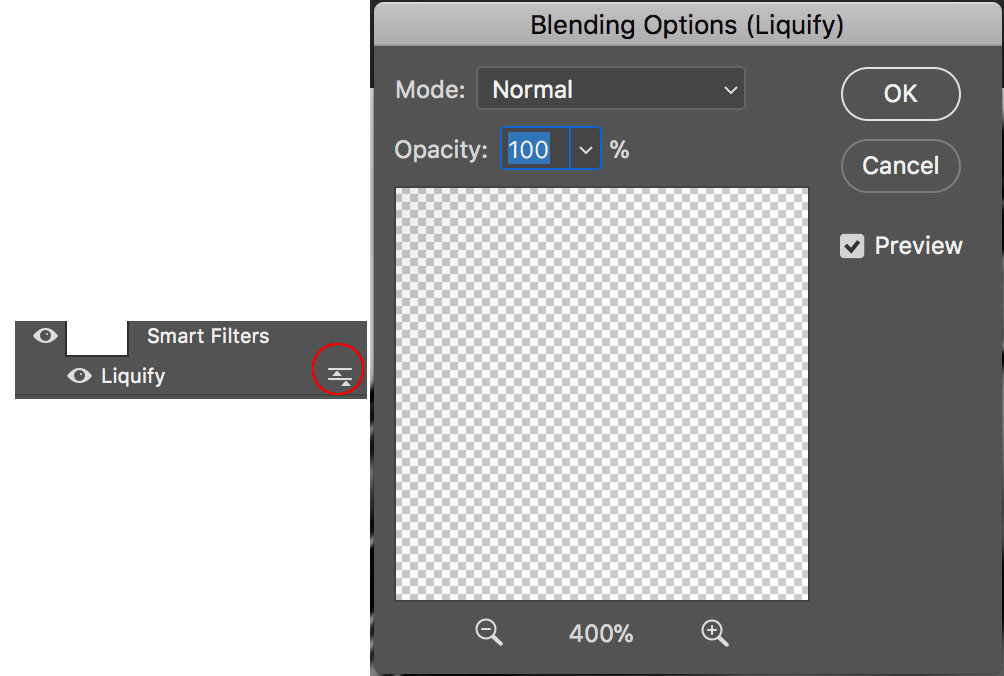
If you click the “eye” icon next to the Filter name, you can hide the Smart Filter as shown below.
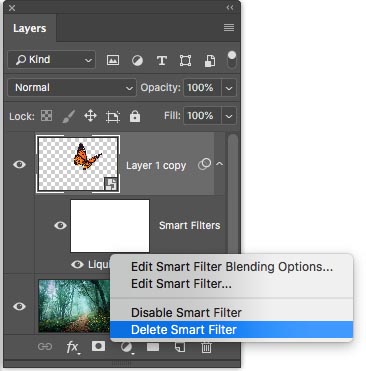
If you want to get rid of the filter, right-click and choose Delete Smart Filter and it will be as if the filter was never used.
Now, that’s what I call options!
The neat thing about smart objects is that they are easy to duplicate and transform without losing quality because we are scaling and distorting the object, rather than the pixels. There is another amazing benefit, but I’ll show you that in the next step.
Let’s duplicate the butterfly smart object (If you haven’t converted it to a Smart Object, do that now.)
Hold down Alt/Option and drag out a copy, it’s that easy.
Let’s transform it.
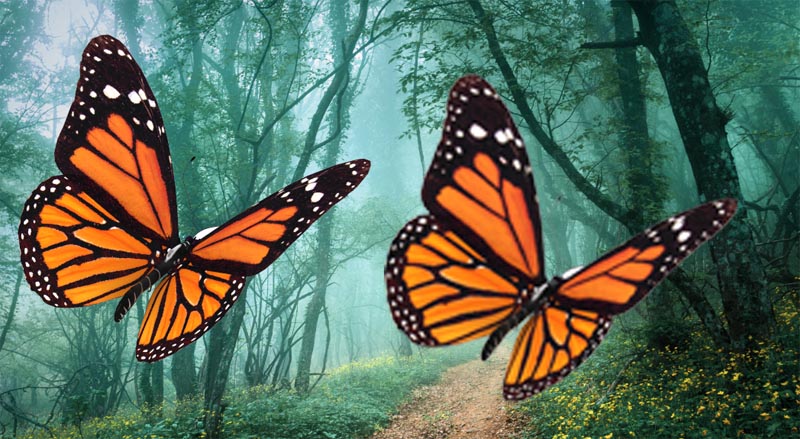
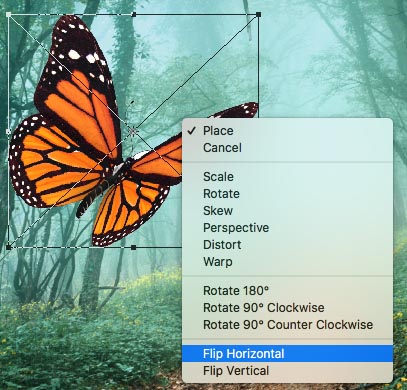
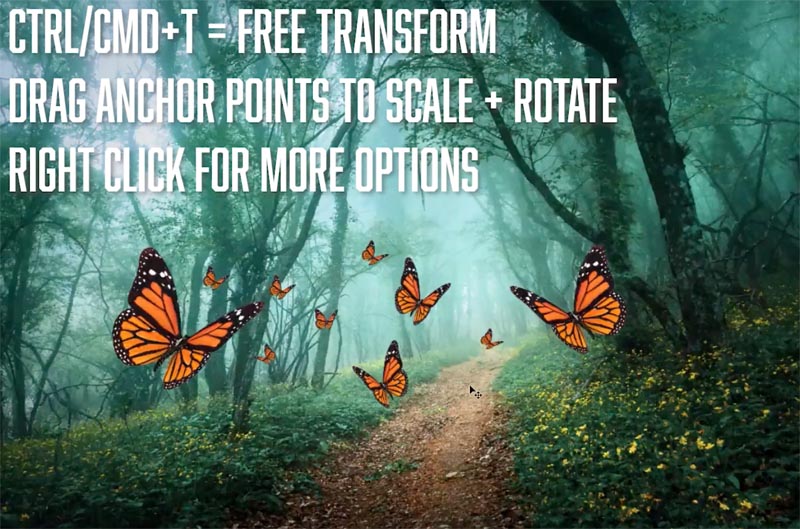
Press Cmd/Ctrl+T for free transform. You can use the 9 points to scale and rotate the butterfly.
Right click for additional options such as warp, distort and more.
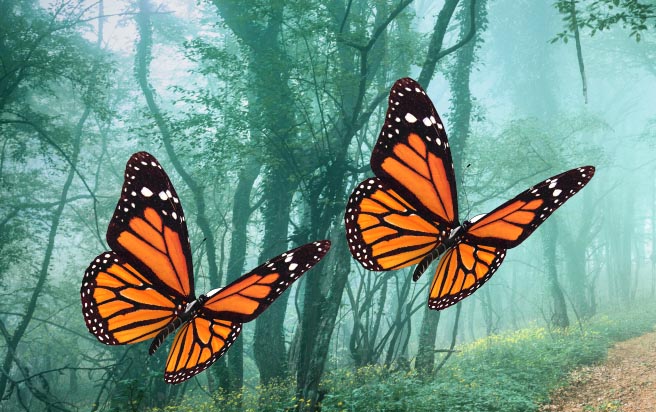
Here I chose Flip Horizontal to mirror the image.
After flipping and scaling the butterfly, we now have two butterflies that look like different ones, even though they use the same image.
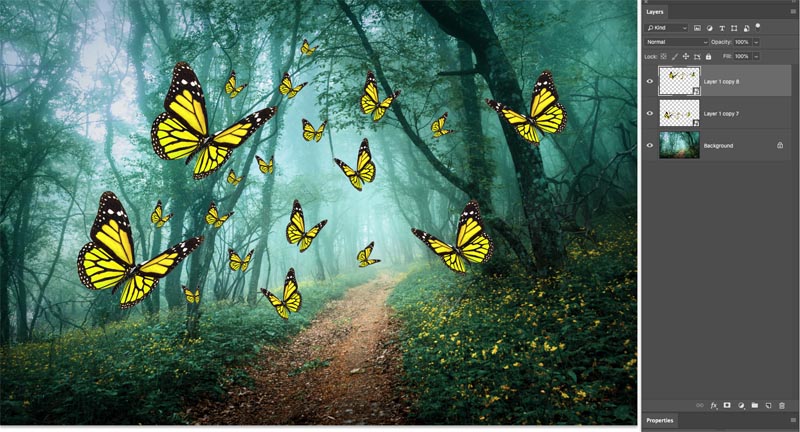
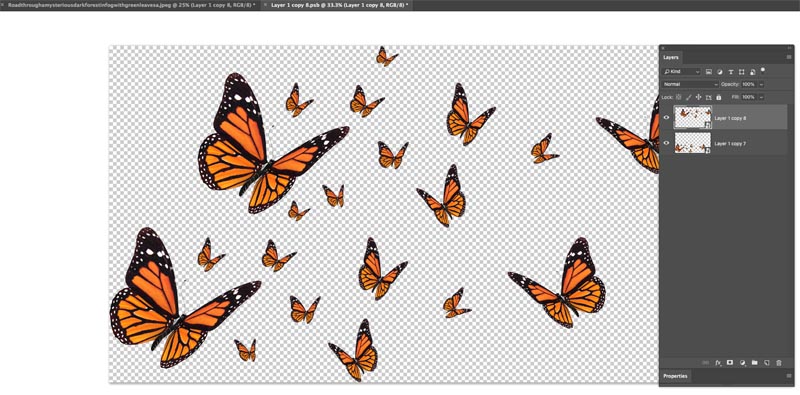
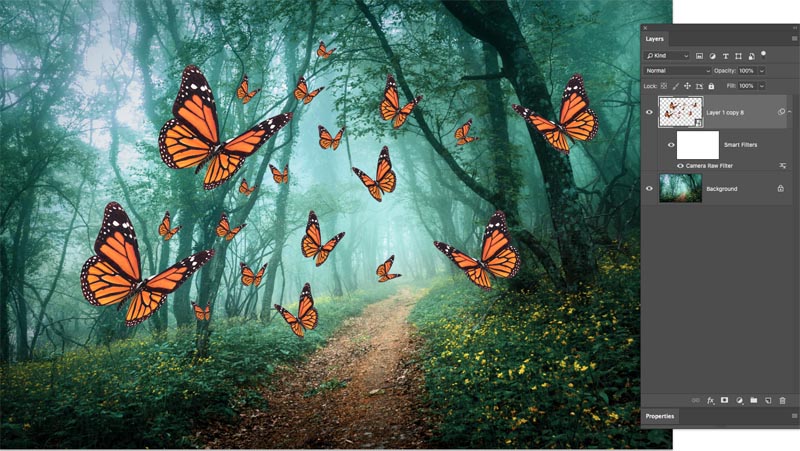
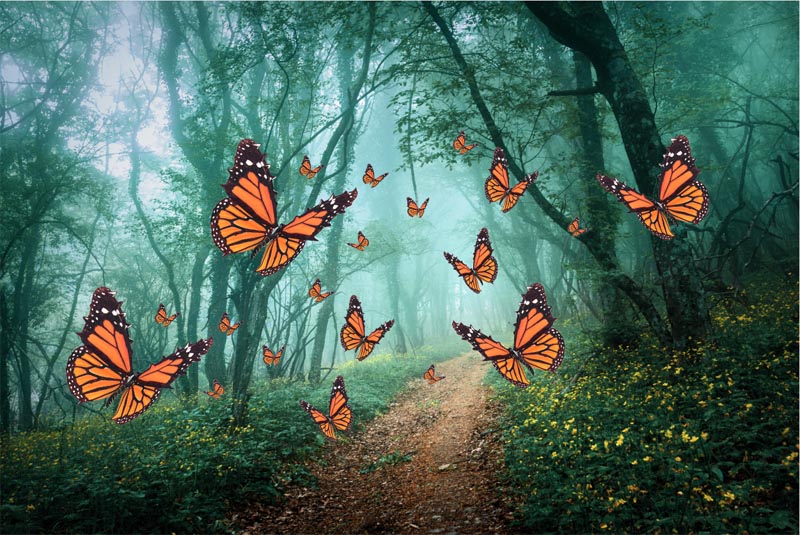
Using the same techniques above, duplicate and scale a few more instances of the butterfly. Now we have butterflies everywhere!
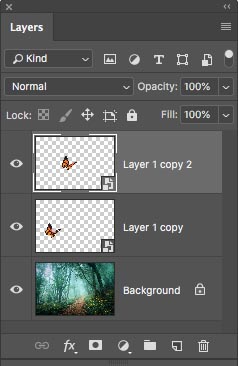
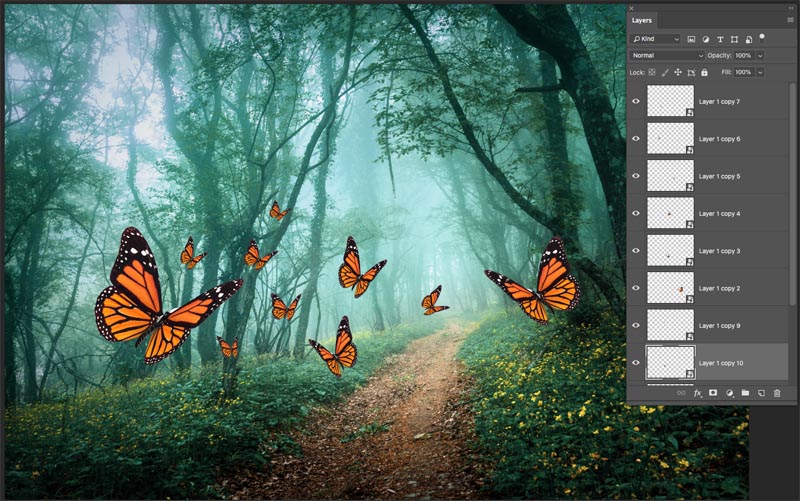
If you look at the layers panel, you will see that each Smart Object is on its own Layer.
Ok, you think this is cool so far? Wait till the next step to have your mind blown.
I call these tips, they sort of are tips, but also just different functions of Smart Objects. Most people think they only do one or 2 things. After these seven, I’ll list more things that Smart Objects can do at the end of this tutorial as an extra tip.
All of these Smart Objects are connected. because they are containers, there is only one butterfly. Each Smart object is pointing to the same butterfly. The objects are instances (or copies) of the same image. This means if we change the butterfly, all of the Smart Objects will reflect that change.
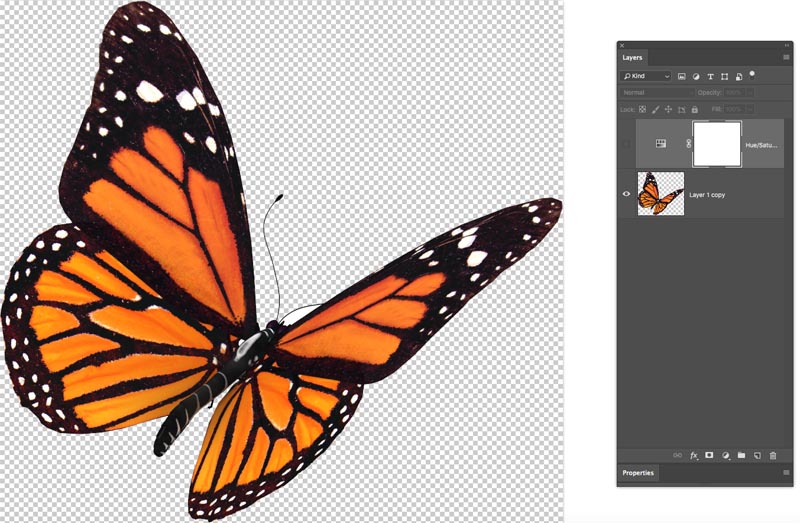
Go to the layers panel and double click on the tumbnail of any of the smart objects.
A new document window will open (as a PSB). We can make changes to this now. This is the equivalent of opening the bag and reaching inside to the potato.
Just to demonstarte how this works, choose a hue Saturation Adjustment Layer. (remember we are inside the smart object now, not in the main document).
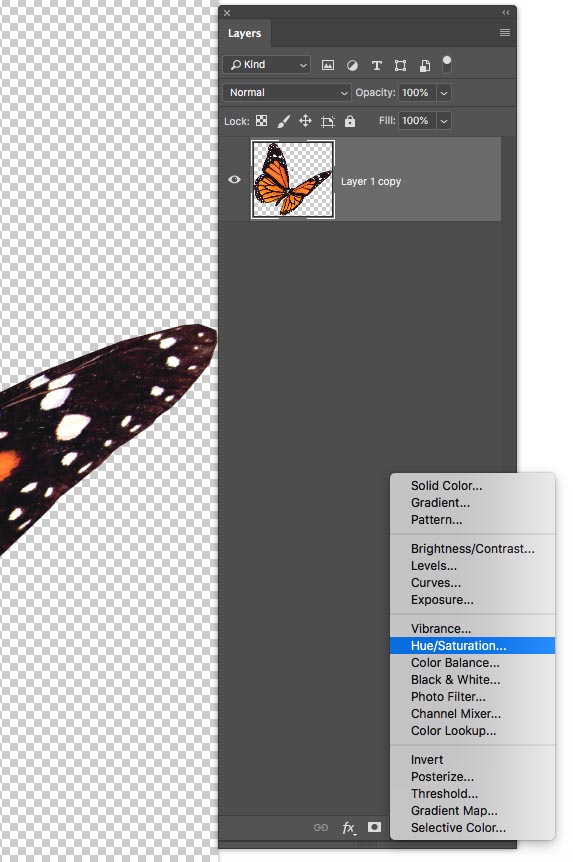
Change the color to yellow, just for fun.
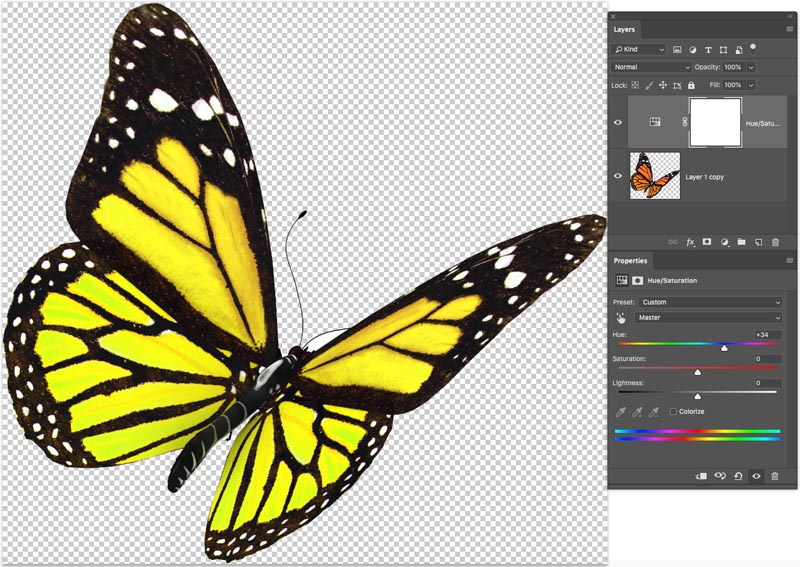
Press Ctrl/Cmd+S to save the contents of the Smart object in the new document window, the PSB, called “Layer1.psb” or something like that. Close the smart object window.
Notice in the main document, all the instances of the butterflies are now yellow. (If you have ever used Flash, you will easily grasp this concept of instances or symbols).


This instance behavior is really useful for making mass changes or keeping everything in sync. But, what if you want to only change one smart object and keep the rest unaffected.
Luckily there is a way to make an independent copy version of the Smart Object, but it’s kind of hidden and really not well known. Aren’t you glad you are reading this? (Makes you want to read all my other tutorials to see what else you have been missing?).
Instead of dragging out a copy, pressing Cmd/Ctrl+J, or dragging the Smart Object to the New Layer icon (all ways of duplicating Smart Objects) do this…
Right-Click on the name of the Smart Object, next to the Thumbnail in the Layers panel.
Choose, New Smart Object via Copy (this is the secret to this).
It will look just like any other Smart Object.
Double click on the Thumbnail of the new Smart Object to open it in a new window, just like the last step.

In this case, let’s do something very noticable, just to easily see the effects of this. Select the butterfl=y and press Cmd/Ctrl+I to Invert the colors.
Save the document and close it.
When you go back to the main document, notice all the butterflies Didn’t update like they did before. Only this new (smart Object via copy) updated. If you don’t yet realize how amazing this is, wait until you need to do ti on a project 🙂
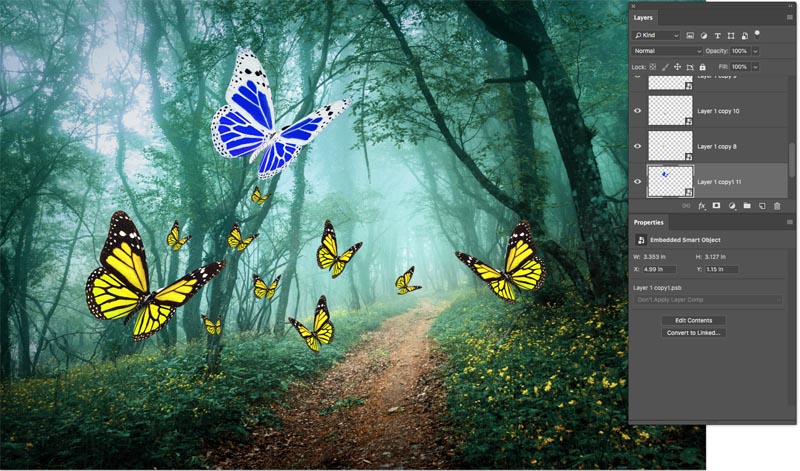
Let’s delete the blue Butterfly, it was just to show you this tip, we don’t need it anymore.

Another really good thing about Smart objects is the ability to nest them. Like stackable Russian dolls, where they go inside each other.
For example, if you select multiple regular layers and choose Merge, they will all be flattened into a single layer, but you cannot separate them or work on the individually anymore. If you select multiple layers and choose Convert to Smart Object you will get a single Layer, but if you double-click it, it will open the bag so to speak and you will be able to access all the individual layers within the new window. Just like multiple potatoes in a bag.
(If this is getting too complex for you, please watch the video at the top and then come back and re-read this section as it’s a little bit advanced.)
Ok, let’s ramp this up a notch. If you can nest a bunch of layers into a Smart Object, you can also nest a bunch of Smart Objects into a single smart object. (Remember the potato and bag example? This is like taking several bags of potatoes and placing them all inside another bag.) They are still there iside their own bags, but you see the outside bag, rather than all the individual bags. BUT you can still reach inside the big bag and inside each of the smaller bags inside. Let’s use a simple example to make it clear.

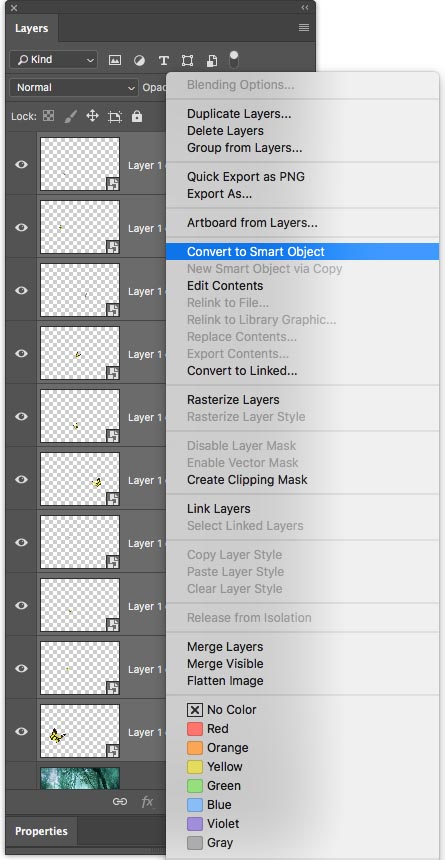
We have our Layers panel, with all the butterfly Smart Objects all stacked up. We could put them into a Layer Group, but it’s also possible to put them all inside a single smart object. This will make it easy to work with them all as a single unit while allowing us absolute flexibility later on.
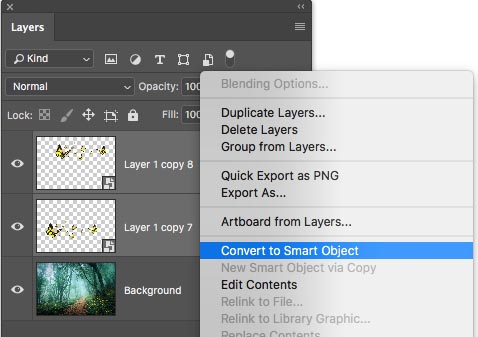
Select all the Smart Objects in the Layers panel. Right-click and choose, Convert to Smart Object. (While the dialog says Convert to Smart Object, it could also mean, put inside Smart Object – which is actually more accurate.
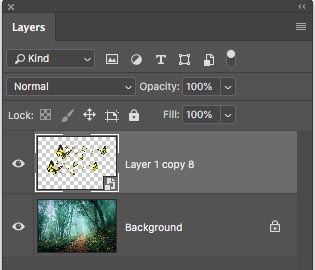
Notice, instead of lots of layers, we now have a single Smart Object. So much easier to manage!
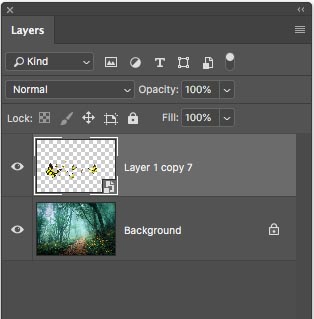
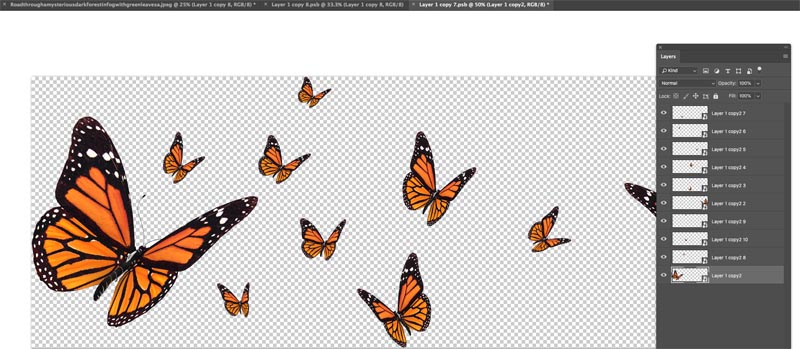
Press Ctrl/Cmd+J to duplicate the smart object,
We now have a copy and can reposition it it very quickly double the amount of butterflies in our image.
Just to make a point, let’s go further down the rabbit hole.
Select both the Smart objects, right click and choose Convert to Smart object.
Now you will see a single Smart object.
Remember that these are all nested like the Russian Nesting dolls or a bags of potatoes inside another bag and then placed inside yet another bag. (more about that soon)
 ,
,
Just to demonstrate the flexibility of these Smart Objects. let’s apply a Smart Filter to them.
Choose Filter>Camera RAW
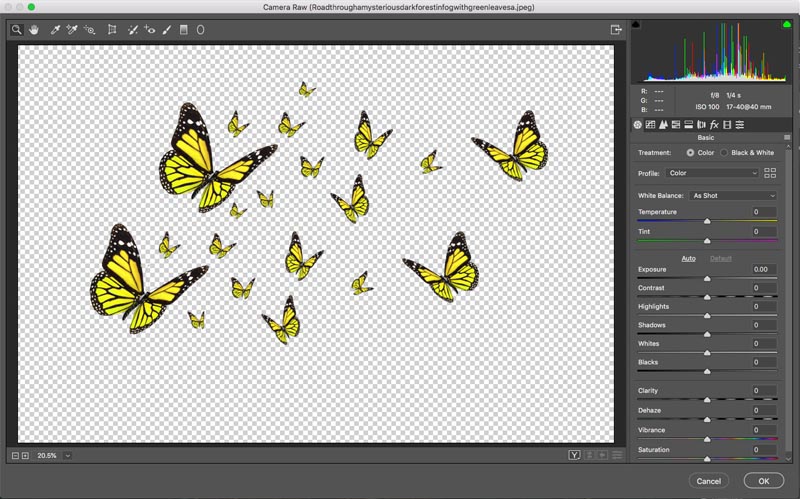
Make a few adjustments and click ok.
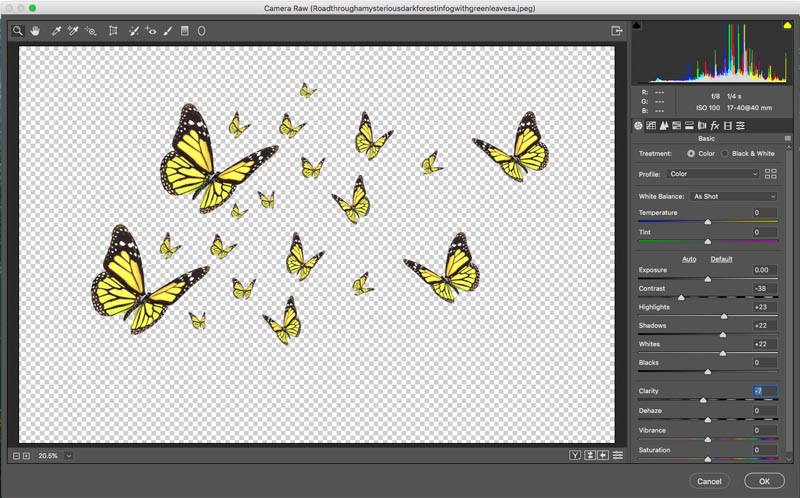
Notice that the Smart object is updated and the Filter is now a Smart Filter.
(Note for advanced users: Applying the smart filter to the nested smart objects, will yield the same results as applying a filter to an individual instance, since they are all connected right? So why do it this way, you may ask? Because if you use the Mask on the Smart Filter, you can vary the way the filter affects the groups of objects in a way that you can’t do on an individual level. )
Ok, so we have a single Smart Object now. Where is the flexibility?
Let’s open up the Smart Object and see.
Double click on the Thumbnail of the Smart Object.
A new Document window will open. Also, there are our 2 Smart Objects,
Let’s go further. double clik a Smert Object Thumbnail to go a level deeper. (Doesn’t matter which as they all go back to the same image, remember, they are instances, copies)
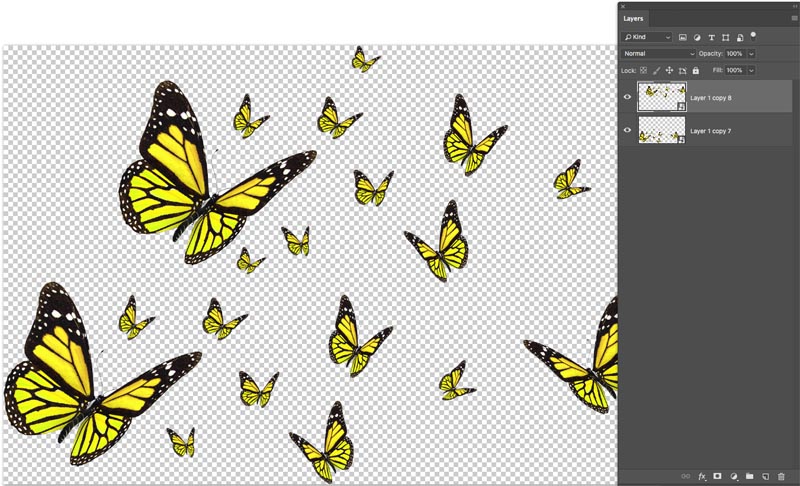
And look at this. Here are all our individual Smart Objects, just like we started with, just nested 3 levels deep.
We want to go further,double-click one of them.

Yet another new window opens. And you can now see our original image complete with the adjustment layer.
Hide the adjustment layer.
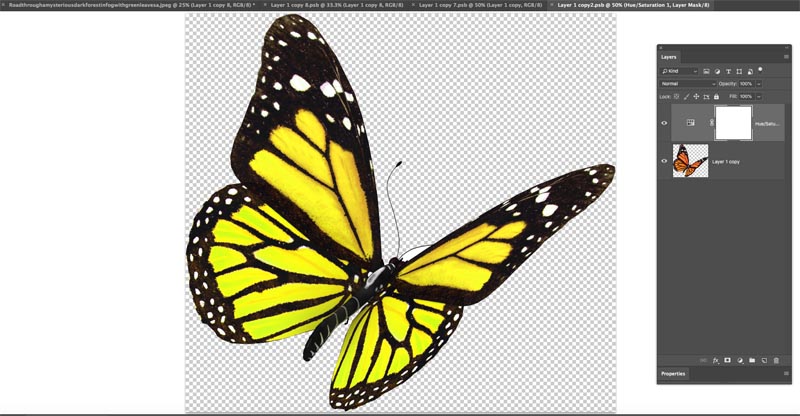
Our butterfly goes back to the original color because we have hidden the color effect that we applied way back. Can you now see how using Smart objects allows us to do whatever we want without committing the permanent results?
Ok, stop. Before I lose you, let me review and clarify what has happened.
See the image underneath. Look at the navigation bar and the layers panels to see how each document is nested.
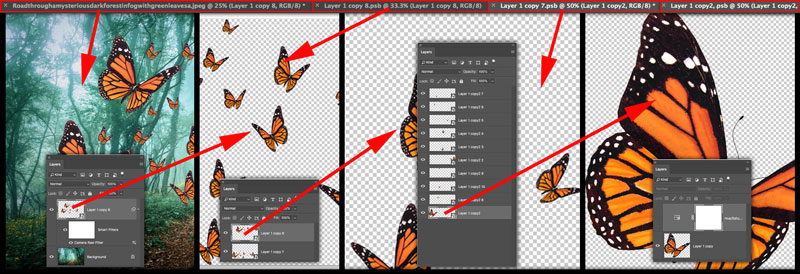
We start with the main image.
Go inside and you’ll see there are 2 layers. Each has a number of butterflies.
Go inside and you have all the layers of the scaled and transformed butterflies.
Double click to go a level deeper and you get to the individual butterfly, the original one.
Save the document of the modified butterfly and close it.
Notice all the layers are updated. Save this document (Ctrl/Cmd+S) and close it.
Going up another level, you will see the updaes. Save and close this one.
And all the objects are updated to reflect the changes. Ok that’s some Rabbit hole stuff! It’s easier than it sdounds, watch the video abouve again, or try it yourself to see.

Ok, almost there! Let’s examine the power of this nested stack (apart from a super clean Layers panel).
Double-click the thumbnails of the Smart Objects until you get all the way into the original image. Let’s alter it.
Right click opn the butterfly and choose, Convert to Smart object, to get a smart filter.
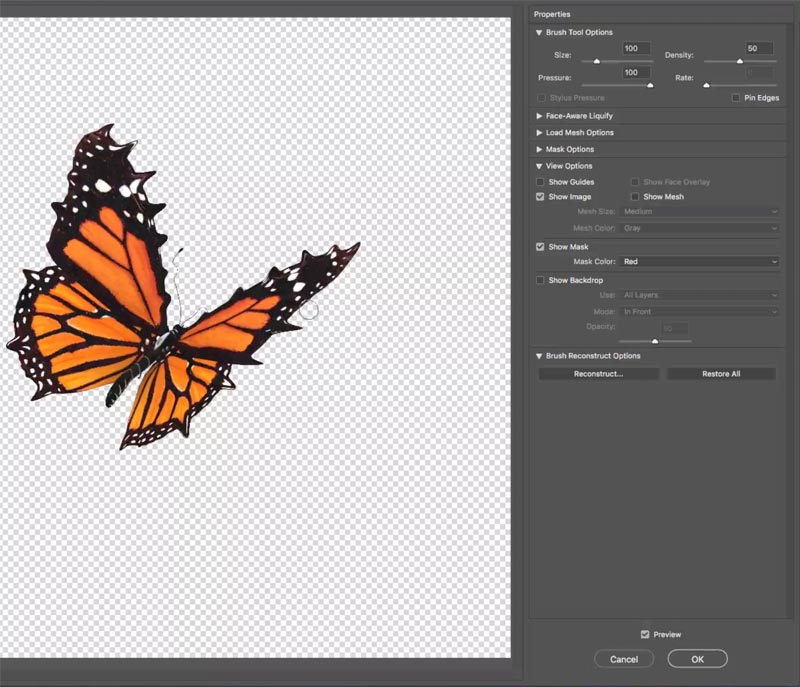
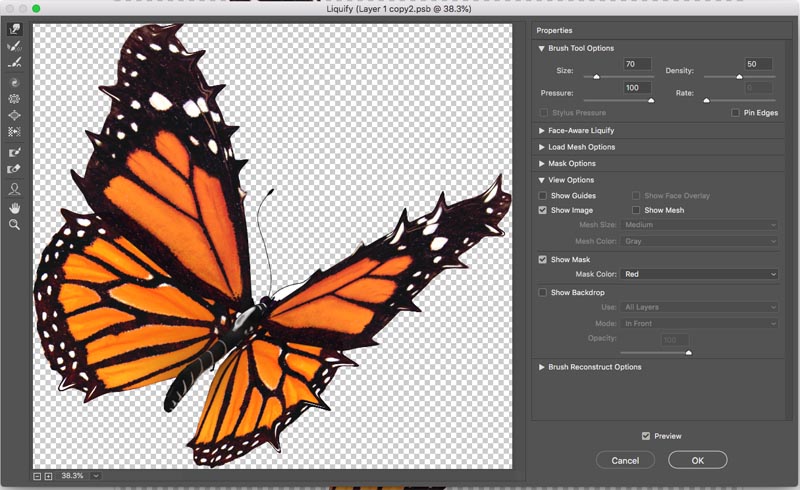
Choose Filter Liquify.
Drag on the corners of the wings, to once again make the spiny Monarch Butterfly (I just made up this name, but who knows, maybe it’s a real thing. Let me know in the comments if you know).
Click ok to apply.
Save the butterfly Smart object.
When you get to the next level, save again (If you don’t save each level, the changes won’t ripple all the way through. You don’t have to actually close the windows, but I do to keep things more organized)

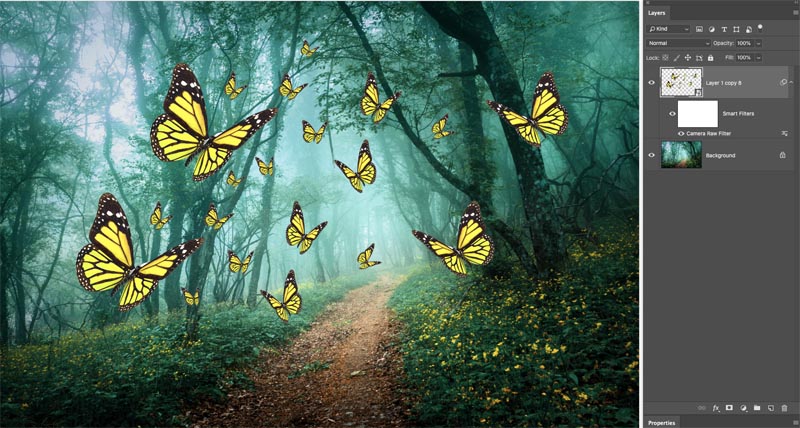
And notice all of our butterflies are updated to spiny wings. This of the time that just saved?
I think you have a bit of a handle on the power of Smart objects now. But they can do more, not limited to.
With all this power and flexibility, you may rightfully ask, why not use Smart Objects all the time? Why even have regular layers? While Smart Objects are the best choice for many, if not most of your tasks, there are still some limitations.
So there we go. That’s Smart Objets in Photoshop. I hope you found this tutorial uiseful.
For further learning on Non Destructive editing in Photoshop including Smart Objects, check out this excellent course by Dave Cross. (Made exclusively for PhotoshopCAFE).
thanks for checking it out, That was an indepth one!
Add a comment and let me know what you think, and don’t forget to subscribe to our newsletter for weekly tutorials!
Colin

This site uses Akismet to reduce spam. Learn how your comment data is processed.
5 Hidden but very useful features in Photoshop CC 2019. This tutorial shows the very useful new features that you...

How to Make your own LUTS in Photoshop, step by step tutorial....


I’ve used this tutorial..so good and helpful..thanks for sharing
I use photoshop to repair old photos on my facebook site Earles picture restoration Prince Edward Island
Thanks for your wonderful tutorials! I’ve gotten into the habit of following each one when it first comes out so that I don’t forget. I use Photoshop mainly for my photography. After importing to LR and making a few adjustments, I often import images into PS to give special effects. I’ve been working with the Dreamscape effect and love the results I get. I also enjoy doing composite montages that give special texture to an image. I’d love to learn some new creative treatments for images. I’m a photography hobbyist with a graphic design background.
I am leaving for a trip in a couple of days and would love this in the form of a little ebook. Happy to pay something for it, as it would be so useful and something that I could sit and study while I enjoy the Sunshine in Queensland!
wonderland of smart objects. learned so much and don’t use enough. tks.
Thank you, Colin for another wonderful tutorial.
*I use Photoshop mainly to make images for the modelling side of Sims 4 characters and enter them into competitions
*I am a teacher so I also run a small group Photoshop Elements workshop for upper primary students in relation to media responsibility to increase students’self-esteem at that vulnerable age, and link to show them that every model or actress, actor they see is not perfect. Also how you can use the application for educational research and publishing of their work within a school situation.
*I use it to make gifts to friends and family putting together collages and invitations, cards, etc for personal purposes.
Even for someone like me, who only has an average knowledge of English, your tutorial is perfectly understandable. You are a very good pedagogue. Congratulations and thank you very much.
Thank you learnt heaps and what fun smart objects our.
Thanks! Good information and the drone video was good too. Nice to see you mention Dave too.
Great stuff as always. Thanks for posting Colin.
In a word – WOW!!
Many thanks. Wish I’d seen this before my most recent project which would have been lots easier. Used repetitions of the same two graphic patterns which I tweaked individually. But, I’ll know for next time.
I use Photoshop primarily as a graphic design hobbyist making cards and gifts for family & friends, memory books, and assorted design projects for folks.
I only use Photoshop for photography. Not design, 3D, animation, etc. Photoshop is getting “bloated” and there are other programs for those other tasks…and they are usually better at it.
Never understood smart objects before now. thanks
I didn’t realize that photos degraded as you showed. Thank you. I will need to remember this as I go forward. I use Photoshop as a hobbyist, editing, color correction etc in photography. I also use it as a fused glass artist to create half tone images to be printed on glass. Would love some beyond the basics insights on how to get great half-tone images. Most of the tutorials I have found on line, whiz through the process or only create basic pieces.
Excellent tut on this subject and I learned tons. My question is why doesn’t PS just make everything a smart objection the first place? I very much appreciate your time and effort to produce these instructive gems and then to add the images to boot! Not to mention the written instructions. Nobody else gives the whole package. Thanks so much.
Excellent tut on this subject and I learned tons. My question is why doesn’t PS just make everything a smart objection the first place? I very much appreciate your time and effort to produce these instructive gems and then to add the images to boot! Not to mention the written instructions. Nobody else gives the whole package. Thanks so much. I see you answered my question above! 🙂
Very nice Tut. Very well explained. Even I learned.
Thank you
Excellent your tutorial solidified some practices I have been working. I yes PS to enhance photography as well a create subjects. Thanks much.
The one thing i would love for smart objects to do is … Open in a new windows (as it does) BUT with a ghosting of the background objects, so you can see how your smart object and it’s changes will react to the information on other layers.
Colin, You did an excellent explaining Smart Objects. I’m a photographer, but now I can see how I can use Smart Objects. I also appreciate that you develop excellent free videos about various subjects without trying to sell things to your viewers all the time.
I am wondering what the draw back is to making everything a Smart Object? I am sure there is one, some.
I mention the cons at the end of the article, there are a few, but not many.
Thank you, Colin,
I found this helpful. I also bookmarked this page, Under Adobe, Photoshop, Colin Smith – Tutorials. I forgot about the invert command. I mostly use Photoshop to adjust and edit family photos, some really need editing, because of discoloring, scratch marks and tears, also, some are too dark or too light.
Waooooh! thanks mr Colin Smith. Love to use the smart objects now for most of my work.
Thanks for the tutorial and especially the written documentation – very helpful. I use Photoshop mainly for my photos taken on holidays, special outings and family gatherings. I also use Photoshop for making birthday cards and the like from my photos.
Thank you for the tutorial on Smart Objects. Can you give a similar tutorial on using Smart Objects in Portrait Retouching?
Great tutorial as usual. I have learned so much from you it is transforming my work more and more as I assimilate each tutorial.
I’ve been wanting to learn about smart objects and this has helped, but for me will take practice. Thanks for sharing and posting this – you explain it all very well.
Appreciate this well explained tutorial on Smart Objects and the various ways of using it. I’ve always wondered how really smart is this Smart Object. Well, you’ve done a great job explaining it and now I understand, and use, this amazing non-destructive feature. Thanks! Keep up the great tutes!
I always watch, enjoy and learn from your “video” tutorials. Many many thanks. It finally dawned on me that the video was followed below by a written tutorial, and below that, I could LEAVE A REPLY.
I have been using Photoshop for more than ten years and believe that I know enough to use it to about 1 to 2% of its capacity. As an amateur photographer, however, I always learn how to improve my Photoshop skills which help me also learn how to take better images which can then be properly processed and better processed (devveloped).
Again, much appreciation and many tha nks.
I’ve read dozens of articles attempting to explain Smart Objects today, but your potato example is the only one that made sense. Thanks!
it’s really very helpful.thanks for sharing
Watched this a a filler while waiting for something else. Glad I did – well described (a potato will never look the same) and a load of inspiration.
Hi,
Great tutorial.
I was wondering if you can help with this:
I would like to use dodge and burn on the raw file in the smart object. The raw is the initial one (not as in your show the leaf). So for this reason I believe I am not able to do as you show. In fact I can’t place a layer as you show. It looks like that I would need the raw file a second time in the object .
What would be the work around ?
Thanks a lot.
Max
Search for my dodge and burn tutorial, it will work on a raw file
Great Explanation. Loved it.
Great Explanation. Helped me to understand the concept. thanks for putting the Adobe stock photos on line so I could go through it with you.
Really well explained. Being new to photoshop, the last few uses were beyond my pay grade, but I plan on using smart objects with art deco types of projects, and this helps know how and why.
Colin, I have spent time with you on your various free YouTube videos and, after learning to both enjoy and trust and, yes, admire your teaching, I took out a membership and am so happy I did.
I am a retired teacher, union leader, professor, and I grew up in the lumber industry (where I thought I would live out my life)–I tell you that because my values include the world of academics and the world of terrible and wonderful reality. I took to photography along the way of my earlier life, then adopted it at the start of my retirement–I’m 75 now and am taking photography up as seriously as I did my teaching profession (I have a PhD in Learning Theory); I tell you that because it helps me underline how admiring I am of your teaching style and passion.
But you asked what I use Photoshop for, and I have been slow to respond. Here’s my answer: Some time ago, before I discovered photoshop or digital processing, I lost my son. I suffered a depression my wife said I must deal with somehow, and quickly. I did not know how–counselling wasn’t working.
But one night, some time in the mid-morning, I stepped outside my house and yelled up at the heavens, in anger. But even as I yelled (how many people I awoke I can only guess), I took note of how beautiful those heavens were, even focusing in on star clusters that recall to this day, many years later. At that very moment, I said, out loud, that I would commit to finding beautiful things in ugly places. My world was an ugly place for me; but from my place on my world, I turned my attention, inadvertently I suppose, to something beautiful. And I resolved to do that for the rest of my life. I shared that with my wife, firming up my commitment. And shortly after that, I turned my attention to Photoshop and digital photography. After a lot of fumbling, and no lessons, I discovered that my camera forced me to look at the world, my world, in much more particular ways than ever I had looked at anything before. I was learning to look. But my pictures were not telling anyone what it was I saw–then I discovered what Photoshop could do for me to meet my commitment not only of finding beautiful things in an ugly world, but to help me show others what it was I found. Fifteen years later, I am beginning to refine my abilities with Photoshop and, virtually each day, I am learning to unmask the ordinary and reveal the beauty my mind, heart, and spirit saw when I clicked my camera.
So that’s it–I use photoshop not so much to find beautiful things in ugly places, but to reveal those beautiful things I found.
And I am so grateful to you for helping me do so. Thank you, thank you, thank you for your generous and splendid teaching abilities.
Wow, what a great story!
Thanks so much for sharing and allowing me to be a part of that amazing journey!
-Colin
you are just amazing … the tutorial is so helpful, I thank you a million times
Fantastic tutorial. I had no idea when or why I’d use a smart object, and now, I’m raring to go with them.
I’m still a little hazy about what happens to a layer with a mask when I combine it with others as a smart object, but I’ll do a little experimentation.
That Randy Rhodes or Zakk Wylde guitar in the background!
Zakk yes
Thank you for clarifying
I was so confused before and frustrated. you have really helped
What is not possible with smart objects? This does not seem to be covered in tutorial regarding his technique. I feel it is extremely important to know what can’t be done before jumping in to smart objects and then having to rasterize what you have done when you don’t wish to do so.
Thanks! Good information and the drone video was good too. Nice to see you mention Dave too.