
How to use 3D in Photoshop, Ultimate Tutorial
How to use 3D in Photoshop
Learn how to use 3D in Photoshop CC. This Photoshop 3D tutorial shows how to use all the 3D tools in Photoshop. Photoshop is especially good at texturing and Lighting. It’s important to follow the 3D pipeline to get good results. Its the same workflow used for visual effects you see in movies and print commercials. Obviously more sophisticated tools are used for movies such as Maya or 3D Studio for games. Photoshop has a surprising amount of tools that enable us to make some pretty decent 3D work. It’s weakness is lack of modeling tools and the rendering is very slow. Photoshop is great for compositing 3D into photographs and maybe I’ll address that in another tutorial. This tutorial will show you the workflow and explain how 3D works as well as the tools in Photoshop, with my usual sprinkling of tips.
I suggest that you watch the video because there is a lot of information in it that would take too long to write it all out.
Please note, Adobe have started to remove 3D from Photoshop. Learn how to keep 3D working in Photoshop
Try to watch the whole video, so you don’t miss anything, but here is an index for you: – Geometry, 3D models 1:10 – Surfaces, textures and materials 9:56 – Lighting in 3D 17:24 – Rendering 24:15 – Animation 26:26
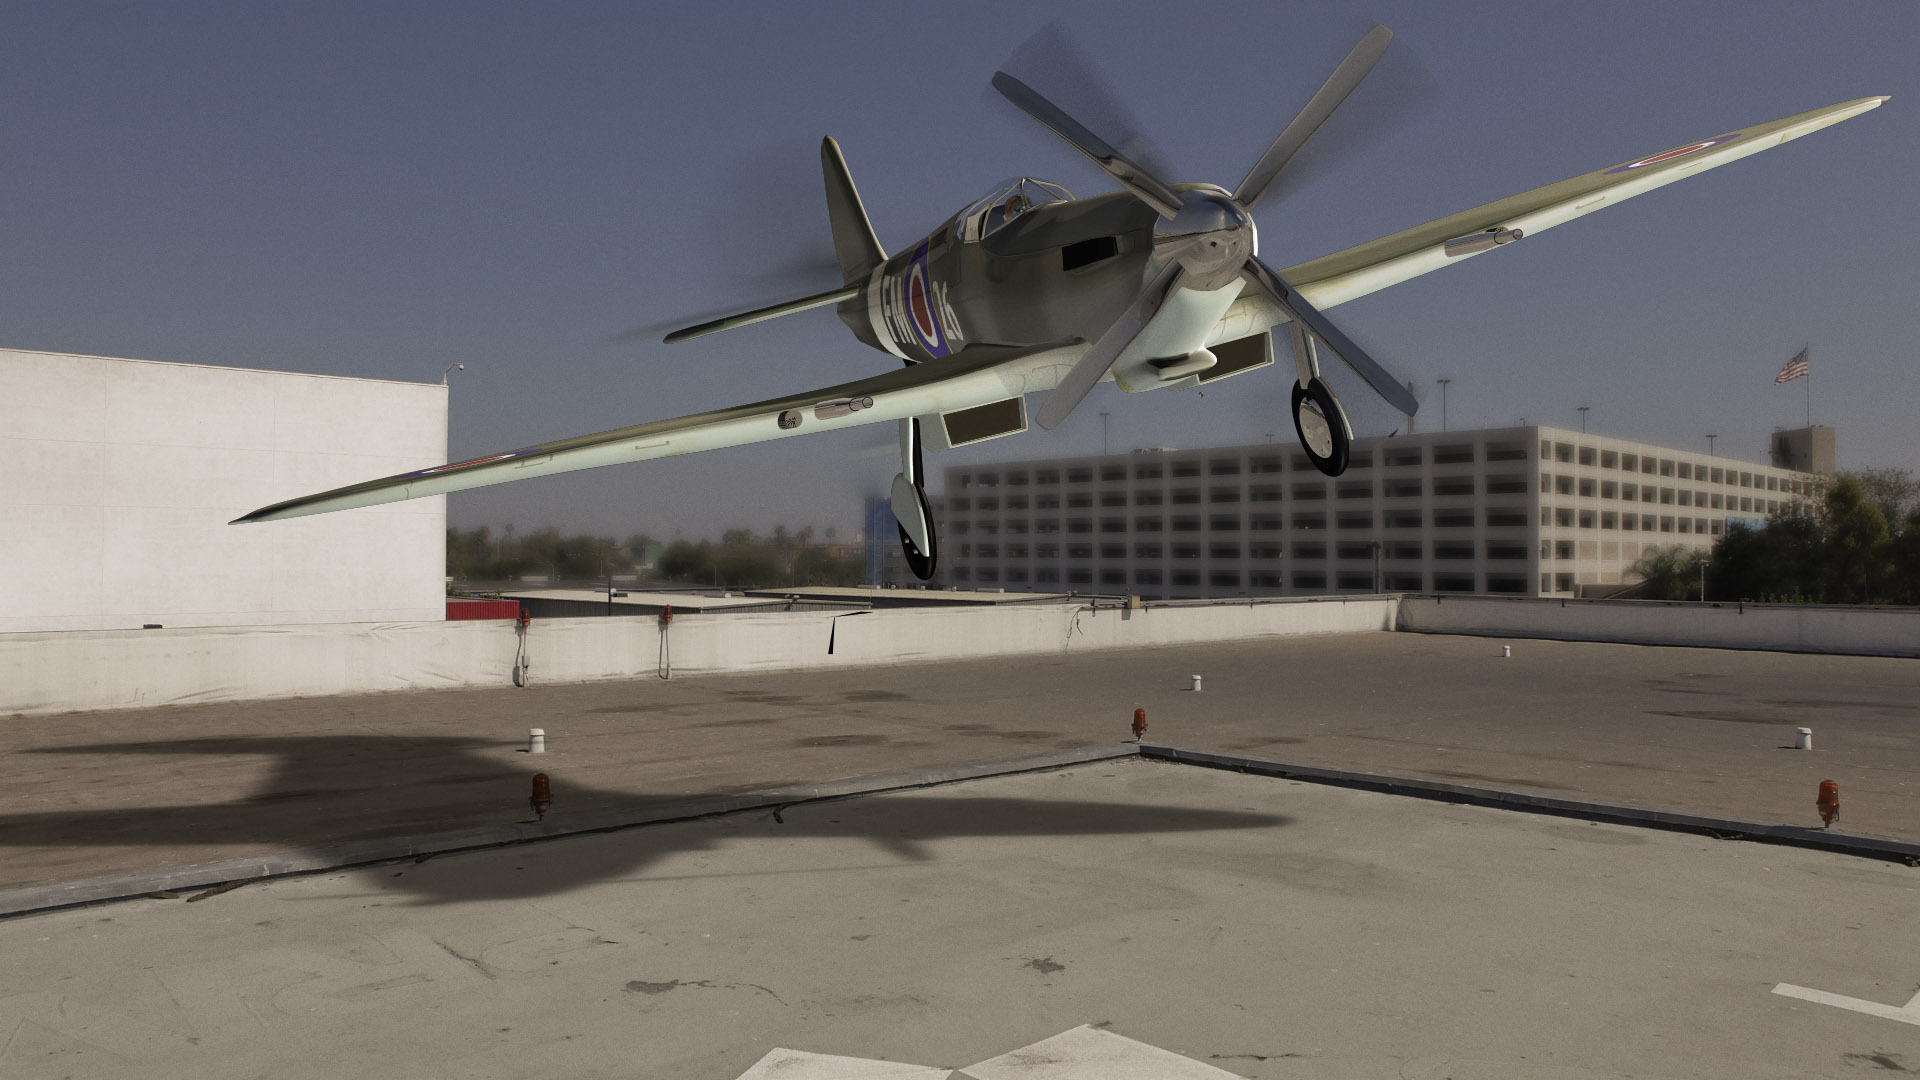
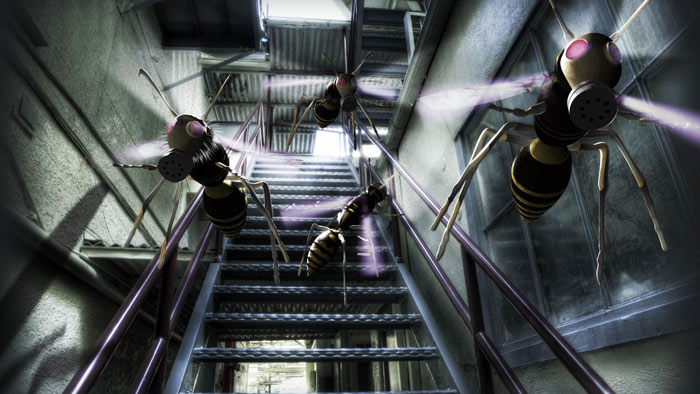
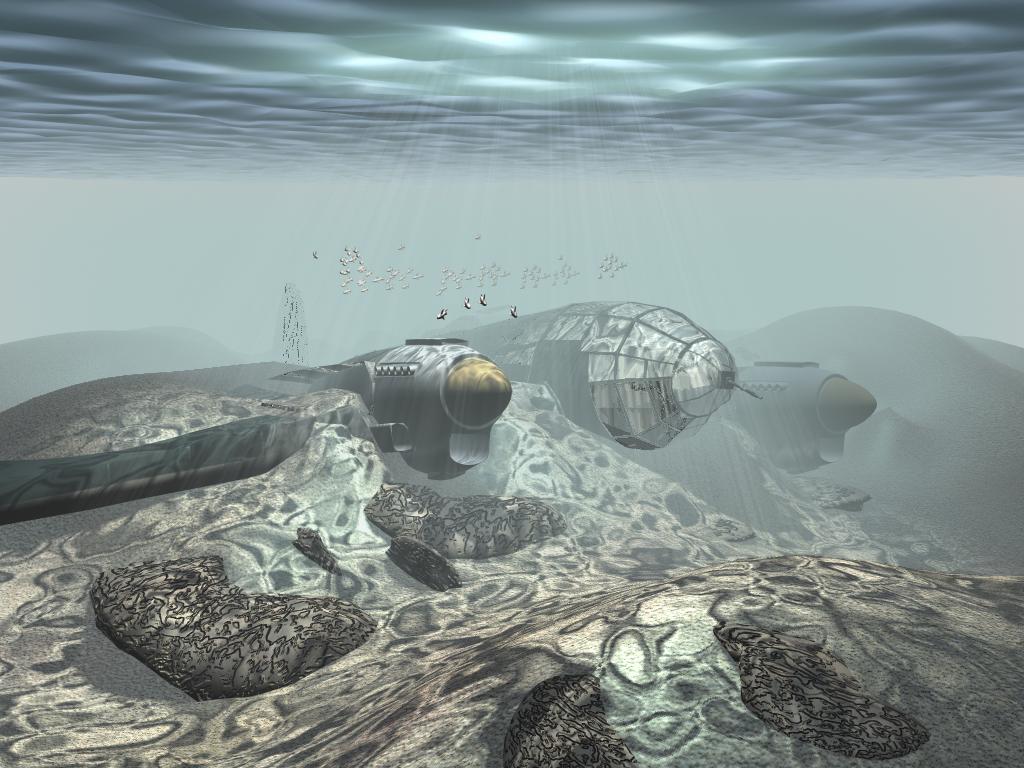
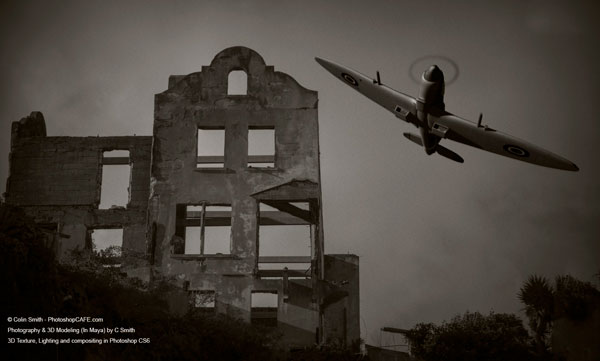
Here are a few on the 3D images I have created in Maya.
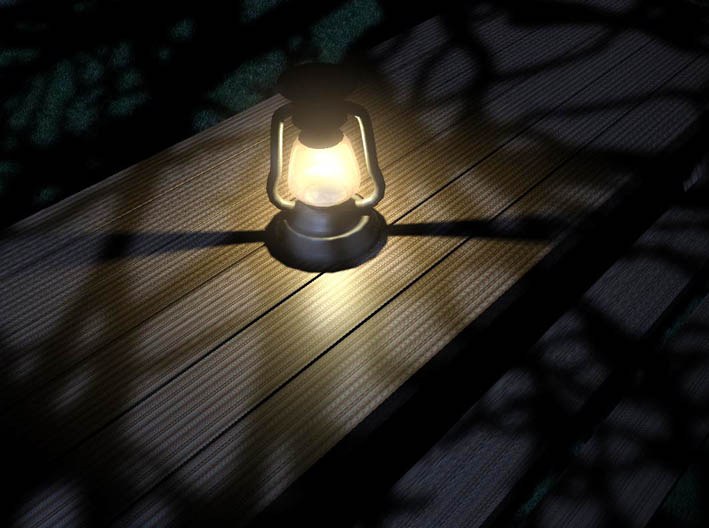
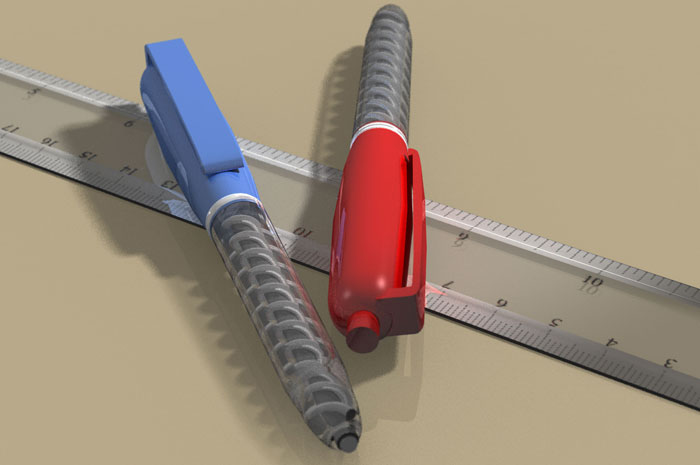
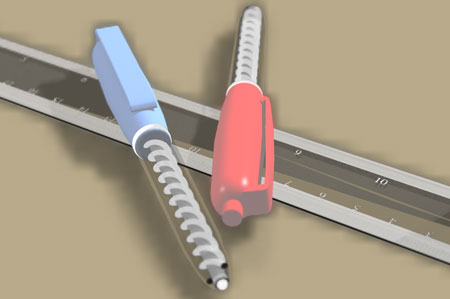
This is an image that I created entirely in Photoshop. The pens and ruler were modeled in Photoshop using basic shapes and paths. I used transparency and diffuse to create the markings on the ruler and you can see that Photoshop ray tracer does a decent job of rendering the shadows and reflections.
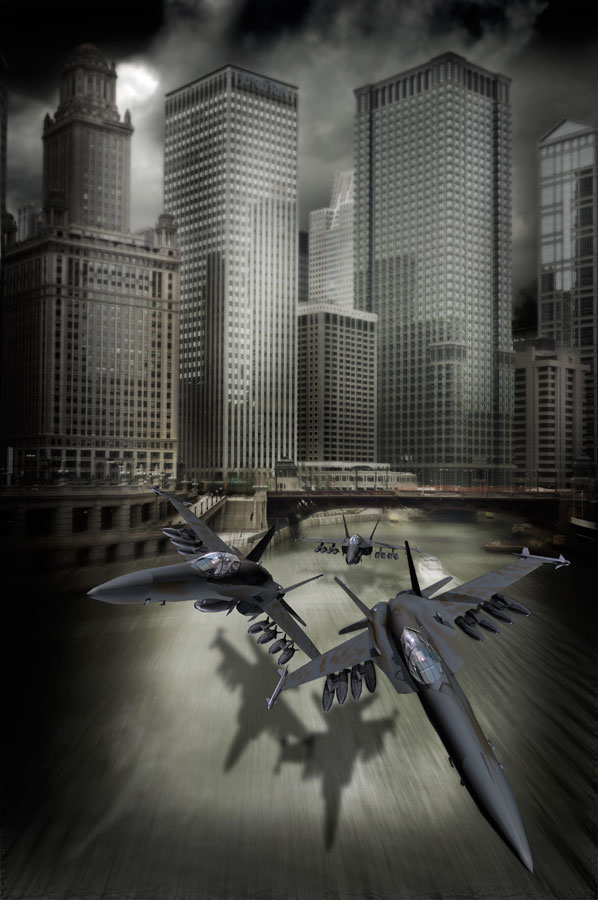
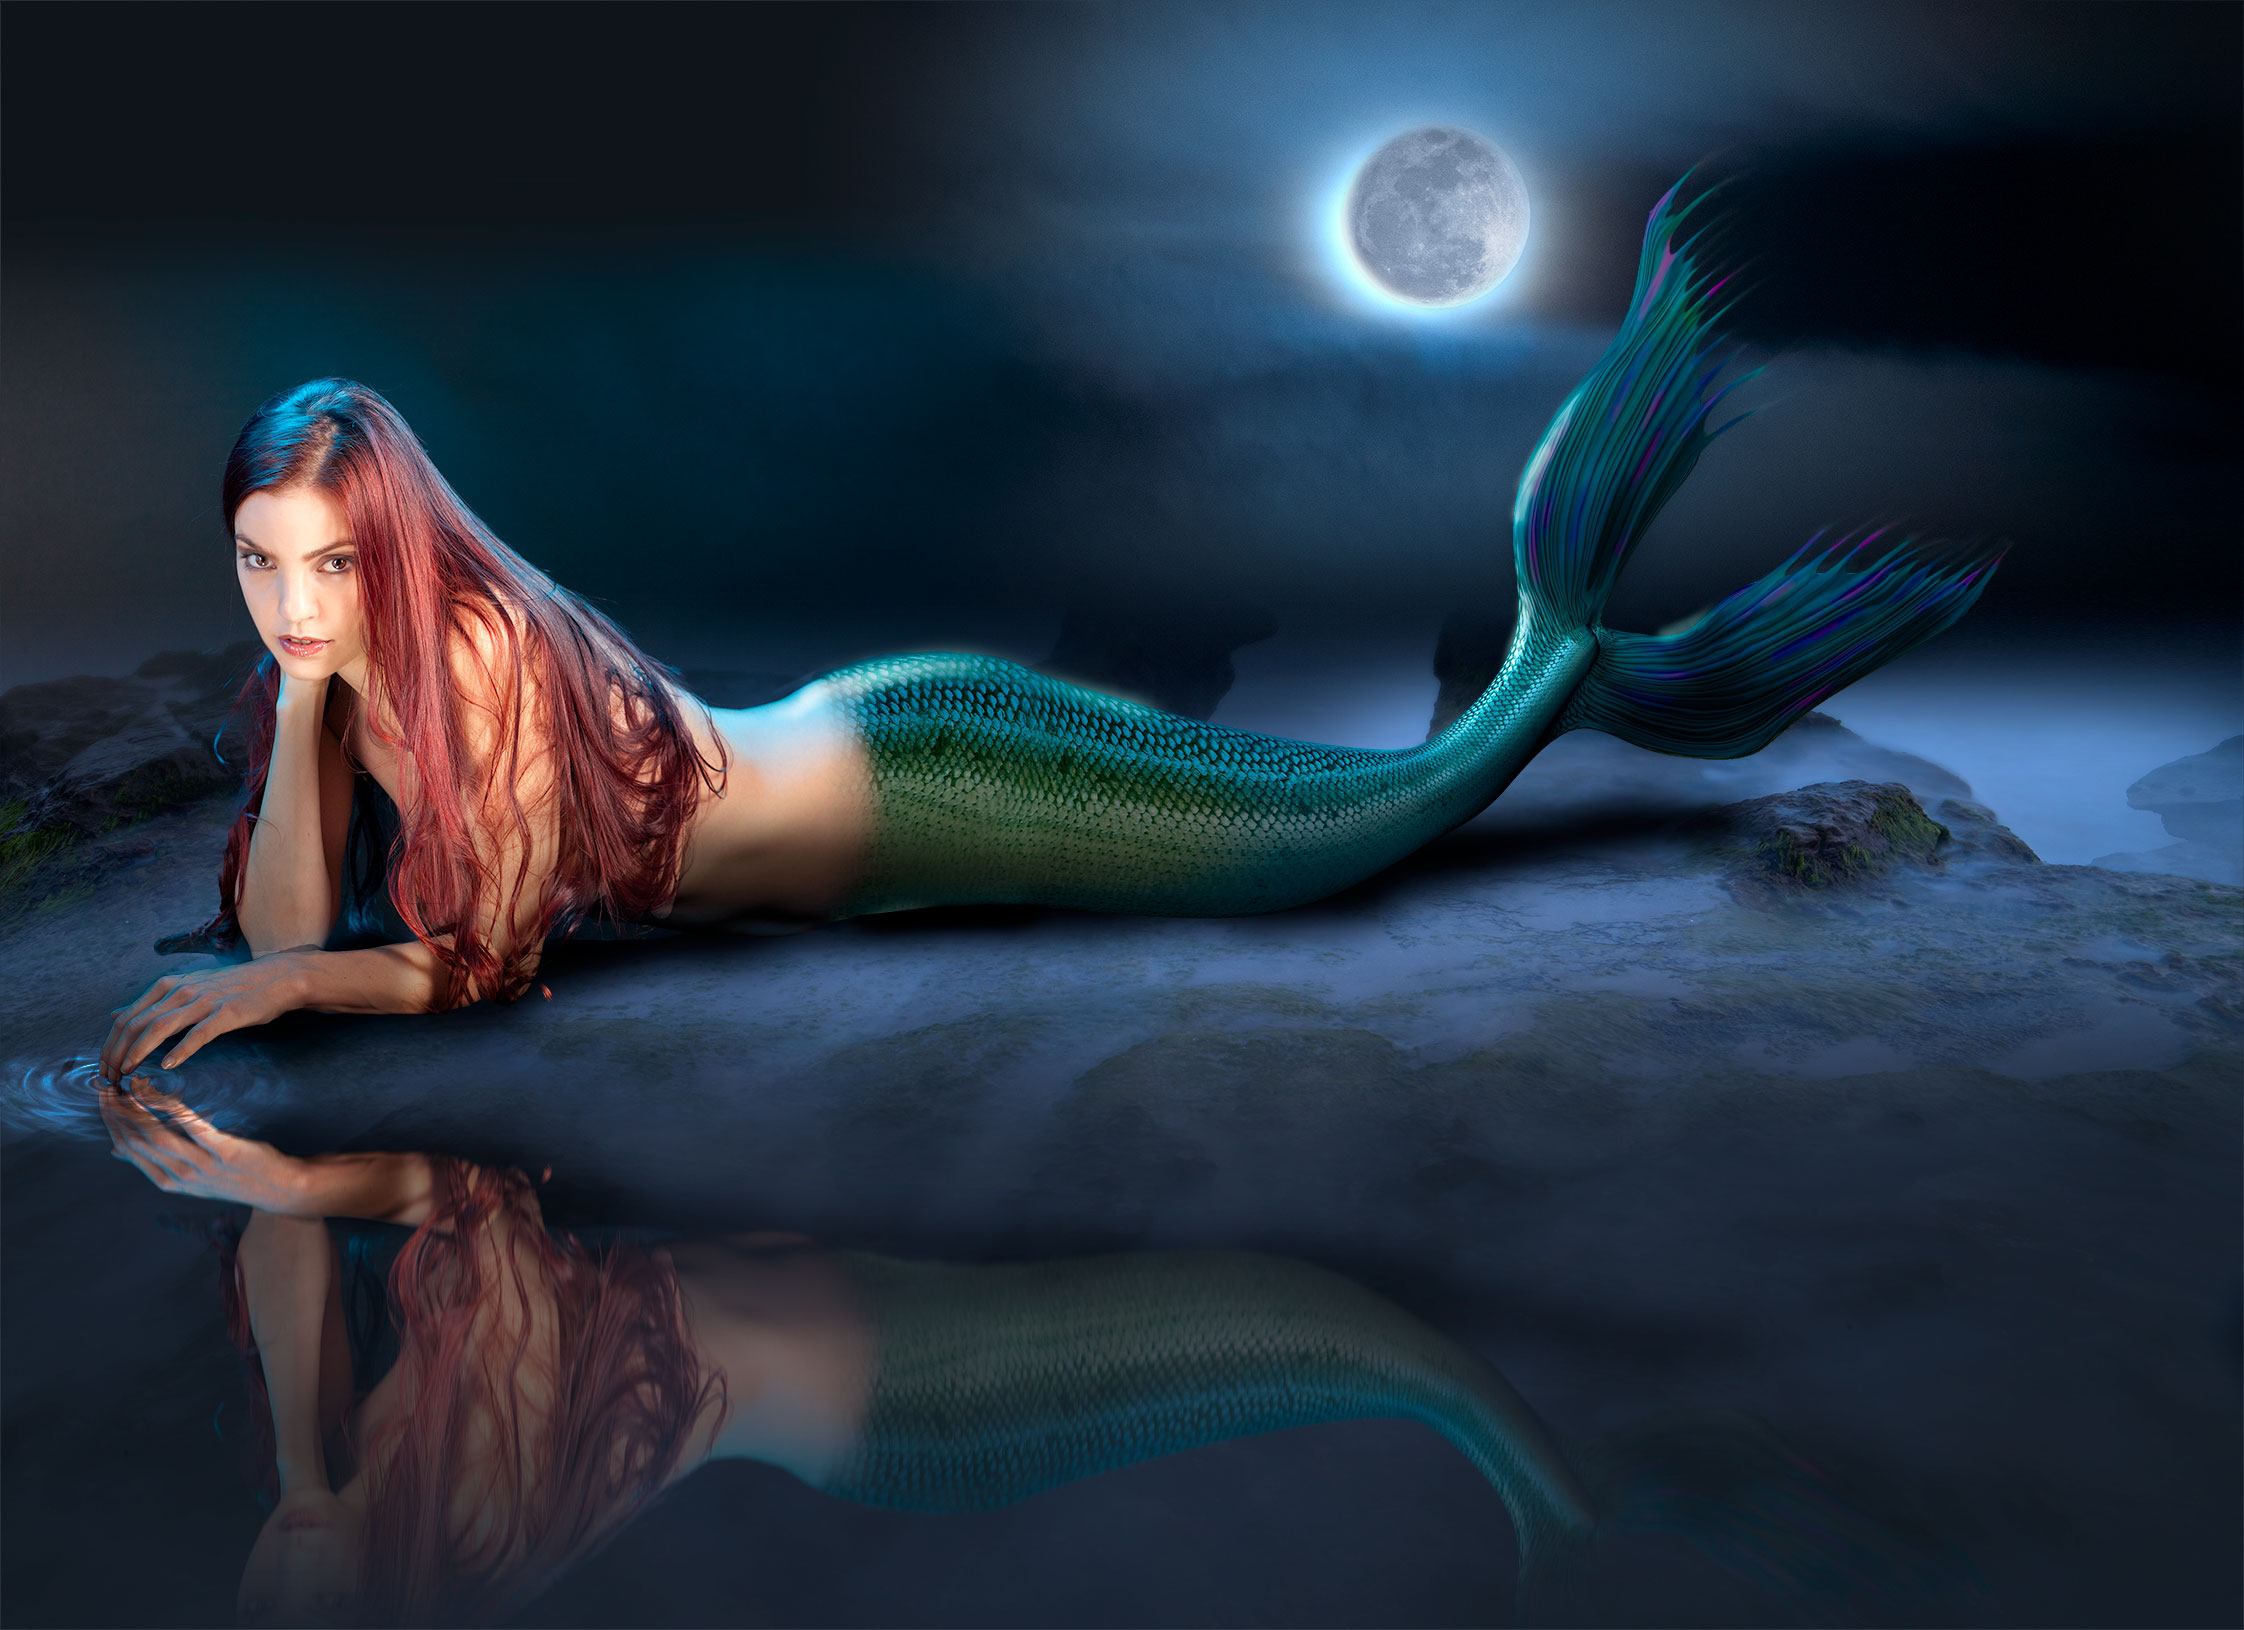
And a couple more where I used Photoshop 3D to composite 3D with Photographs.
The 3D Pipeline
The 3D workflow is broken into several stages. Each stage should be completed before moving to the next for a successful 3D image.
- Modeling: Either create or import the 3D model, also called a mesh or geometry.
- Texturing: This is where you add color, texture and surface properties such as transparency, reflectivity etc.
- Lighting: Not to be overlooked, adding realistic lighting can make or break a 3D scene. My VFX instructor used to say a well lit scene with an average model is better than a great model that is poorly lit.
- (Optional) Animation: This is where you move the scene, objects, or parts of objects. This can be done in Photoshop too. Obviously not every 3D project will involve animation.
- Rendering: This is where the computer builds the final high quality image frames and adds reflections etc. This is a time consuming task, so I suggest doing long renders at the end of the day or overnight.
3D in Photoshop
Ok, let’s get started. Follow along, everything you need is in Photoshop CC and this will also work in CS6 Extended although a few things might have changed. Its totally different in CS5.
Step 1. 3D Mesh
Create a new document. I chose 16×9 for mine at 1920×1080 (HD)
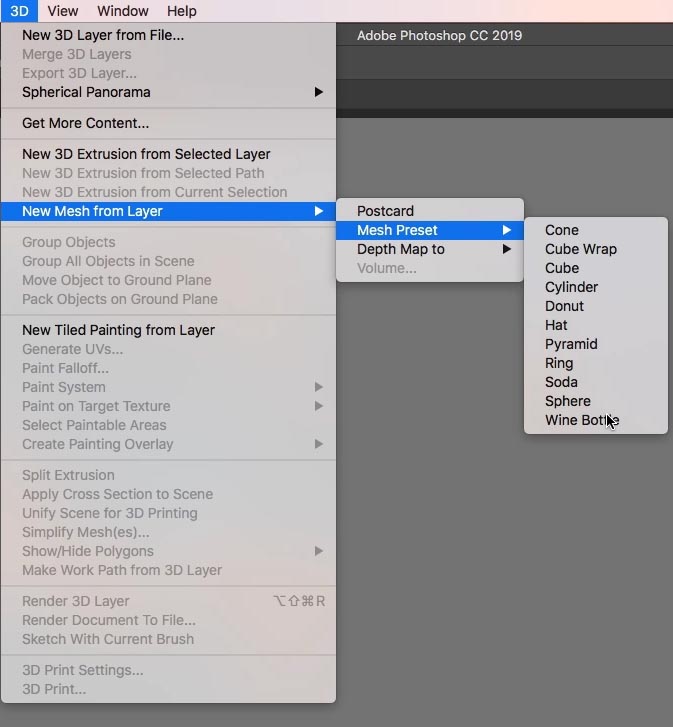
We need a model, called mesh is Photoshop. You can import one if you like. You can find 3D models at places like turbo squid, renderosity, google 3D warehouse, Adobe stock etc. we will use one of the shapes built into Photoshop.
3D>New Mesh From Layer>Mesh Preset>Wine Bottle
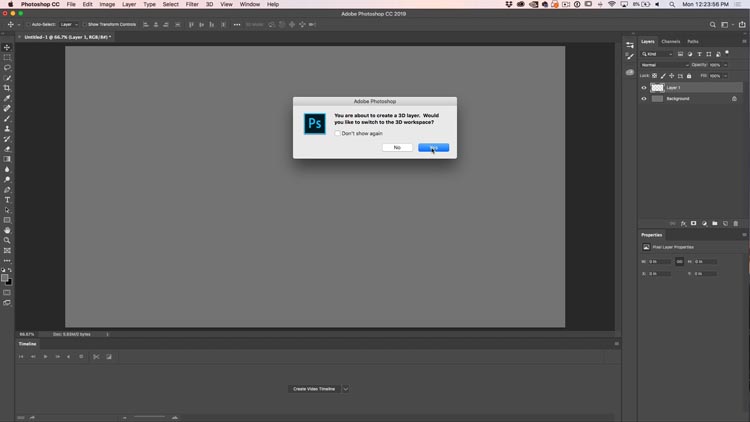
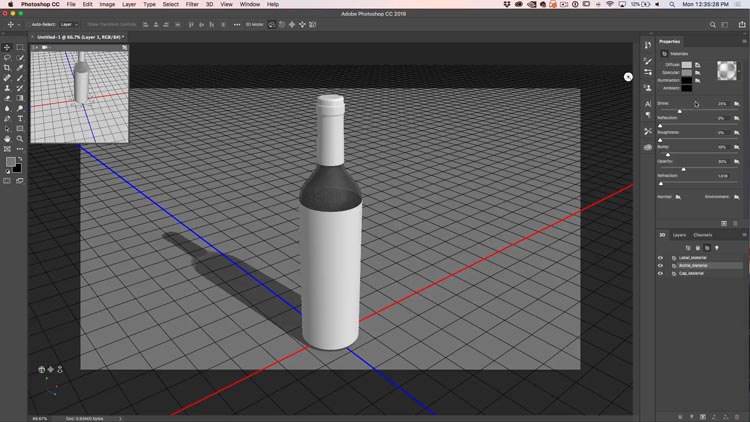
You will see a promo to switch to the 3D workspace, do it. You will get a 3D panel, properties panel and a viewport.
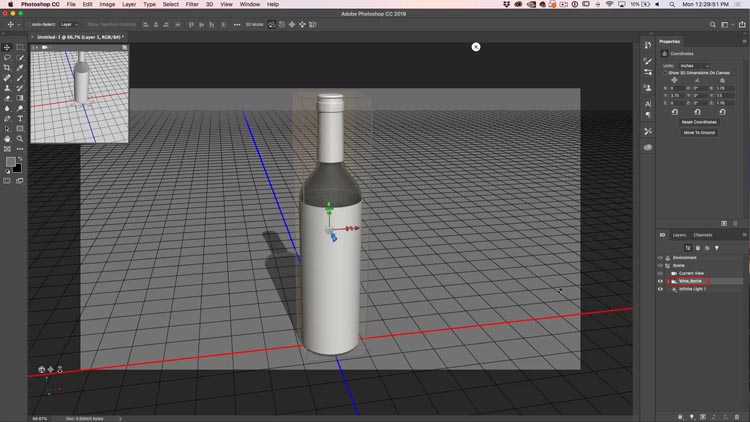
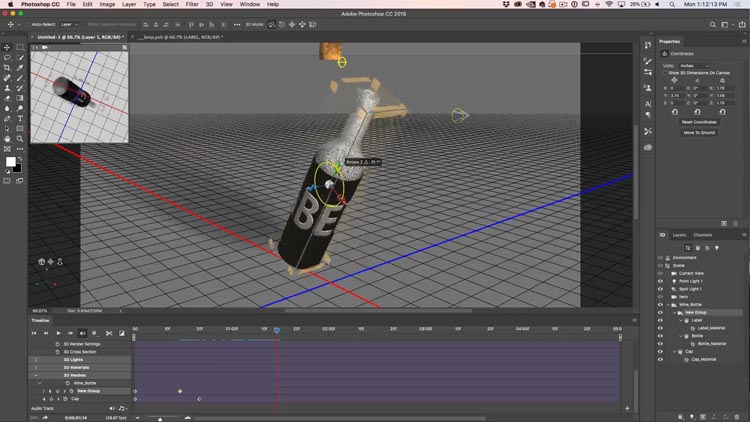
Here is the 3D workspace with the 3D model
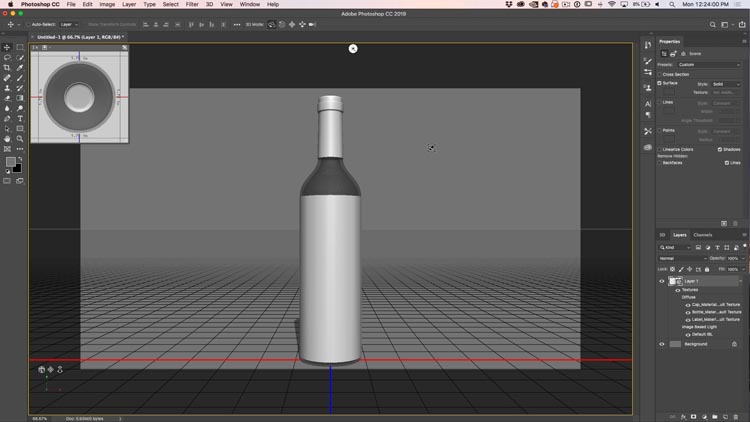
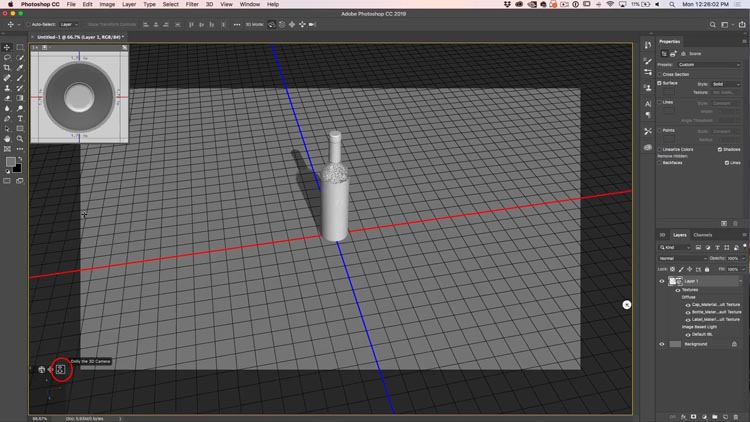
In the lower left you will see some arrows and tools. You can use these to move around in 3D. You are in the world view right now and its like flying a drone through the scene, but you are the drone.
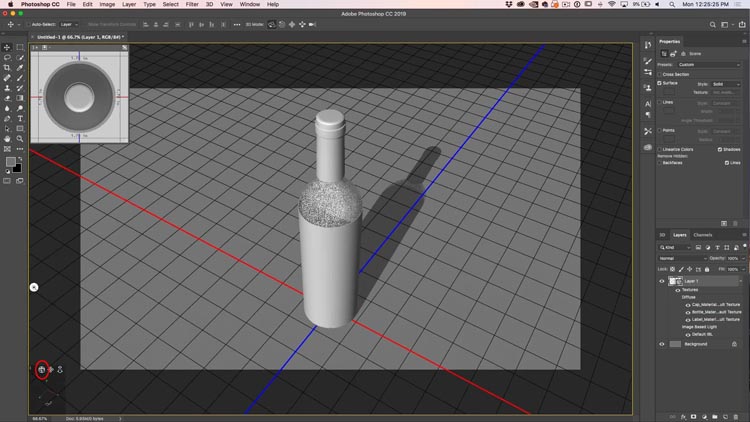
Choose the rotate tool to spin the scene around.
You can zoom in out out of the scene with the dolly tool.
In the top left is the viewport, called secondary view in Photoshop. View>Show>Secondary view
You can view the model from different angles here. To get precise placement of something you need to look at the top view and one of the side views.
Choose the view from the list
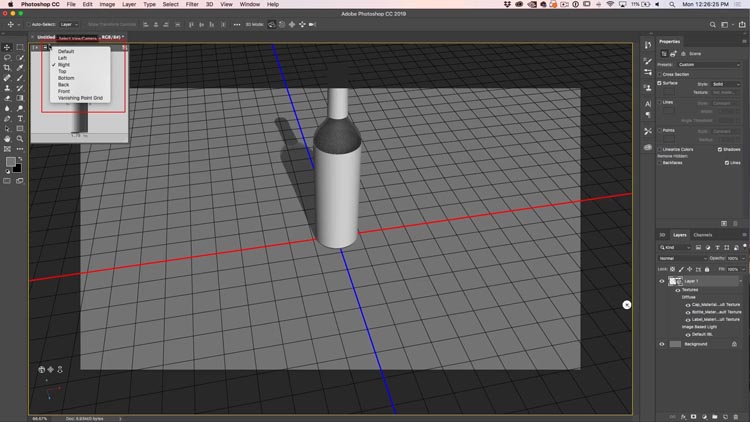
Click the arrow to swap the correct view for the one in the secondary view. This is how you change views (in 3D these views are called cameras).
That was the environment, world, or scene. The reason I give multiple names is because all of these features are common to all 3D packages and some use different names. Popular ones are Maya, 3D Studio Max, SoftImage, Cinema 4D, Strata, Rhino, Blender, sketchup and more.
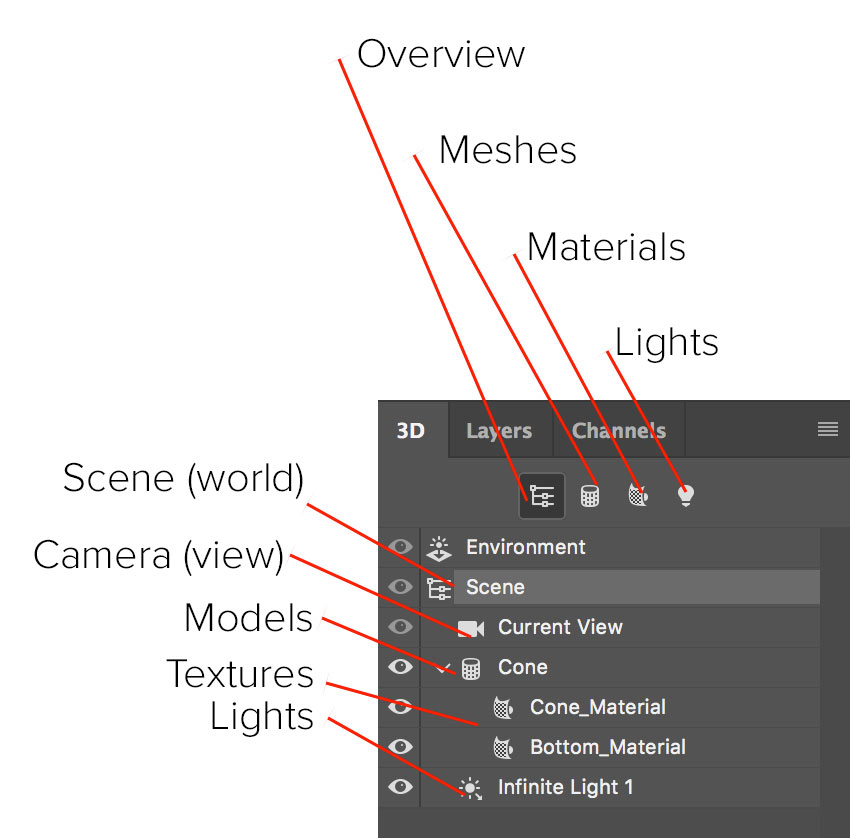
Now lets look at manipulating the object, or model. The 3D panel is where you select different things. If you choose the model, all the modifier tools will work on the model instead of the whole scene. Choose whichever part you want to work with in the 3D panel.
Here we have selected the wine bottle in the 3D panel.
Choose the move tool and will see some 3D tools at the top. We will focus on orbit, pan and zoom.
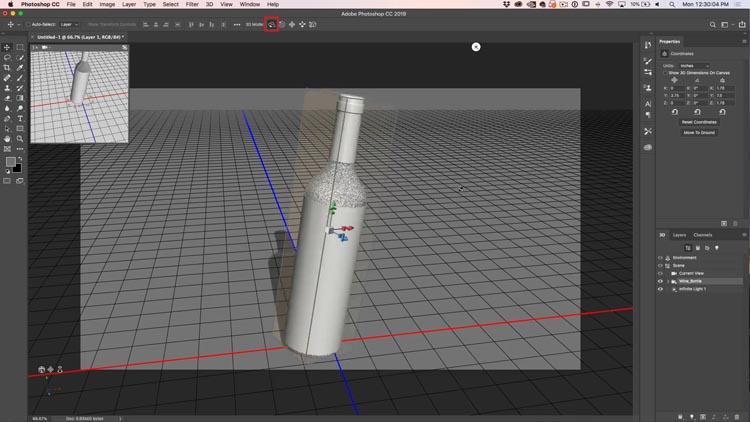
Orbit, enables us to spin the 3D model around.
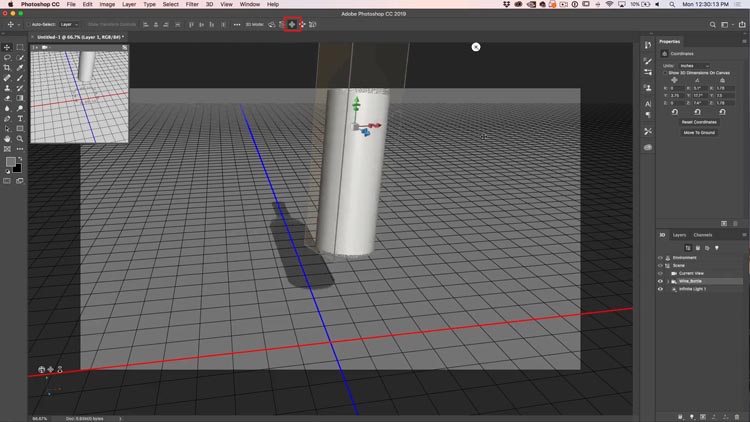
Choosing the pan tool allows us to reposition the model in 3D space.
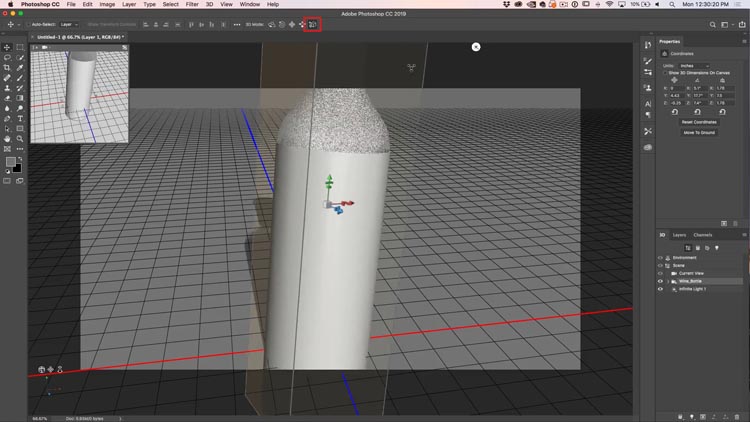
The zoom tool is used to change the size of an object.
There are 3 axis in 3D (the 3 dimensions). They are
- Y axis: up and down
- X axis: side to side
- Z axis: (Depth) closer or further away from you.
Everything is done on these 3 axis or planes.
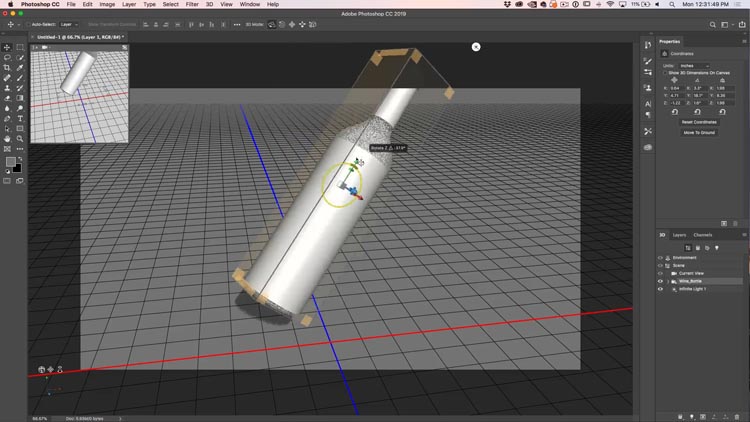
There is a 3D tool you can use in photoshop to transform on a single axis a time, without switching tools at the top.
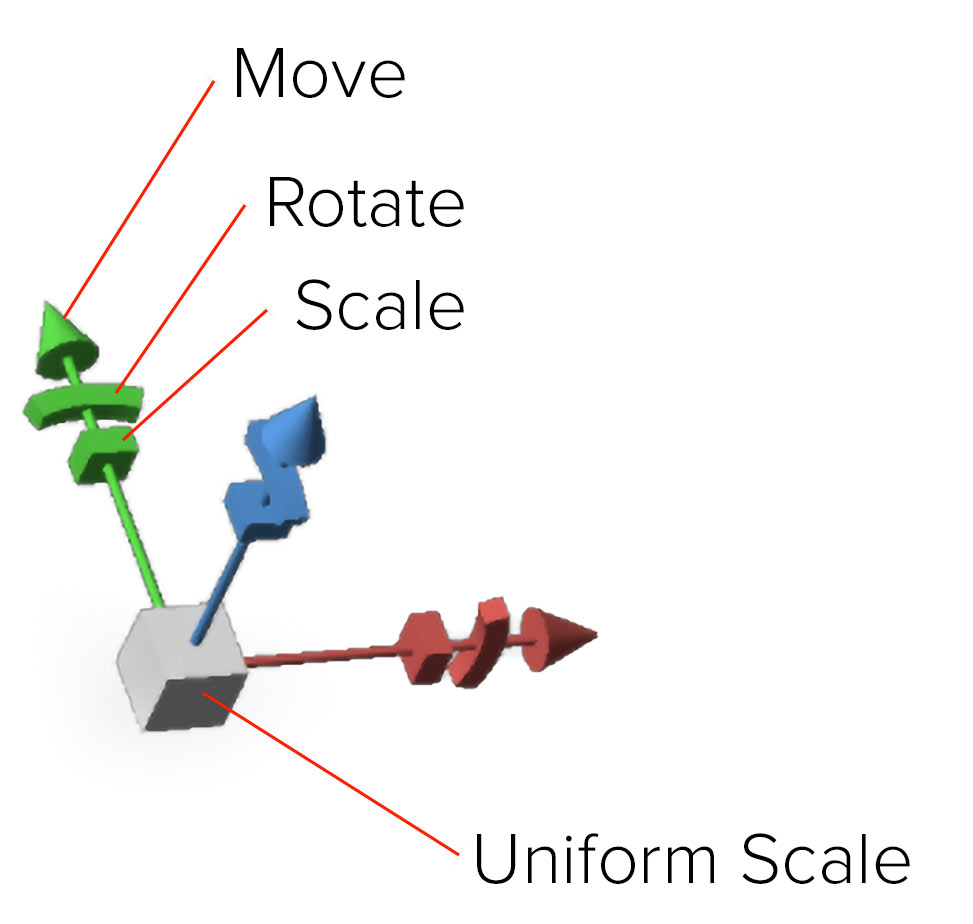
Here Im using the tool to transform the bottle.
To reset everything, click on the rounded arrows at the bottom of the properties panel. Make sure your object is selected and you are using the 2nd option on the Properties.
You can select different parts of a model (if it has them) and manipulate those separately.
That is the basics of meshes, (yes there are tools to build, bend and do other things to them, (but this isn’t a modeling tutorial).
Part 2: Textures
Now we are going to look at textures, otherwise known as Materials.
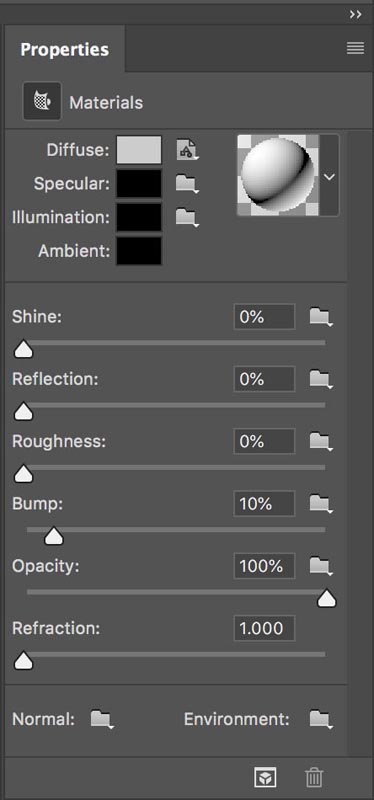
Choose the Materials tab in the 3D panel to view all your materials. The Properties panel will display all the material properties of the selected object.
There are a lot of different options here.
- Diffuse: The flat color or pattern
- Specular: Hotspots to make things look shiny
- Illumination: Glow
- Ambient: adds an overall tint
- Shine: Makes an object look glossy or flat
- Reflection: Reflects things like a mirror
- Roughness: smooth or rough surface
- Bump: embossing
- Opacity: transparency
- Refraction: distorts behind transparency, like a lens
When you see a folder, an image can be used.
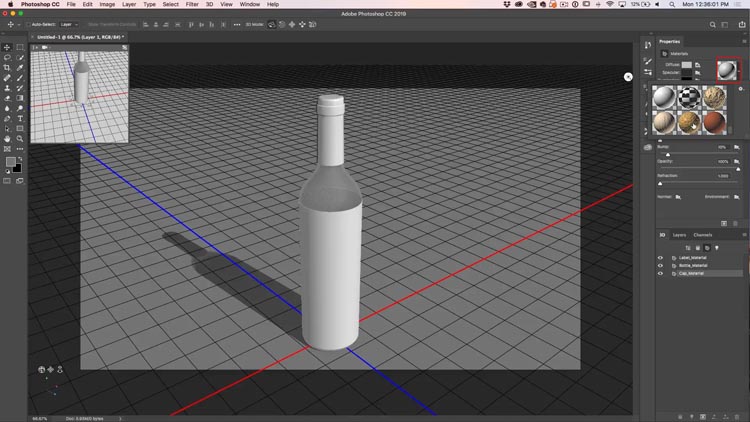
The properties of glass.
You can also select a pre made material. Photoshop ships with some that simulate things like glass, metal, wood etc.
To apply, just select your object and then select a material.
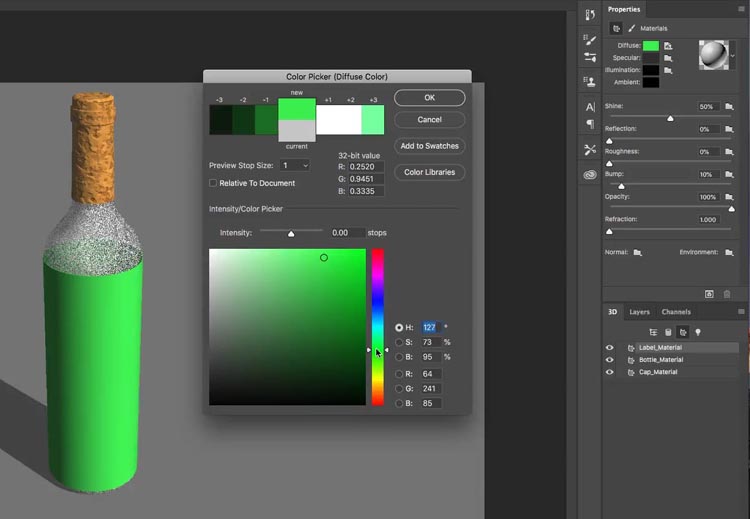
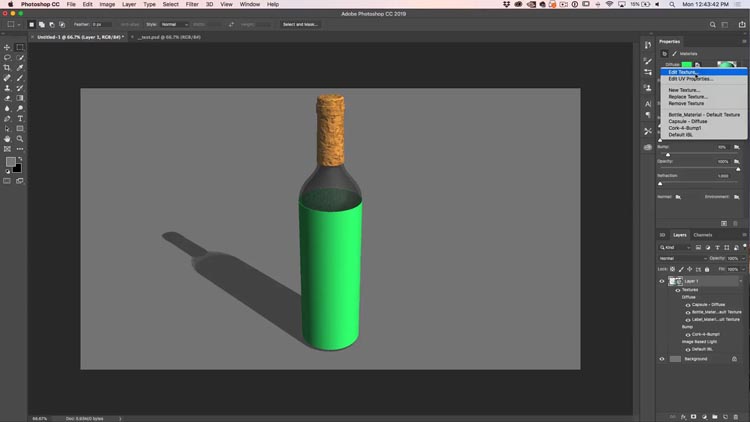
Here I used a cork material.
Under diffuse. you can click the swatch and add a color.
You can also use an image as a texture.
Click the folder and choose Edit texture if there is one already. (Otherwise use new texture).
A new document will open in Photoshop.
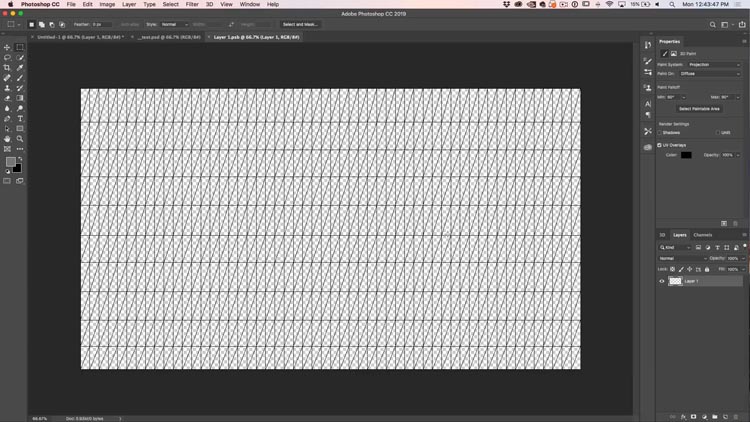
Work in here just like you would any Photoshop image, you can use photos, art, text, whatever you like.
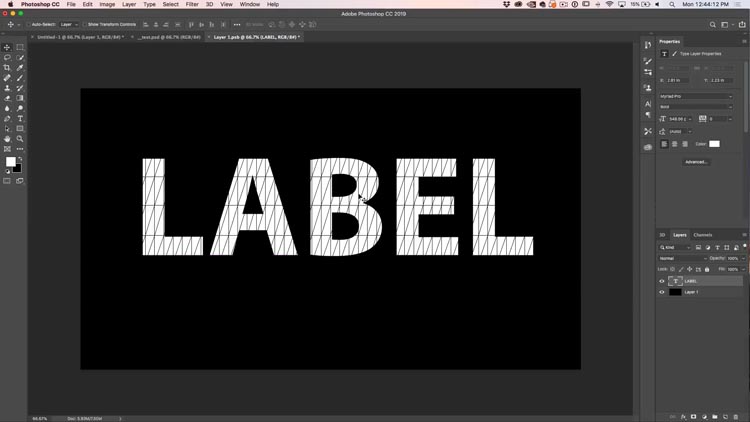
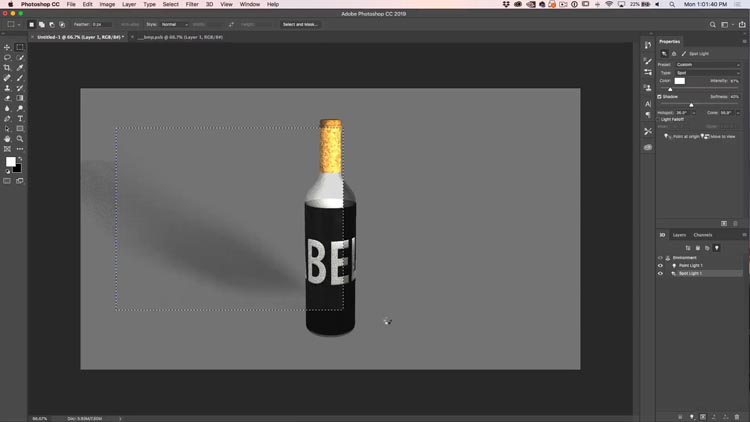
For simplicity, Lets make a black label with white lettering that says “Label” I know, how original.
Save and close the window.
Notice that the label material has now updated to our design.
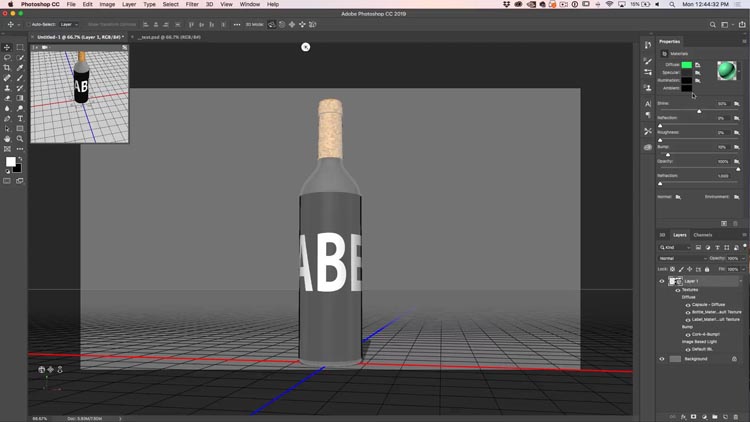
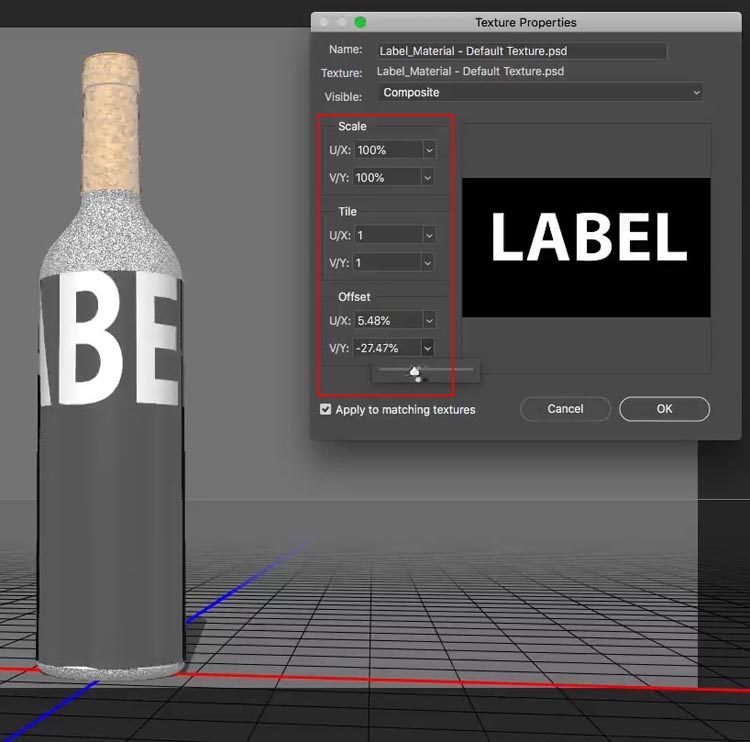
You can change the size and placement of the label by choosing the folder next to diffuse in the properties panel. Choose edit UV properties.
you will see 6 sliders that allow you to slide and scale your texture so it fits how you like.
And that’s the basics of materials.
Step 3. Lighting
I hope this tutorial is helping so far and you are starting to understand all the things you can do in photoshop. We have now built our scene, its time to light and render it. (we will get to animation at the end).
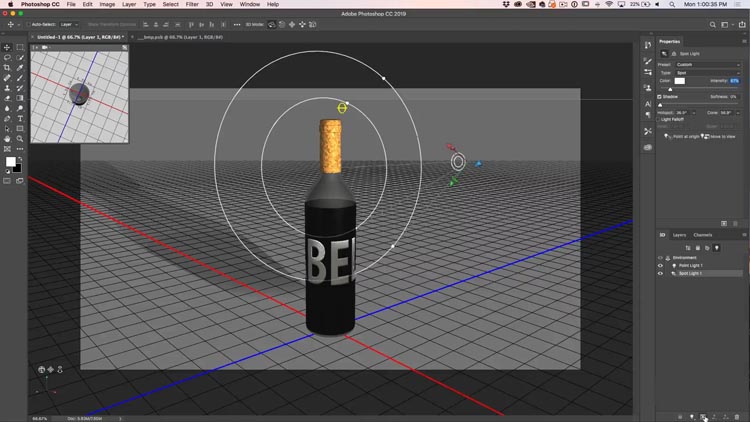
Choose the lighting tab in the 3D panel.
You will see a light. You can drag on the widget to reposition the light.

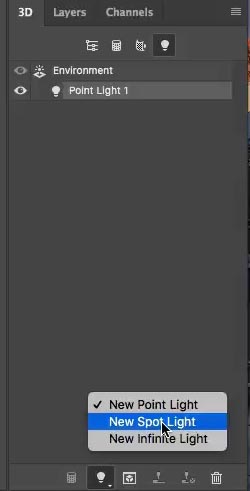
To create a light, go to the 3D panel and choose the light at the bottom. A new light will be created.
There are 3 types of lights in photoshop
- Point: Like a lightbulb, omni directional.
- Spot: A beam of light, illuminates in front only
- Infinite: single directional light, like the sun
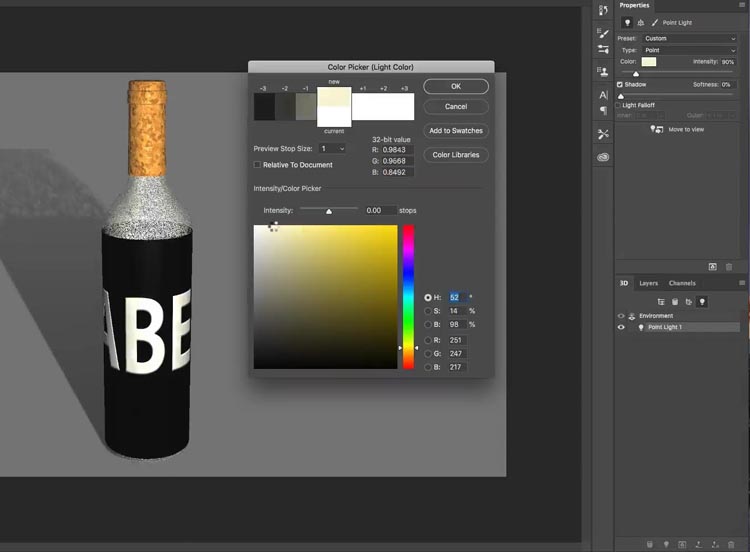
You can change things in the properties panel, such as add a color to a light, or change its brightness (intensity).
You can also add or remove a shadow and control its softness. (a soft shadow will take a lot longer to render than a hard edged shadow).
Positioning the lights
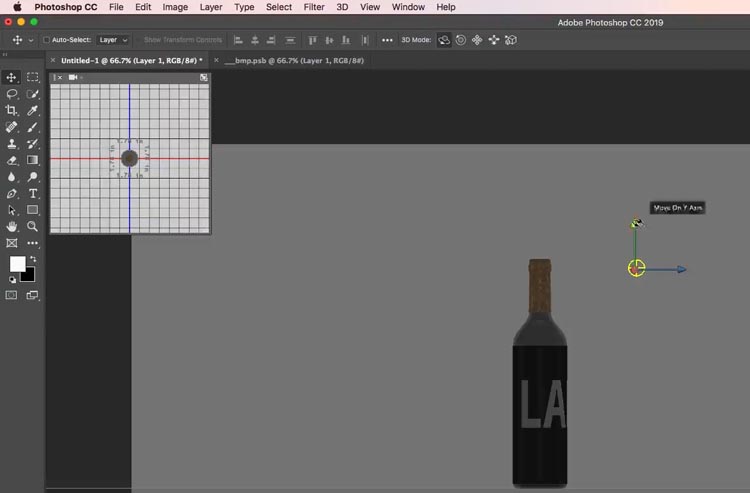
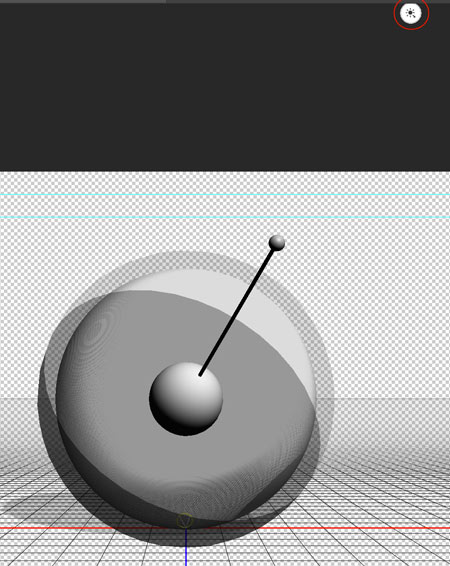
When you are positioning the lights, its a good idea to use the top down view (in the secondary view panel) to position the light, as its impossible to tell the true position in a perspective view.

Once you have positioned the light, change its height using the side or front view.
Lets add a spot light. This type of light has more options, so it will be useful to you, for us to examine it.
Choose. new spotlight from the 3D panel.

You can position the light using the manipulation tools. They work the same way as they do for other objects such as models.
Here are a couple of tips to help you position the beam of light.
With the light selected: Hold down the alt/Option key and click on your object. This will aim the light at the place you click.
Hold down the Shift key and drag on the shadow to reposition the light. There are also other tips in the video at the top of the page.
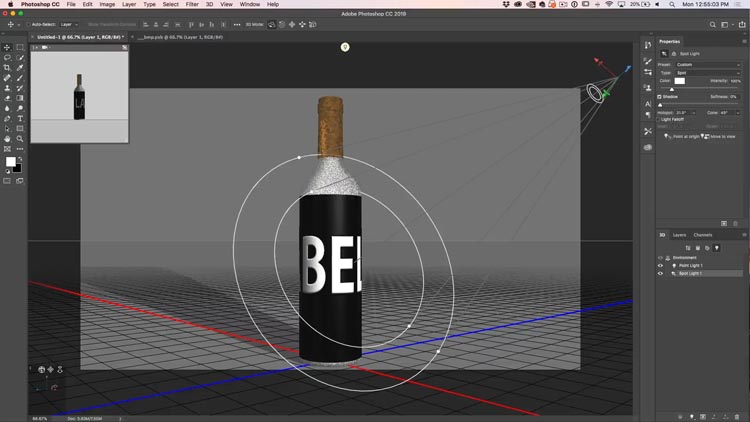
There is also a manipulator tool for the light. Click on the little white circle with the light symbol to activate it.
Once you have positioned the light, you can adjust the intensity and even add a color of you like.
You will see 2 rings around the light.
- Cone: Outside ring
- Hotspot: Inside ring
By adjusting these rings, you can make the beam of light have a hard or soft edge. A larger gap between the rings will produce a softer edge to the light.
Step 4 Rendering
Now we come to the final stage, unless you are doing animation, then you would do the animation first and then come back to this step.
Even if you are going to animate, its best to render a single frame first just to check everything looks right.
We are working with 3D in draft resolution for faster performance. When we render, Photoshop uses Ray Tracing to build the image and add all the reflections and other goodies.
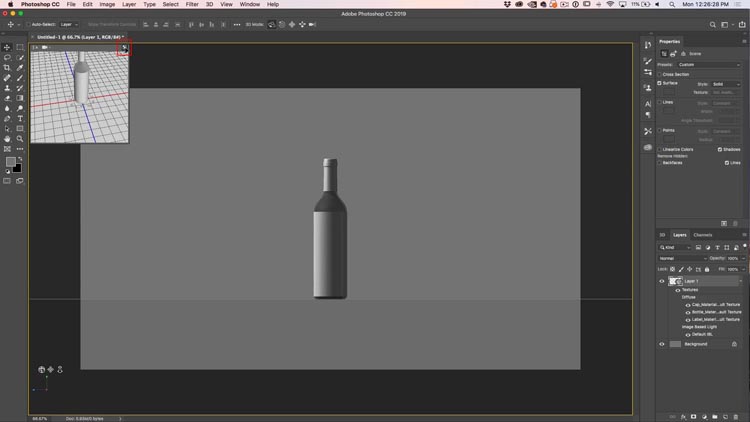
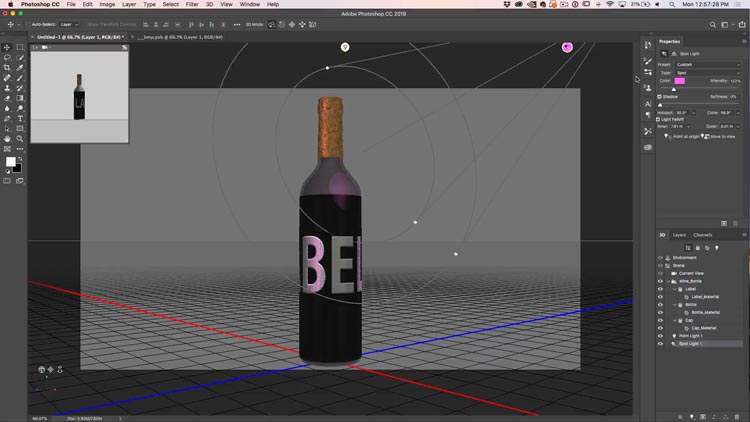
Here is an image before rendering.
You can see a final rendered scene here. Notice the transparency, reflection, shadow and refraction look much better when the scene is rendered.
To render choose the render button at the bottom of the 3D panel. The keyboard shortcut Shift+Alt+Ctrl+R (Shift+Option+Cmd+R on mac) will work great too.

You can save time by spot checking parts of your image. If you use the marquee tool to make a selection,Photoshop will render just within that selection.
Rendering settings.
At the time of this writing, the help files on Photoshop are outdated for render settings, so this is the most up to date info available.
In the 3D panel click on Scene to show the render settings in Properties.
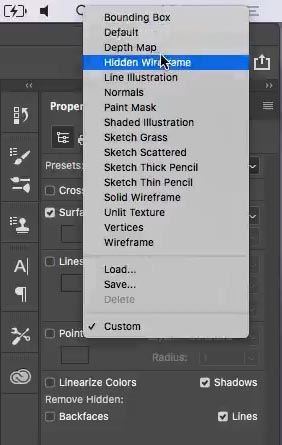
You will see a preset drop down.
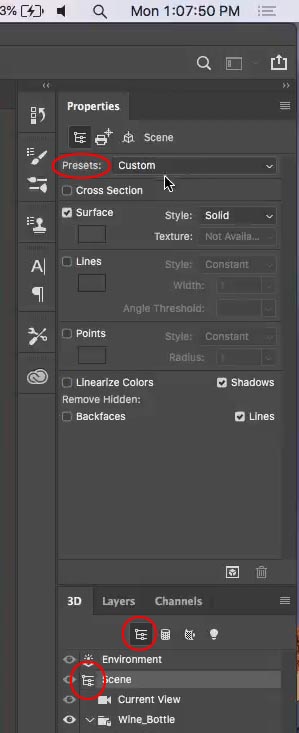
Default is Ray tracing, and there are lots of other options that do different things which you can try if you like.
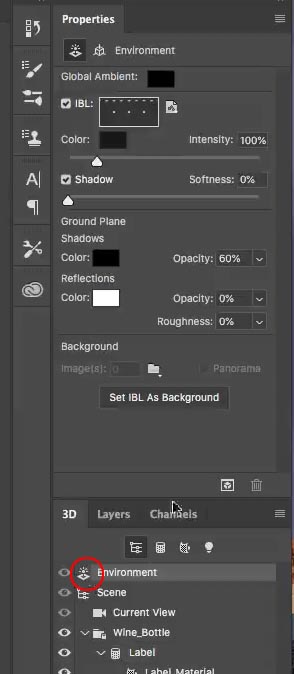
To change more render settings, choose Environment from the 3D panel. You will get IBL (Image Based Lighting) among other preferences.
This is where you control global shadows and ground plane.
Photoshop>Preferences>3D is where you can change the shadow and ray tracing quality.
5. 3D animation
Now it’s time to make things move. I have some other tutorials where I show you animation in Photoshop, such as my Star Wars text, spinning cube, or video tutorial.
Choose window>Timeline
Click the button in the middle of the timeline to create a timeline.

You will see a list of all the properties in your 3D image. Any property with a stopwatch next to it can be animated.
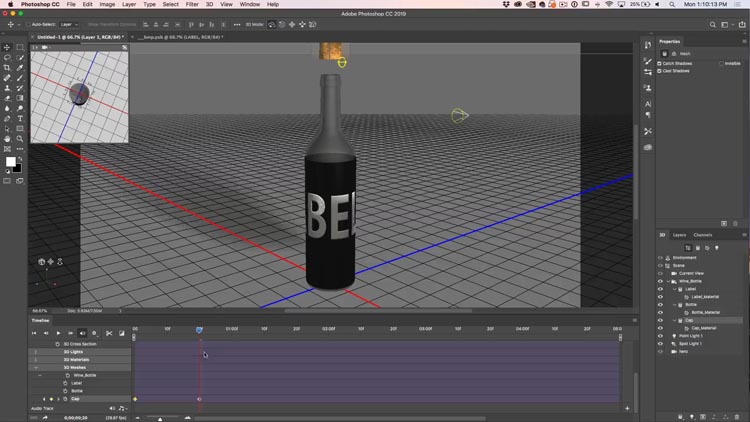
Scroll down to meshes and open it up.

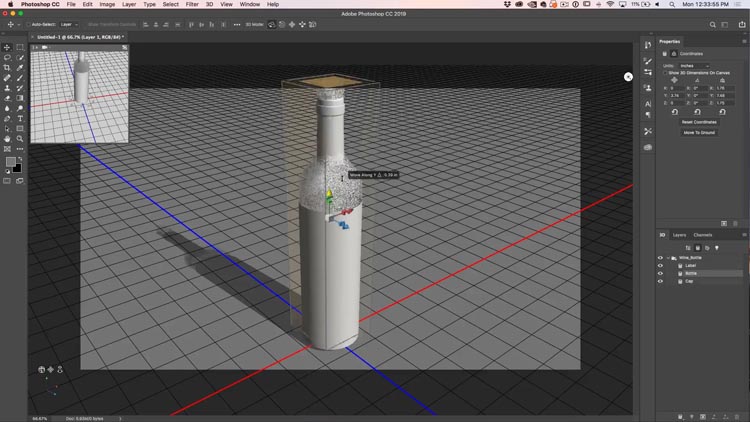
Lets start by animating the top of the bottle.
Choose the mesh for the bottle top. Click on the stopwatch to set the starting keyframe. (Animation will be created between 2 keyframes).

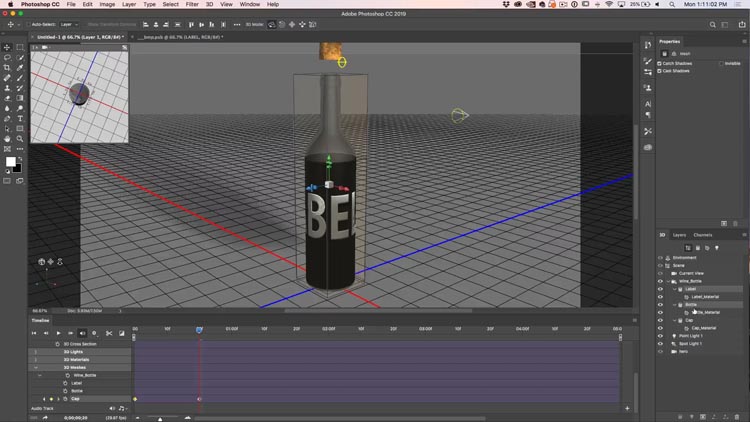
Drag the playhead forward in time.
Slide the bottle top up by clicking on the y axis arrow (shown earlier in this tutorial, or watch the video to really see it in motion. The animation section begins at 26:26).
When you release the mouse, a new keyframe will be created.
Press the play button or hit the spacebar to see the animation.
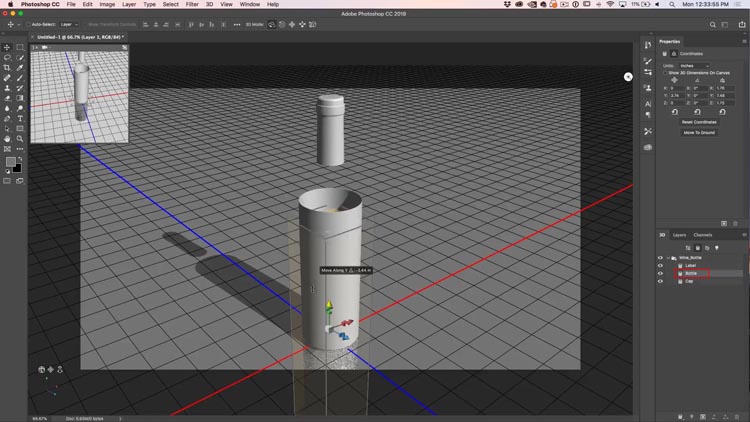
Let’s add a second animation of the bottle falling over.
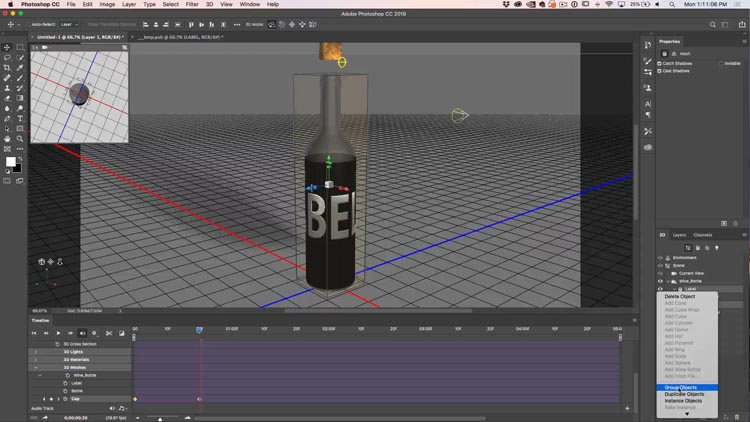
Right now, we need to combine the bottle and the label so that they move together.
Select both the bottle and label in the 3D panel Click on bottle. Hold Shift and click on label in the panel.
Right click and choose Group objects.
The group will be called New Group. Find it in the timeline.

Move the playhead to the starting position and click the stopwatch by the new Group.
Move the playhead to the ending position.
Use the rotate tool to rotate the bottle. A keyframe will be created.
Hot the spacebar to view the playback.
When you want to render an animation, you will do it differently than the render button.
Choose File>Export>Render Video
Choose to export an image sequence or as a video.
Choose the format H.264, the presets will work really well, Current Settings High Quality will give a nice quality video.
Choose the 3D quality. Before you press render, make sure you don’t need your computer for a while, leaving it overnight at bedtime is a good option, as this will take a long time.
Alright! You now enough about 3D in Photoshop to get busy creating. Best of luck!
Thanks for checking out this tutorial, there are lots of other great tutorials here at PhotoshopCAFE.
Thanks,
Colin
PS Don’t forget to follow us on Social Media for more tips.. (I've been posting some fun Instagram and Facebook Stories lately)
You can get my free Layer Blending modes ebook along with dozens of exclusive Photoshop Goodies here


15 thoughts on “How to use 3D in Photoshop, Ultimate Tutorial”
Leave a Reply

How to make the apple liquid glass effect in Photoshop

How to edit and retouch a photo in Lightroom. The ultimate freeLightroom photo editing tutorial, full workflow, adjustments, lens correction,...
Easily remove things from photos with advanced content aware fill options in Photoshop. When Content Aware Fill doesn't work as...


Wow – thank u for such extensive and well detailed lesson. Thank u!!
Finally, 3D widgets etc. are explained in away that I now feel so much more comfortable with. Thanks Colin.
Thanks Colin , I know a little about 3d but didn’t have a clue you could do that work in photoshop, I’ll work on it . What else does photo shop do , can it make the tea too !
Only coffee, its working on tea 😉
Fabulous tutorial, as they all have been. I would love to see you develop a course, starting at the very simple basics as you have done here, and building up to the more advanced. I would buy it instantaneously. I have watched your tutorials every week for years and have learned so much from them. You are a marvelous teacher explaining the difficult in an easy to understand and easy to follow manner. Kudos to you!
Absolutely fantastic, I have never used three D in Photoshop but I will now.
Thank you Phil.
I NEVER knew I could do this in Photoshop. Freakin’ GREAT Vid…
This great, thank you! Quick question, the ground plane seems straight forward but, what if you need to put the word a big 3D sign on the side of a building or picture frame on the wall and have the light actually cast shadows on the wall not ground? Of course, the background would be a perspective photo of a building or interior. Thank you again!
This is a great tutorial. I’ve been using Photoshop for years to create 3D objects & learned something new about lighting today!
Thank you!
P.S. Can Photoshop’s bump texture alter the exterior shape of any object, like going beyond the smooth surface of a sphere?
you explain how to save render presets: what if you have multiple meshes in the same document and want to use the same scene/lighting etc across each of them, iE: a row of bottles with different shapes and labels?
You can add multiple objects to a scene
How do you make a custom shape in 3d in Photoshop? Like, if I want to make a 3d furniture object to import to Dimensions? I can’t find any relevant tutorials.. Everything is about round objects ..ALso, never done anything in 3d from scratch so any advice is welcome. Thank you
It’s very difficult. Photoshop has limited modeling tools. It can be done, but it’s better to build the models in a different program or get them from other places and bring them into Photoshop. But you could build furniture our of boxes and stuff.
If you check out Stephen Burns course on 3D in our premium tutorials, he shows how to make things in Photoshop.
All I want to do is ‘render a video’ like I used to in export? Why has that option gone?