
Kiosk Orbs

This Tutorial has come about due to a few requests. This starts with a fairly simple object, and finally ends up with the orb Design. Take it step by step, and you shall not only understand how to create this object, but realise that a little bit of thinking and understanding of light effects goes a long way into creating lots of things.
We will start by making a simple glass ball and then create the final object.
IMPORTANT *** all these calibrations depend on your eyes a lot, both the above steps as well as those to follow. Adjust to make the look just right..
© By Vinesh V George (aka Omengeorge) ::
Edited By Colin Smith photoshopcafe.com
Make the orbs

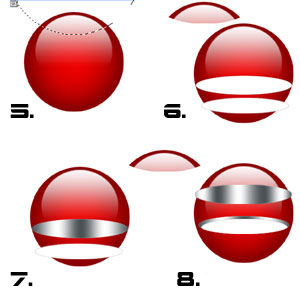
Step 1. make a simple circle with your circular marquee tool. Red makes for a nice colour, but you can go with anything you like.
Step 2. Give the circle a innerglow layer effect, just change the glow colour to black and the blend mode to multiply. Why am I using the Inner glow instead of the inner shadow? Because inner glow doesn’t have an angular deflection, and thus is easily uniform.
Step 3. Load the selection from the circular area and on a new layer drag the linear gradient (white to transparent) downwards from top (close to the bottom but not completely bottom).
Step 4. Now press Ctrl/Cmd+T to transform the white gradient. Drag the handles to bring it upwards halfway through, and drag it in a bit in from the top and sides.
Create a merged composite layer: Hide the background – Create a new blank layer on top and then Press Alt+Ctrl+Shift+E (Option+Cmd+Shift+E on Mac) to create a merged layer on top.
Cutting the orbs
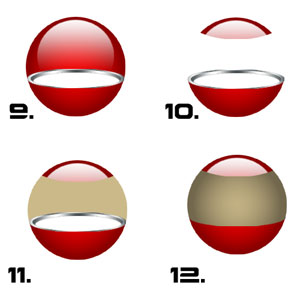
Step 5. take the merged layer and create a circular selection above. the circle should be much larger than the original circle. Again use your eyes to tell you what seems right, then copy the section and paste it in to a new layer. This creates the top portion of the orb. Place it again in the proper exact position. (Cmd/Ctrl+J will copy the selection to a new layer)
Step 6. Now to go onto the base of the orb. In a new layer create an eliptical shape that fits into the lower half of the circle. Duplicate this layer and reduce the size a little, as shown in fig.6.
Step 7. Select the larger elipse layer and load its selection by pressing Ctrl/Cmd and clicking on the layer thumbnail. Now select the cylindrical gradient tool and going with the grey-white-grey-white-grey colour combo, drag across.
Step 8. Duplicate this layer too and bring the duplicate upwards, as shown. Now place the white small portion up above the actual gradiated layer. Place it as shown in fig.8. Link both layers and reduce their size by a bit, so that the outer gradiated elipse is just a bit within the red circle.
create the interior
Step 9. Take the duplicated gradient layer and again select it , now giving it a slightly different gradient of greys and whites. Now bring the duplicated gradient layer down. arrange it beneath both the other layers, and position as shown in fig.9. It should be a visible from both sides as it is the rim of the orb.
Step 10. Now to remove the portions of the orb that aren’t required. As before by keeping Ctrl/Cmd pressed and clicking on the layer thumbnails; first select the large outer rim elipse (with the gray gradient) and then Shift+Ctrl/Cmd+Click on the thumbnail of the the upper top portion layer (created in step 5).
You will now have the 2 elipses selected. We want to also select the bottom portion of the orb. Choose the Rectangular marquee tool hold down shift and drag over the bottom portion. Inverse the selection (Ctrl/Cmd+Shift+I) and delete the middle portion of the orb. The figure should look as it is in Fig.10.
Step 11. Now to create the glass portion. Create a circle of the same size of the orb, any colour you want. Place it behind the other layers.
Step 12. As with the initial outer orb, give it the same kind of innerglow effect, and now bring it forward so as to cover all but the red outer portions of the orb.
Step 4
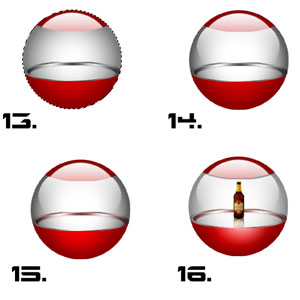
Step 13. Go to the layer palette and make the fill amount =0. This makes the layer invisible, but keeps the layer effects visible, as shown in Fig.13.
Step 14. As you had done with the red circle, ie, creating a white gradient reflection, create the same in a new layer above the glass layer, so as to create a more realistic lighting effect. Adjust the settings as required to make it as realistic looking as possible.
Step 15. Now select the base layers, ie the grey metal gradient layers and the white elipse, and merge them together. After this press Cntrl+U to adjust the hue of the layer. Since it’s grey, click on colorize, and adjust to a redish colour in keeping with the colour of the orb itself.
Step 16. Finally give a very slight drop shadow to the upper portion of the red orb, just to attain more realism. Secondly the lower portion seems off. SO create a new layer above the red lower orb portion. Then select the radial gradient tool, and select the white to transparent option. Now drag from somewhere above the red to a little bit in. Erase portions that arent contained within the red portion. Check Fig.16. to see the effect.
Step 5
You orb is ready. You can display any items in there now, just make sure any Items kept in have a good reflection added on. This will give the base a shiny appearance.
Step 6
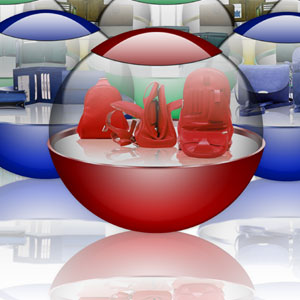
Shown here are my futuristic orb kiosks, and the final version of my cover for BT Leather.
See this as more of a tutorial that helps you to understand how to play around with your imaginative abilities and create stuff

PS Don’t forget to follow us on Social Media for more tips.. (I've been posting some fun Instagram and Facebook Stories lately)
You can get my free Layer Blending modes ebook along with dozens of exclusive Photoshop Goodies here

One thought on “Kiosk Orbs”
Leave a Reply
Crop marks show the printer where to trim the final piece. Photoshop doesn't have the ability to create crop marks...
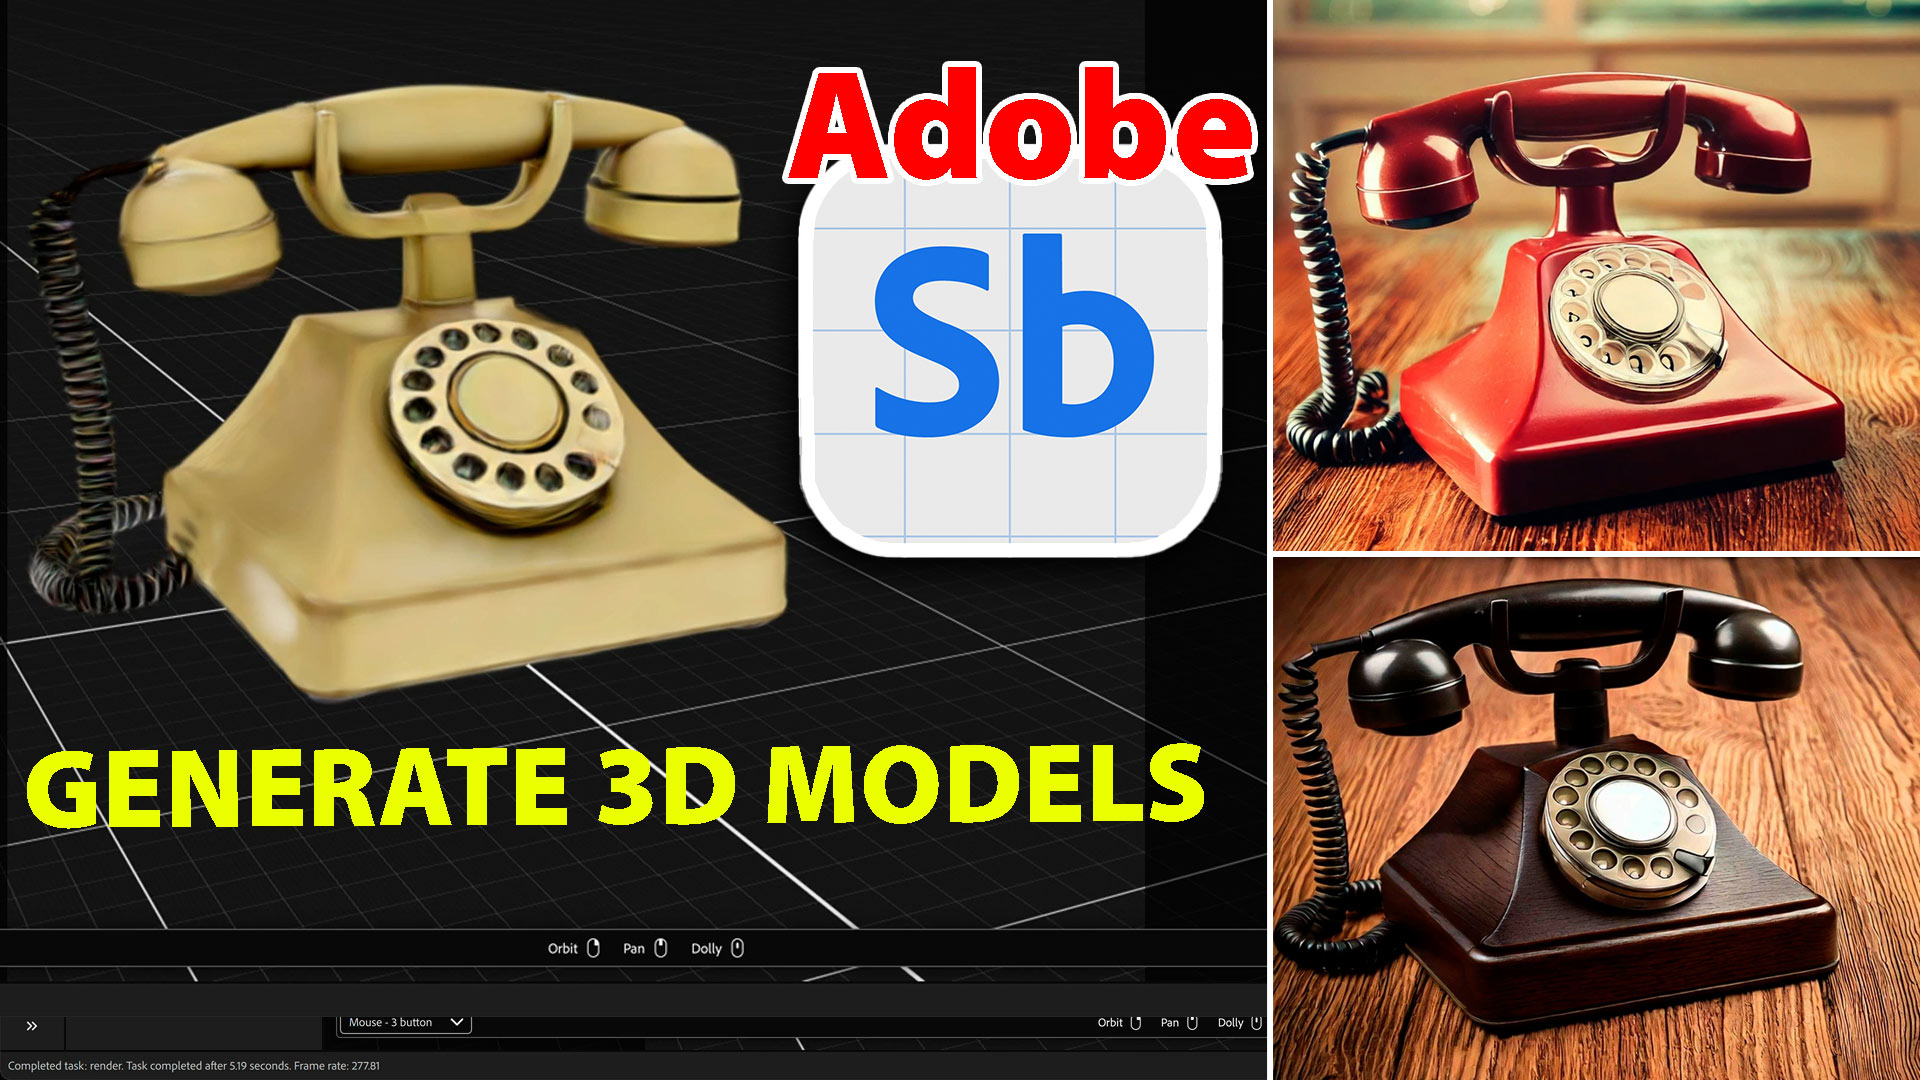
How to generate 3D models using Firefly ai in free Adobe Substance 3D viewer. Generate images from the 3D models

new feature review of Photoshop CC 2015, Artboards, Linked Library Smart Objects, Adobe Stock photos, Blur gallery, layer style update...


I would like a copy of your CS6 Super guide but the form does not seem to work.
Thank you