How to Create a hyper realistic non-destructive Lens Flare effect in Photoshop
That Warm Sunny Lens Flare look
Have you seen those trendy cool colorized photos that have color on the edges and really nice lighting? Perhaps you have wondered how its done? In this Photoshop tutorial, I will show you how. It’s called the lensflare look. It goes beyond the basic Photoshop lensflare and adda s a popular style to your photo. As I like to do here at PhotoshopCAFE, I have provided the video NAD the written Step by step instructions, so you can learn your way! Watch the video, read the steps below, or for maximum learning, do both!
Where to position a lens flare
A lens flare is caused by bright directional light, entering the lens. His light can bounce of the lens into the sensor, producing the lens shaped circles overlaying the image. Zoom lenses get more flare because there are more pieces of glass in them. A lens hod is used to prevent or reduce lens flare. In studio, Flags are used to block the direct light from striking the glass on a lens. Generally in photography and video, lens flare is avoided. However, there are circumstances when it’s desired and created on set, or in Photoshop to produce the Lens Flare look. Its become quite common to shoot for flare in modern photography. Lens flare does two things. First of all, it reduces contrast and saturation in an image and it can produce artifacts such as circles and lines. (See the end of this article for the 4 different types of Lens Flares in Photoshop).
When producing a lens Flare in post production, you can’t just place it anywhere. You have to place it where it makes sense, or it will look wrong and fake. Remember, lens flare is caused by a bright light source striking the glass in a “line of sight” line. When looking through a lens, if you can see the light source, such as the sun or a light bulb, there is a good chance of flare.
- Rule #1: You must be shooting in the direction of the light in front of the lens (backlit).
Rule #2: You must be able to see the light source from the lens. Either directly, or reflected.
Rule#3: Position the lens Flare where the light source will be, or the reflected Light source.
So, if you have the sun, a light, a flashlight, candle or any light source, it can produce a flare. You can also get a flare off a reflective surface such as glass, water, chrome or bright metal. You cannot get a flare from a dark area with no light source or reflected light.
Don’t forget to like this and FOLLOW US on Facebook!
Lens Flare Effect in Photoshop: Step-By-Step Tutorial
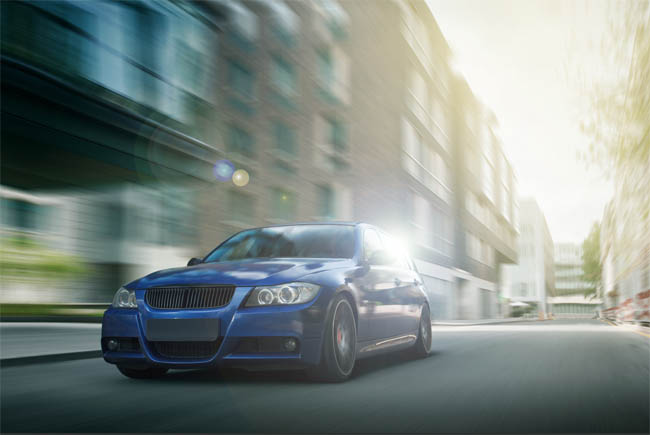
We will begin with this image from Adobe Stock. You can grab the free watermarked version here. Check out my quick video on how to use Adobe Stock for this kind of thing.
Step 1: the Lens Flare
We are going to apply a lensflare directly onto the Photo. (Don’t worry, we will change it soon).
Choose Filter>Render>Lensflare
You will see the standard lensflare that most people use. Let’s NOT use it 😉
Step 2: Don’t be Cliche
Change the option to 105mm Prime. You can drag in the window to reposition the lensflare to reflect off the glass of the car. It has to be directly from a light source of a highly reflective surface for it to appear real.
Click ok
And you will see the lens flare on the photo. (Watch the video above afterwards to see the effect of changing the brightness).
Step 3: Make it non destructive
Press Ctrl/Cmd+Z to undo the lens flare. All we wanted to do was dial in the position for now. (Note: We wanted to see the preview image which you can only see on the actual layer. You could also apply it to a Smart Object as mentioned in the comments to get the same result).
Hold down Alt/Option and click on the new Layer Icon in the Layers Panel
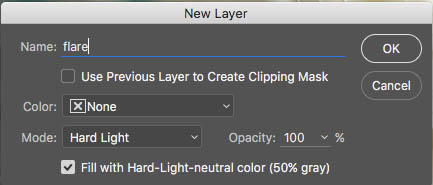
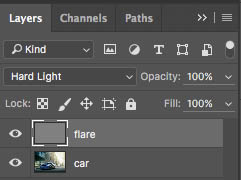
You will get a new Layer with Options. Change the Mode to Hard Light. Now you will have the option to check a box which says “Fill with…50% gray” click it.
Click ok
You now have a new layer filled with 50% gray (You can’t add a lens flare to a blank layer).
Notice the gray appears transparent because of the Hard Light Blending mode. Make sure you select the gray layer.
Step 4: Apply the perfectly positioned Flare
There is a keyboard shortcut that will apply the previous filter with exactly the same settings as previously used. Press Cmd/Ctrl+F
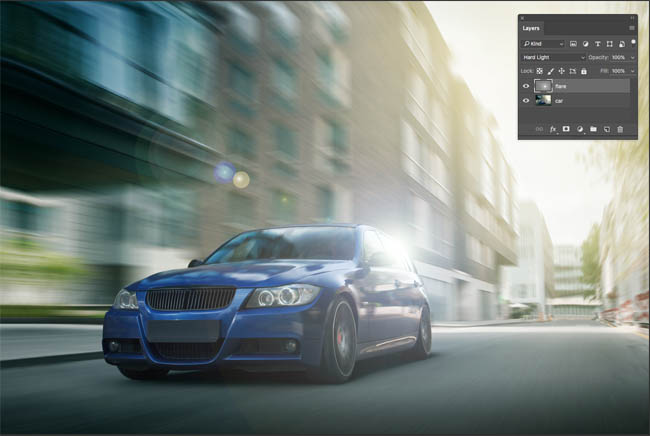
You will see that the lens flare is now on its own layer. Because its using a blending mode, you can move it around on the screen if you like. (Grab my free ebook here, to learn more about Photoshop Layer blending modes).
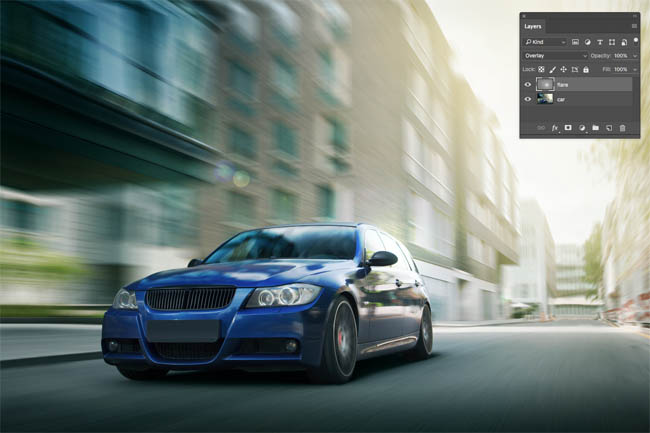
Notice, you can also try different blending modes for a different result, such as Overlay here. We will use Hard Light for this example though.
Step 5: Apply the light spill for the cool look
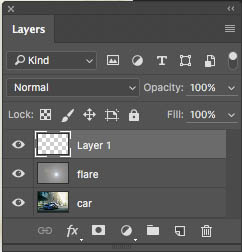
Create a new layer
Choose an yellow/orange color as the foreground color, from the color picker at the bottom of the toolbox.
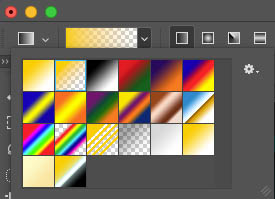
Choose the gradient tool and the second option from the gradients at the top. Foreground to transparent
Choose Linear gradient:
Mode:Normal
Opacity: 100%
Transparency on
Step 6: the color spill
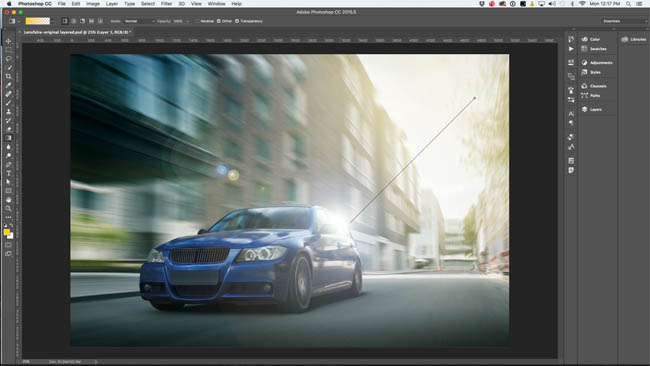
Start at the top right of the screen and drag towards the bottom left in a diagonal direction
You should see a gradient like this
Step 7: Blending Mode for Lens flare
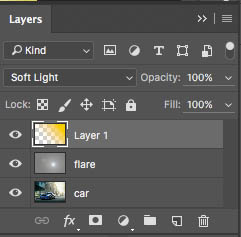
Change the blending mode for the gradient. Soft Light works well.
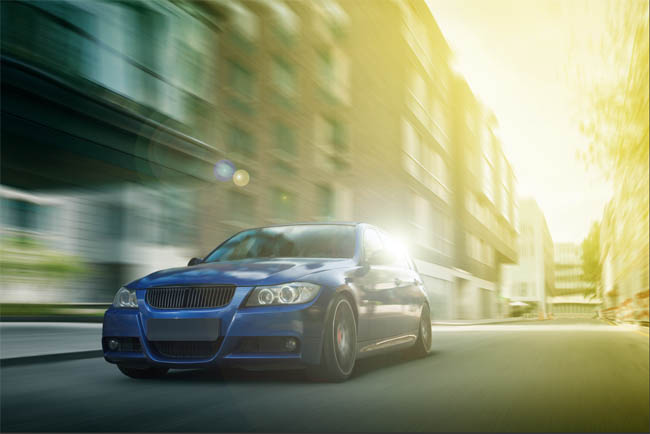
And here is the final result. Don’t forget you can experiment with different amounts of transparency and different blending modes for different results.
Xtra Credit
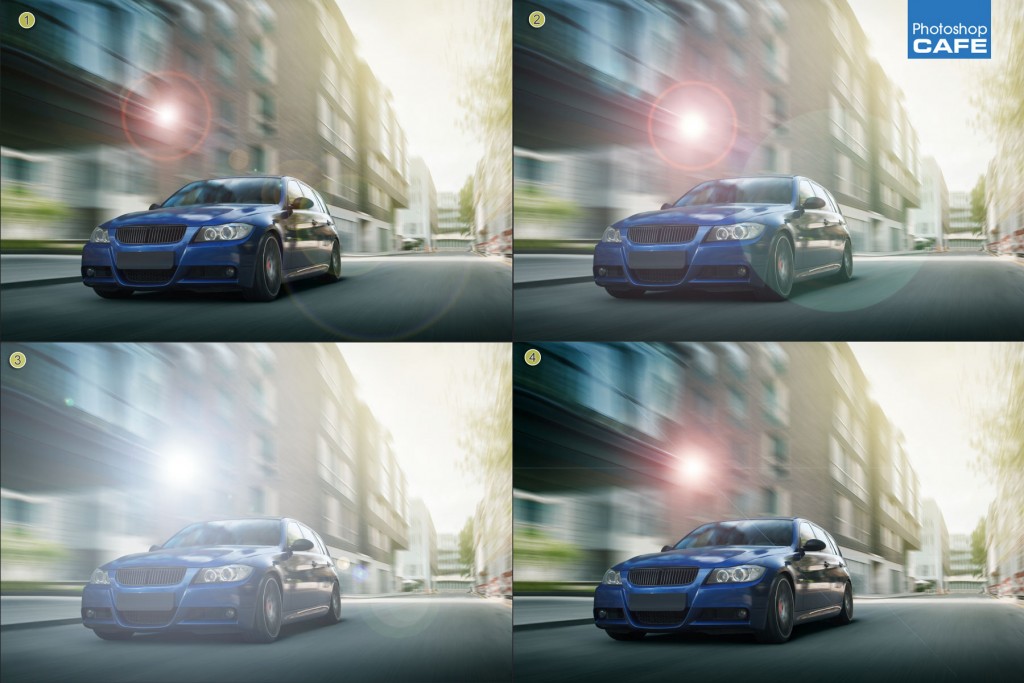
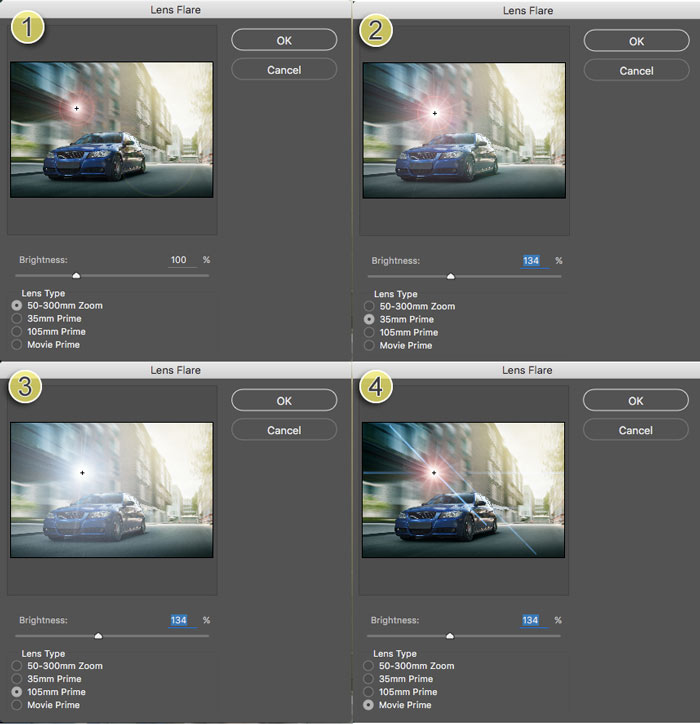
The 4 Lens Flares in Photoshop
There are four different types of lens flares availabe in Photoshop. You probably wouldn’t know it, seeing that most people use the first one that comes up. Please note, the placement of the lens flare is to make it clear to see these examples, but not realistic positioning, see the beginning of this article for Lens Flare placement.
- 50-300 Zoom. This is the most popular, because it’s the default. If you use it, try and change the color or something, so that it doesn’t look like you used an “out of the box” Photoshop Lens Flare)
- 35mm Prime. Similar to the 50-300, but this has more rays, more of a startburst effect.
- 105mm prime: This one is blue in color, and a bit more natural looking in my opinion. This is great to add that hotspot effect.
- Movie Prime: This also adds the steaks of light (straight lines)like you might see in a movie. JJ Abrams uses these in just about every scene he shoots, as they add a modern or futuristic look. . He does them with the camera though, not in post.
Thanks for checking out this tutorial on making hyper realistic lens fares in Photoshop!
Great to see you here at the CAFE!
Check out all our other awesome tutorials (They are all original and ONLY here at PhotoshopCAFE).
Colin
PS Don’t forget to follow us on Social Media for more tips.. (I've been posting some fun Instagram and Facebook Stories lately)
You can get my free Layer Blending modes ebook along with dozens of exclusive Photoshop Goodies here

4 thoughts on “How to Create a hyper realistic non-destructive Lens Flare effect in Photoshop”
Leave a Reply
New Features in Photoshop 2024, how to use new features in Photoshop 25 with Colin Smith from PhotoshopCAFE
This Photoshop tutorial has it all; How to make a page peel, how to turn day into night, blending layers,...
All the new Features in Photoshop Beta April 2024, one of the biggest updates ever.







Very cool!
Another way to achieve that is to change the image into a smart object. As a smart object the filters turn to smart filter. And smart filter are also non destructive
But good to know your way.
Yes, you are correct. Photoshop is like pizza, there are many different ways of doing things.
This looks excellent and you explained it so well. I’m definitely going to be using this in some of my comps. Thank you, Colin.
Colin, the CMD+F repeat filter doesn’t work – it acts in the keystroke default mode and opens a search (Find) window.