
Dotted lines in photoshop tutorial
In Photoshop, it’s always been a challenge to make dotted lines until Photoshop CC. This tutorial is going to show you how to make dotted lines in any version of Photoshop
Let’s first look at how to do custom dotted lines in Photoshop CC, then we will move on to the old school way.
The limitation of the CC method is that we can only work with paths or shapes. Vectors in other words.
Check out the video that shows exactly how to make dashed and dotted lines in Photoshop CC. Then read the tutorial, they are different and supplement each other.
Step 1
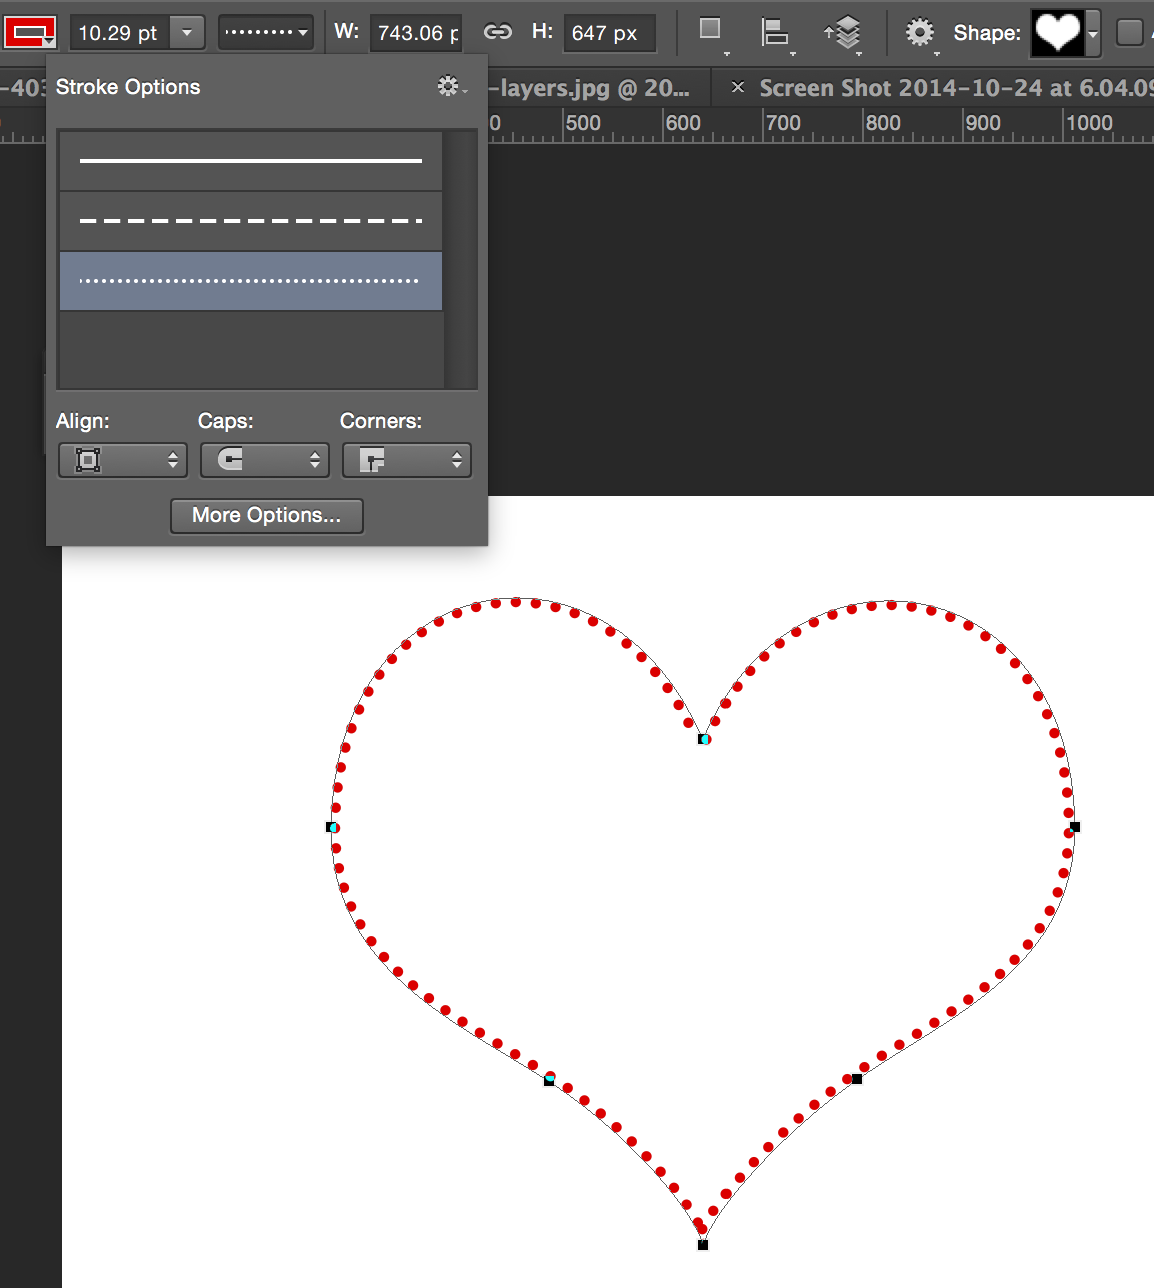
Use with the pen tool, or the custom shape tool set to custom shapes or paths. In this case, grab a heart custom shape and choose Shape for the options

I have made a heart custom shape.

Step 2
Next to the stroke, choose the color and width from the top menu. Click on the line next to size to reveal the Stroke Options. This is where you can choose sots, dashes or a solid line.
Step 3
Click on the More options button to set a custom dot/dash style.
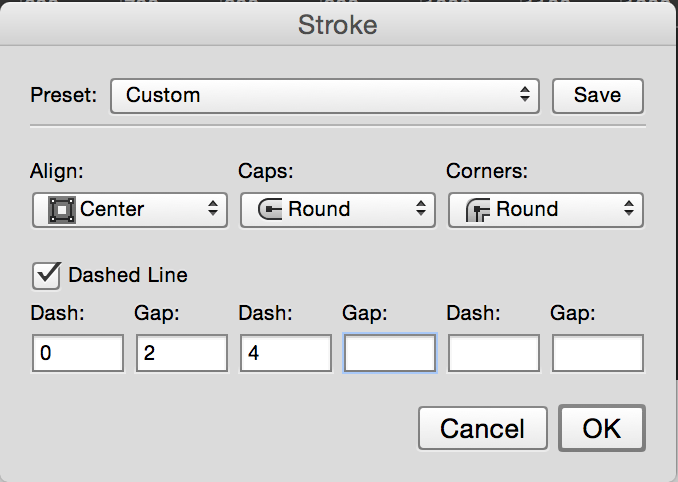
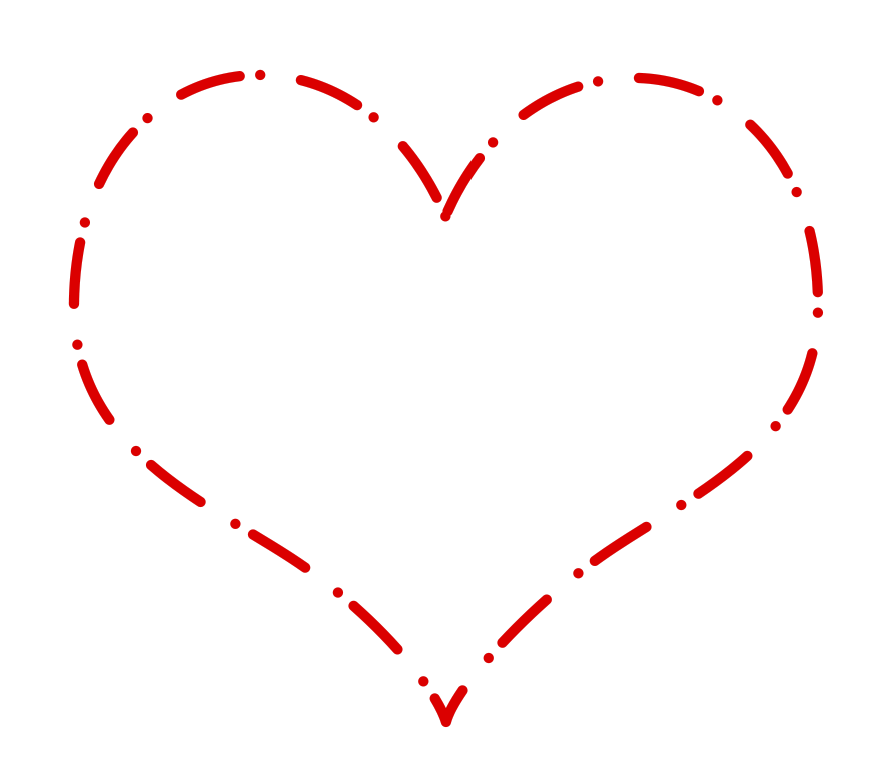
here we have a custom dashed path on our heart shape.
Other method of making dotted lines (Raster/Old School way)
Here is how to make a dotted line, the old school way that is supported on every version of Photoshop. Also experiment with different brush tip shapes for some variations, you could even use photos.
See how to make a custom brush from a photo
Step 1
Select the brush tool. (B) ![]()
Open the brushes Panel (F5) or Window>Brushes
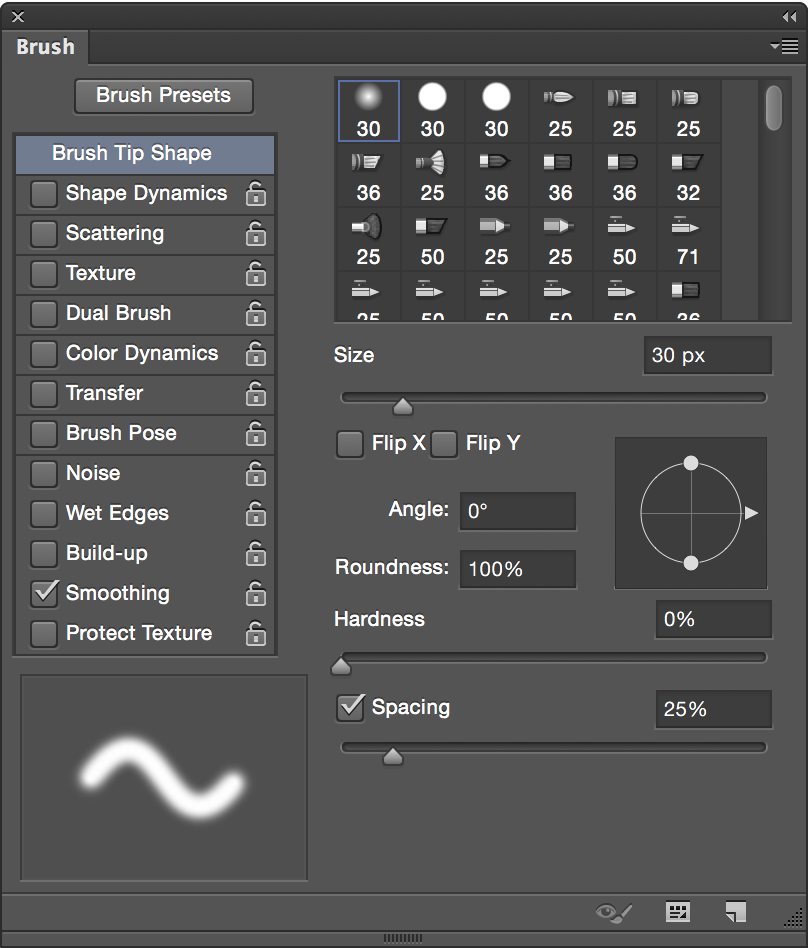
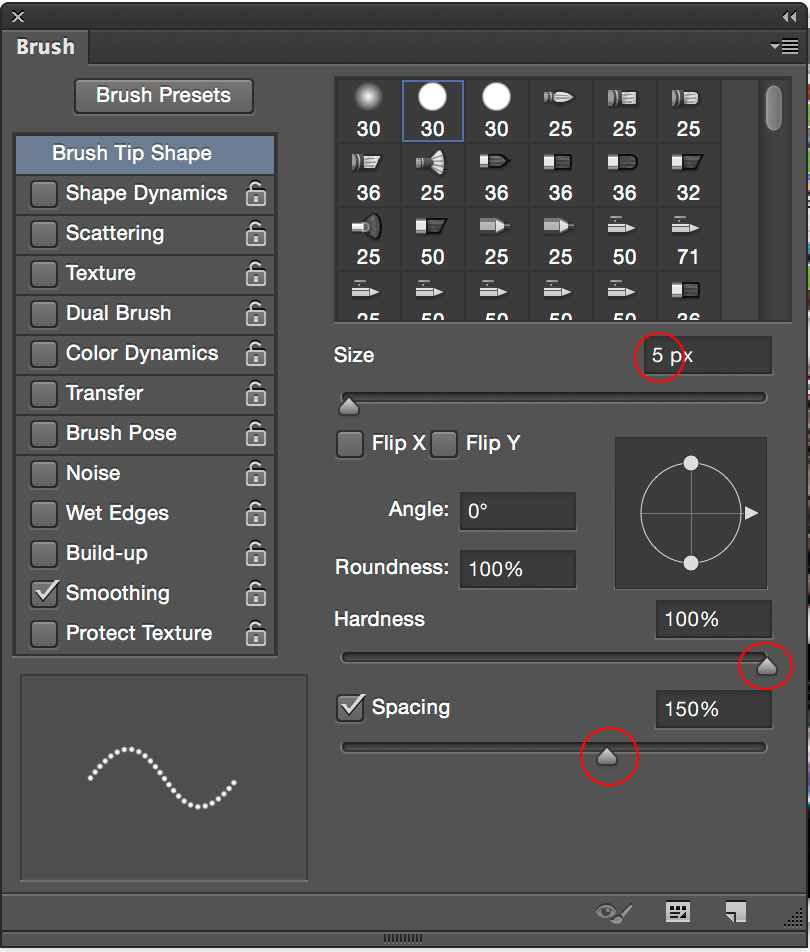
Step 2
Let’s change some settings
I chose 5 for the size. Obviously the larger the size, the larger the dots
It’s important to set the brush to hard
Set the spacing for 150% – More to increase the gap between dots
Step 3
You can save the bush if you want to use it again. To do this, click the icon in the bottom right corner of the Brushes panel. You only really need to make it one time and can change the size at any time for a larger or smaller one.

Step 4
To draw a straight line: Click your mouse anywhere, Hold shift and click again. It will connect the dots, with a nice dotted line.
![]()
Here is a little example of what is possible with dotted lines.
I created a background and renamed it layer 1. Added a new layer on top and made some dotted lines.
Then I loaded the selection, selected layer 1, turned off layer 2 and hit delete.
Then I added a white background and a drop shadow for effect.

PS Don’t forget to follow us on Social Media for more tips.. (I've been posting some fun Instagram and Facebook Stories lately)
You can get my free Layer Blending modes ebook along with dozens of exclusive Photoshop Goodies here


15 thoughts on “Dotted lines in photoshop tutorial”
Leave a Reply

How to make a realistic looking shadow in Photoshop. This photoshop tutorial shows how to cast a shadow, Colin Smith's...

How to embed type in photoshop. Heres a tutorial that will how you how to carve your mark. This is...

You are going to love how easy it is to change the color of anything in Photoshop. Check out how...


I don’t see the ‘spacing’ option in cs3, so how then exactly does this work in “every version”?
This option is only available on version CC. Near the bottom of the tutorial labeled “Old School” way is how you can do it on CS3
Using PS6. I don’t see any of the options you mention. F5 doesn’t do anything and there is no “Brushes” option in the Window menu. Is it possible top make a dashed line in this version of PS?
Really Helpful… you Legit
Does it work with path, I ccan’t do it with paths but shapes, on cc2018.
Using PS CC.
PS: Thank you for those wonderful tutorials.
I’m on CC2018 and have struggled with this so I was thrilled to see you had a tutorial for making dotted lines. But no matter what I try, I still get double dots on a line. I can get them to be nearly on top of each other but not perfectly. They are just slightly offset. Esp. noticeable on larger dots because they look out of round. I’ve been using the “old” method with brushes for years, but was hoping for a vector dotted line I could resize.
Great simple tutorial, Very well explained in simple terms. Thank you
CC2018 Mac version
I don’t have a ‘line’ tool in my toolbar – any idea what to do? Using CC18
Its under the rectangle/custom shape tool
thanks 🙂
Thanks for your effort, your tips are very helpful, keep up the good work. Cheers
Much Obliged. I didn’t know about the, “click + shift + click,” options. That’s awesome. 🙂 Worked great for Photoshop 5 LE. Thank you. 🙂