
Double Bevelled Outlines Photoshop Tutorial
Double bevel, insert effect in Photoshop
This Photoshop tutorial shows you how to make a chiseled inset in a shape. All the steps remain the same on the newest CC versions of Photoshop.
Step 1
Start with your shape on a new layer. Try experimenting with a shape of your own.
I drew this with the polygon lasso tool an filled it with green.
Step 2
 Make a selection around your object. Ctrl/Cmd+Click on the layer Thumbnail.
Step 3
select>modify>contract.
I chose 10 pixels
Step 4
Your selection is now contracted.
Step 5
Now to make the groove.
Select>modify>Border
I chose 5 pixels
Step 6
 You should see the double selection now.
Step 7
 Press the delete/backspace key to erase the object on the selection.
Deselect
Step 8
Now to add the bevel:
Add the layer styles (press the little f on the bottom of the layers palette.)
Choose the inner bevel option
*Optional: add a drop shadow too.
Step 9
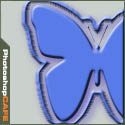
And the shape is now bevelled!
If you want you can add some text, select it, switch to the object layer and hit del/backspace to chisel out some text.

What's new in Photoshop 25.5.1 March 2024 update. How to update Photoshop

This is the original Tutorial on this rap diamond effect, there have been many rips of it in other places....

An interface would never be complete without the little buttons that appear to be made of glass. This tutorial will...


