Photoshop tutorial Miniature tilt-shift photo effect
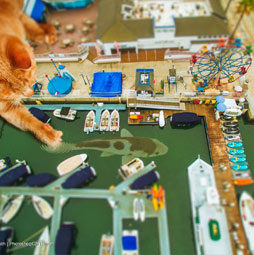
Honey, I shrunk the Photo.
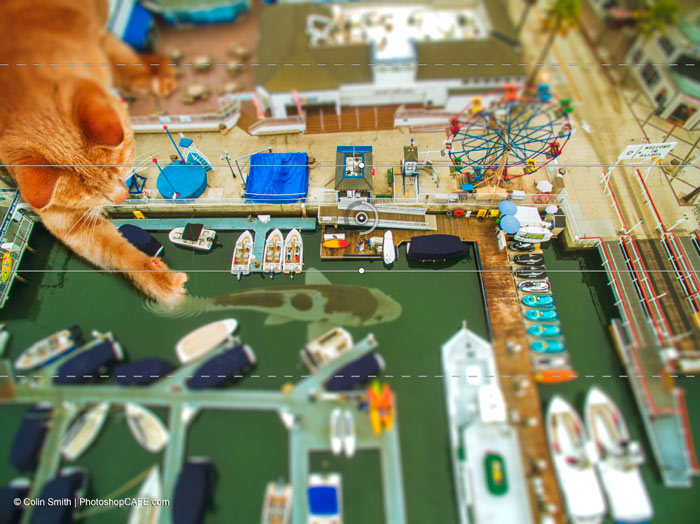
I started a series of images I call Catzilla. The first one was a giant kitten destroying New York City. I decided to continue on this humorous theme of destructive cat composites. For this image, I wanted to do something different. I used a drone to capture an aerial photograph in Balboa, California. Rather than add a giant fish and cat to the photo, I decided to do something more creative. What if the cat and the fish are normal sized and I shrink down the harbor and make it look like a toy, or scale model. This is where the idea of doing a tilt-shift effect to the photo would work well. Rather than just give you the steps (which I do), I wanted to talk through the thinking behind the image as well as a high level overview of the compositing steps.
Step1
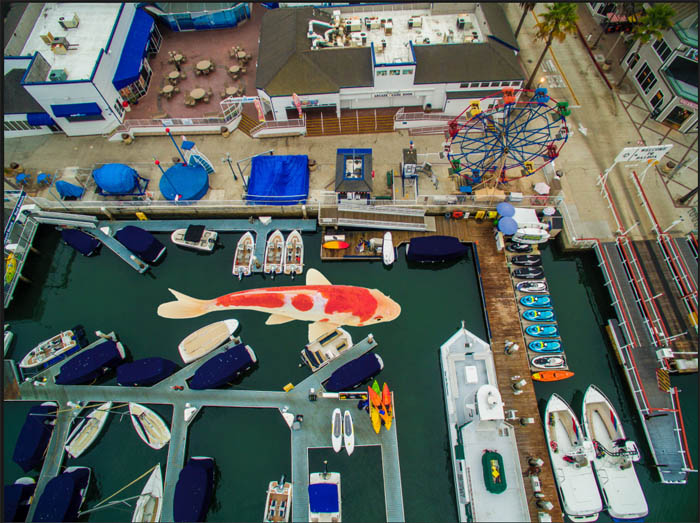
Here is the original photograph that I captured very early in the morning (6:15 am) Because its before the sun breaks through there are no strong shadows to influence the image too much as far as lighting goes. This was captured on the DJI Phantom 3 Professional (I call mine Leonardo, yes I name all my quadcopters).
I have done some very basic adjustments in Lightroom, really just setting exposure and contrast.
Step 2
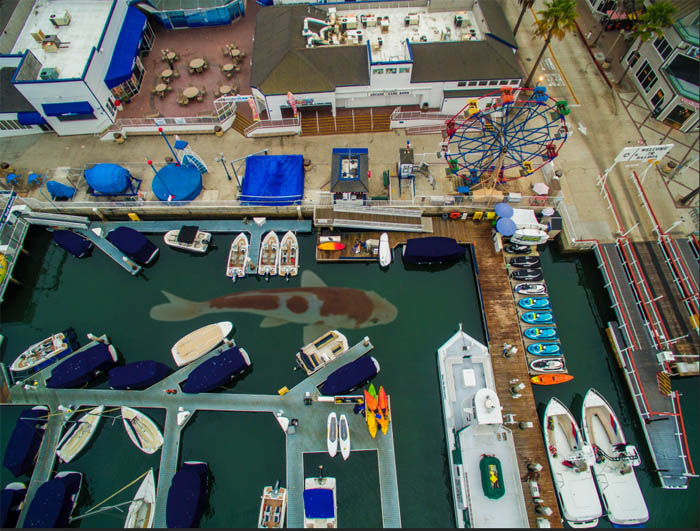
I grabbed this image of a koi
I extracted it and dropped it in the water. You can find one on stock, or generate one in Photoshop.
Step 3.
I wanted to make the fish appear underwater, so I Darkened the highlights and reduced the color saturation.
Step 4
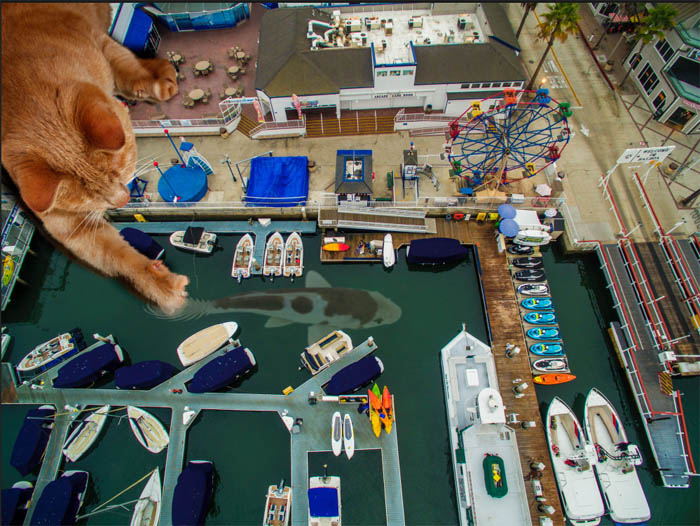
Next I grabbed the cat
I extracted it from the background and put it into the composite. (I also added a slight dark reflection on the left of the arm. This matched the shadow/reflection of the boats. I also added a little ripple effect to the water.
Step 5
To change the mood a little bit, I warmed up the entire photo using adjustment layers and curves. I also increased the vibrance of the colors in Camera Raw. I always increase the color saturation before doing a tiltshift effect, because toys and scale models are generally painted with brighter colors than you see in the real world. This has to do with the color paints used as well as the lake of dirts and grime that you see in the real world. (A really good modeler, will compensate for wear, but its not as common).
I also chose to do the compositing first, because I wanted the cat and the fish to be affected by the tilt-shift for a sense of scale. You could add them afterwards, but it would look too fake.

Step 6
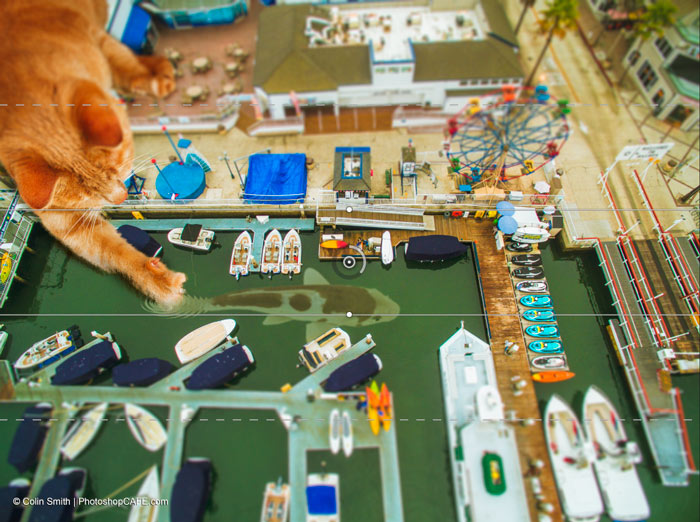
Time to add the Tilt-shift effect
Select all the layers and convert to a Smart Object (see tutorial). This makes sure all the layers get the effect. (If you are not using CC, then you will need to create a stamp visible/composite layer instead as Tilt-shift only works on a Smart Object in Photoshop CC). Non CC users: Select all the layers and press Ctrl+Alt+Shift+E / Cmd+Option+Shift+E on Mac.
Choose Filter>Blur Gallery>Tilt Shift
This is what you will see
Step 7
Click and drag the pin and move it higher in the image. I wanted the blur to cut through the ferris wheel as its an important part of the image to me. I also wanted the cat’s face to be sharp. I also moved the top lines in a little closer to set a different fall-off point for the blur.
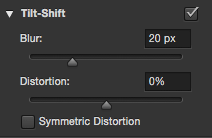
I set the blur to 20 px, this will vary for each image, see what looks right to you. The good thing about using a Smart Object is that you can change it later if you want to.
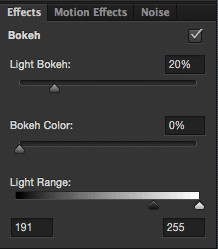
I also clicked on the effects tab and pushed in just a little bit of light bokeh. 20% gives a nice plasticky look to the highlights and adds to the effect.
Step 8
Here is the Final image. Catzilla strikes again.
Here is the first of the Catzilla series
If you are interested in learning more about compositing in Photoshop, I created a very comprehensive tutorial called Sky City Project. In this series of videos, I show multiple ways of extracting photos, blending them and then changing the lighting with blending modes and dodging and burning. As a bonus I show you how to paint in clouds (like the smoke in the catzilla image) and well as some different ways of creating cinematic coloring effects.
Add a comment and join in the discussion. Any questions or requests for future tutorials? Let’s hear them.
Until next time, See you at the CAFE!
Colin
PS Don’t forget to follow us on Social Media for more tips.. (I've been posting some fun Instagram and Facebook Stories lately)
You can get my free Layer Blending modes ebook along with dozens of exclusive Photoshop Goodies here

One thought on “Photoshop tutorial Miniature tilt-shift photo effect”
Leave a Reply
How to use a LUT in Lightroom and Adobe Camera RAW
Here is a cool little effect I just made up. I know this one is going to be popular. A...
Making waves: I have been asked many times how I made the wavey Grid in my Sig. So here it...






Step by step tutorial is always helpful thanks for sharing.