
New Features in Lightroom, Lightroom Classic and ACR Feb 2025 update
Lightroom Classic 14.2 Lightroom 8.2 new features
Lightroom and ACR have been updated today, here are the new features.
Tether updates focus in Lightroom Classic
Tethering is when you attach a cable to your camera and shoot directly into Lightroom Classic. You can also remote control your camera. This is available for Sony, Canon and Nikon cameras.
Connect the camera and choose File>Tethered Capture>Start Tethered capture
In this case, I’m using a Sony A7S3

Choose Live view
The new feature is onscreen focusing.

Move the rectangle to change the focus point

You can also select different Metering modes

And, yes, it works with macro as well.

I think this is a really great feature for table top and product photography. With my testing the focus speed is too slow for portrait photography. I could see myself using this on table top, being able to remotely adjust settings and focus on the camera while looking at a large screen, is a nice feature.
Adaptive Profiles
Custom profiles are a great starting place for your images. Adaptive Profiles make it even better. By utilizing ai to analyze the image, Lightroom can create the perfect profile for each image. We have had these in Camera Raw for a little while, but now they are here in LR and LRC. THere are 2. Adaptive color and Adaptive B&W. I have done a tutorial on adaptive profiles here.
Choose the 4 window button to go into profiles.

Profiles appear on the right.

Scroll down to adaptive. Roll over to preview. Click to apply.
This is a perfect starting place. Make the other adjustments like you normally would.

Speed Improvements in Lightroom Classic
There are a few speed updates. 2 notable ones are when rotating and cropping. The other is improved performance with multiple masks. You can see this in the video at the top.

Lightroom Desktop updates
Lets look at the Lightroom Desktop, formally known as Lightroom Mobile. This is the desktop component that syncs with the Phone and iPad app.

Secondary Window
Dual monitor support is now here.

Here. I have dragged both windows together so you can see them both.
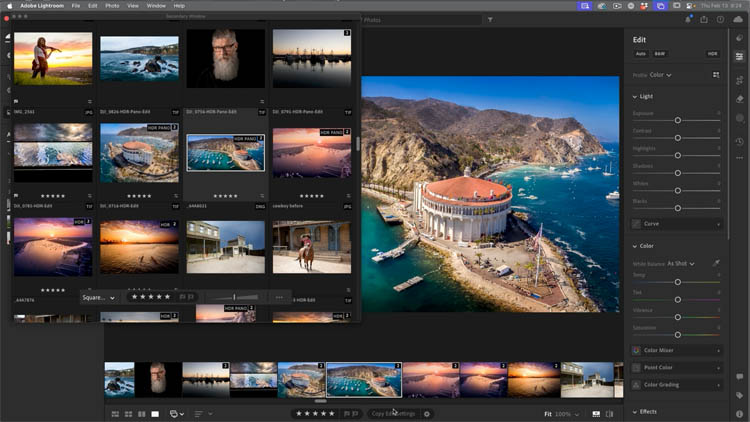
New compare view option
Click on the compare view icon

Now, we can see before and after side by side. This helps when making edits.

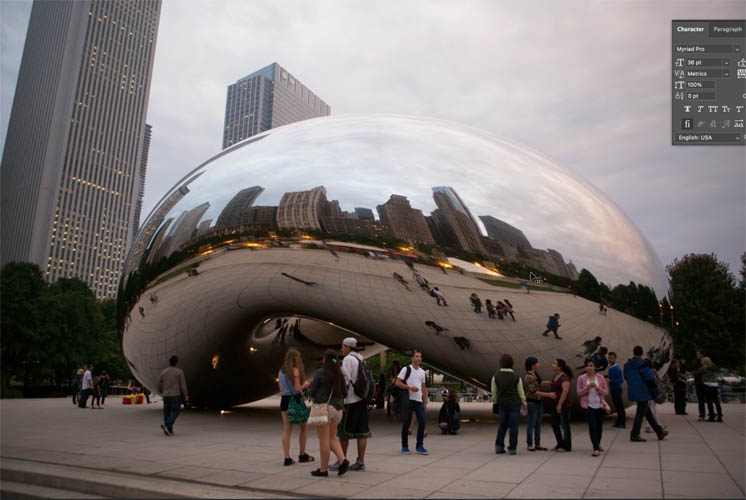
ACR Adobe Camera RAW update: Remove People
We now have a remove people in ACR (Not in Lightroom yet).
Here is the bean in Chicago, notice I have a lot of people in the shot, as well as reflections of people.
Choose filter>Camera RAW to launch ACR.
First we have to enable this feature. Choose the gear in the top right of ACR

Turn on Technology Previews. (This is the ACR beta functionality).

Choose the eraser tool
Make sure you are in the ai setting.
‘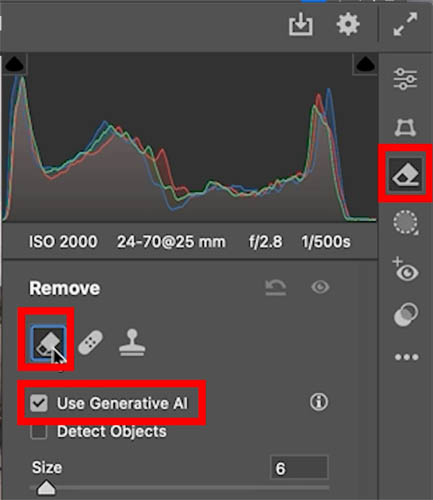
Under Distraction Removal, you will see people have been added to the reflection feature.

All the people will be highlighted in red.

Click the blue remove button to remove the people.

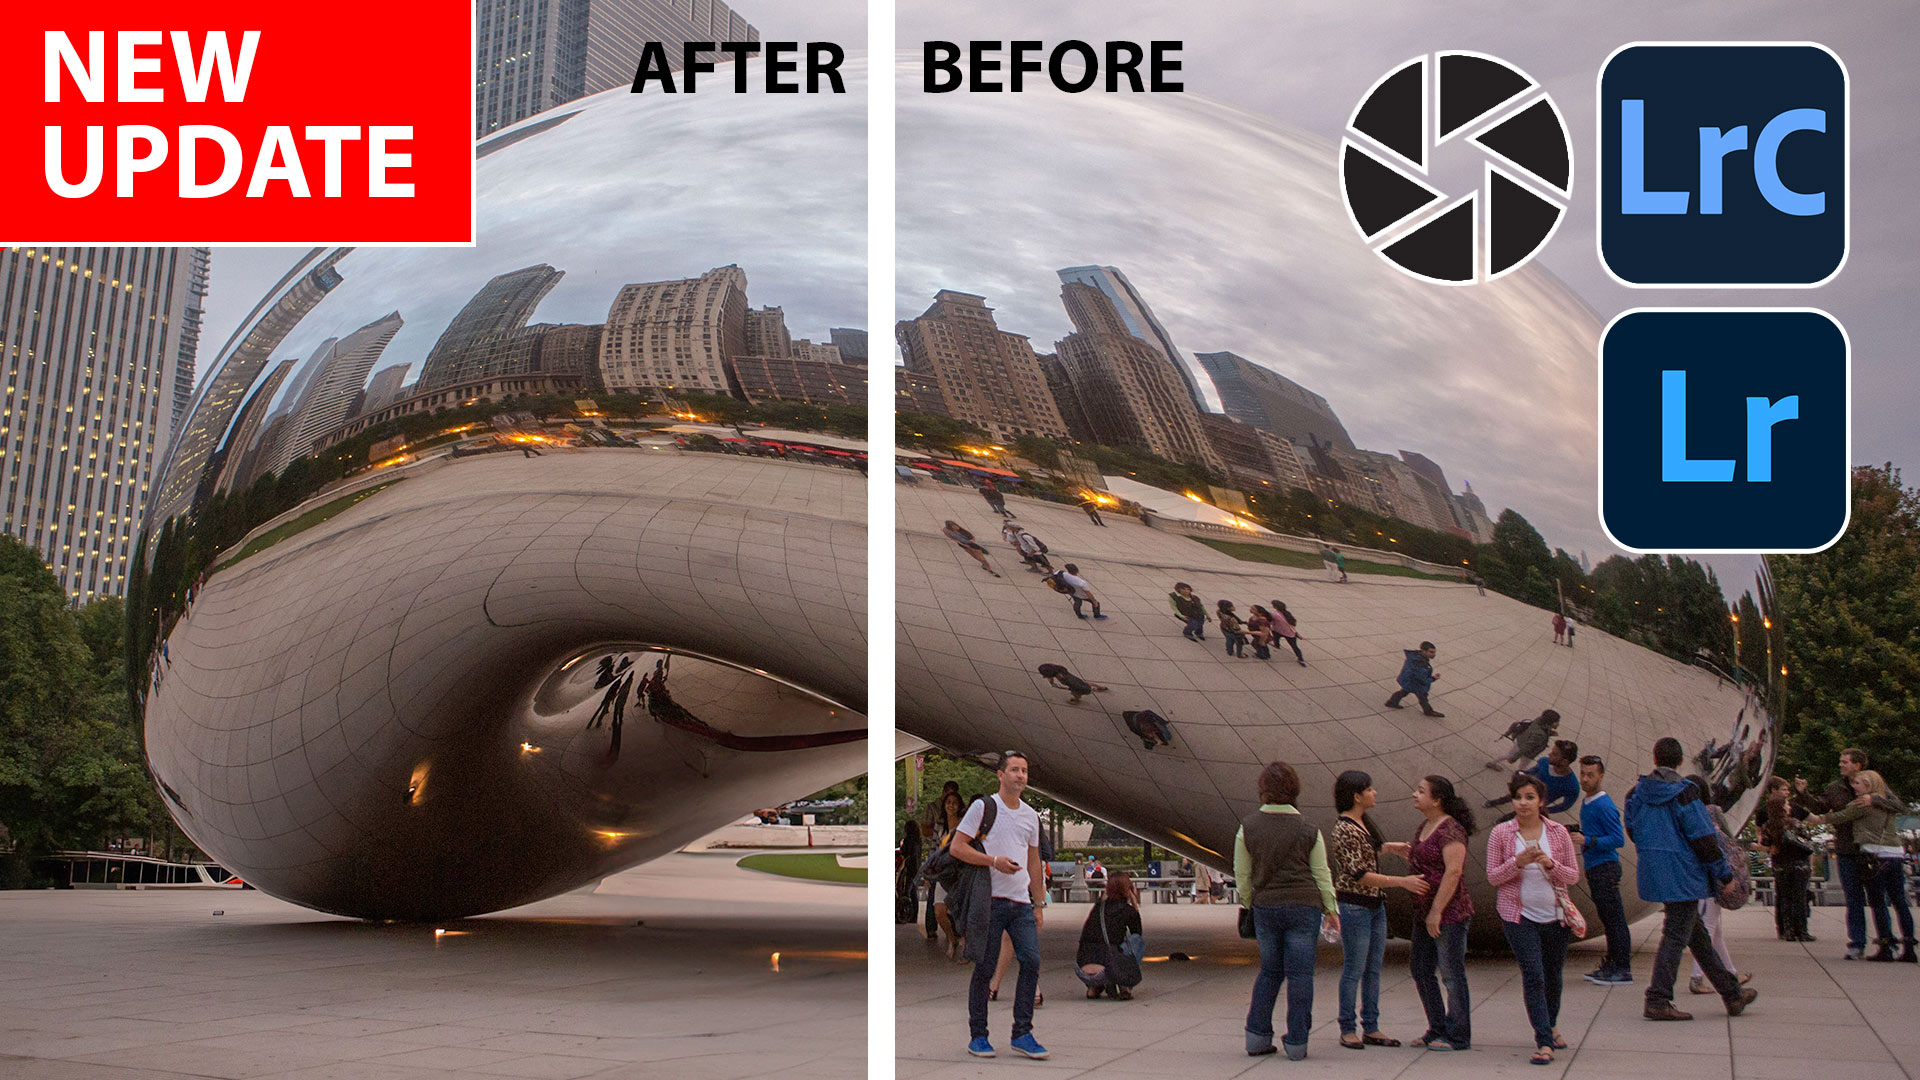
It does a great job. If it misses any, just use the remove tool to finish the job.

And there you go! I may do some in depth tutorials on one or two of these in th near future. Let me know which onwes you want to know more about.
Great to see you here at the CAFE
Colin
PS Don’t forget to follow us on Social Media for more tips..
(I've been posting some fun Instagram and Facebook Stories lately)
You can get my free Layer Blending modes ebook along with dozens of exclusive Photoshop Goodies here

11 thoughts on “New Features in Lightroom, Lightroom Classic and ACR Feb 2025 update”
Leave a Reply

In this Photoshop tutorial, I’m going to show you how to turn on the lights in a photo. I made this car...

This tutorial shows how to crop a photograph in Photoshop to an exact size and resolution. Includes tips, composing and...


Nice quick overview – thank you. I work with LrC since Lr doesn’t seem to offer anything I need that’s not in LrC. I have no need for Lr Mobile at all.
Not interested in using Lightroom on mobile device. Just keep using Lightroom Classic. Love the videos each week . Thanks for every one. Try not to miss any.
Thanks for the tutorials.
So …… STILL CLASSIC 🙂
I use LrC as I do not want to pay for Lr which is online dependent.
Useful to have in LR the few times it is used, but LRC is normally the way I go and it needs to stay
Not using Desktop … LRc
There are no adaptive profiles in my updated LRc (v. 14.2); how do i locate and install them?
I use LR Classic.
I use Bridge + Photoshop for 90% of my work and LRc for ~ 10%. I do a lot of artistic portrait work. Request: please do a tutorial on a PS technique for using artistic overlays WITHOUT masks (which require a lot of time.) I think we could do this with a Smart Object containing a Depth Map which would make the Overlay much more flexible. Thanks for your help.
Lightroom Classic user only. Lightroom / photoshop mobile is a no no for me
I have not yesterday used the remove reflections or people but having watched this video I am confident that this is a great way forward in the removal of unwanted people in my shots, no more do I have to stand around waiting for them to move out the way or do more work in Photoshop to remove them.
this update was a complete disaster for me. I can’t use Auto. I can’t use Previous. I can’t get to the Color Adaptive Profiles and it tales twice as long to export photos. I have only used this update for one day. I am sure this is just the tip of the iceberg.