
How to master the Split Warp tool in Photoshop, Ultimate Guide. Bend anything!
How to use Split Warp in Photoshop 2020 In depth
This week I’m going to show you how to really master the new Split Warp tool in Photoshop 2020.
The video will be live first thing Wed morning!
I have been playing with the warp tool a LOT and I have figured out some things that I haven’t seen anywhere else, so you saw it here first 🙂 I’m going to do 4 quick projects so I can show you these different ways of doing things that would be very hard otherwise. There are so many more things that can be done, but these are the building blocks that will lead you to new paths.
Please check out the video because it shows every step and a few little extras.
The images I’m using are all from Adobe Stock. Check out my tut on how to get Adobe stock images inside Photoshop.
The Warp tool in photoshop
Let’s start with the basic warp, we will build on this information as we go through the tutorial. Even though it will get advanced near the end, you should be able to follow along id you build your knowledge sequentially.
Before you start
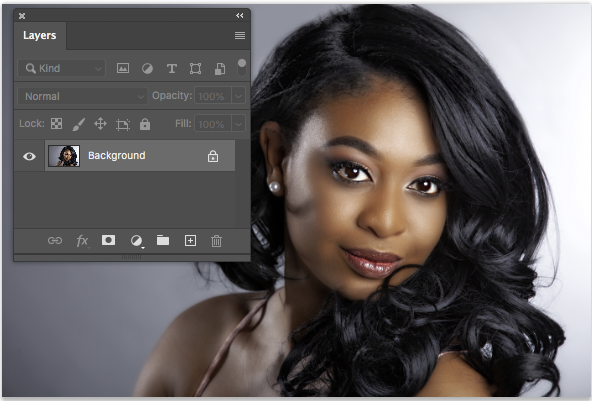
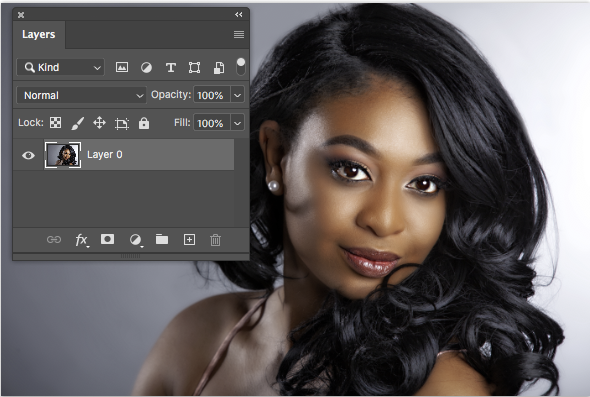
Before you can warp anything in photoshop, you need to covert the background to a layer. Just click the padlock to the right of background in the layers panel.
You will see its now Layer 1. Good.
THE BASICS : Step 1
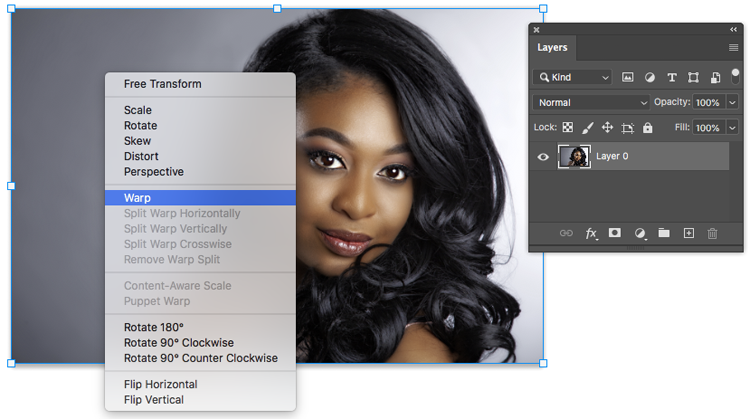
Press Cmd/Ctrl+T for free transform mode
Right-Click and choose Warp (we will do this every time).
Step 2
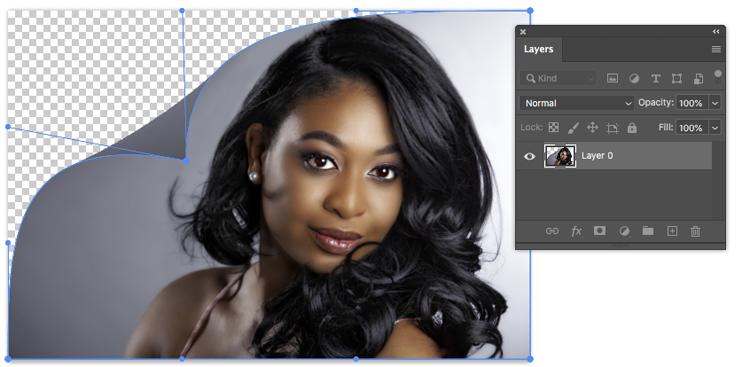
With the traditional warp tool you can drag on the image to distort it, or drag down fro a corner to make a page peel effect. (This isn’t new)
Step 3
Continue to drag corners to make a nice bent picture
Step 4
Add a Drop Shadow layer style, it looks cool. lets keep going…

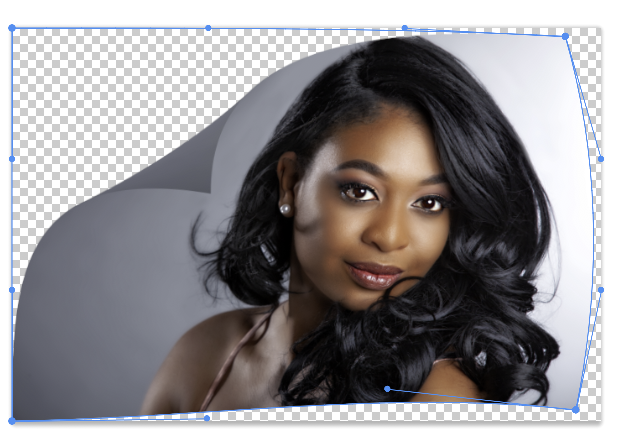
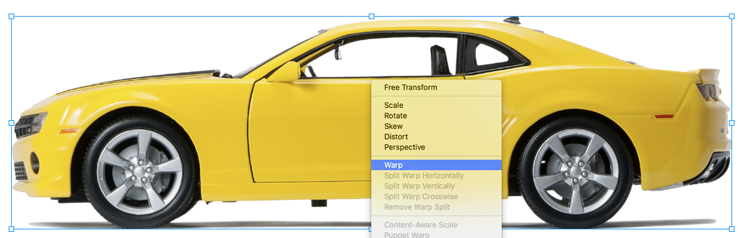
The new Split Warp
Ok, here is where it’s new.
Step 1
Ctrl/Cmd+T free transform. Right Click and Choose warp.
Now in Warp mode, you can right click and see that you can split the mesh, horizontal, vertical or crosswise (both at same time).
Step 2
Here I added a vertical split.
TIP: You don’t need to right click and select the menu, hold down Alt/Option and drag to split the mesh onscreen.
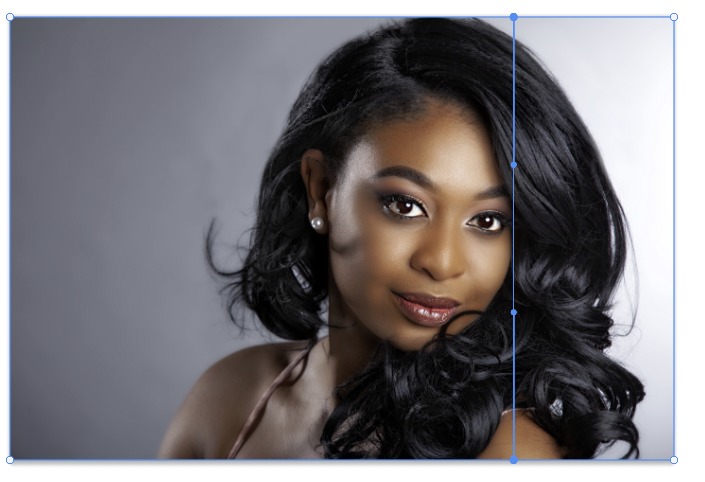
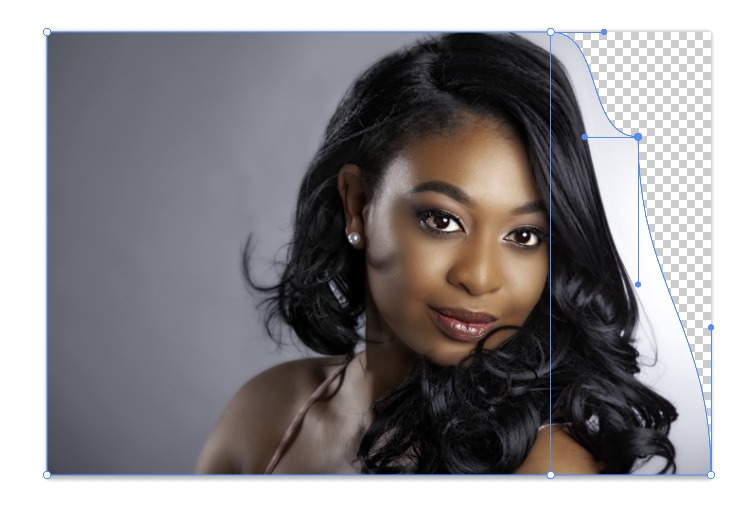
Step 3
Notice if you move the points, only the pixels on one side of the split are warped. This is useful information. You can use the splits to protect to target parts of the image.
Step 4
In this case, We dragged on the right side to add body to the hair. This isn’t so much a bout a useful effect yet, its just a basic lesson on how the grid works. Let’s move on to more fun and practical things.

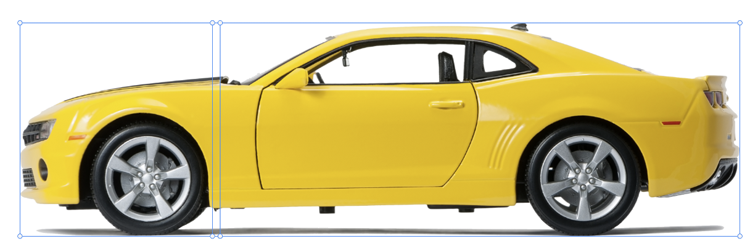
Using Photoshop split warp to stretch objects
Here is a picture of a Camaro, isolated from the background. Its a white background with the car on a layer – I show how to extract it on the video above.
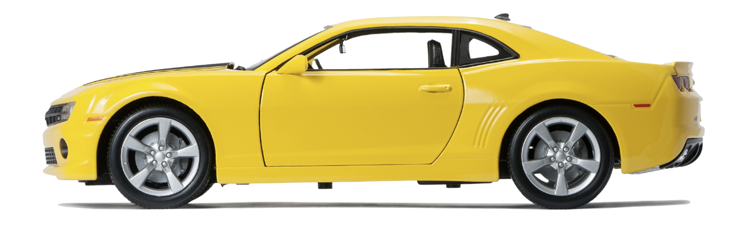
Step 1
Cmd/Ctrl+T for free transform
Right click and choose Warp to go into warp mode.
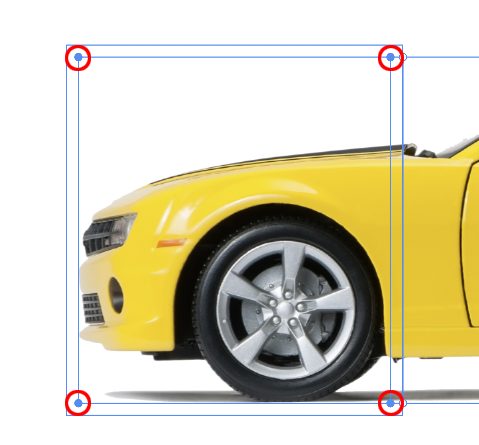
Step 2
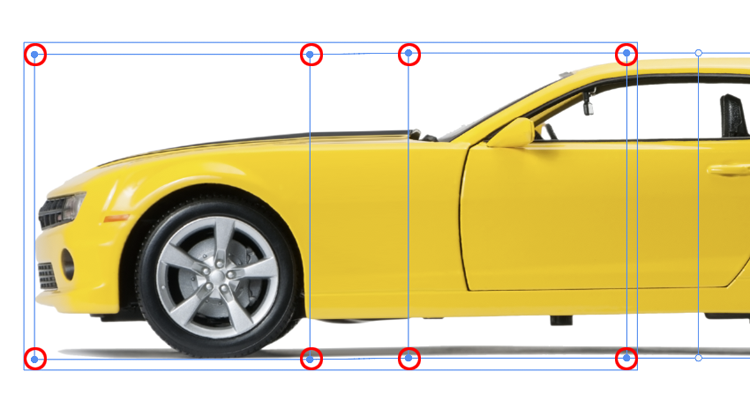
Alt/Option click to add 2 vertical cuts.
TIP: If you go close to a vertical or horizontal guide, it will create only a single cut and not a cross cut.
Step 3
You can select multiple points at once.
Shift+Drag to select the 4 points. You can also Shift+Click to add or subtract individual points.
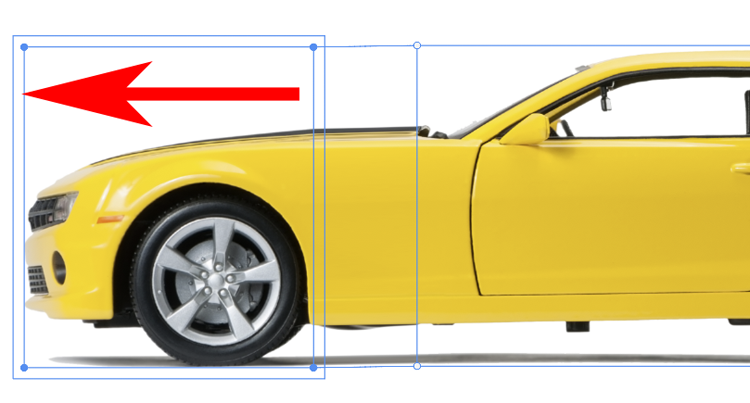
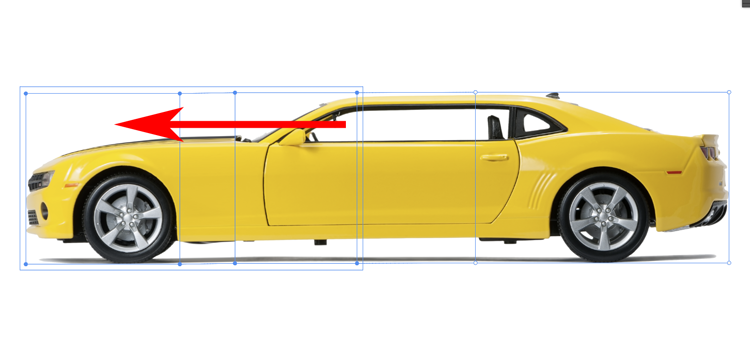
Step 4
Drag the box to the left to stretch the front of the car.
Step 5
Let’s do that again in the middle of the car. Add 2 more points.

Step 6
This time, select 8 points
Step 7
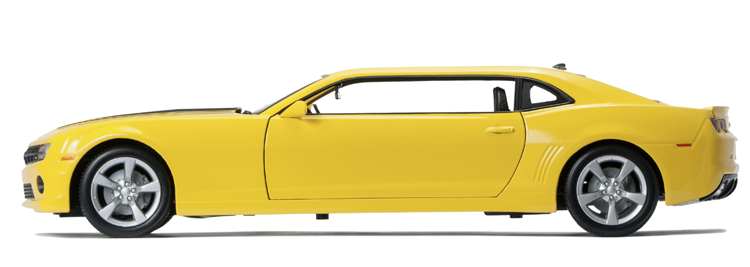
Drag to make a sports car limo. How fun.
Step 8
I hope you are starting to understand the basics of this split warp and how you can use it.
Check out my tutorial here, where we use it differently to reshape a photo and shadow in Photoshop
Making a Spherical Warp in Photoshop
Ok, now we are starting to get into the really good stuff.
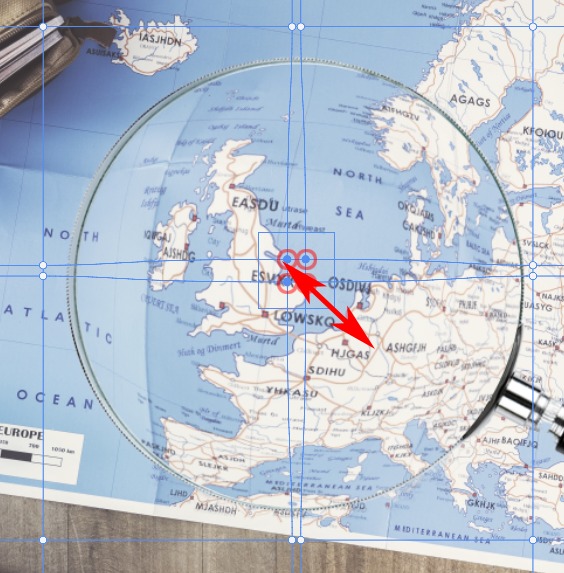
Here is a pic with a magnifying glass. A real lens would cause warping of the image through it.

This is the setup, see the video to understand, but basically I have 2 copies of the image, One is the background, the second is just above the circle for the lens, The is the area that we will warp.
If I hold Alt/Option and click between the image layer and the circle, it will clips the layer to that shape – if you don’t understand the video explains, I want to focus on the warping here 🙂
I hid the background so you can see whats happening.
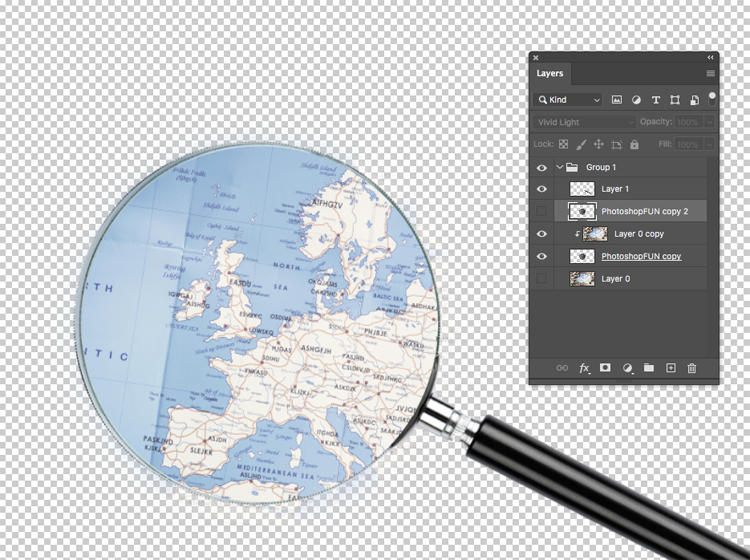
Ok, turn the background back on.
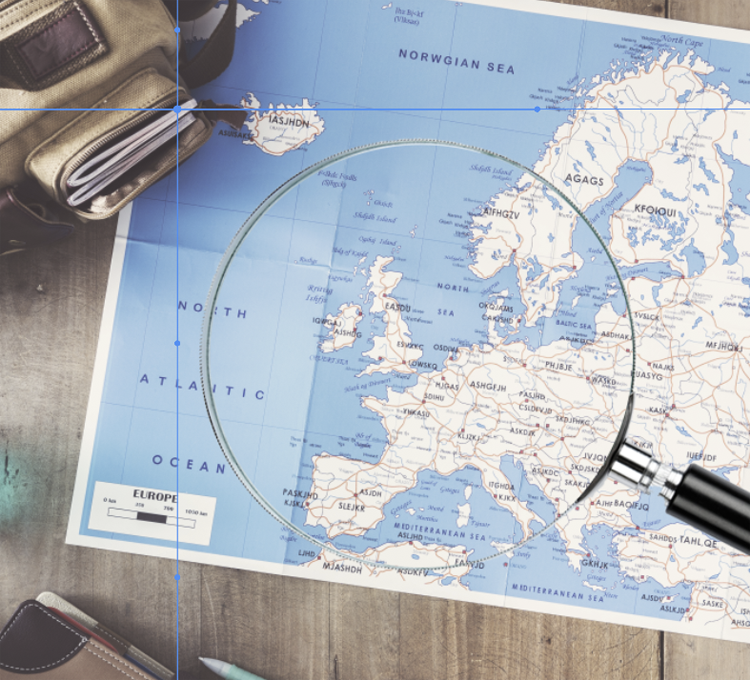
Step 1
Choose the layer that we want to warp – Press Cmd/Ctrl+T. Right-Click and choose warp.
Add a cross cut on the top left of the circle – Option/Alt+Drag.
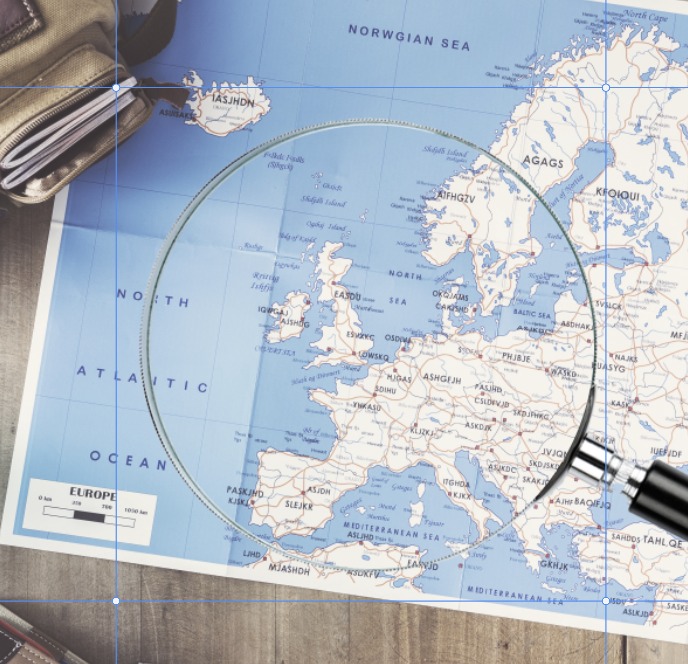
Step 2
Make another cross cut at the bottom right, outside the circle.
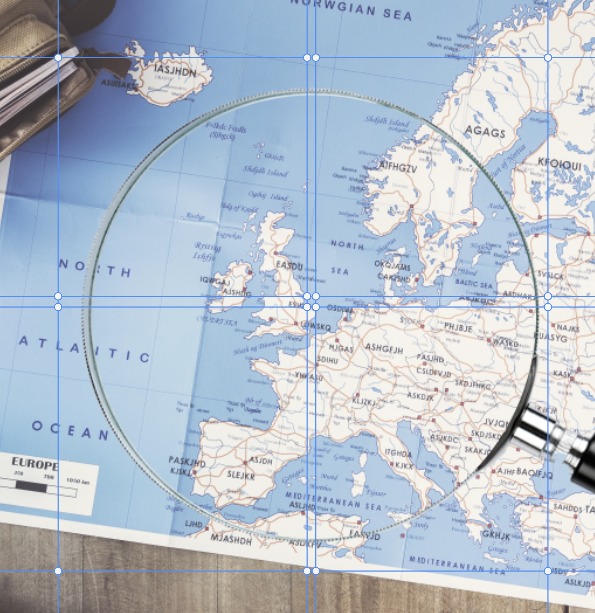
Step 3
Now, here is a trick I figured out to bulge or pinch an image.
Add 4 more points near the center.
Step 4
Select the 4 center points.
Drag on the corner of the bounding box and the circle will bloat like a sphere. The outside grid will make the shape look correct.
Step 5
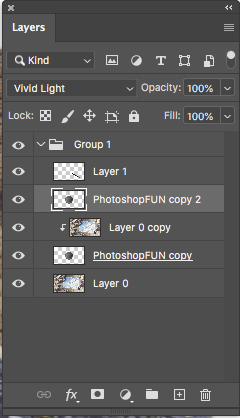
Pop the lens on top and change to Vivid light for the reflection.
And notice we have a nice warp. The purpose of this was so you could see how to make a spherical bulge, very important skill to have.

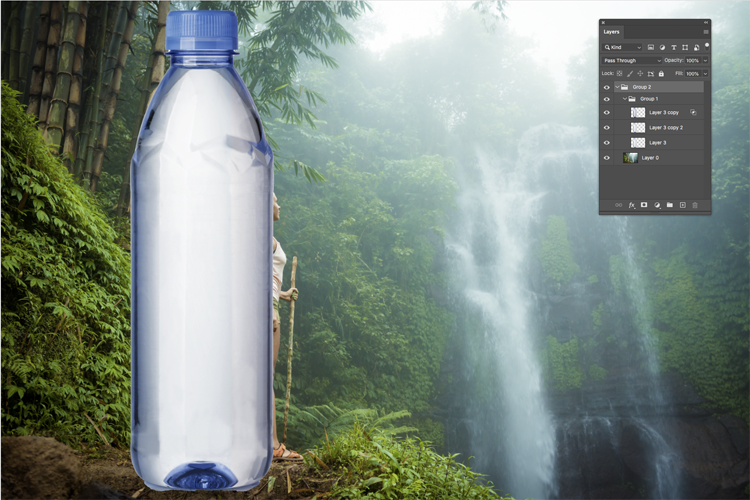
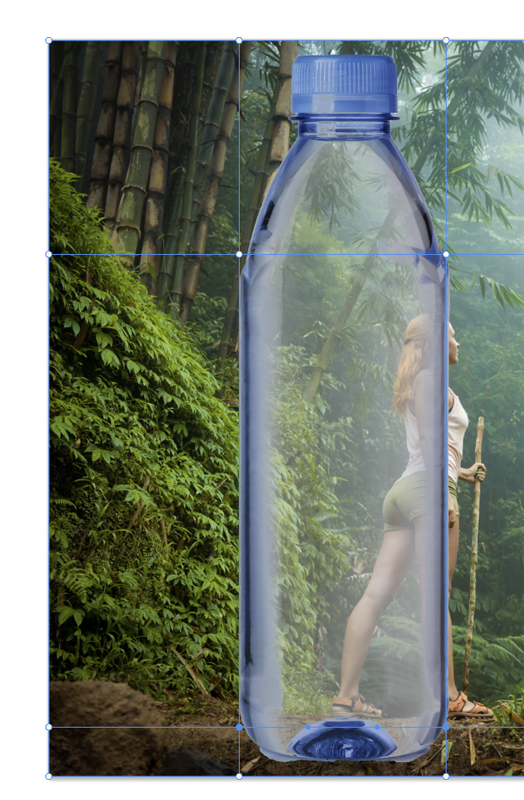
Warping to a bottle shape.
Ok, we are really ramping it up now. Irregular shared lens distortion, imagine trying to do this without split warp. We are going to do a cylindrical warp, with curved ends 🙂
Here is a picture to start with

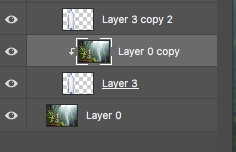
And a bottle I have extracted. I have made 3 layers so we can sandwich our picture in here.
Step 1
Duplicate the image, bottom layer (Cmd/Ctrl+J)
Move the duplicated layer between the bottle layers.
Step 2
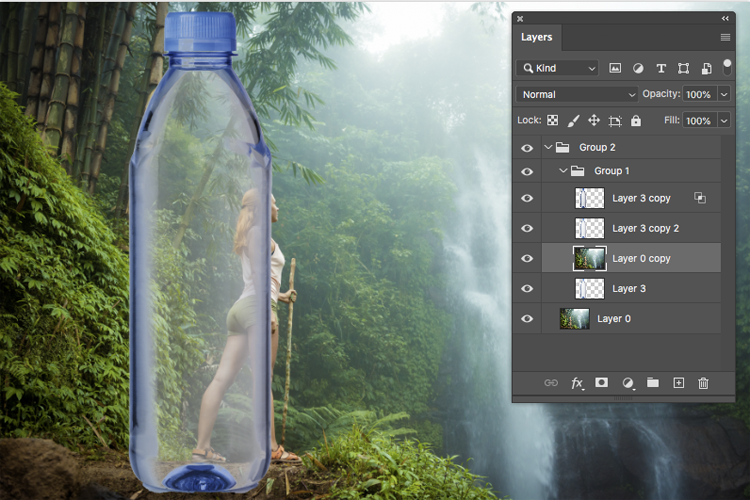
As before, I am clipping the top image layer to the shape of the bottle, This way, we don’t have to extract it to the shape of the bottle later. (Once again, these steps are on the video, but not important to understanding how the warp tool works, its just set up stuff).
Step 3
We need displacement behind the bottle for this to look realistic. Here we go…
Press Cmd/Ctrl+T for free transform. Right-Click and choose warp.
Make to vertical cuts on the edges of the bottle.

Step 4
Make horizontal cuts at the bottom of the neck and top of the bottom curve.
Step 5
And for the warping area, make 2 more vertical cuts near the center.

Step 6
Select the 4 center points. (Shift drag to select).
Note: If it warps when you try to shift+drag select, its because a point is already selected. Click away to deselect all points.
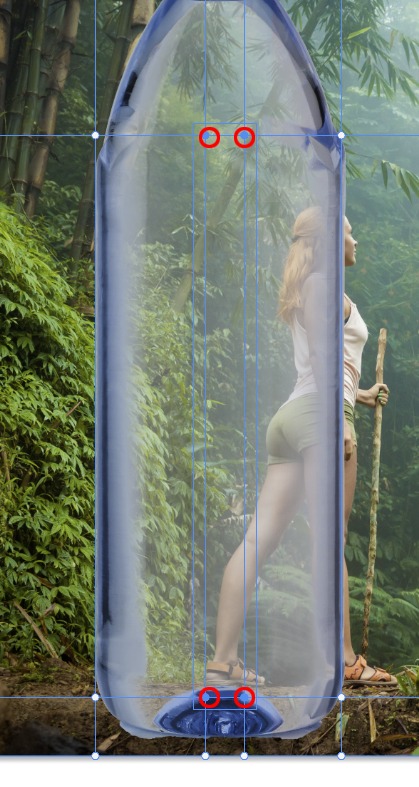
Step 7
When you move your cursor inside the outside box, about 1/2 way down, you will see a double sided arrow. Drag out and it will push the mesh out horizontally only (It also works vertically).

See how this makes a nice realistic warp and how it bends at the top and bottom, as well for a super realistic bend.

In this example, we looked at the different ways to use the Split warp using hidden shortcuts and some tricks. I hope you found this useful, if so, share this tutorial on Social media and with your friends.
Let me know if you liked it and would like to see more tuts like this. You can use these same techniques to warp photos and add textures and more to objects. Its a great creation tool as well as a useful retouching tool. I’d love to see what you do with this tutorial, . Share them on our priviate Facebook page HERE
Have fun!
Great to see you here at the CAFE
Colin Smith
PHOTOSHOP SUPERGUIDE
- New Feature overview (All the new features in Photoshop 2020)
- Trouble Shooting Photoshop 2020
- Advanced Warp (Warping a dinosaur and shadow)
- New Presets panels, (Using gradients to colorize an image)
- Photoshop on iPad
I enjoy making these for you. As time permits, I’ll keep making one each week. Drop a comment and let me know what you would love to learn in photoshop. Also don’t forget to check out my premium tutorials, it’s what supports this website and enables me to do what I do,
PS Don’t forget to follow me on Social Media>
PS Don’t forget to follow us on Social Media for more tips.. (I've been posting some fun Instagram and Facebook Stories lately)
You can get my free Layer Blending modes ebook along with dozens of exclusive Photoshop Goodies here


5 thoughts on “How to master the Split Warp tool in Photoshop, Ultimate Guide. Bend anything!”
Leave a Reply

This Photoshop tutorial shows how to make a blended background blur, the blurry background looks like the depth of field...

How to add birds to a photo and make the background transparent without having to make selections. Add life to...

How to use the unreleased new HDR features in Camera Raw in Photoshop. These new features enable you to output...


Great Tutorial Colin. Easy to understand and follow – thanks for sharing
Thanks Colin… this was really informative. You are the best instructor on the Internet when it comes to Photoshop.
Thanks 🙂
Outstanding!!! Thank you for this tutorial, it gives me another tool in my workflow…
Thanks for the great enlightening video.