How to rapidly grow your Photoshop skills, 5 tips
How to get better at Photoshop, fast
Happy New year! If learning and growing your Photoshop skills is on your list of resolutions, this article will be perfect for you!
The tips for rapidly improving efficiency and creativity in Photoshop include learning keyboard shortcuts, using readily available assets such as textures and stock images, being observant of light and design elements in the world around you, building core skills through practice, and using resources such as tutorials and books. By following these tips and incorporating them into your workflow, you can create professional-grade images and elevate your skills in Photoshop. Watch the video for more in-depth information.
Tip 1. Learn keyboard shortcuts:
Keyboard shortcuts can save a lot of time and make it easier to perform tasks in Photoshop. For example, holding the space bar while using the elliptical marquee tool allows you to move it around, holding Shift constrains it to a perfect circle, and holding Alt or Option draws from the center. You can also use keyboard shortcuts to copy or cut and paste layers, and to select and align multiple layers.
This shortcut cheat sheet can be downloaded from the vault.
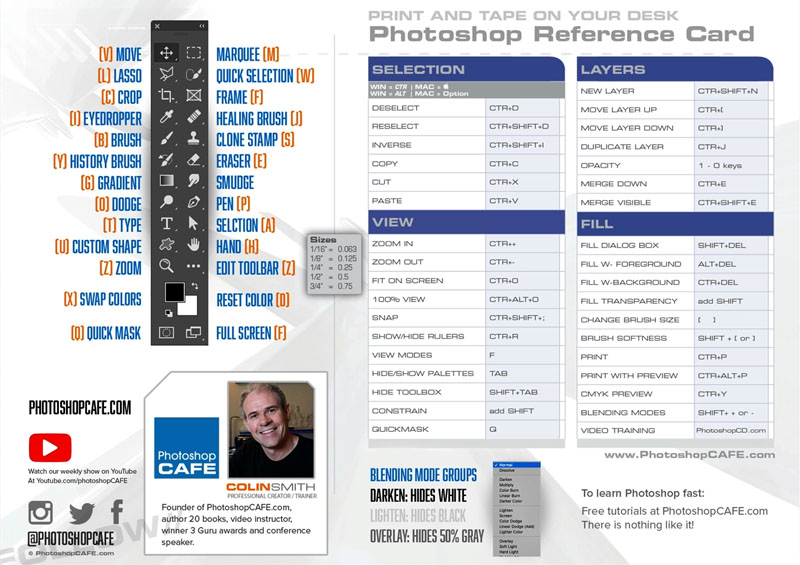
Tip 2. Use readily available assets:
Using textures, stock images, and artificial intelligence (AI) tools can elevate the appearance of your images and improve your productivity. You can use your phone as a creative tool with apps like Adobe Capture, and access free resources on Adobe Stock.
Did you know that Adobe Stock offers a collection of free images that you can use in your projects? These high resolution images can really elevate the appearance of your work, and the best part is that you can access them for free. Here’s how:
- Go to Adobe Stock’s website and change the search parameter from “All” to “Free”.

- Type in the type of image you’re looking for, such as “texture”.
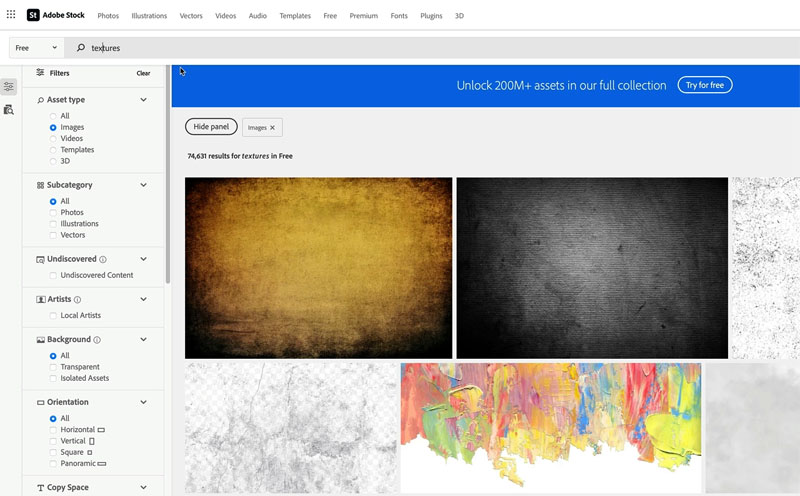
- Adobe Stock will show you a list of free images that match your search.
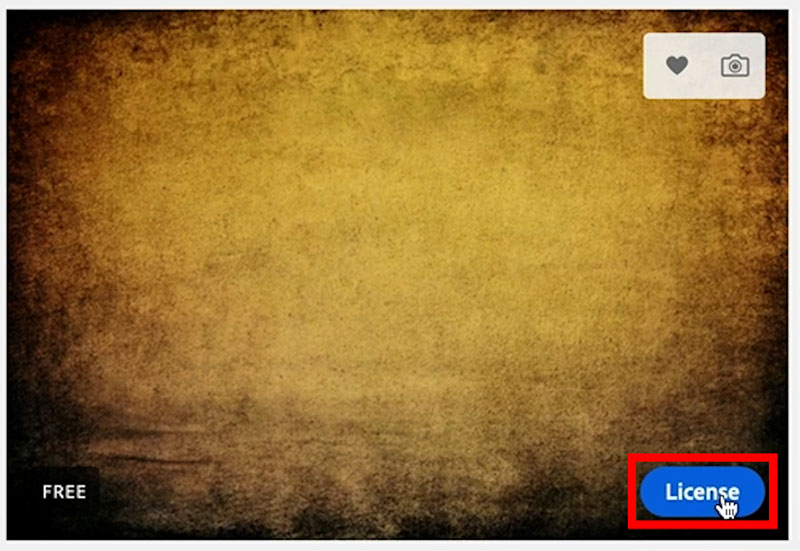
- To use an image, click on the “License” button and it will be added to your library.

- You can then access the image in Photoshop by going to the “Libraries” panel and double clicking on it, or by dragging it onto your image.
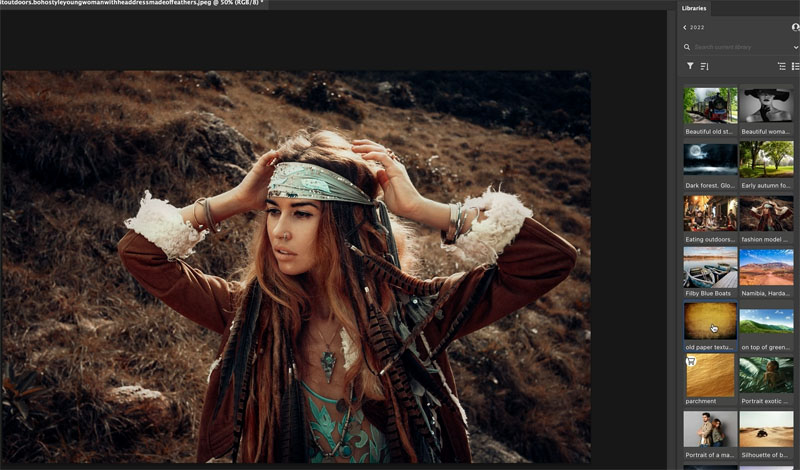
- From there, you can adjust the blending mode, add a mask or use a soft edge brush for a more polished look.

There are over 75,000 free textures (and lots more photos, templates and more) to choose from on Adobe Stock, so take advantage of this resource to elevate your images and add professional-grade elements to your projects.
There are also lots of free Photoshop extras at the PhotoshopCAFE vault. Grab brushes, images, cheat sheets, keyboard shortcut sheet, presets, brushes and lots more. Access is free here. If you already receive our newsletter, the direct link is at the bottom of each newsletter, you don’t need to sign up again.
Tip 3: Observe and pay attention to details:
To increase the quality of your images, it’s important to observe and pay attention to details in nature, light, and the environment. This can help you with your design, illustration, and photography. Take a close look at things and try to understand what gives them their essence, such as what makes glass look like glass or how shadows and light interact. By applying this attention to detail to your work, you can set it apart from others.

I like to ask people a question. When you see chrome, what color is it? And most people say silver, but it’s not. If you just glance at it quickly, yes, it could appear to be silver. But if you really look at chrome, what it’s doing is just reflecting the environment. All the different colors are there if you look closely.

Tip 4: Build core skills:
Some areas of Photoshop require practice and skill, such as using brushes, dodging and burning, and painting. To improve in these areas, it’s helpful to spend some time working with these tools every day. For example, you can use brushes to add light to an image by painting with white on an overlay layer. You can also practice making selections and using the pen tool. As you get stronger in these core skills, you will become quicker and more efficient in Photoshop.
Dodging and burning is a technique in Photoshop that allows you to adjust the exposure and contrast of specific areas of an image. It’s a powerful tool that can help you create more dynamic and visually appealing images. Here’s a tutorial on how to dodge and burn in Photoshop: (Full course here)
- Create a new layer by holding down the Alt (Option) key and clicking on the “Create a new layer” icon in the Layers panel.
- Change the blend mode of the new layer to “Overlay” by selecting it from the drop-down menu in the Layers panel.
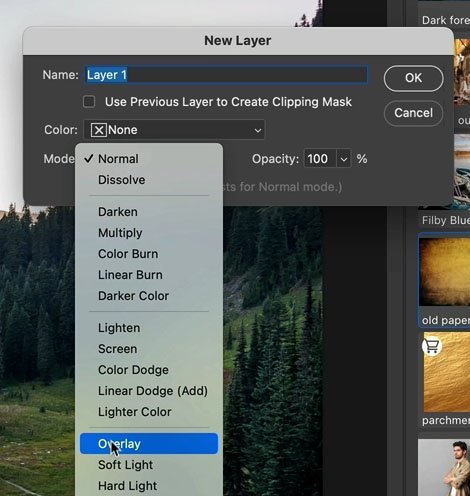
- Use the Brush tool (shortcut: B) to paint with white on the new layer to add light and increase the exposure of specific areas. You can use the D key to reset the foreground and background colors to black and white, respectively, and the X key to switch between them.
- To make the brush stroke more subtle, drop the flow to around 10% by pressing Shift+1. If you’re using a pen tablet, you can enable pen pressure in the brush settings to make the brush stroke even more natural and smooth. If you’re using a mouse, you can simply paint with it.
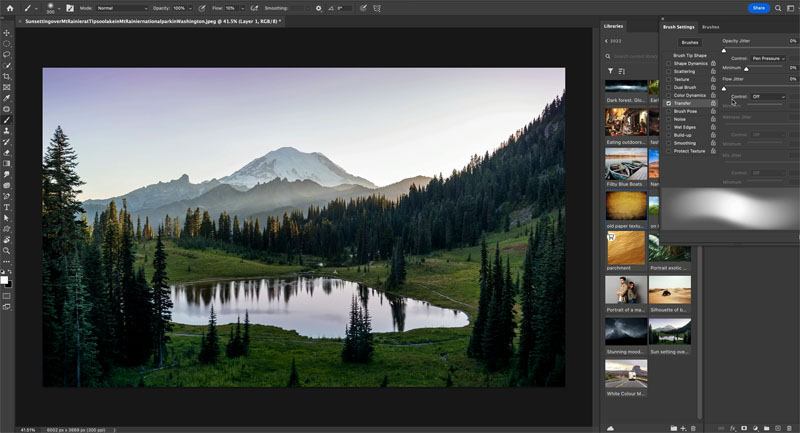
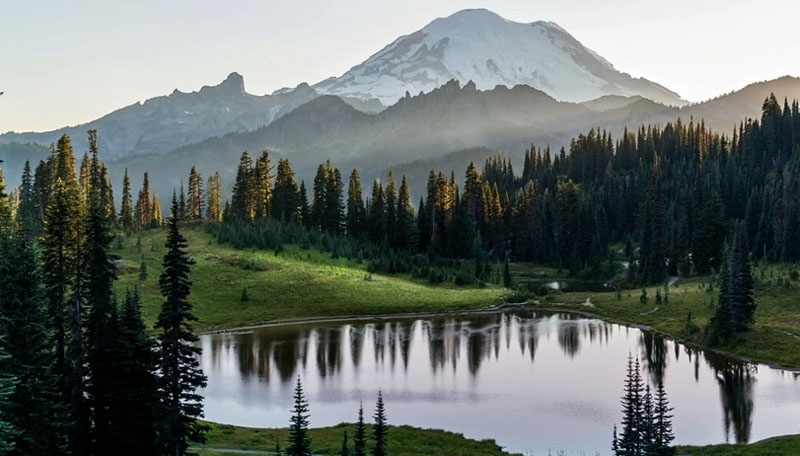
- To burn or decrease the exposure of specific areas, switch the foreground color to black and paint on the new layer.
- You can use the opacity slider in the Layers panel to adjust the strength of the dodge and burn effect.
- Compare the before and after to see the difference that dodging and burning has made to your image.
Remember, the more you practice dodging and burning, the better you’ll get at it. It takes time and effort, but the results are worth it.
Tip 5: Use resources:
One valuable resource for learning Photoshop is photoshopcafe.com (where you are now), a website that offers tutorials and tips on how to use the software. You can browse the categories of tutorials or search for specific topics. In addition to video tutorials, there are also written steps to help you learn at your own pace. It’s also important to stay up to date with new tools and techniques that are released, and to be open to learning and trying them out.
I believe in the power of books to improve skills and provide inspiration. Throughout my career as a Photoshop Instructor, I have written 21 books on the subject, starting with a Photoshop 6 book back in 2001 and continuing with my latest book on drones and drone photography. In all of my books, I try to include as many inspirational images as possible to inspire readers. I know that I can gain a lot of inspiration from looking at other people’s work, and I believe it’s important to seek out inspiration and then use it to create something of your own. I also have created a library of video courses here

I hope you found these tips useful!
Don’t forget to tune in every week for new tutorials here to help you on your Photoshop journey!
Welcome to the CAFE
Colin
PS Don’t forget to follow us on Social Media for more tips.. (I've been posting some fun Instagram and Facebook Stories lately)
You can get my free Layer Blending modes ebook along with dozens of exclusive Photoshop Goodies here

2 thoughts on “How to rapidly grow your Photoshop skills, 5 tips”
Leave a Reply
Photoshop 2020, new feature tutorials. PhotoshopCAFE Photoshop 2020 Superguide.
In this photoshop tutorial you will learn how 3D works in Photoshop. Colin Smith walks you through the new features...
How to create Cyberpunk styled colors and lights in Photoshop.


Hey Colin, I really appreciate all your tips and I can usually put them into immediate practice, but I’m having a problem with #2 on this set of five. On my PS installation (24.1.0) which is up-to-the-minute, I don’t get a downward-pointing arrow in the Search box in the Library Module as you do in the video when you search for “texture”. How can I get that activated?
They are always changing things in the Library, I suggest going directly to Adobe Stock and downloading, you can search by the free collection.